
Subscribe to Our Youtube Channel
Related Manuals for CHIEF CM8


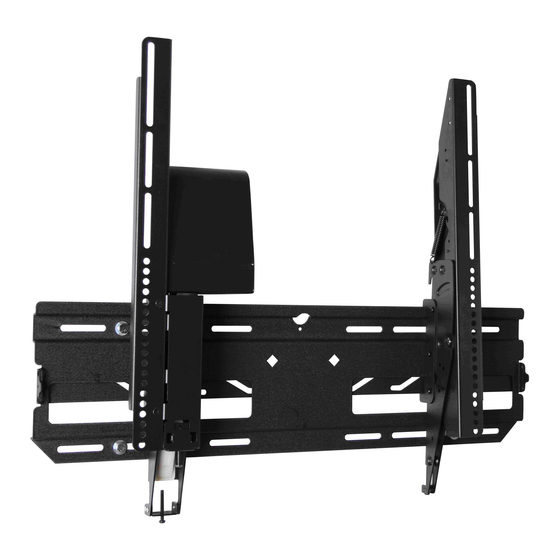
Summary of Contents for CHIEF CM8
- Page 1 I N S T A L L A T I O N I N S T R U C T I O N S Automated Tilt Mounting System...
-
Page 2: Important Safety Instructions
Installation Instructions DISCLAIMER WARNING: TO REDUCE THE RISK OF Milestone AV Technologies, and its affiliated corporations and BURNS, FIRE, ELECTRIC SHOCK, OR INJURY TO subsidiaries (collectively, "Milestone"), intend to make this PERSONS: manual accurate and complete. However, Milestone makes no claim that the information contained herein covers all details, •... -
Page 3: Installation Instructions
Installation Instructions LEGEND Tighten Fastener Pencil Mark Apretar elemento de fijación Stram fastspændingsbeslag Marcar con lápiz Blyantmærke Befestigungsteil festziehen Skruva åt fäste Stiftmarkierung Pennmarkering Apertar fixador Kiristä kiinnike Marcar com lápis Piirretty merkki Serrare il fissaggio Dokr ci element mocuj cy Segno a matita Oznaczenie o ówkiem Bevestiging vastdraaien... -
Page 4: Tools Required For Installation
Installation Instructions TOOLS REQUIRED FOR INSTALLATION 3/16" (5mm) - wood studs 1/2" (12.5mm) - masonry PARTS A (1) [Motorized C (1) Mounting Bracket] [Non-Motorized Mounting Bracket] B (1) [Wall Bracket] C1 (1) [Pin] F (1) [IR Receiver] G (1) E (1) [Listed Power G3 (6) G1 (8) - Page 5 Installation Instructions DIMENSIONS...
- Page 6 Installation Instructions INSTALLATION WARNING: IMPROPER INSTALLATION CAN LEAD TO MOUNT FALLING CAUSING SEVERE PERSONAL INJURY OR DAMAGE TO EQUIPMENT! It is the installers responsibility to make certain the structure to which the mount is being attached is capable of supporting five times the weight of the CM8 and all attached equipment not to exceed 150 lbs (68 kg).
- Page 7 Installation Instructions Concrete Installation NOTE: Mount the wall bracket in four spots, spaced a minimum horizontal distance of 12" (30.5cm). Level wall bracket (B) and mark locations of pilot holes. 1/2" x 2-1/2" (12.5mm x 63.5mm) Drill four 1/2" x 2-1/2" (12.5mm x 63.5mm) pilot holes into mounting surface.
- Page 8 Installation Instructions Attaching Brackets to Display Mounting Slots WARNING: IMPROPER INSTALLATION CAN LEAD TO MOUNT FALLING CAUSING SERIOUS PERSONAL INJURY OR DAMAGE TO EQUIPMENT! DO NOT substitute hardware. Only use hardware provided or specified by manufacturer. NOTE: Locate Digital Optical Audio Output on back of display (if available).
-
Page 9: Installing Display
Installation Instructions Installing Display WARNING: IMPROPER INSTALLATION CAN LEAD TO DISPLAY FALLING CAUSING SERIOUS PERSONAL INJURY OR DAMAGE TO EQUIPMENT! Ensure mounting bracket hooks are completely engaged over wall bracket. CAUTION: DISPLAY MAY WEIGH IN EXCESS OF 40 LBS! Always use two people and proper lifting techniques when installing or positioning display on wall bracket. - Page 10 Installation Instructions Connecting Electrical Components Electrical Rating: DC 12V; 0.4A CAUTION: DAMAGE TO CABLES POSSIBLE! Do not run cables or wires near the moving parts of this mount. Plug the Listed power supply (E) [provided with the mount] into the CM8 control box and the home’s electrical socket. Plug the IR receiver (F) into the CM8 control box, and attach the head to bottom side of display.
-
Page 11: Adjusting Tilt
Installation Instructions Adjusting Tilt NOTE: Remove plastic tab from remote control (J) before use. Use the down arrow button on the remote control (J) to fully tilt down the display. RESET AUTO MANU NOTE: The CM8 is designed to tilt the display down a maximum of 13°. - Page 12 Installation Instructions Removing Spring to Tilt Display Remove and keep two Phillips screws from plastic cover on non-motorized bracket (C). Remove and keep one Phillips screw from latch. Lower latch to remove spring. Return latch to original position. Store spring in plastic cover. Reinsert screw holding the latch.
- Page 13 Installation Instructions Adjusting Upright Position of Display (Optional) Adjust upright position of display (+/- 2°) by turning the bottom screw on the motorized bracket (A).
- Page 14 Installation Instructions Setting Preset Position Remove pin (C1) from STORE opening. Insert pin into appropriate opening dependent on tilt angle desired: • Insert pin into "P1" for maximum preset tilt angle of approximately 6°. • Insert pin into "P2" for maximum preset tilt angle of approximately 9°.
-
Page 15: Manufacturer's Declaration Of Conformity
Installation Instructions MANUFACTURERS DECLARATION OF CONFORMITY Product identification: Model/type Electronic Wall Mount Category (description) Mounting devices, Stands and other Accessories, to be used with entertainment electronics Brand CM8T15U Manufacturer: Milestone AV Technologies 8401 Eagle Creek Parkway Savage, MN 55378 EU Representative: Milestone AV Technologies Fellennoord 130 5611 ZB Einhoven... - Page 16 F 877.894.6918 / 952.894.6918 Europe A Fellenoord 130 5611 ZB EINDHOVEN, The Netherlands P +31 (0)40 2668620 Chief Manufacturing, a products division F +31 (0)40 2668615 of Milestone AV Technologies Asia Pacific A Office No. 1 on 12/F, Shatin Galleria...
Need help?
Do you have a question about the CM8 and is the answer not in the manual?
Questions and answers