Table of Contents
Advertisement
Quick Links
Download this manual
See also:
Instruction Manual
Advertisement
Table of Contents

Related Manuals for Duerkopp Adler 589


Summary of Contents for Duerkopp Adler 589
-
Page 1: Operating Instructions
Automatic double-chainstitch buttonholer Operating instructions Installation instructions Service instructions Postfach 17 03 51, D-33703 Bielefeld Ÿ Potsdamer Straße 190, D-33719 Bielefeld Telefon + 49 (0) 5 21 / 9 25-00 Ÿ Telefax + 49 (0) 5 21 / 9 25 24 35 Ÿ www.duerkopp-adler.com... - Page 2 Anleitung, komplett / Manual, complete Übersicht Summary Bedienanleitung Operating instructions Aufstellanleitung Installation instructions Serviceanleitung Service instructions Bauschaltplan Interconnection-diagram 9870 579020 B 9870 579020 B Postfach 17 03 51, D-33703 Bielefeld • Potsdamer Straße 190, D-33719 Bielefeld Sprache: Deutsch / Englisch Telefon +49 (0) 521 / 9 25-00 •...
- Page 3 Foreword This instruction manual is intended to help the user to become familiar with the machine and take advantage of its application possibilities in accordance with the recommendations. The instruction manual contains important information on how to operate the machine securely, properly and economically. Observation of the instructions eliminates danger, reduces costs for repair and down-times, and increases the reliability and life of the machine.
-
Page 4: General Safety Instructions
General safety instructions The non-observance of the following safety instructions can cause bodily injuries or damages to the machine. 1. The machine must only be commissioned in full knowledge of the instruction book and operated by persons with appropriate training. 2. -
Page 5: Table Of Contents
Contents page: Preface and general safety instructions Part 1: Operating Instructions Class 589 Product description Designated use ........... 5 Brief description . - Page 6 Contents page: 9.3.2 Selecting a parameter ..........23 Sewing process .
-
Page 7: Product Description Designated Use
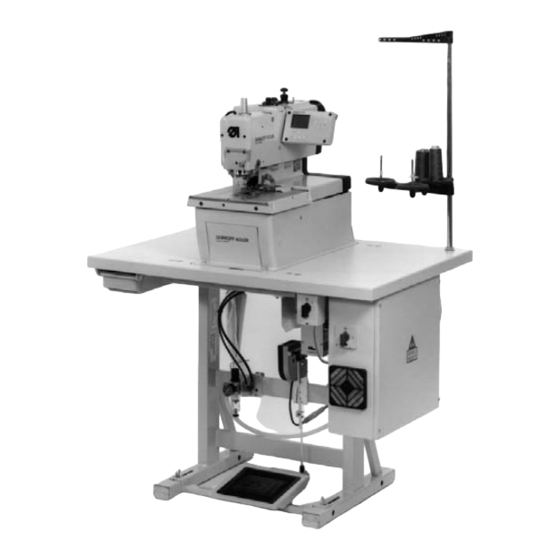
Product description Designated use The DÜRKOPP ADLER 589 is an automatic sewing machine designed for sewing buttonholes in light to medium-heavy material. Such material, which is generally made of textile or synthetic fibres, is used in the clothing industry. This sewing machine can also be used to produce so-called technical seams. - Page 8 – The use of step motors confers great versatility. No use of control cams. – One-pedal operation for the following functions: - close/open clamps - switching on the sewing process - rapid halt with needle lift – Pneumatically-operated thread-trimming system with short drive distances for precise operation.
-
Page 9: Subclasses
Subclasses 589-212000 With short trimmer for the upper and bobbin threads. The bobbin-thread trimmer is located in the throat plate, enabling the thread to be severed very close to the material. Flexible cutting (two lengths preset, with/without eye). For taper, round and cross tacks. Can also be used for double-chainstitch eyelets in conjunction with appropriate sewing apparatus. -
Page 10: Product Structure
Product structure Subclasses Equipment Material number sewing automat 0589 990002 sewing automat 0589 990004 accessory kit 0791 579501 Optional extras: lengthways positioning kit 0579 590074 upper thread catcher 0579 590564 pneumatic connection pack 0797 003031 halogen tripod sewing lamp 9822 510000 table clamp for halogen tripod sewing lamp 9822 510011 9880 579001... -
Page 11: Technical Data
Technical data Head: class 589 Stitch type: double chainstitch Number of needles: Needle system: Needle thickness: max. Nm 125 (depending on the subclass) Upper-thread thickness: max. Nm 50 Bobbin-thread thickness: max. Nm 30 Max. Speed: 2200 rpm Stitch distance: 0.5 - 2 mm Max. -
Page 12: Operation
Operation Needles, yarns and gimps Needles Needle system: Needle thicknesses: Nm 90-125 depending on the type of thread and material and the sewing apparatus (E no.). The needle thickness to be used for each machine and its sewing apparatus (E no.) is given on the nameplate. Yarns The appearance of the buttonhole is greatly affected by the yarn used. -
Page 13: Removing And Replacing The Clamp Plates
Removing and replacing the clamp plates Caution: danger of injury The clamp plates 1 must be removed and replaced with the machine switched off or in the “Safe Stop” position. Inadvertently operating the pedal with the main switch turned on may lead to damage or injury. Removing the clamp plates –... -
Page 14: Changing The Needle
Changing the needle Caution: danger of injury The needle must be changed with the machine switched off or in the “Safe Stop” position. – Undo screw 1. – Pull the needle 2 out of the needle bar. – Push the new needle as far as it will go into the hole in the needle bar. -
Page 15: Threading The Upper Thread
Threading the upper thread Caution: danger of injury The upper thread may only be threaded with the machine switched off or in threading mode (see “threading mode” section). – Thread the upper thread as shown in the illustrations. – To thread the upper thread insert the threading wire (in the accessory kit) upwards through the hollow needle bar 1 from below. -
Page 16: Threading The Bobbin Thread
Threading the bobbin thread Caution: danger of injury The bobbin thread may only be threaded with the machine switched off or in threading mode (see “threading mode” section). The machine must be in its final position, i.e. the hook turret with loopers must point forwards. -
Page 17: Threading The Gimp Thread (Only 589-221000)
Threading the gimp thread (only 589-221000) Gimp 589-221000 Caution: danger of injury The gimp thread may only be threaded with the machine switched off or in threading mode (see “threading mode” section). – Thread the gimp thread as shown in the illustrations. –... -
Page 18: Thread Tensions
Thread tension Needle and bobbin-thread tension The thread tensions depend on the type and quality of the yarn and material. The thread tension should be the minimum at which the appearance of the buttonhole is satisfactory. With thin material excessive thread tensions may cause unwanted gathering and thread breakage. -
Page 19: Bobbin-Thread-Tensioning Spring
Bobbin-thread-tensioning spring Caution: danger of injury The thread-tensioning spring may only be adjusted with the machine switched off or in the “Safe Stop” position. The deflection and pre-tensioning force of the thread-tensioning spring 1 affect the bobbin-thread tension and thus the shape and purling of the buttonhole. -
Page 20: Changing The Cutting Blocks
Changing the cutting blocks Two cutting blocks are available. The cut length can be changed by switching cutting blocks. Caution: danger of injury Cutting blocks may only be switched with the machine switched off or in the “Safe Stop” position. Removing the cutting-block –... -
Page 21: Spreading The Workpiece
Spreading the workpiece Where cutting precedes sewing the incision opens to enable the piercing needle to sew the left and right seam rows cleanly without piercing the cut edge of the material. On machines where cutting follows sewing the material is kept taut for the sewing process. -
Page 22: Switching On - Switching Off - Safe Stop
Switching on - Switching off - Safe Stop Switching on – The sewing-drive switch 1 must be in position 1. – Turn on the main switch 2. The Dürkopp Adler logo briefly appears. The opening screen appears. Switching off – Turn off the main switch 2. -
Page 23: Switching Threading Mode On And Off
Switching threading mode on and off Caution: danger of injury For threading either the machine must be switched off or threading mode must be activated. – Push the pedal back. The hook turret is rotated to the optimum threading position. The thread tensioners are opened. -
Page 24: Operating The Controller
Operating the controller Display OK key Entry field key function ï ð In the main menu: switch from one buttonhole program to another If an entry field is activated: switch from one position to another. Where functions have a number of selection possibilities: switch from one to another, e.g. -
Page 25: Changing Parameter Values
Changing parameter values 9.3.1 Numerical values Numerical values can be changed in the following way: Use the ñ and ò cursor keys to select the line containing the value – you wish to change. – Press the enter key. The cursor flashes under one digit of the numerical value. Use the ï... -
Page 26: Sewing Process
Sewing process 9.4.1 Switching on Number of buttonhole sequence Buttonhole shape Buttonhole sequence Rotation speed buttonhole length cut mode Piece counter – Turn on the main switch . The Dürkopp Adler logo briefly appears.. – The main screen appears. – Press the “RST”... -
Page 27: Changing Buttonhole Parameters
9.4.3 Changing buttonhole parameters The main parameters of the buttonhole are displayed on the main screen. Changing the parameters Use the ñ and ò cursor keys to select the line containing the – parameter to be changed. – Press OK. –... -
Page 28: Sewing
Sewing The sewing process can be controlled with the pedal, the hand switches or the “RST” and “ESC” keys on the operating panel. In automatic operation the machine moves to the new insertion position after each sewing process (sequence mode). In manual operation it moves to the insertion position of the current buttonhole (sequence and single-button mode). -
Page 29: Changing A Buttonhole Program
Changing a buttonhole program Up to 50 different buttonholes can be programmed in the buttonhole programming menu. The various parameters of each buttonhole shape can be changed. A sketch of the current buttonhole shape is shown in the left half of the display. If the ñ... - Page 30 meas. designation stitch distance taper tack length length cross tack length lateral cross tack position stitch distance in the cross tack seam extension eye shape eye shape Not all symbols are displayed, only the ones that are important for the pertinent buttonhole type.
- Page 31 Symbol Parameter Meaning Intermediate fabric This parameter changes the intermediate-fabric type. Taper tack length In buttonholes with taper tacks, the length from the tip of the taper to the end of the taper (measurement kl). The minimum taper tack length is 2 mm.
-
Page 32: Buttonhole Sequence
Buttonhole sequence The 589 controller can be programmed with up to 25 sequences of buttonhole shapes. Each sequence can contain up to 5 buttonholes. – Press “S”. The controller switches to the buttonhole-sequence programming menu. – To program or alter a buttonhole shape press “P”. –... -
Page 33: Piece Counter
Piece counter General The 589 machine is equipped with a piece counter. The piece counter counts the number of buttonholes sewn, not the number of buttonhole sequences sewn. The current piece-counter value is displayed behind the “S” symbol. Switching the machine off does not affect the piece-counter value. The piece counter counts up to a maximum of 65000 buttonholes. -
Page 34: Buttonhole And Sequence Programming: A Brief Description
9.9 Buttonhole and sequence programming: a brief description 9.9.1 Selecting a buttonhole number – Push the pedal back: the cloth carrier plate and hook turret move to their starting positions – Press “P”: The display switches from sewing mode to buttonhole programming mode. -
Page 35: Setting Buttonhole Sequences: A Brief Description
9.10 Setting buttonhole sequences: a brief description 9.10.1 Selecting a buttonhole sequence – Push the pedal back: the cloth carrier plate and hook turret move to their starting positions. – Press “S”. The display switches from sewing mode to sequence mode: in this mode sequences can be programmed. -
Page 36: Error Messages
Error messages 10.1 Pressure monitor The pressure monitor monitors the pressure of the air supply. If the pressure is inadequate this warning message appears in the display. Fault rectification – Switch the machine off. – Ensure that the air pressure is adequate. –... -
Page 37: Maintenance
Maintenance Caution: danger of injury Maintenance work may only be carried out with the machine switched off. The utmost care must be taken when carrying out maintenance work that requires the machine to be running. 11.1 Cleaning A clean machine is a trouble-free machine. Daily cleaning: –... -
Page 38: Lubrication
11.2 Lubrication Check the oil level in oil reservoirs 1 and 2 every week. Caution: danger of injury Oil can cause skin eruptions. Avoid protracted contact with the skin. In the event of contact, thoroughly wash the affected area. CAUTION: The handling and disposal of mineral oil is subject to legal regulation.
Need help?
Do you have a question about the 589 and is the answer not in the manual?
Questions and answers