Burley Honey Bee Owner's Instruction And Safety Manual
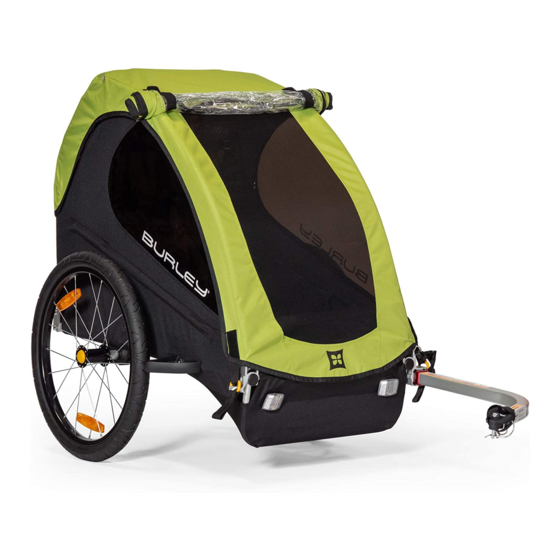
Child trailer
Hide thumbs
Also See for Honey Bee:
- Owner's instruction & safety manual (40 pages) ,
- Owner's instruction and safety manual (32 pages) ,
- Owner's instruction manual (24 pages)

Subscribe to Our Youtube Channel
Related Manuals for Burley Honey Bee


Summary of Contents for Burley Honey Bee
- Page 1 Owner’s Instruction and Safety Manual child trailer Burley Honey Bee ™ Stroll Bike...
-
Page 2: Table Of Contents
Contents Owner’s Instruction Introduction and Safety Manual Safety Guidelines Burley Honey Bee Parts Bag Contents ™ Tool List Opening and Closing Your Trailer 4 Attaching the Seat Mounting Reflectors Installing Wheel Guards Attaching Wheels Using Parking Brake Installing Tow Bar Installing Handle Bar Receivers Installing Cover Attaching Handle Installing Safety Flag Using Seat Harness Hitching Trailer to Your Bicycle Safety Checklists Maintenance and Storage Replacement Parts List Replacement Parts Diagram Warranty... -
Page 3: Introduction
8. Instruct children not to bounce or lean, as a weight shift IT IS VERY IMPORTANT FOR YOU TO FAMILIARIZE YOURSELF WITH could cause the trailer to tip over. YOUR BURLEY BY READING THIS ENTIRE MANUAL BEFORE USE. 9. To protect children from flying debris, always use your IF YOU HAVE ANY QUESTIONS, PLEASE CONTACT YOUR cover. Never leave children unattended. Check children AUTHORIZED BURLEY DEALER OR VISIT WWW.BURLEY.COM. -
Page 4: Opening And Closing Your Trailer
FIGURE 1 FIGURE 1 2. Rotate frame locks and snap onto rear tube. FIGURE 2 3. To close trailer, reverse opening process. To view a video clip of “Opening and Closing Your Trailer” go to: www.burley.com/support/tutorials.cfm. WARNING Plastic Saddles CHECK THAT THE FRAME LOCKS ARE PROPERLY ENGAGED BEFORE USING THE TRAILER. FAILURE TO DO SO CAN RESULT IN SERIOUS INJURY. Frame Locks FIGURE 2 Attaching the Seat Attach hooks on seat sides to D-rings by windows. -
Page 5: Mounting Reflectors
Mounting Reflectors 1. Screw reflectors and brackets together. Bracket 2. Loosen screws on reflector brackets. Mount reflectors/ brackets horizontally on rear corners of side frame tubes, with reflectors extending out past trailer sides. 3. Tighten screws securely. PHOTO 2 WARNING MAKE SURE REFLECTORS FACE OUTWARD. INCORRECTLY INSTALLED REFLECTORS CAN REDUCE VISIBILITY AND CAUSE AN Reflector ACCIDENT OR SERIOUS INJURY. Left Side Frame Tube PHOTO 2: Trailer left rear corner Installing Wheel Guards 1. Match holes in wheel guards with holes on outside of lower Screws... -
Page 6: Using Parking Brake
Using Parking Brake Engage parking brake by pushing handle to the right. Exercise Brake Handle Engaged caution when disengaging brake, as it may spring to the left. PHOTO 3 Brake PHOTO 3 Installing Tow Bar 1. Slide tow bar through both tow bar mounts on left side. 2. Match rear tow bar hole with rear mount hole. 3. Insert the retaining pin through both holes, and lock retaining hoop securely. FIGURE 6 WARNING Retaining Hoop NEVER OPERATE TRAILER WITHOUT RETAINING PIN LOCKED IN PLACE. AN UNLOCKED TOW BAR CAN LOOSEN OR DETACH, Front Tow Bar CAUSING ACCIDENT RESULTING IN SERIOUS INJURY. -
Page 7: Installing Cover
Installing Cover 1. At top of frame, stretch elastic loops around handlebar mounts. 2. Match hook and loop fastener strips on cover to strips on trailer front and rear. 3. Hook O-rings on cover over ends of side frame tubes. Attaching Handle 1. Loosen knobs. Handle Bar 2. Slide handle into lower handlebar receivers and tighten Tighten Knob knobs securely. To change height position, flip handle over. PHOTO 5 PHOTO 5: Tighten knob clockwise Installing Safety Flag Inserting flag pole in handlebar receiver Insert flag pole into hole in top of LEFT handle bar receiver. PHOTO 6 IMPORTANT DO NOT USE TRAILER WITHOUT SAFETY FLAG. -
Page 8: Using Seat Harness
Using Seat Harness One Passenger: In two-passenger trailers, use inner shoulder straps and Note: middle crotch strap. 1. Place child in center of seat. 2. Snap shoulder straps into Y-buckle, with buckle positioned Strap Tubes at child’s sternum. Adjust straps so that child cannot move too far forward in seat. 3. Fasten and adjust lap belt snugly. FIGURE 8 IMPORTANT Lap Belt SINGLE PASSENGER MUST BE SEATED IN CENTER POSITION. FIGURE 8 Two passengers: For two children, use both shoulder harnesses and two Note: outer crotch straps. Strap Strap 1. Seat first child on one side of seat. -
Page 9: Hitching Trailer To Your Bicycle
Hitching Trailer to Your Bicycle The Burley Forged Standard Hitch is used Note: for bicycles with either nutted axles or FIGURE 10 Hitch quick release assemblies FIGURES 11 & 12 1. Remove axle nut or rear quick release lever assembly from bike. 2. Match hole on flat side of hitch upper arm to left (non-chain ring side) rear dropout hole, and place hitch flat against the dropout. 3. Loosely reassemble axle nut or quick release assembly through hitch, dropout and wheel. Racks, bags, or fittings should not interfere with hitch. 4. Slide flex connector between hitch side arms, and match holes. 5. Open retaining pin and insert through hitch and flex connector holes from above. Close retaining pin. 6. Tighten axle nut or tighten and close quick release lever, with lever pointing to rear of bike. A properly adjusted quick release lever should leave an imprint on your palm when the lever is rotated FIGURE 10: Nutted axle assembly to the closed position. Verify that hitch is secure and cannot be... -
Page 10: Safety Checklists
✓ 950021 Brake Assembly 5 years 250032 External Roll Bar (available ONLY in Europe) 5 years Inspect fabric parts for rips, abrasion, or missing or ✓ 950016 Axle Receiver Kit w/ Handle Receiver 5 years damaged hardware 250160 Wheel Guard Assembly (Set of 2) (NOT SHOWN) 3 years Contact your Authorized Burley Dealer for replacement of ✓ 950038 Flex Connector for Square Tow Bar w/ Safety Strap 3 years any damaged or worn-out parts Recommended Accessories Maintenance and Storage • Stroller Kit • Storage Cover Hitch and Tow Bar Maintenance • Baby Snuggler Store trailer indoors if possible. Do not use or store trailer • Handle Bar Console at temperatures below 32˚F (0°C), as hitch flex connector • Alternative Hitches can become brittle and possibly break, causing an accident Please go to www.burleygear.com for updated product parts list, diagrams and available accessories... - Page 11 B U R L E Y H O N E Y B E E O W N E R ’ S I N S T R U C T I O N A N D S A F E T Y M A N U A L...
-
Page 12: Warranty
B U R L E Y D E S I G N 4020 Stewart Rd. Eugene, OR 97402 PH 541.687.1644 800.423.8445 541.687.0436 burley burley.com burley.com Copyright 2008 by Burley Design LLC. © “Burley” is a registered trademark of Burley Design LLC 170134 Manual Honey Bee Child Trailer r1 RTFM Rev 08.08...
Need help?
Do you have a question about the Honey Bee and is the answer not in the manual?
Questions and answers