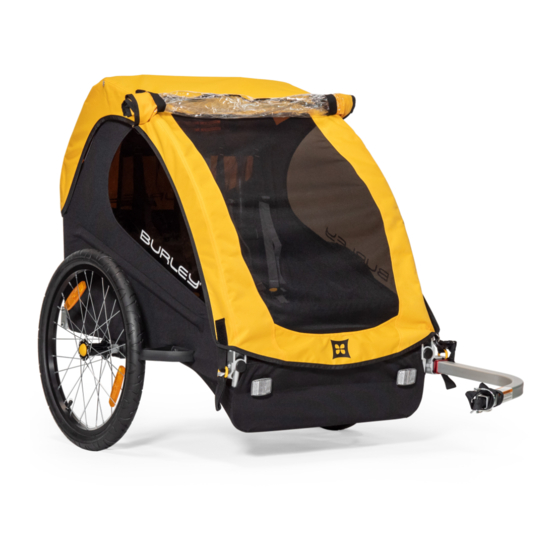
Burley BEE Owner's Instruction And Safety Manual
Burley design bicycle trailer owner's instruction and safety manual
Hide thumbs
Also See for BEE:
- Owner's instruction and safety manual (24 pages) ,
- Owner's instruction & safety manual (24 pages) ,
- Homeowner's instructions (10 pages)
Summary of Contents for Burley BEE
- Page 1 d’LITE ™ LADY BUG ™ SOLO ™ ENCORE ™ ™ ™ Owner’s Instruction and Safety Manual...
-
Page 2: Table Of Contents
IMPORTANT: Because some of the features and guidelines for using your Burley merit close attention, it is very important that you familiar- ize yourself with the trailer by reading this entire manual before use. If you have any questions, please contact your Authorized Burley Dealer or check our website at www.burley.com. - Page 3 Know Your Trailer Hitch Clamp the hitch securely to the bicycle frame, and check for a tight attach- ment each time you use the trailer. Refer to “Hitching Your Burley to Your Bicycle” and “Maintenance and Storage” sections of this manual for proper installation, use and maintenance of your hitch.
-
Page 4: Hardware Bag Contents And Tool Lists
IMPORTANT: Please verify that you have received all of the contents listed. Do not proceed with assembly if any parts are missing; contact Burley immediately for replacement parts. Hardware Bag Contents: All: Warranty Card, Burley Owner’s Instruction & Safety Manual d’Lite... -
Page 5: Mounting The Reflectors
Mounting the Reflectors : Factory-installed : Rear Reflectors Only ™ ™ All other models: FRONT: Clear front reflectors are mounted horizontally to both sides of the trailer fabric front. “TOP” is marked on the reflector front. Locate the grom- mets on the trailer fabric front, insert the screw into the reflector back through the grommet, and tighten snugly. -
Page 6: Installing And Operating The Tongue
Installing and Operating the Tongue d’Lite , Encore , Solo , Lady Bug ™ ™ ™ ™ Tip the trailer onto its rear end. Slide the tongue through the LEFT front tongue receptacle. Depress the safety button to allow it to slide back through the rear tongue receptacle. -
Page 7: Attaching The Handle
To install the handle, slide it into the lower handle bar receivers and tighten the knobs. (The upper handlebar receivers have spacers in them for the optional Burley Rollbar, available from your Burley dealer.) To change the position, remove the handle from the handle bar receivers, flip it over and reinstall it as described above. -
Page 8: Using The Parking Brake
To stow the front window (all models except the Bee), unzip it, roll it up and insert the loop Velcro ends of the elastic straps into the hook Velcro holders on the cover top. The Adjustable Sunshade slides up and down as needed. -
Page 9: Using The Seat Harness
Padded Seat & Shoulder Harness, Child Seat Recliner, and Recessed Helmet Pocket (d’Lite , Solo , Lady Bug , Cub ™ ™ ™ ™ To Install Seat Pad: Attach the seat pad Velcro hook strips to the loop Velcro strips on the seat. To Install Shoulder Harness Pad: Insert the shoulder straps into the shoulder harness pad as shown in the drawing at the right. -
Page 10: Hitching Your Burley To Your Bicycle
B U R L E Y T R A I L E R O W N E R ’ S I N S T R U C T I O N A N D S A F E T Y M A N U A L ™ Hitching your Burley to Your Bicycle The Burley standard trailer hitch was designed to quickly and safely attach to virtually all types of bicycles. It is attached to the left rear dropout (the non-chainring side) of your bicycle. -
Page 11: Safety Checklists
To extend the life of your trailer, wipe it dry (to help avoid mildew) and store it out of direct sunlight in a dry, well-ventilated area. Burley offers a du- rable polyester storage cover to protect your trailer from the elements when it is not in use. - Page 12 , Ladybug , Encore , Solo ™ ™ ™ Note: Contact Burley about parts not listed. 1. Safety flag 2. Handlebar 3. Plastic handlebar mount, inner right 4. Plastic handlebar mount, inner left 5. Plastic handlebar mount, outer 6. Knob 7.
-
Page 13: Parts List And Diagram
Parts List & Diagram ™ Note: Subassemblies are indented (contact Burley about parts not listed). 1. (1) Polyurethane Shell (2) Front Reflector (clear) (2) Rear Reflector (red) (2) Suspension Elastomer (1) Pair Side Panel Hold Down (left and right) (1) Tongue Retaining Pin (1) Pair Tongue Receptacle (front and rear) (1) Safety Pin &... - Page 14 Parts List & Diagram ™ Note: Subassemblies are indented (contact Burley about parts not listed). 1. (1) Preassembled Main Frame Assembly (1) Front Main Frame, 1” Aluminum Tube (1) Rear Main Frame, 1” Aluminum Tube (1) Left Frame, 1” Aluminum Tube (1) Right Frame, 1”...
-
Page 15: Warranty
Burley neither assumes nor authorizes any person to assume any other liability in connection with Burley product, and there are no oral agreements or warranties collateral to or affecting this agreement. This warranty gives you specific legal rights and you may also have other rights which vary from state to state. Copyright ©2007 by Burley Design, LLC “Burley”...


Need help?
Do you have a question about the BEE and is the answer not in the manual?
Questions and answers