Cisco RVS4000 - Gigabit Security Router User Manual
4-port gigabit security router with vpn business series
Hide thumbs
Also See for RVS4000 - Gigabit Security Router:
- Datasheet (4 pages) ,
- Administration manual (195 pages) ,
- Quick start manual (2 pages)
Table of Contents
Advertisement
Advertisement
Table of Contents

Related Manuals for Cisco RVS4000 - Gigabit Security Router


Summary of Contents for Cisco RVS4000 - Gigabit Security Router
-
Page 1: User Guide
4-Port Gigabit Security Router with VPN User Guide RVS4000 Model: BUSINESS SERIES... - Page 2 Linksys is a registered trademark or trademark of Cisco Systems, Inc. and/or its affiliates in the U.S. and certain other countries. Copyright © 2008 Cisco Systems, Inc. All rights reserved. Other brands and product names are trademarks or registered trademarks of their respective holders.
-
Page 3: About This Guide
Network Security www.linksys.com/security Copyright and Trademarks Linksys is a registered trademark or trademark of Cisco Systems, Inc. and/ or its affiliates in the U.S. and certain other countries. Copyright © 2007 Cisco Systems, Inc. All rights reserved. Other brands and product names are trademarks or registered trademarks of their respective holders. -
Page 4: Table Of Contents
Table of Contents Chapter 1: Introduction Chapter 2: Networking and Security Basics An Introduction to LANs ......... 2 The Use of IP Addresses. - Page 5 Table of Contents QoS > QoS Setup ......... . .23 QoS >...
- Page 6 Table of Contents How to Establish a Secure IPSec Tunnel .......44 Step 1: Create an IPSec Policy .
- Page 7 Table of Contents Avis d’Industrie Canada ........64 User Information for Consumer Products Covered by EU Directive 2002/96/EC on Waste Electric and Electronic Equipment (WEEE) .
-
Page 8: Chapter 1: Introduction
Introduction Chapter 1 Chapter 1: Introduction Thank you for choosing the 4-Port Gigabit Security Router with VPN. The Linksys 4-Port Gigabit Security Router with VPN is an advanced Internet-sharing network solution for your small business needs. Like any router, it lets multiple computers in your office share an Internet connection. -
Page 9: Chapter 2: Networking And Security Basics
Networking and Security Basics Chapter 2 Chapter 2: and its dynamic IP address has expired, the DHCP server will assign it a new dynamic IP address. Networking and Security A DHCP server can either be a designated PC on the network or another network device, such as the Router. - Page 10 Networking and Security Basics Chapter 2 client PCs and servers running various operating systems including Windows, Linux, and Solaris from network worm attacks. However, this system does not prevent viruses contained in email attachments. The P2P (peer-to-peer) and IM (instant messaging) control allows the system administrator to prevent network users from using those protocols to communicate with people over the Internet.
-
Page 11: Chapter 3: Planning Your Virtual Private Network (Vpn)
Planning Your Virtual Private Network (VPN) Chapter 3 Chapter 3: 3) Man in the middle attacks Planning Your Virtual Once the hacker has either sniffed or spoofed enough information, he can now perform a “man in the middle” Private Network (VPN) attack. -
Page 12: Vpn Router To Vpn Router
Planning Your Virtual Private Network (VPN) Chapter 3 VPN tunnel using IPSec (refer to “Appendix C: Configuring For additional information and instructions about IPSec between a Windows 2000 or XP PC and the Router”). creating your own VPN, please visit Linksys’s website Other versions of Microsoft operating systems require at www.linksys.com. -
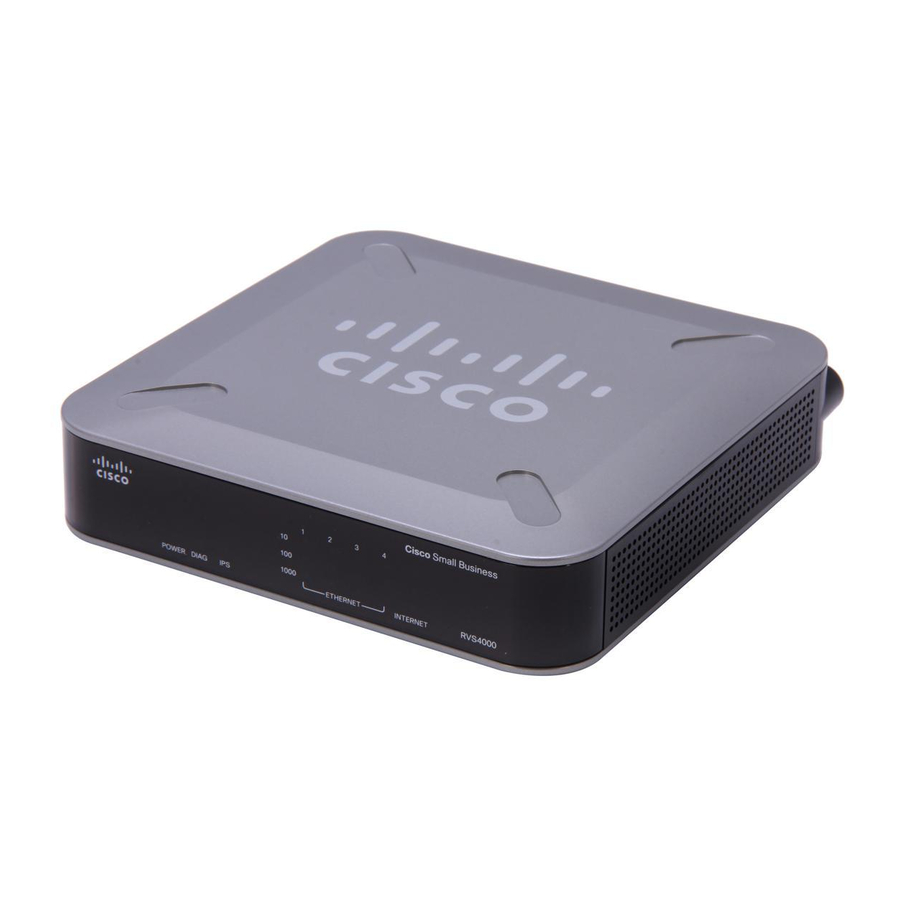
Page 13: Chapter 4: Product Overview
Product Overview Chapter 4 Back Panel Chapter 4: Product Overview The Router’s ports and Reset button are located on the back panel of the Router. Front Panel The Router’s LEDs are located on the front panel of the Router. Back Panel RESET The Reset button can be used in one of two ways:... -
Page 14: Chapter 5: Setting Up And Configuring The Router
Setting Up and Configuring the Router Chapter 5 Setup Chapter 5: Setting Up and The Setup tab is used to access all of the Router’s basic setup functions. The device can be used in most network Configuring the Router settings without changing any of the default values. Some users may need to enter additional information in order to connect to the Internet through an ISP (Internet Service The router is configured using the built-in Web-based... -
Page 15: Setup > Wan
Setting Up and Configuring the Router Chapter 5 Network Setting Status Automatic Configuration - DHCP By default, the Router’s Configuration Type is set to LAN IP Displays the IP address of the Router’s LAN Automatic Configuration - DHCP, and it should be kept interface. - Page 16 Setting Up and Configuring the Router Chapter 5 When you have finished making changes to the screen, click Save Settings to save the changes, or click Cancel Changes to undo your changes. PPPoE Some DSL-based ISPs use PPPoE (Point-to-Point Protocol over Ethernet) to establish Internet connections.
- Page 17 Setting Up and Configuring the Router Chapter 5 Heart Beat Signal Heart Beat Signal is a service used in Australia. Check with your ISP for the necessary setup information. L2TP IP Address This is the Router’s IP address, when seen from the WAN, or the Internet.
-
Page 18: Setup > Lan
Setting Up and Configuring the Router Chapter 5 Optional Settings (Required by some ISPs) Password • Host Name (DynDNS) or Domain name (TZO) • Some of these settings may be required by your ISP. Verify with your ISP before making any changes. Custom DNS (DynDNS) •... -
Page 19: Setup > Dmz
Setting Up and Configuring the Router Chapter 5 Server Settings (DHCP) IPv6 The Router can be used as your network’s DHCP (Dynamic IPv6 Address If your network has implemented IPv6, Host Configuration Protocol) server, which automatically enter the proper IPv6 address in this field. assigns an IP address to each PC on your network. -
Page 20: Setup > Mac Address Clone
Setting Up and Configuring the Router Chapter 5 Operating Mode Click Save Settings to save your changes, or click Cancel Changes to undo your changes. Operation Mode Select the Operating mode in which Setup > MAC Address Clone this Router will function.: •... -
Page 21: Setup > Time
Setting Up and Configuring the Router Chapter 5 Destination IP Address Enter the network address of the Set the local time using Network Time Protocol (NTP) remote LAN segment. For a standard Class C IP domain, the Automatically If you wish to use a Network Time Protocol network address is the first three fields of the Destination server to set the time and date, select this option, then LAN IP, while the last field should be zero. -
Page 22: Firewall
Setting Up and Configuring the Router Chapter 5 Firewall Single IP Address Allows access from the single IP • address that you enter in the field provided. From the Firewall Tab, you can configure the Router to • IP Range Allows access from a range of IP addresses deny or allow specific internal users from accessing the that you enter in the field provided. - Page 23 Setting Up and Configuring the Router Chapter 5 Editing IP ACL Rules Firewall > IP Based ACL Priority This is the rule’s priority. Edit IP ACL Rule Enable This indicates whether the rule is enabled or Action Select the desired action, Allow or Deny, from disabled.
-
Page 24: Firewall > Internet Access Policy
Setting Up and Configuring the Router Chapter 5 Time To make the rule apply for an entire day, select 24 Hours. To make the rule apply only during a specific period of the day, enter the starting time in the From field and the ending time in the To field. -
Page 25: Firewall > Single Port Forwarding
Setting Up and Configuring the Router Chapter 5 policy to be enforced. Select the individual days during For example, you could configure your Web Server to which the policy will be in effect, or select Everyday. accept connections on both port 80 (standard) and port Enter a range of hours and minutes during which the 8080. -
Page 26: Firewall > Port Range Triggering
Setting Up and Configuring the Router Chapter 5 Enabled Click the Enabled checkbox to enable port range forwarding for the relevant application. VPN > Summary Click Save Settings to save the settings you have entered. Click Cancel Changes to cancel any changes you have entered. -
Page 27: Vpn > Ipsec Vpn
Setting Up and Configuring the Router Chapter 5 Tunnel(s) Defined Displays the number of tunnels Select Tunnel Entry To create a new tunnel, select new. currently defined. This number will be greater than the To configure an existing tunnel, select it from the drop- Tunnels Enabled field if any defined tunnels have been down menu. - Page 28 Setting Up and Configuring the Router Chapter 5 Remote Security Group Type Select the remote LAN A one-way hashing algorithm that produces • user(s) behind the remote gateway who can use this VPN a 128-bit digest. tunnel. This may be a single IP address or a Sub-network. SHA1 A one-way hashing algorithm that produces •...
-
Page 29: Vpn > Vpn Client Accounts
Setting Up and Configuring the Router Chapter 5 VPN > VPN Client Accounts Certificate Management This section allows you to manage the certificate used Use this page to administer your VPN Client users. Enter the for securing the communication between the router and information at the top of the screen and the users you’ve QuickVPN clients. -
Page 30: Qos
Setting Up and Configuring the Router Chapter 5 L2TP PassThrough Layer 2 Tunneling Protocol is the Direction Select Upstream for outbound traffic or method used to enable Point-to-Point sessions via the Downstream for inbound traffic. Internet on the Layer 2 level. L2TP Passthrough is enabled Mini. -
Page 31: Qos > Dscp Setup
Setting Up and Configuring the Router Chapter 5 Administration The Administration tab provides access to system administration settings and tools. It includes the following screens: Administration > Management QoS > QoS Setup Port ID The number of the LAN port. Trust Mode Select either Port, CoS, or DSCP. -
Page 32: Administration > Log
Setting Up and Configuring the Router Chapter 5 UPnP Outgoing Log Select Enable to cause all outgoing packets to be logged. You can then click View Outgoing Universal Plug and Play (UPnP) can used to set up public Table to display information on the outgoing packets services on your network. -
Page 33: Administration > Diagnostics
Setting Up and Configuring the Router Chapter 5 Administration > Diagnostics Administration > Backup & Restore Administration > Backup & Restore To download a copy of the current configuration and store the file on your PC, click Backup to start the download. Restore Configuration To restore a previously saved config file back to the Router, enter the file name in the field or click Browse to select the... -
Page 34: Administration > Firmware Upgrade
Setting Up and Configuring the Router Chapter 5 Administration > Firmware Upgrade Signature Update Before upgrading the firmware, download and extract the Router firmware upgrade file from the Linksys website, www.linksys.com. Enter the firmware upgrade file name in the Signature Update field, or click Browse to find the file. -
Page 35: Ips > Information
Setting Up and Configuring the Router Chapter 5 L2 Switch L2 > Create VLAN VLANs are logical subgroups of a Local Area Network (LAN) created via software rather than defining a hardware solution. VLANs combine user stations and network devices into a single domain regardless of the physical LAN segment to which they are attached. -
Page 36: L2 > Vlan Port Setting
Setting Up and Configuring the Router Chapter 5 L2 > VLAN Port Setting Function/Port table The top half of the table indicates each port’s current mode (Untagged, Tagged, or Trunk). The lower half of the table is used to assign port membership for the selected VLAN. -
Page 37: L2 > Port Setting
Setting Up and Configuring the Router Chapter 5 L2 > Port Setting Rx Frames Displays the number of Frames received on the selected port. Tx Errors Displays the number of error packets transmitted from the selected port. Rx Errors Displays the number of error packets received from the selected port. -
Page 38: Status
Setting Up and Configuring the Router Chapter 5 Forward Delay Enter a number from 4 to 30. The default DNS 1-2 Displays the DNS (Domain Name System) IP is 15. addresses currently used by this Gateway. Force Version This is the default protocol version to use. IP Conntrack Click this button to display the IP Conntrack Select Normal (use RSTP) or Compatible (compatible with... - Page 39 Setting Up and Configuring the Router Chapter 5 DHCP Server The status of the Router’s DHCP server function is displayed here. Start IP Address This shows the beginning of the range of IP addresses used by the DHCP Server. End IP Address This shows the end of the range of IP addresses used by the DHCP Server.
-
Page 40: Appendix A: Troubleshooting
Troubleshooting Appendix A Appendix A: Windows 2000 Click Start, Settings, and Control Panel. Double-click Troubleshooting Network and Dial-Up Connections. Right-click the Local Area Connection that is This appendix provides solutions to problems that may associated with the Ethernet adapter you are using, occur during the installation and operation of the Router. - Page 41 Troubleshooting Appendix A I want to test my Internet connection. If you do NOT get a reply, check the cable, and make • sure Obtain an IP address automatically is selected Check your TCP/IP settings. in the TCP/IP settings for your Ethernet adapter. Windows 98 and Millennium ping followed by your At the command prompt, type...
- Page 42 Troubleshooting Appendix A I am not able to access the Router’s Web-based Utility I need to set up a server behind my Router. Setup page. To use a server like a web, ftp, or mail server, you need Refer to “I want to test my Internet connection” above to know the respective port numbers they are using.
- Page 43 Troubleshooting Appendix A I forgot my password, or the password prompt always Select the Service from the Application column. appears when saving settings to the Router. Enter the IP Address of the server that you want the Internet users to access. For example, if the web Reset the Router to factory defaults by pressing the Reset server’s Ethernet adapter IP address is 192.168.1.100, button for ten seconds and then releasing it.
- Page 44 Troubleshooting Appendix A I need to upgrade the firmware. Click Save Settings. If the connection is lost again, follow steps 1 and 2 to re- In order to upgrade the firmware with the latest features, establish connection. you need to go to the Linksys website and download the latest firmware at www.linksys.com.
-
Page 45: Frequently Asked Questions
Troubleshooting Appendix A Check the Enabled checkbox for the entry. network, users are advised to use the IP address to identify the resource. When you have completed the configuration, click Save Settings. I have a Gateway-to-Gateway IPSec VPN tunnel connected between two RVS4000 routers, but the users When I enter a URL or IP address, I get a time-out error or in one network cannot see the computers in the remote am prompted to retry. - Page 46 Troubleshooting Appendix A Does the Router support any operating system other The web page hangs; downloads are corrupt, or nothing than Windows 98, Millennium, 2000, or XP? but junk characters are being displayed on the screen. What do I need to do? Yes, but Linksys does not, at this time, provide technical Force your Ethernet adapter to 10Mbps or half duplex support for setup, configuration or troubleshooting of any...
- Page 47 Troubleshooting Appendix A What is DMZ Hosting? Demilitarized Zone (DMZ) allows one IP address (computer) to be exposed to the Internet. Some applications require multiple TCP/IP ports to be open. It is recommended that you set your computer with a static IP if you want to use DMZ Hosting.
-
Page 48: Appendix B: Using Linksys Quickvpn For Windows 2000, Xp, Or Vista
Using Linksys QuickVPN for Windows 2000, XP, or Vista Appendix B Installing the Linksys QuickVPN Software Appendix B: Using Linksys QuickVPN for Installing from the CD-ROM Windows 2000, XP, or Vista Insert the RVS4000 CD-ROM into your CD-ROM drive. Go to the Start menu and then click Run. In the field provided, enter D:\VPN_Client.exe (if “D”... -
Page 49: Using The Linksys Quickvpn Software
Using Linksys QuickVPN for Windows 2000, XP, or Vista Appendix B Save the zip file to your PC, and extract the .exe file. Double-click the .exe file, and follow the on-screen QuickVPN Tray Icon— instructions. Proceed to the next section, “Using the Connection Linksys QuickVPN Software”. -
Page 50: Distributing Certificates To Quickvpn Users
Using Linksys QuickVPN for Windows 2000, XP, or Vista Appendix B QuickVPN Client Version Number Distributing Certificates to QuickVPN Users The following explains how to export a certificate from the RVS4000 for distribution to QuickVPN users, as well as how to install the certificate on the QuickVPN users’ PCs. Generate the Certificate as follows: Log on to the Web-based Utility. -
Page 51: Appendix C: Configuring Ipsec With A Windows 2000 Or Xp Computer
Configuring IPSec with a Windows 2000 or XP Computer Appendix C How to Establish a Secure IPSec Tunnel Appendix C: Configuring IPSec with Step 1: Create an IPSec Policy a Windows 2000 or XP Click Start, select Run, and type secpol.msc in the Open field. - Page 52 Configuring IPSec with a Windows 2000 or XP Computer Appendix C Make sure the IP Filter List tab is selected. Click Add. mask 255.255.255.0. (These are the Router’s default settings. If you have changed these settings, enter your new values.) If you want to enter a description for your filter, click the Description tab and enter the description there.
-
Page 53: Step 3: Configure Individual Tunnel Rules
Configuring IPSec with a Windows 2000 or XP Computer Appendix C Click the Filter Action tab, and click the filter action Require Security radio button. Then, click Edit. Filters Properties Filter Action Tab If you want to enter a description for your filter, click On the Security Methods tab, verify that the Negotiate the Description tab and enter the description there. - Page 54 Configuring IPSec with a Windows 2000 or XP Computer Appendix C Connection Type Tab Tunnel 2: Router->win Preshared Key This new Preshared key will be displayed. Click the In the new policy’s Properties screen, make sure Apply button to continue, if it appears on your screen; that win ->...
- Page 55 Configuring IPSec with a Windows 2000 or XP Computer Appendix C Filter Action Tab New Preshared Key Click the Authentication Methods tab, and verify Click the Tunnel Setting tab. Click the radio button The that the authentication method Kerberos is selected. tunnel endpoint is specified by this IP Address, and Then, click Edit.
-
Page 56: Step 4: Assign New Ipsec Policy
Configuring IPSec with a Windows 2000 or XP Computer Appendix C Step 4: Assign New IPSec Policy the name of the tunnel in the Tunnel Name field. This is to allow you to identify multiple tunnels and does In the IP Security Policies on Local Machine window, right- not have to match the name used at the other end of click the policy named to_Router, and click Assign. -
Page 57: Appendix D: Gateway-To-Gateway Vpn Tunnel
Gateway-to-Gateway VPN Tunnel Appendix D Appendix D: Configuration of the RVS4000 Gateway-to-Gateway VPN Follow these instructions for the first VPN Router, designated RVS4000. The other VPN Router is designated Tunnel the RV082. Launch the web browser for a networked computer, designated PC 1. -
Page 58: Configuration Of The Rv082
Gateway-to-Gateway VPN Tunnel Appendix D In the IPSec Setup section, select the appropriate For the Remote Security Gateway Type, select encryption, authentication, and other key management address. Enter the RVS4000’s WAN IP address in the IP settings. Address field. In the Preshared Key field, enter a string for this key, for For the Remote Security Group Type, select Subnet. -
Page 59: Configuration When The Remote Gateway Uses A Dynamic Ip Address
Gateway-to-Gateway VPN Tunnel Appendix D Configuration when the Remote Gateway Uses a Dynamic IP Address This example assumes the Remote Gateway is using a dynamic IP address. If the Remote Gateway uses a static IP address, refer to “Configuration when the Remote Gateway Uses a Static IP. -
Page 60: Configuration Of Pc 1 And Pc 2
Gateway-to-Gateway VPN Tunnel Appendix D Configuration when Both Gateways Use For the VPN Tunnel setting, select Enable. The WAN IP address (B.B.B.B) of the RV082 will be Dynamic IP Addresses automatically detected. This example assumes both Gateways are using dynamic For the Local Security Group Type, select Subnet. -
Page 61: Configuration Of The Rv082
Gateway-to-Gateway VPN Tunnel Appendix D For the VPN Tunnel setting, select Enable. The WAN IP address (B.B.B.B) of the RV082 will be automatically detected. For the Local Security Group Type, select Subnet. Enter the RV082’s local network settings in the IP Address and Subnet Mask fields. -
Page 62: Appendix E: Trend Micro Protectlink Gateway Service
Trend Micro ProtectLink Gateway Service Appendix E How to Purchase, Register, or Activate the Appendix E: Service Trend Micro ProtectLink You can purchase, register, or activate the service using Gateway Service the ProtectLink screen. ProtectLink Overview Click the ProtectLink tab to display this screen. The optional Trend Micro ProtectLink Gateway service provides security for your network. -
Page 63: How To Use The Service
Trend Micro ProtectLink Gateway Service Appendix E Web Protection When the wizard is complete, the Web Protection, Email Protection, and License tabs will appear. Enable URL Filtering To filter website addresses (URLs), select this option. NOTE: If you replace the Router with a new router that supports this service, click I have my Enable Web Reputation To block potentially malicious... -
Page 64: Protectlink > Email Protection
Trend Micro ProtectLink Gateway Service Appendix E URL(s) to approve Enter the trusted URL(s). Separate multiple URLs with semicolons (“;”). To add the URLs, click Add. Approved URLs list The trusted URLs are displayed. To delete a URL, click its trash can icon. Approved Clients You can designate up to 20 trusted clients (local IP addresses) that will always have access to filtered URLs. - Page 65 Trend Micro ProtectLink Gateway Service Appendix E ProtectLink > License License Update Information To refresh the license information displayed on-screen, click Update Information. License Information View detailed license online To view license information online, click this link. Status The status of your license, Activated or Expired, is displayed.
- Page 66 Trend Micro ProtectLink Gateway Service Appendix E 4-Port Gigabit Security Router with VPN...
-
Page 67: Appendix F: Specifications
Specifications Appendix F Appendix F: Specifications Specifications Secure Management HTTPS, Username/Password Model RVS4000 802.1X Port-based RADIUS Authentication Standards IEEE 802.3, 802.3u, 802.1x, (EAP-MD5, EAP-PEAP) RFC791 (IP Protocol), RFC2460 Ports Ethernet, Power Service-based Service-based Bandwidth Buttons Reset Management supports Rate Cabling Type UTP CAT 5 Control and Priority LEDs... - Page 68 Specifications Appendix F Environmental Dimensions 6.69" x 1.61" x 6.69" W x H x D (170 x 41 x 170 mm) Unit Weight 0.84 lb (0.38 kg) Power 12V 1A Certification FCC Class B, CE, ICES-003 Operating Temp. 32 to 104ºF (0 to 40ºC) Storage Temp.
-
Page 69: Appendix G: Warranty Information
Warranty Information Appendix G Appendix G: service offerings. This limited warranty shall not apply to such third party software or service offerings. This limited Warranty Information warranty does not guarantee any continued availability of a third party’s service for which this product’s use or operation may require. -
Page 70: Technical Support
Warranty Information Appendix G original purchase when returning your product. Products received without a RMA number and dated proof of original purchase will be rejected. Do not include any other items with the product you are returning to Linksys. Defective product covered by this limited warranty will be repaired or replaced and returned to you without charge. -
Page 71: Appendix H: Regulatory Information
Regulatory Information Appendix H Industry Canada Statement Appendix H: Regulatory Information This Class B digital apparatus complies with Canadian ICES-003. Operation is subject to the following two conditions: FCC Statement This device may not cause interference and This product has been tested and complies with the This device must accept any interference, including specifications for a Class B digital device, pursuant to Part interference that may cause undesired operation of... -
Page 72: User Information For Consumer Products Covered By Eu Directive 2002/96/Ec On Waste Electric And Electronic Equipment (Weee)
Regulatory Information Appendix H User Information for Consumer Products Ceština (Czech) - Informace o ochraně životního prostředí pro zákazníky v zemích Evropské unie Covered by EU Directive 2002/96/EC on Evropská směrnice 2002/96/ES zakazuje, aby zařízení označené Waste Electric and Electronic Equipment tímto symbolem na produktu anebo na obalu bylo likvidováno s netříděným komunálním odpadem. - Page 73 Regulatory Information Appendix H Eesti (Estonian) - Keskkonnaalane informatsioon Français (French) - Informations environnementales Euroopa Liidus asuvatele klientidele pour les clients de l’Union européenne Euroopa Liidu direktiivi 2002/96/EÜ nõuete kohaselt on La directive européenne 2002/96/CE exige que l’équipement seadmeid, millel on tootel või pakendil käesolev sümbol sur lequel est apposé...
- Page 74 Regulatory Information Appendix H Lietuvškai (Lithuanian) - Aplinkosaugos informacija, Nederlands (Dutch) - Milieu-informatie voor klanten skirta Europos Sąjungos vartotojams in de Europese Unie Europos direktyva 2002/96/EC numato, kad įrangos, kuri ir De Europese Richtlijn 2002/96/EC schrijft voor dat apparatuur die kurios pakuotė...
- Page 75 Regulatory Information Appendix H Português (Portuguese) - Informação ambiental para Slovenčina (Slovene) - Okoljske informacije za stranke clientes da União Europeia v Evropski uniji A Directiva Europeia 2002/96/CE exige que o equipamento Evropska direktiva 2002/96/EC prepoveduje odlaganje opreme, que exibe este símbolo no produto e/ou na sua embalagem označene s tem simbolom –...
-
Page 76: Appendix I: Software License Agreement
THE SOFTWARE, YOU ARE CONSENTING TO BE BOUND BY THIS AGREEMENT. IF YOU DO NOT AGREE TO ALL OF THESE This product from Cisco-Linksys LLC or from one of its TERMS, THEN YOU MAY NOT DOWNLOAD, INSTALL OR USE affiliates Cisco Systems-Linksys (Asia) Pte Ltd. or Cisco- THE SOFTWARE. -
Page 77: Schedule 2
Software License Agreement Appendix I your Linksys product and/or the Software is being used in INCIDENTAL OR PUNITIVE DAMAGES, REGARDLESS OF accordance with the terms of this Agreement; (iii) to provide CAUSE (INCLUDING NEGLIGENCE), ARISING OUT OF improvements to the way Linksys delivers technology to OR RELATED TO THE USE OF OR INABILITY TO USE THE you and to other Linksys customers;... - Page 78 Software License Agreement Appendix I Preamble TERMS AND CONDITIONS FOR COPYING, DISTRIBUTION AND MODIFICATION The licenses for most software are designed to take away your freedom to share and change it. By contrast, the 0. This License applies to any program or other work which GNU General Public License is intended to guarantee your contains a notice placed by the copyright holder saying it freedom to share and change free software--to make sure...
- Page 79 Software License Agreement Appendix I c) If the modified program normally reads commands object code or executable form with such an offer, in interactively when run, you must cause it, when started accord with Subsection b above.) running for such interactive use in the most ordinary The source code for a work means the preferred form of way, to print or display an announcement including the work for making modifications to it.
-
Page 80: Schedule 3
Software License Agreement Appendix I License and any other pertinent obligations, then as a guided by the two goals of preserving the free status of consequence you may not distribute the Program at all. all derivatives of our free software and of promoting the For example, if a patent license would not permit royalty- sharing and reuse of software generally. - Page 81 Software License Agreement Appendix I Copyright (c) 1998-2007 The OpenSSL Project. All rights Original SSLeay License reserved. ----------------------- Redistribution and use in source and binary forms, with Copyright (C) 1995-1998 Eric Young (eay@cryptsoft.com) or without modification, are permitted provided that the All rights reserved.
- Page 82 Software License Agreement Appendix I THE AUTHOR OR CONTRIBUTORS BE LIABLE FOR ANY DIRECT, INDIRECT, INCIDENTAL, SPECIAL, EXEMPLARY, OR CONSEQUENTIAL DAMAGES (INCLUDING, BUT NOT LIMITED TO, PROCUREMENT OF SUBSTITUTE GOODS OR SERVICES; LOSS OF USE, DATA, OR PROFITS; OR BUSINESS INTERRUPTION) HOWEVER CAUSED AND ON ANY THEORY OF LIABILITY, WHETHER IN CONTRACT, STRICT LIABILITY, OR TORT (INCLUDING NEGLIGENCE OR OTHERWISE)
-
Page 83: Appendix J: Contact Information
Contact Information Appendix J Appendix J: Contact Information Linksys Contact Information Website http://www.linksys.com Support Site http://www.linksys.com/support FTP Site ftp.linksys.com Advice Line 800-546-5797 (LINKSYS) Support 800-326-7114 RMA (Return Merchandise http://www.linksys.com/warranty Authorization) NOTE: Details on warranty and RMA issues can be found in the Warranty section of this Guide. 7112610B-JL 4-Port Gigabit Security Router with VPN...
Need help?
Do you have a question about the RVS4000 - Gigabit Security Router and is the answer not in the manual?
Questions and answers