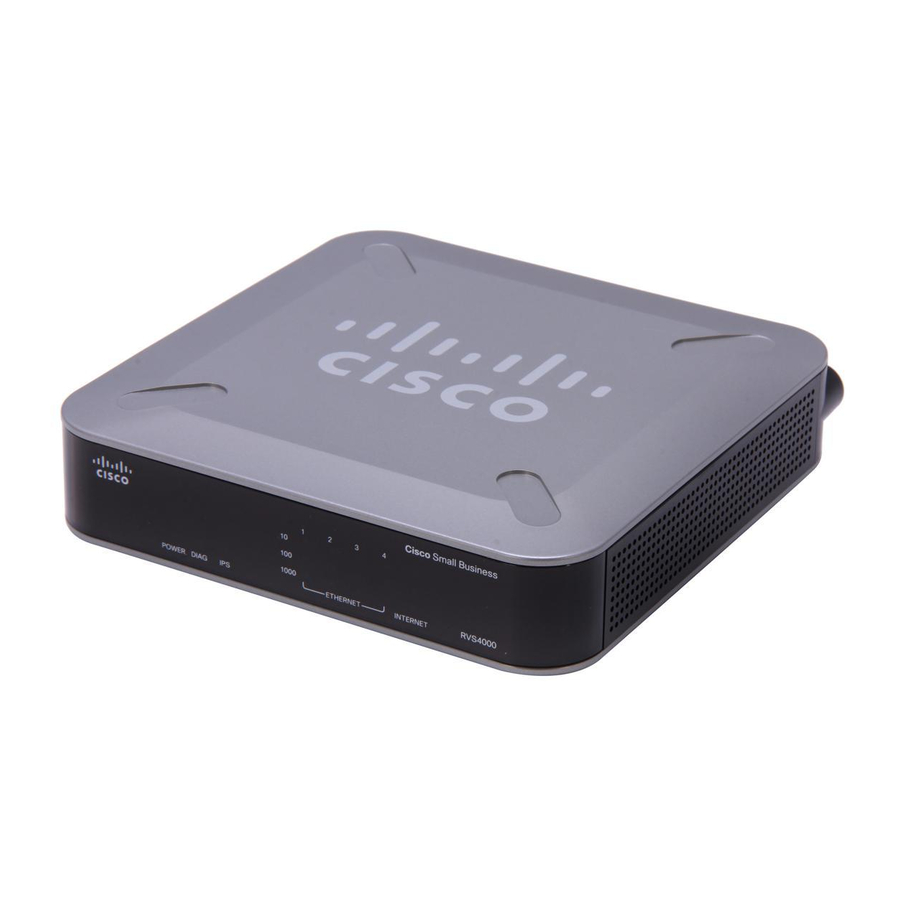
Cisco RVS4000 - Gigabit Security Router Administration Manual
4-port gigabit security router with vpn
Hide thumbs
Also See for RVS4000 - Gigabit Security Router:
- Datasheet (4 pages) ,
- User manual (83 pages) ,
- Quick start manual (2 pages)

Related Manuals for Cisco RVS4000 - Gigabit Security Router


Summary of Contents for Cisco RVS4000 - Gigabit Security Router
- Page 1 ADMINISTRATION GUIDE Cisco Small Business RVS4000 4-Port Gigabit Security Router with VPN...
- Page 2 Cisco and the Cisco Logo are trademarks of Cisco Systems, Inc. and/or its affiliates in the U.S. and other countries. A listing of Cisco's trademarks can be found at www.cisco.com/go/trademarks. Third party trademarks mentioned are the property of their respective owners. The use of the word partner does not imply a partnership relationship between Cisco and any other company.
-
Page 3: Table Of Contents
2) Data Sniffing 3) Man in the middle attacks What is a VPN? VPN Router to VPN Router Computer (using the Cisco QuickVPN Client software) to VPN Router Chapter 4: Getting Started with the RVS4000 Router Front Panel Back Panel... - Page 4 QoS > DSCP Setup Administration Administration > Management Router Access Administration > Log Administration > Diagnostics Administration > Backup & Restore Administration > Factory Default Administration > Reboot Administration > Firmware Upgrade Cisco RVS4000 Security Router with VPN Administrator Guide...
- Page 5 Running the VPN Setup Wizard Building Your VPN Connection Remotely Appendix A: Troubleshooting Frequently Asked Questions Appendix B: Using Cisco QuickVPN for Windows 2000, XP, or Vista Overview Before You Begin Installing the Cisco QuickVPN Software Installing from the CD-ROM...
- Page 6 How to Access the Configuration Utility How to Purchase, Register, or Activate the Service ProtectLink How to Use the Service ProtectLink > Web Protection ProtectLink > License Appendix F: Specifications Specifications Performance Cisco RVS4000 Security Router with VPN Administrator Guide...
- Page 7 Contents Setup/Config Management Security Features Network Routing Layer 2 Environmental Appendix G: Where to Go From Here Product Resources Related Documentation Cisco RVS4000 Security Router with VPN Administrator Guide...
-
Page 8: Chapter 1: Introduction
Introduction Thank you for choosing the Cisco RVS4000 4-Port Gigabit Security Router with VPN. The 4-Port Gigabit Security Router with VPN is an advanced Internet-sharing network solution for your small business needs. Like any router, it lets multiple computers in your office share an Internet connection. -
Page 9: Chapter 2: Networking And Security Basics
Ethernet ports. The router inspects Internet port services like the web server, ftp server, or other Internet applications, and, if allowed, it will forward the packet to the appropriate PC on the LAN side. Cisco RVS4000 Security Router with VPN Administrator Guide... -
Page 10: The Use Of Ip Addresses
If you run more than one DHCP server on your network, you will experience network errors, such as conflicting IP addresses. To disable DHCP on the router, see the Basic Setup section in Chapter 5, “Setting Up and Configuring the Router.” Cisco RVS4000 Security Router with VPN Administrator Guide... -
Page 11: The Intrusion Prevention System (Ips)
Buffer Overflow, Access Control, Scan, Trojan Horse, Misc., P2P, IM, Virus, Worm, and Web Attacks. Customers are encouraged to update their IPS signature file regularly to prevent any new types of attacks on the Internet. Cisco RVS4000 Security Router with VPN Administrator Guide... - Page 12 Networking and Security Basics The Intrusion Prevention System (IPS) IPS Scenarios Cisco RVS4000 Security Router with VPN Administrator Guide...
-
Page 13: Chapter 3: Planning Your Virtual Private Network (Vpn)
At this point, your data becomes open to hackers who use a variety of methods to steal not only the data you transmit but also your network login and security data. Some of the most common methods are described in on the next page. Cisco RVS4000 Security Router with VPN Administrator Guide... -
Page 14: Mac Address Spoofing
Internet. Data travelling over the Internet often passes through many different servers around the world before reaching its final destination. That’s a long way to go for unsecured data and this is when a VPN serves its purpose. Cisco RVS4000 Security Router with VPN Administrator Guide... -
Page 15: What Is A Vpn
You can use VPN to create a secure network that links a central office with branch offices, telecommuters, and/or professionals on the road (travelers can connect to a VPN router by using any computer with the Cisco QuickVPN Client software). -
Page 16: Vpn Router To Vpn Router
While using the VPN, the telecommuter now has a secure connection to the central office’s network, as if he were physically connected. For more information, refer to Appendix D, “Gateway-to-Gateway VPN Tunnel.” VPN Router to VPN Router Cisco RVS4000 Security Router with VPN Administrator Guide... -
Page 17: Computer (Using The Cisco Quickvpn Client Software) To Vpn Router
In this illustration, you see an example of a computer-to-VPN router VPN. In her hotel room, a traveling businesswoman connects to her ISP. Her notebook computer has the Cisco QuickVPN Client software, which is configured with her office’s IP address. She accesses the Cisco QuickVPN Client software and connects to the VPN router at the central office. -
Page 18: Chapter 4: Getting Started With The Rvs4000 Router
POWER LED: Steady green when the router is powered on. Flashes when the router is running a diagnostic test. DIAG LED: Unlit when the system is ready. Flashes red during firmware upgrades. Cisco RVS4000 Security Router with VPN Administrator Guide... -
Page 19: Back Panel
Reset button for 10 seconds. This action restores the factory defaults and clear all of the router settings, such as port forwarding or a new password. INTERNET Port: Provides a WAN connection to a cable modem or DSL modem. Cisco RVS4000 Security Router with VPN Administrator Guide... -
Page 20: Placement Options
You can place the router horizontally on the rubber feet, mount it in the stand, or mount it on the wall. Desktop Option For desktop placement, place the Cisco RVS4000 router horizontally on a surface so it sits on its four rubber feet. Stand Option To install the router vertically in the supplied stands, follow the steps below. -
Page 21: Wall Option
Repeat step 2 with the other stand. STEP 3 Wall Option To mount the Cisco RVS4000 router on the wall, follow these steps. Determine where you want to mount the router and install two screws (not STEP 1 supplied) that are 2-9/16 in. apart (approximately 64.5 mm). -
Page 22: Installing The Router
Repeat step 1 to connect up to four PCs, switches, or other network devices to the STEP 2 router. Connect an Ethernet network cable from your cable modem or DSL modem to the STEP 3 Internet port on the back panel of the router. Cisco RVS4000 Security Router with VPN Administrator Guide... -
Page 23: Configuring The Router
STEP 1 In the Address field enter http://192.168.1.1 and press Enter. STEP 2 In the User Name and Password fields, enter admin. The default user name and STEP 3 password are admin. Cisco RVS4000 Security Router with VPN Administrator Guide... - Page 24 Test the setup by opening your web browser from any computer and entering STEP 10 http://www.cisco.com/smb. Congratulations! The installation of the router is complete. For more information about advanced settings and security options, refer to NOTE Chapter 5, “Setting Up and Configuring the Router.” Cisco RVS4000 Security Router with VPN Administrator Guide...
-
Page 25: Chapter 5: Setting Up And Configuring The Router
The first time you open the configuration utility, enter admin (the default username) in the Username field and enter admin in the Password field. Click the OK button. You can change the password later from the Administration > Management window. Cisco RVS4000 Security Router with VPN Administrator Guide... -
Page 26: Setup
Setup > Summary The Setup > Summary window displays a read-only summary of the router’s basic information. Click a hyperlink (underlined text) to open a related page where you can update the information. Cisco RVS4000 Security Router with VPN Administrator Guide... - Page 27 Displays the amount of flash memory installed in the router. Port Statistics This section displays color-coded status information on the router’s Ethernet ports: • Green Indicates that the port has a connection. • Black Indicates that the port has no connection. Cisco RVS4000 Security Router with VPN Administrator Guide...
- Page 28 SMTP server address, then you have not set up the mail server. Click the Email hyperlink to display the Administration > Log window where you can configure the SMTP mail server. Cisco RVS4000 Security Router with VPN Administrator Guide...
-
Page 29: Setup > Wan
By default, the router’s Configuration Type is set to Automatic Configuration - DHCP, and it should be kept only if your ISP supports DHCP or you connect through a dynamic IP address. Automatic Configuration - DHCP Cisco RVS4000 Security Router with VPN Administrator Guide... - Page 30 Primary DNS (Required) and Secondary DNS (Optional) Your ISP will provide you with at least one DNS (Domain Name System) Server IP Address. Click Save to save your changes, or click Cancel to undo your changes. Cisco RVS4000 Security Router with VPN Administrator Guide...
- Page 31 Internet again. To activate Connect on Demand, select the Connect on Demand option and enter in the Max Idle Time field the number of minutes of inactivity that must elapse before your Internet connection is terminated automatically. Cisco RVS4000 Security Router with VPN Administrator Guide...
- Page 32 Your ISP will provide you with the Default Gateway Address. PPTP Server Enter the IP address of the PPTP server. User Name and Password Enter the User Name and Password provided by your ISP. Cisco RVS4000 Security Router with VPN Administrator Guide...
- Page 33 Heart Beat Signal User Name and Password Enter the User Name and Password provided by your ISP. Heart Beat Server Enter the IP address of the Heart Beat server. Cisco RVS4000 Security Router with VPN Administrator Guide...
- Page 34 ISP will provide you with the IP Address you need to specify here. Subnet Mask The router’s Subnet Mask, as seen by external users on the Internet (including your ISP). Your ISP will provide you with the Subnet Mask. Cisco RVS4000 Security Router with VPN Administrator Guide...
- Page 35 Alive. In the Redial Period field, you specify how often you want the router to check the Internet connection. The default Redial Period is 30 seconds. Click Save to save your changes, or click Cancel to undo your changes. Cisco RVS4000 Security Router with VPN Administrator Guide...
- Page 36 When Manual is selected in the MTU field, this option is enabled. It is recommended that you set this value within the range of 1200 to 1500, but the value can be defined between 128 and 1500. Cisco RVS4000 Security Router with VPN Administrator Guide...
- Page 37 The router advises the DDNS Service of your current WAN (Internet) IP address whenever this address changes. If you use TZO, you should NOT use the TZO software to perform this “IP address update”. Cisco RVS4000 Security Router with VPN Administrator Guide...
-
Page 38: Setup > Lan
Setting Up and Configuring the Router Setup Setup > LAN The Setup > LAN window allows you to change the router’s local network settings. Setup > LAN Cisco RVS4000 Security Router with VPN Administrator Guide... - Page 39 The Windows Internet Naming Service (WINS) provides name resolution service (similar to DNS) in Windows networks. If you use a WINS server, enter that server’s IP Address here. Otherwise, leave this blank. Cisco RVS4000 Security Router with VPN Administrator Guide...
-
Page 40: Setup > Dmz
Internet gaming and videoconferencing. Whereas Port Range Forwarding can only forward a maximum of 10 ranges of ports, DMZ hosting forwards all the ports for one PC at the same time. Cisco RVS4000 Security Router with VPN Administrator Guide... -
Page 41: Setup > Mac Address Clone
MAC address of the network adapter in the computer that you use to connect to the web interface. Click Save to save your changes, or click Cancel to undo your changes. Cisco RVS4000 Security Router with VPN Administrator Guide... -
Page 42: Setup > Advanced Routing
RIP (Routing Information Protocol) If you want the router to use the RIP protocol, select Enabled; otherwise, keep the default setting, Disabled. Cisco RVS4000 Security Router with VPN Administrator Guide... - Page 43 Click this button to show the routing table established either through dynamic or static routing methods. Inter-VLAN Routing Inter-VLAN Routing Select Enable to allow packets to be routed between VLANs in different subnets. The default is Enable. Cisco RVS4000 Security Router with VPN Administrator Guide...
-
Page 44: Setup > Time
NTP Server IP If the User-defined NTP Server option is set to Enable, enter the IP address of the NTP server. Click Save to save your changes, or click Cancel to undo your changes. Cisco RVS4000 Security Router with VPN Administrator Guide... -
Page 45: Setup > Ip Mode
IPv6 hosts in the LAN are connected to remote IPv6 islands over 6to4 tunnels (per RFC3056). Click Save to save your settings or click Cancel to undo your changes. Cisco RVS4000 Security Router with VPN Administrator Guide... -
Page 46: Firewall
This feature allows you to use an http or https port to remotely manage the router. To enable this feature, select Enable and enter the port number in the Port field, then configure the HTTPS and Remote IP address settings that appear below. Cisco RVS4000 Security Router with VPN Administrator Guide... - Page 47 If local users have access to WAN proxy servers, they may be able to circumvent the router’s content filters and access Internet sites blocked by the router. Denying Proxy will block access to any WAN proxy servers. Cisco RVS4000 Security Router with VPN Administrator Guide...
-
Page 48: Firewall > Ip Based Acl
Edit button Click Edit at the end of a row to edit the associated rule. Delete button Click Delete at the end of a row to delete the associated rule. Cisco RVS4000 Security Router with VPN Administrator Guide... - Page 49 Edit IP ACL Rule window. Select this option to log all traffic that is filtered by this rule. Log Prefix Enter a text string to prepend to each matched event in the log. Cisco RVS4000 Security Router with VPN Administrator Guide...
- Page 50 From field and the ending time in the To field. Click Save to save your changes, or click Cancel to undo your changes. Click Return to return to the IP-Based ACL window. Cisco RVS4000 Security Router with VPN Administrator Guide...
-
Page 51: Firewall > Internet Access Policy
Select a policy from the drop-down menu to display the settings for a policy. You can then perform these operations: • Create a Policy: See the instructions below. • Delete the current policy: Click Delete. Cisco RVS4000 Security Router with VPN Administrator Guide... - Page 52 To delete a policy, check the box in the Delete column, and then click Delete. • View or change the PCs covered by the current policy: Click Edit List of PCs to display the List of PCs window. Internet Policy Summary List of PCs Cisco RVS4000 Security Router with VPN Administrator Guide...
- Page 53 Note that only the URL is checked, not the content of each Web page. Click Save to save your changes, or click Cancel to undo your changes. Cisco RVS4000 Security Router with VPN Administrator Guide...
-
Page 54: Firewall > Single Port Forwarding
Server using the standard port 80.) Protocol Select the protocol used for this application, TCP and/or UDP. IP Address For each application, enter the IP address of the PC running the specific application. Cisco RVS4000 Security Router with VPN Administrator Guide... -
Page 55: Firewall > Port Range Forwarding
For each application, enter the IP address of the PC running the specific application. Enabled Click the Enabled checkbooks to enable port range forwarding for the relevant application. Click Save to save your changes, or click Cancel to undo your changes. Cisco RVS4000 Security Router with VPN Administrator Guide... -
Page 56: Firewall > Port Range Triggering
Forwarded Range. Enabled Click the Enabled checkbooks to enable port range triggering for the relevant application. Click Save to save your changes, or click Cancel to undo your changes. Cisco RVS4000 Security Router with VPN Administrator Guide... -
Page 57: Protectlink
Setting Up and Configuring the Router ProtectLink ProtectLink ProtectLink > ProtectLink Purchase ProtectLink > ProtectLink Purchase The optional Cisco ProtectLink Web service provides security for your network. For more information, see Appendix E, “Cisco ProtectLink Web Service.” Cisco RVS4000 Security Router with VPN Administrator Guide... -
Page 58: Vpn > Summary
Tunnel Test Click Connect to verify the tunnel status; the test result is updated in the Status column. If the tunnel is connected, you can disconnect the IPSec VPN connection by clicking Disconnect. Cisco RVS4000 Security Router with VPN Administrator Guide... - Page 59 Displays the total connection time of the latest VPN session. Disconnect Check the Disconnect box at the end of each row in the VPN Clients Table and click the Disconnect button to disconnect a VPN Client session. Cisco RVS4000 Security Router with VPN Administrator Guide...
-
Page 60: Vpn > Ipsec Vpn
Setting Up and Configuring the Router VPN > IPSec VPN Use the VPN > IPSec VPN window to create and configure a Virtual Private Network (VPN) tunnel. VPN > IPSec VPN Cisco RVS4000 Security Router with VPN Administrator Guide... - Page 61 Domain Name field. • IP + Domain Name (FQDN) Authentication Choose this option to include the IP address and a domain name for greater security. Enter an arbitrary Cisco RVS4000 Security Router with VPN Administrator Guide...
- Page 62 This specifies the lifetime of the IKE-generated key. If the time expires, a new key is renegotiated automatically. Enter a value from 300 to 100,000,000 seconds. The default is 28800 seconds. Phase 2 Cisco RVS4000 Security Router with VPN Administrator Guide...
- Page 63 Click this button to break a connection for the current VPN tunnel. View Log Click this button to view the VPN log, which shows details of each tunnel established. Advanced Click this button to display these additional settings. Cisco RVS4000 Security Router with VPN Administrator Guide...
-
Page 64: Vpn > Vpn Client Accounts
Use this window to administer your VPN Client users. After you enter the information at the top of the window, the information for the specified users appears in the table. This feature is available with the Cisco QuickVPN client only. The router supports up to five simultaneous Cisco QuickVPN sessions. - Page 65 Certificate Last Generated or Imported This displays the date and time when a certificate was last generated or imported. Click Save to save your changes, or click Cancel to undo your changes. Cisco RVS4000 Security Router with VPN Administrator Guide...
-
Page 66: Vpn > Vpn Passthrough
Point-to-Point sessions via the Internet on the Layer 2 level. L2TP Passthrough is enabled by default. To disable L2TP Passthrough, select Disabled. Click Save to save your changes, or click Cancel to undo your changes. Cisco RVS4000 Security Router with VPN Administrator Guide... -
Page 67: Qos
You can use QoS (Quality of Service) to perform Bandwidth Management, by either Rate Control or Priority. You can also configure QoS Trust Mode and the DSCP settings. QoS > Bandwidth Management QoS > Bandwidth Management - Rate Control Cisco RVS4000 Security Router with VPN Administrator Guide... - Page 68 After a rule is set up, click this button to add it to the list. The list can contain a maximum of 15 entries. Delete selected application Click this button to delete a rule from the list. Cisco RVS4000 Security Router with VPN Administrator Guide...
- Page 69 15 entries. Delete selected application Click this button to delete a rule from the list. Click Save to save your changes, or click Cancel to undo your changes. Cisco RVS4000 Security Router with VPN Administrator Guide...
-
Page 70: Qos > Qos Setup
Select the traffic forwarding queue, 1 to 4, to which the CoS priority is mapped. Queue 4 has the highest priority. Click Save to save your changes, or click Cancel to undo your changes. Cisco RVS4000 Security Router with VPN Administrator Guide... -
Page 71: Qos > Dscp Setup
Select the traffic forwarding queue, 1 to 4, to which the DSCP priority is mapped. Queue 4 has the highest priority. Restore Defaults Click this button to restore the default DSCP values. Click Save to save your changes, or click Cancel to undo your changes. Cisco RVS4000 Security Router with VPN Administrator Guide... -
Page 72: Administration
Select Enable if you wish to use SNMP. To use SNMP, you need SNMP software on your PC. System Name Enter a suitable name to identify this device. It will be displayed by your SNMP software. Cisco RVS4000 Security Router with VPN Administrator Guide... - Page 73 When the UPnP function is enabled, Windows XP can add or delete entries to the underlined UPnP Forwarding Table. Some Internet games require enabling UPnP. UPnP If you want to use UPnP, keep the default setting, Enable. Otherwise, select Disable. Cisco RVS4000 Security Router with VPN Administrator Guide...
-
Page 74: Administration > Log
Select the log level(s) that the router should record. Log levels and their meanings are: Log Levels Level Severity Name Description LOG_DEBUG Debug-level message LOG_INFO Informational messages only LOG_NOTICE Normal but significant condition Cisco RVS4000 Security Router with VPN Administrator Guide... - Page 75 Return Email Address This address will appear as the Sender’s address in the email. Enable SMTP Authentication If your SMTP server requires Authentication, you can enable it here, and enter the Username and Password. Cisco RVS4000 Security Router with VPN Administrator Guide...
-
Page 76: Administration > Diagnostics
Enable this if you want to see a log of all incoming and outgoing URLs or IP addresses. View Log Click this button when you wish to view the logs. A new window appears with the log data. Administration > Diagnostics Administration > Diagnostics Cisco RVS4000 Security Router with VPN Administrator Guide... - Page 77 Identifies a specific pair (A, B, C, or D) in the cable. Each cable consists of 8 pins (4 pairs). Cable Length Displays the length of the cable in meters. Status Displays the status of the pair. Cisco RVS4000 Security Router with VPN Administrator Guide...
-
Page 78: Administration > Backup & Restore
To restore a previously saved config file back to the router, enter the file name in the field or click Browse to select the config file, then click Restore to upload the config file. Cisco RVS4000 Security Router with VPN Administrator Guide... -
Page 79: Administration > Factory Default
Any previously saved settings will be lost when the default settings are restored. After clicking the button, another window appears. Click OK to continue. Another window appears while the system reboots. Cisco RVS4000 Security Router with VPN Administrator Guide... -
Page 80: Administration > Reboot
Administration > Firmware Upgrade Administration > Firmware Upgrade Use this page to upgrade the router by using firmware from Cisco.com. Step-by- step instructions are provided on the next page. File Type in the name of the extracted firmware upgrade, or click Browse to locate the file. - Page 81 STEP 1 panel. The PIDVID number includes the characters V01 (Version 1) or V02 (Version 2). To find the latest firmware for the router, go to www.cisco.com/go/software. STEP 2 In the search box, enter: RVS4000, and then click Go. STEP 3...
-
Page 82: Ips
Normalization of Telnet negotiation strings. RPC record fragging detection. Signature Update Before upgrading the signature file, get the Router Intrusion Prevention System (IPS) file from the Cisco website. To find the file, go to After www.cisco.com/go/software (registration/login required), and search for RVS4000. -
Page 83: Ips > P2P/Im
FASTTRACK, KURO, EDONKEY2000, BITTORRENT, DIRECTCONNECT, PIGO, and WINMX. Instant Messenger Instant messaging applications can be blocked (Block) or allowed (Non-Block). The preconfigured instant messaging applications are MSN, ICQ, YAHOO_MESSENGER, IRC, ODIGO, REDIFF, GOOGLE_TALK, and IM_QQ. Cisco RVS4000 Security Router with VPN Administrator Guide... -
Page 84: Ips > Report
Displays the IP Address of attackers and the frequency (number of times) of the attacks. Attack Category Displays the category (type) of attack and the frequency (number of times) of the attacks. Cisco RVS4000 Security Router with VPN Administrator Guide... - Page 85 Setting Up and Configuring the Router IPS > Report Cisco RVS4000 Security Router with VPN Administrator Guide...
-
Page 86: Ips > Information
VLANs have no minimum number of ports, and can be created per unit, per device, per stack, or any other logical connection combination, as VLANs are software based and not defined by physical attributes. Cisco RVS4000 Security Router with VPN Administrator Guide... - Page 87 To create multiple VLANs with a range of ID numbers, enter the starting and ending ID numbers and click Add Range. Delete Selected VLAN To delete a VLAN, select it form the VLAN list and click Delete Selected VLAN. Cisco RVS4000 Security Router with VPN Administrator Guide...
-
Page 88: L2 Switch > Vlan Port Setting
The Port VLAN ID (PVID) assigned to untagged frames received on the interface. The default is 1. If the Mode is Tagged, the port receives only tagged frames and so the port has no PVID. Cisco RVS4000 Security Router with VPN Administrator Guide... -
Page 89: L2 Switch > Vlan Membership
VLAN). To make a port a member of the VLAN, select the applicable mode(s). For example, if the port mode is Untagged, select Untagged; if the mode is Tagged, select Tagged; if the mode is Trunk, select either Tagged or Untagged. Cisco RVS4000 Security Router with VPN Administrator Guide... -
Page 90: L2 Switch > Radius
The controlled port state is set to Force-Authorized (forward traffic). • Force Unauthorized The controlled port state is set to Force-Unauthorized (discard traffic). Port State Displays the state of the selected port. Cisco RVS4000 Security Router with VPN Administrator Guide... -
Page 91: L2 Switch > Port Setting
Flow Control Displays the flow control status on the port. Operates when a port is in Full duplex mode. MaxFrame Displays the maximum frame size the port can receive and send. Cisco RVS4000 Security Router with VPN Administrator Guide... -
Page 92: L2 Switch > Statistics
Displays the number of Frames received on the selected port. Tx Errors Displays the number of error packets transmitted from the selected port. Rx Errors Displays the number of error packets received from the selected port. Cisco RVS4000 Security Router with VPN Administrator Guide... -
Page 93: L2 Switch > Port Mirroring
To enable source port mirroring on a port, check the box next to that port. To disable source port mirroring on a port, leave the box unchecked. The default is disabled. Mirror Port Select the mirror destination port from the drop-down menu. Cisco RVS4000 Security Router with VPN Administrator Guide... -
Page 94: L2 Switch > Rstp
Check this box to specify that the associated port is an edge port (end station). Uncheck the box to specify that the associated port is a link (bridge) to another STP device. The default is checked (edge port). Cisco RVS4000 Security Router with VPN Administrator Guide... -
Page 95: Status
Displays the type of the connection. Interface Displays the Gateway Internet Interface. IP Address Displays the Gateway Internet IP Address. Subnet Mask Displays the Subnet Mask for the IP address above. Default Gateway Displays your ISP’s Gateway. Cisco RVS4000 Security Router with VPN Administrator Guide... - Page 96 Go to Page drop-down menu. To see the latest information, click Refresh. Click Close to return to the Status > Gateway window. Status > Gateway > IP Conntrack Cisco RVS4000 Security Router with VPN Administrator Guide...
-
Page 97: Status > Local Network
Click this button to open a window that displays the PCs that use the router as an ARP/RARP server. The ARP/RARP Table window displays all ARPs/RARPs (PCs and other network devices) with this information: IP addresses and MAC addresses. Cisco RVS4000 Security Router with VPN Administrator Guide... -
Page 98: Chapter 6: Using The Vpn Setup Wizard
• Cisco RVS4000 4-Port Gigabit Security Router with VPN • Cisco WRVS4400N v1. 1 Wireless-N 4-Port Gigabit Security Router with • Cisco WRVS4400N v2 Wireless-N 4-Port Gigabit Security Router with VPN Use these instructions to configure required data using the Web Administrator Interface. -
Page 99: Running The Vpn Setup Wizard
If you have an RVS4000, WRVS4400N v1. 1 , or WRVS4400N v2 Installation CD-ROM, insert it into your CD-ROM drive. • Download the VPN Setup Wizard from the Cisco Support site for your router. Go to the Start menu and click Run. In the field provided, enter: STEP 2 D:\VPN Setup Wizard.exe... - Page 100 Using the VPN Setup Wizard Running the VPN Setup Wizard Welcome Window Cisco RVS4000 Security Router with VPN Administrator Guide...
- Page 101 Using the VPN Setup Wizard Running the VPN Setup Wizard Read the information about the wizard, and then click Next to proceed. STEP 4 Informational Window Cisco RVS4000 Security Router with VPN Administrator Guide...
- Page 102 If your PC is remote to the routers, choose Build VPN connection from Internet remotely, and see the“Building Your VPN Connection Remotely,” on page 109 for instructions on this type of installation. Build VPN Connection Remotely Cisco RVS4000 Security Router with VPN Administrator Guide...
- Page 103 Router 2 WAN IP address: Enter the WAN IP address of Router 2. • Router 2 IP by DNS Resolved: Enter the DDNS Domain Name of Router 2 if it does not have a static IP address for its internet connection. Cisco RVS4000 Security Router with VPN Administrator Guide...
- Page 104 Using the VPN Setup Wizard Running the VPN Setup Wizard The router configuration is checked. Check Router Configuration Cisco RVS4000 Security Router with VPN Administrator Guide...
- Page 105 When the Summary window appears, use the Click button to view the VPNC STEP 7 Summary window. Summary Window Review the settings, as needed. Click Close when you are ready to continue. STEP 8 VPNC Summary Window Cisco RVS4000 Security Router with VPN Administrator Guide...
- Page 106 In the Summary window, if all your entries appear correct, click Go. Otherwise STEP 9 click Back to go back and make any corrections. Configure the Router Click Testing to make sure the connection is successfully established. STEP 10 Cisco RVS4000 Security Router with VPN Administrator Guide...
- Page 107 Using the VPN Setup Wizard Running the VPN Setup Wizard Test the Connection When testing is done, click Exit to end the Wizard. STEP 11 Cisco RVS4000 Security Router with VPN Administrator Guide...
- Page 108 Using the VPN Setup Wizard Running the VPN Setup Wizard Exit the Wizard Congratulations! Setup is now complete. You may now log into the Web Administrator Interface and see the results. Test Results Cisco RVS4000 Security Router with VPN Administrator Guide...
-
Page 109: Building Your Vpn Connection Remotely
Choose Build VPN connection from Internet remotely. Click Next to continue. STEP 1 Build VPN Connection Remotely Enter the required data in the Configure VPN Tunnel window and then click Next to STEP 2 continue. Cisco RVS4000 Security Router with VPN Administrator Guide... - Page 110 Router 2 WAN IP address: Enter the WAN IP address of the Router 2. • Router 2 IP by DNS Resolved: Enter the DDNS Domain Name of Router 2 if it does not have a static IP address for its internet connection. Cisco RVS4000 Security Router with VPN Administrator Guide...
- Page 111 Using the VPN Setup Wizard Running the VPN Setup Wizard The router configuration is checked. STEP 3 Check Router Configuration The Summary window appears. Use the Click box to view the VPNC Summary STEP 4 window. Cisco RVS4000 Security Router with VPN Administrator Guide...
- Page 112 Click Close when you are ready to continue. VPNC Summary Window In the Summary window, if all your entries appear correct, click Go. Otherwise STEP 6 click Back to go back and make any corrections. Cisco RVS4000 Security Router with VPN Administrator Guide...
- Page 113 Using the VPN Setup Wizard Running the VPN Setup Wizard Configure the Router Click Testing to make sure the connection is successfully established. STEP 7 Cisco RVS4000 Security Router with VPN Administrator Guide...
- Page 114 Using the VPN Setup Wizard Running the VPN Setup Wizard Test the Connection When testing is done, click Exit to end the Wizard. STEP 8 Cisco RVS4000 Security Router with VPN Administrator Guide...
- Page 115 Using the VPN Setup Wizard Running the VPN Setup Wizard Congratulations! Setup is now complete. You may now log into the Web Administrator Interface and see the results. View Test Results Cisco RVS4000 Security Router with VPN Administrator Guide...
-
Page 116: Appendix A: Troubleshooting
This appendix provides solutions to problems that may occur during the installation and operation of the router. Read the descriptions below to help solve your problems. If you can’t find an answer here, check the Cisco website at www.cisco.com. I need to set a static IP address on a PC. - Page 117 Alternative DNS server (provided by your ISP). Contact your ISP or go on its website to find the information. Click OK in the Internet Protocol (TCP/IP) Properties window. Click OK in the STEP 9 Local Area Connection Properties window. Cisco RVS4000 Security Router with VPN Administrator Guide...
- Page 118 Windows 98 and Millennium: Click Start and Run. In the Open field, type command. Press Enter or click OK. b. Windows 2000 and XP: Click Start and Run. In the Open field, type cmd. Press Enter or click OK. Cisco RVS4000 Security Router with VPN Administrator Guide...
- Page 119 If you do NOT get a reply, try the ping command from a different computer to verify that your original computer is not the cause of the problem. At the command prompt, type ping www.cisco.com and press Enter. STEP 5 •...
- Page 120 If you change the router’s IP address to 192. 1 68.2. 1 , that should solve the problem. Change the router’s IP address through the Setup menu of the configuration utility. If you Cisco RVS4000 Security Router with VPN Administrator Guide...
- Page 121 192. 1 68. 1 . 1 01 SMTP 25 to 25 Both 192. 1 68. 1 . 1 02 (Outgoing) POP3 110 to 110 Both 192. 1 68. 1 . 1 02 (Incoming) Cisco RVS4000 Security Router with VPN Administrator Guide...
- Page 122 192. 1 68. 1 . 1 02 VPN IPSEC 500 to 500 192. 1 68. 1 . 1 00 Configure as many entries as you like. STEP 4 When you have completed the configuration, click Save. STEP 5 Cisco RVS4000 Security Router with VPN Administrator Guide...
- Page 123 Click Administration > Management in the navigation tree. STEP 3 Enter a new password in the Router Password field. STEP 4 Re-enter the new password in the Re-enter to Confirm field. STEP 5 Cisco RVS4000 Security Router with VPN Administrator Guide...
- Page 124 If your router has hardware version 1, go STEP 1 www.cisco.com/go/software To find the latest firmware for the router, go to www.cisco.com/go/software. STEP 2 In the search box, enter: RVS4000, and then click Go. STEP 3...
- Page 125 Double-click the RVS4000 Upgrade Utility icon on your desktop. Alternatively, run STEP 11 the utility by clicking Start > All Programs > Cisco Small Business RVS4000. Follow the on-screen instructions to perform the upgrade. STEP 12 My DSL service’s PPPoE is always disconnecting.
- Page 126 Enter any name you want to use for the Application Name. STEP 4 Enter the Start and End Ports of the Triggered Range. Check with your Internet STEP 5 application provider for more information on which outgoing port services it uses. Cisco RVS4000 Security Router with VPN Administrator Guide...
- Page 127 Click File. Make sure Work Offline is NOT checked. STEP 1 Press CTRL + F5. This is a hard refresh, which will force Internet Explorer to load STEP 2 new web pages, not cached ones. Cisco RVS4000 Security Router with VPN Administrator Guide...
-
Page 128: Frequently Asked Questions
AppleTalk, a communications protocol used on Apple and Macintosh networks, can be used for LAN to LAN connections, but those protocols cannot connect from the Internet to the LAN. Cisco RVS4000 Security Router with VPN Administrator Guide... - Page 129 Does the router support any operating system other than Windows 98, Millennium, 2000, or XP? Yes, but Cisco does not, at this time, provide technical support for setup, configuration or troubleshooting of any non-Windows operating systems. Does the router support ICQ send file? Yes.
- Page 130 Upgrade, page How can I be notified of new router firmware upgrades? All Cisco firmware upgrades are posted on www.cisco.com/go/software, where you can download the files for free. The router’s firmware can be upgraded by Cisco RVS4000 Security Router with VPN Administrator Guide...
- Page 131 Any platform that supports Ethernet and TCP/IP is compatible with the router. How many ports can be simultaneously forwarded? Theoretically, the router can establish 2,048 sessions at the same time, but you can only forward 30 ranges of ports. Cisco RVS4000 Security Router with VPN Administrator Guide...
- Page 132 How do I get mIRC to work with the router? From the Firewall > SIngle Port Forwarding menu, set port forwarding to 113 for the PC on which you are using mIRC. Cisco RVS4000 Security Router with VPN Administrator Guide...
-
Page 133: Appendix B: Using Cisco Quickvpn For Windows 2000, Xp, Or Vista
Using Cisco QuickVPN for Windows 2000, XP, or Vista Overview This appendix explains how to install and use the Cisco QuickVPN software that can be downloaded from www.cisco.com. QuickVPN works with computers running Windows 2000, XP, Vista, or Windows 7. (Computers using other operating systems will have to use third-party VPN software.) For Windows Vista, QuickVPN... - Page 134 Using Cisco QuickVPN for Windows 2000, XP, or Vista Before You Begin Click Add/Save. STEP 4 Check the Active box for VPN Client No. 1. STEP 5 Click Save. STEP 6 VPN Client Accounts Window Cisco RVS4000 Security Router with VPN Administrator Guide...
-
Page 135: Installing The Cisco Quickvpn Software
Using Cisco QuickVPN for Windows 2000, XP, or Vista Installing the Cisco QuickVPN Software Installing the Cisco QuickVPN Software You can install the software by using one of the following methods: • Installing from the CD-ROM, page 135 • Downloading and Installing from the Internet, page 137 Installing from the CD-ROM Insert the RVS4000 CD-ROM into your CD-ROM drive. - Page 136 Using Cisco QuickVPN for Windows 2000, XP, or Vista Installing the Cisco QuickVPN Software Copying Files Finished Installing Files Click Finished to complete the installation. Proceed to “Using the Cisco STEP 3 QuickVPN Software,” on page 137. Cisco RVS4000 Security Router with VPN Administrator Guide...
-
Page 137: Downloading And Installing From The Internet
PC will prevent a pop-up warning from appearing during this procedure, but pre-installation is not required. To use your QuickVPN software: Double-click the Cisco QuickVPN software icon on your desktop or in the system STEP 1 tray. Cisco RVS4000 Security Router with VPN Administrator Guide... - Page 138 Using Cisco QuickVPN for Windows 2000, XP, or Vista Using the Cisco QuickVPN Software The QuickVPN Login window appears. Enter the following information: STEP 2 • Profile Name: Enter a name for your profile. • User Name and Password: Enter the user name and password that were assigned to you.
- Page 139 Using Cisco QuickVPN for Windows 2000, XP, or Vista Using the Cisco QuickVPN Software QuickVPN Status To terminate the VPN tunnel, click Disconnect. To change your password, click Change Password. For information, click Help. If you clicked Change Password and have permission to change your own STEP 6 password, you will see the Connect Virtual Private Connection window.
-
Page 140: Distributing Certificates To Quickvpn Users
Using Cisco QuickVPN for Windows 2000, XP, or Vista Distributing Certificates to QuickVPN Users Connect Virtual Private Connection You can change your password only if you have been granted that privilege by your NOTE system administrator. Distributing Certificates to QuickVPN Users Follow this procedure to export a certificate from the RVS4000 for distribution to QuickVPN users, and to install the certificate on the QuickVPN users’... - Page 141 Using Cisco QuickVPN for Windows 2000, XP, or Vista Distributing Certificates to QuickVPN Users Each QuickVPN user must then install the certificate as follows: STEP 3 a. Save the certificate into the directory where the QuickVPN Client is installed. For example: C:\Program Files\Cisco\QuickVPN Client\ b.
-
Page 142: Appendix C: Configuring Ipsec With A Windows 2000 Or Xp Computer
Windows “secpol” application and the router’s configuration utility. • The text on your screen may differ from the text in your instructions regarding the OK or Close buttons; click the appropriate button on your screen. Cisco RVS4000 Security Router with VPN Administrator Guide... -
Page 143: Environment
Step 1: Create an IPSec Policy • Step 2: Build Filter Lists • Step 3: Configure Individual Tunnel Rules • Step 4: Assign New IPSec Policy • Step 5: Create a Tunnel Through the configuration utility Cisco RVS4000 Security Router with VPN Administrator Guide... -
Page 144: Establishing A Secure Ipsec Tunnel
Uncheck the Activate the default response rule box, and then click Next. e. Click Finish, making sure the Edit box is checked. Build filter lists. STEP 2 Throughout this section the term “win” refers to both Windows 2000 and NOTE Windows XP. Cisco RVS4000 Security Router with VPN Administrator Guide... - Page 145 In the new policy’s properties window, verify that the Rules tab is selected. Uncheck the Use Add Wizard box, and click Add to create a new rule. Rules Tab b. Make sure the IP Filter List tab is selected. Click Add. Cisco RVS4000 Security Router with VPN Administrator Guide...
- Page 146 The IP Filter List window should appear. Enter an appropriate name, such as win-> Router, for the filter list, and uncheck the Use Add Wizard box. Then, click Add. IP Filter List Cisco RVS4000 Security Router with VPN Administrator Guide...
- Page 147 If you want to enter a description for your filter, click the Description tab and enter the description there. Click OK. Then, click OK or Close in the IP Filter List window. Cisco RVS4000 Security Router with VPN Administrator Guide...
- Page 148 New Rules Properties h. The IP Filter List window should appear. Enter an appropriate name, such as Router->win for the filter list, and uncheck the Use Add Wizard box. Click Add. IP Filter List Cisco RVS4000 Security Router with VPN Administrator Guide...
- Page 149 In the Destination address field, select My IP Address. Filters Properties If you want to enter a description for your filter, click the Description tab and enter the description there. k. Click OK or Close. Cisco RVS4000 Security Router with VPN Administrator Guide...
- Page 150 The window will contain listings for Router->win and win->Router. New Rule Properties Click OK (Windows XP) or Close (Windows 2000) in the IP Filter List window. Configure individual tunnel rules. STEP 3 Cisco RVS4000 Security Router with VPN Administrator Guide...
- Page 151 On the IP Filter List tab, select filter list win->Router. IP Filter List Tab b. Click the Filter Action tab, and click the filter action Require Security radio button. Then, click Edit. Cisco RVS4000 Security Router with VPN Administrator Guide...
- Page 152 On the Security Methods tab, verify that the Negotiate security option is enabled, and uncheck the Accept unsecured communication, but always respond using IPSec box. Select Session key Perfect Forward Secrecy, and click OK. Cisco RVS4000 Security Router with VPN Administrator Guide...
- Page 153 Configuring IPSec with a Windows 2000 or XP Computer How to Establish a Secure IPSec Tunnel Security Methods Tab d. Select the Authentication Methods tab, and click Edit. Cisco RVS4000 Security Router with VPN Administrator Guide...
- Page 154 Authentication Methods Tab e. Change the authentication method to Use this string to protect the key exchange (preshared key), and enter the preshared key string, such as XYZ12345. Click OK. Preshared Key Cisco RVS4000 Security Router with VPN Administrator Guide...
- Page 155 New Preshared Key g. Select the Tunnel Setting tab, and click The tunnel endpoint is specified by this IP Address radio button. Then, enter the router’s WAN IP Address. Tunnel Setting Tab Cisco RVS4000 Security Router with VPN Administrator Guide...
- Page 156 Tunnel 2: Router->win In the new policy’s Properties window, make sure that win -> Router is selected and uncheck the Use Add Wizard box. Then, click Add to create the second IP filter. Cisco RVS4000 Security Router with VPN Administrator Guide...
- Page 157 Click the Filter Action tab, and select the filter action Require Security. Then, click Edit. On the Security Methods tab, verify that the Negotiate security option is enabled, and uncheck the Accept unsecured communication, but Cisco RVS4000 Security Router with VPN Administrator Guide...
- Page 158 IPSec box. Select Session key Perfect Forward Secrecy, and click OK. Filter Action Tab Click the Authentication Methods tab, and verify that the authentication method Kerberos is selected. Then, click Edit. Authentication Methods Tab Cisco RVS4000 Security Router with VPN Administrator Guide...
- Page 159 Then click OK. Preshared Key n. This new Preshared key will be displayed. Click the Apply button to continue, if it appears on your screen; otherwise, proceed to the next step. Cisco RVS4000 Security Router with VPN Administrator Guide...
- Page 160 New Preshared Key o. Click the Tunnel Setting tab. Click the radio button The tunnel endpoint is specified by this IP Address, and enter the Windows 2000/XP computer’s IP Address. Tunnel Setting Tab Cisco RVS4000 Security Router with VPN Administrator Guide...
- Page 161 Click the Connection Type tab, and select All network connections. Then click OK or Close to finish. Connection Type Tab q. On the Rules tab, click the OK or Close button to return to the window showing the security policies. Cisco RVS4000 Security Router with VPN Administrator Guide...
- Page 162 Assign new IPSec policy. STEP 4 In the IP Security Policies on Local Machine window, right-click the policy named to_Router, and click Assign. A green arrow appears in the folder icon. Local Computer Cisco RVS4000 Security Router with VPN Administrator Guide...
- Page 163 Open your web browser, and enter 192.168.1.1 in the Address field. Press Enter. b. When the User name and Password fields appear, enter the default user name and password, admin. Press Enter. c. Click VPN > IPSec VPN. Cisco RVS4000 Security Router with VPN Administrator Guide...
- Page 164 Then click Enable. Enter the name of the tunnel in the Tunnel Name field. This is to allow you to identify multiple tunnels and does not have to match the name used at the other end of the tunnel. Cisco RVS4000 Security Router with VPN Administrator Guide...
- Page 165 Preshared Key field. Also enable Perfect Forward Secrecy to ensure that the initial key exchange and IKE proposals are secure. Click Save to save these changes. Your tunnel should now be established. Cisco RVS4000 Security Router with VPN Administrator Guide...
-
Page 166: Appendix D: Gateway-To-Gateway Vpn Tunnel
Internet Any VPN router can be deployed, such as the 10/100 16-, 8-, or 4-Port VPN Router (model numbers RV016, RV082, or RV042); however, this example uses the RV082. Cisco RVS4000 Security Router with VPN Administrator Guide... -
Page 167: Configuration When The Remote Gateway Uses A Static Ip Address
Click VPN > IPSec VPN. d. Enter a name in the Tunnel Name field. e. For the IPSec VPN Tunnel setting, select Enable. The WAN IP address (A.A.A.A) of the RVS4000 will be automatically detected. Cisco RVS4000 Security Router with VPN Administrator Guide... - Page 168 IP Address and Subnet Mask fields. In the IPSec Setup section, select the appropriate encryption, authentication, and other key management settings. In the Preshared Key field, enter a string for this key, for example, 13572468. Cisco RVS4000 Security Router with VPN Administrator Guide...
- Page 169 The WAN IP address (B.B.B.B) of the RV082 will be automatically detected. For the Local Security Group Type, select Subnet. Enter the RV082’s local network settings in the IP Address and Subnet Mask fields. Cisco RVS4000 Security Router with VPN Administrator Guide...
- Page 170 In the IPSec Setup section, select the appropriate encryption, authentication, and other key management settings. (These should match the settings of the RVS4000.) k. In the Preshared Key field, enter a string for this key, for example, 13572468. Cisco RVS4000 Security Router with VPN Administrator Guide...
- Page 171 Verify that PC 1 and PC 2 can ping each other (refer to Windows Help for more information). If the computers can ping each other, then you know the VPN tunnel is configured correctly. Cisco RVS4000 Security Router with VPN Administrator Guide...
-
Page 172: Configuration When The Remote Gateway Uses A Dynamic Ip Address
Click VPN > IPSec VPN. d. Enter a name in the Tunnel Name field. e. For the IPSec VPN Tunnel setting, select Enable. The WAN IP address (A.A.A.A) of the RVS4000 will be automatically detected. Cisco RVS4000 Security Router with VPN Administrator Guide... - Page 173 IP Address and Subnet Mask fields. In the IPSec Setup section, select the appropriate encryption, authentication, and other key management settings. In the Preshared Key field, enter a string for this key. For example, 13572468. Cisco RVS4000 Security Router with VPN Administrator Guide...
- Page 174 The WAN IP address (B.B.B.B) of the RV082 will be automatically detected. For the Local Security Group Type, select Subnet. Enter the RV082’s local network settings in the IP Address and Subnet Mask fields. Cisco RVS4000 Security Router with VPN Administrator Guide...
- Page 175 In the IPSec Setup section, select the appropriate encryption, authentication, and other key management settings. (These should match the settings of the RVS4000.) k. In the Preshared Key field, enter a string for this key, for example, 13572468. Cisco RVS4000 Security Router with VPN Administrator Guide...
- Page 176 Verify that PC 1 and PC 2 can ping each other (refer to Windows Help for more information). If the computers can ping each other, then you know the VPN tunnel is configured correctly. Cisco RVS4000 Security Router with VPN Administrator Guide...
-
Page 177: Configuration When Both Gateways Use Dynamic Ip Addresses
Click VPN > IPSec VPN. d. Enter a name in the Tunnel Name field. e. For the IPSec VPN Tunnel setting, select Enable. The WAN IP address (A.A.A.A) of the RVS4000 will be automatically detected. Cisco RVS4000 Security Router with VPN Administrator Guide... - Page 178 IP Address and Subnet Mask fields. In the IPSec Setup section, select the appropriate encryption, authentication, and other key management settings. In the Preshared Key field, enter a string for this key, for example, 13572468. Cisco RVS4000 Security Router with VPN Administrator Guide...
- Page 179 The WAN IP address (B.B.B.B) of the RV082 will be automatically detected. For the Local Security Group Type, select Subnet. Enter the RV082’s local network settings in the IP Address and Subnet Mask fields. Cisco RVS4000 Security Router with VPN Administrator Guide...
- Page 180 In the IPSec Setup section, select the appropriate encryption, authentication, and other key management settings. (These should match the settings of the RVS4000.) k. In the Preshared Key field, enter a string for this key, for example, 13572468. Cisco RVS4000 Security Router with VPN Administrator Guide...
- Page 181 Verify that PC 1 and PC 2 can ping each other (refer to Windows Help for more information). If the computers can ping each other, then you know the VPN tunnel is configured correctly. Cisco RVS4000 Security Router with VPN Administrator Guide...
-
Page 182: Appendix E: Cisco Protectlink Web Service
Cisco ProtectLink Web Service Overview The optional Cisco ProtectLink Web service provides security for your network. It filters website addresses (URLs), and blocks potentially malicious websites. ProtectLink is available for online purchase through online resellers such as CDW.com and PCConnection.com. -
Page 183: How To Purchase, Register, Or Activate The Service
ProtectLink has not yet been activated. If the ProtectLink menu is not displayed, upgrade the router’s firmware. For the NOTE firmware download link, see Appendix G, “Where to Go From Here.” Cisco RVS4000 Security Router with VPN Administrator Guide... - Page 184 I have purchased ProtectLink Web and want to register it. If you already have a license, click this link. You will be redirected to the Cisco ProtectLink Web website. Then follow the on-screen instructions. I have my Activation Code (AC) and want to activate ProtectLink Web.
-
Page 185: How To Use The Service
ProtectLink > Web Protection. ProtectLink > Web Protection The Web Protection features are provided by the router. Configure the website filtering settings on this screen. Cisco RVS4000 Security Router with VPN Administrator Guide... - Page 186 Cisco ProtectLink Web Service How to Use the Service ProtectLink > Web Protection Cisco RVS4000 Security Router with VPN Administrator Guide...
- Page 187 This level blocks most potentially malicious websites and does not create too many false positives. The default is Medium and is the recommended setting. This level blocks fewer potentially malicious websites and reduces the risk of false positives. Cisco RVS4000 Security Router with VPN Administrator Guide...
- Page 188 URL requests, the overflow will be held back until they can be processed. This is the default setting. Temporarily bypass Cisco URL verification for requested URLs If there are too many URL requests, the overflow will be allowed without verification.
-
Page 189: Protectlink > License
How to Use the Service ProtectLink > License The license for the Cisco ProtectLink Web serviceis valid for one year from the time the activation code is generated. On the License window, license information is displayed. Use this window to renew your license, add seats, or view license information online. -
Page 190: Appendix F: Specifications
Specifications The Cisco RVS4000 4-Port Gigabit Security Router with VPN specifications are described in this appendix. Specifications Model RVS4000 Standards IEEE802.3, 802.3u, 802. 1 X, RFC791 (IP Protocol), RFC2460, IPv4 (RFC791), IPv6 (RFC2460), RIPv1 (RFC1058), RIPv2 (RFC1723) Ports Ethernet, Power... -
Page 191: Management
Protocol (IP, TCP, UDP, ICMP) Normalization, L7 Signature Matching Secure HTTPS, Username/Password Management 802.1X Port-based RADIUS Authentication (EAP-MD5, EAP-PEAP) Service-based Service-based Bandwidth Management supports Rate Control and Priority Prioritization Types 802. 1 p, DSCP, and Port-based Queues 4 queues Cisco RVS4000 Security Router with VPN Administrator Guide... -
Page 192: Network
VPN Passthrough of PPTP, L2TP, and IPSec Routing Static and RIP v1, v2 Inter-VLAN Routing Layer 2 VLAN Port-based and 802.1Q Tag-based VLANs Number of VLANs Support four 802.1Q VLANs (VLAN ID ranges from 1 to 4094) Cisco RVS4000 Security Router with VPN Administrator Guide... -
Page 193: Environmental
32 to 104ºF (0 to 40ºC) Storage Temp. -4 to 158ºF (-20 to 70ºC) Operating Humidity 10 to 85% Noncondensing Storage Humidity 5 to 90% Noncondensing Specifications are subject to change without notice. Cisco RVS4000 Security Router with VPN Administrator Guide... -
Page 194: Appendix G: Where To Go From Here
Where to Go From Here Cisco provides a wide range of resources to help you and your customer obtain the full benefits of the Cisco RVS4000 4-Port Gigabit Security Router with VPN. Product Resources Support Cisco Small Business www.cisco.com/go/smallbizsupport Support Community Online Technical Support www.cisco.com/smallbizhelp... -
Page 195: Related Documentation
Model RVS4000 4-Port Gigabit Security Router with VPN Quick Start Guide For compliance and safety information, see the Regulatory Compliance and Safety Information for the Cisco Wired and Wireless Routers and Access Point Devices (EMC Class B Devices) Cisco RVS4000 Security Router with VPN Administrator Guide...
Need help?
Do you have a question about the RVS4000 - Gigabit Security Router and is the answer not in the manual?
Questions and answers