
Related Manuals for Kuzma Air Line


Summary of Contents for Kuzma Air Line
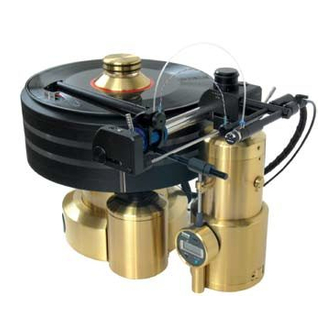
- Page 1 Instruction manual KUZMA AIR LINE AIR BEARING TONEARM (on Stabi XL turntable) With silver filters Serial Number: ………. 2010-4...
-
Page 2: Table Of Contents
KUZMA LTD INSTRUCTION MANUAL FOR AIR LINE tonearm The Air line tonearm is a very precisely engineered piece of equipment. However the construction is robust and requires minimal maintenance for optimal performance. Small ring CONTENTS: Page 1.0. General description 2.0. Unpacking 3.0. -
Page 3: General Description
This is automatically drained into holder stands. The compressor is equipped with a safety valve and switches off in case of overheating. The whole system is easily maintained and simple to use. KUZMA AIR LINE-Linear tracking air bearing tonearm: Effective length 184 mm Fixing distance... -
Page 4: Unpacking
2.0. Unpacking: Compressor with “double drain bottle system.” 2.1. Compressor box: Open the box and lift up the compressor by the handle. It is a heavy item. Remove the plastic bag. Inside the box is the instruction manual for the compressor, a bottle with oil, and a plastic drainage bottle. -
Page 5: Setup Description
Mount the armbase onto armboard. The dimension and position is the same as for Stogi tonearms but the main cutout hole is bigger. It is called the Kuzma cutout- that means that central hole has 40 mm in diameter. Three screws will fix the armbase from the top through the armboard into the black metal ring. -
Page 6: Air Supply Setup
6 to 8 bars and then cooling down for 2 minutes (not working). It is necessary to monitor this cycle occasionally! Everything is set and checked by Kuzma Ltd. The only item to be added is oil inside the compressor and air intake filter, which must be fitted after transport. - Page 7 At the front of the compressor is a pressure regulator with filters and pressure gauges and at the other end of compressor is the main cable and input air filter (oil refill). In the plastic bag inside the compressor’s housing is an air intake filter and nozzle for filling the oil.
- Page 8 Note: Every week or so this should be open for a few hours when the compressor is running! 4.2. Air tubes: Connect the PVC tubes in blue 'Quick fit' fittings. Keep the valve lever closed at the tone arm. There are two pieces of PVC air supply tubing. The shorter connects the air supply from the red filters to the tonearm and the longer connects the compressor to the red filters.
- Page 9 4.4. Air pressure Setup: Note: keep valves on air tube supply and tonearm in the closed position. All tubes must be connected. 4.4.1. Compressor ON: Plug the compressor into the mains and leave it permanently turned ON. The main switch is under the cover on the top.
-
Page 10: Tonearm Setup
5.0. Tonearm Setup: Note: See also 4.4.3. On the tonearm remove the protective shaft cover and the security wire which has restricted movement of the arm bearing during transport. The tonearm is not balanced, as there is no extra weight on the headshell. When the air bearing is functioning, the counterweight will rotate the tube so that the headshell will go up. -
Page 11: Adjustment Of Tangential Geometry
In the unlocked position rotation of the counterweight is easy. To begin with, the tonearm should be balanced to zero tracking force. This is not easy to achieve due to the very low friction in the bearing. Heavy cartridges (above 15g): use a small counterweight which should be firmly screwed by hand at the end of the threaded rod for counterweight. - Page 12 Protractor – position from top Move the cartridge along the headshell to such a distance, that the tip of the diamond (needle) is on the line on the protractor, which goes from centre of record towards edge of record. This is the line where the tip of the diamond will be 'tangential' to all grooves on an LP. Using the cueing device, just lift the needle above the protractor for an mm or so.
-
Page 13: Fine Horizontal Levelling
Now you can start playing LPs. On a spinning record gently lower the needle into the first groove. When the needle touches the record it will move in and out a little before settling into the first groove. If it moves inside, skipping a few grooves or drops from the record, that means that the horizontality of the tonearm is not correct. -
Page 14: Adjustment Of Azimuth
To make VTA adjustment easier, you can rotate the ring while holding the main knob to adjust the zero starting point on the knob. This knob can rotate a little even when the lever is in the lock position (the lever locks the support mechanism and not the knob itself). The lever, gently pushed into the lock position, gives rigidity to the VTA system due to its special construction. -
Page 15: Damping
7.0. Damping: A damping system, consisting of a paddle, damping trough and silicone oil, can also be retrofitted on all Air Line tonearms. The paddle is fixed on to the threaded rod and the trough is fixed on to the blocking plate. With oil levels, paddle height, damping can be changed from zero to max. -
Page 16: Zero Switch Kit
8.0. Zero Switching kit (optional): The function of the “zero switching kit” is to eliminate the noise of the compressor switching ON and OFF being heard through the speakers. Kit is available from us, consisting of switching box, which can be fitted in the compressor ONLY by a qualified electrician. - Page 17 Air bearing assembly and bearing shaft with cueing device-blocking plate removed. Protect the cartridge. Do not slide the bearing without compressed air. Allen key 4 mm will release the top screw of the blocking plate, which is at the end of the shaft. Slide it off. Then gently pull off the whole assembly (tube with blue bearing).
-
Page 18: Troubleshooting
10.0. Troubleshooting: NOTE: Check our web site for frequently asked questions (FAQ) for some more answers. See also appendix of this manual. 10.1. Cartridge skips the groove: Tonearm is not horizontal: check horizontality Excessive dirt on record: check and clean for small particles stuck in the groove Inaccurate geometry: check that the cartridge tip follows line Low tracking force Moisture or dirt in the bearing: clean and check PVC bottle and Red filters stands... - Page 19 NOTE: Check our web site for frequently asked questions (FAQ) for some more answers. See also Appendix. Kuzma Ltd Hotemaze 17A SI-4205 PREDDVOR SLOVENIJA P: +386 4 25 35 450 F: +386 4 25 35 454 E mail: kuzma@s5.net www.kuzma.si...
Need help?
Do you have a question about the Air Line and is the answer not in the manual?
Questions and answers