Table of Contents
Advertisement
Advertisement
Table of Contents

Related Manuals for Sim2 D60


Summary of Contents for Sim2 D60
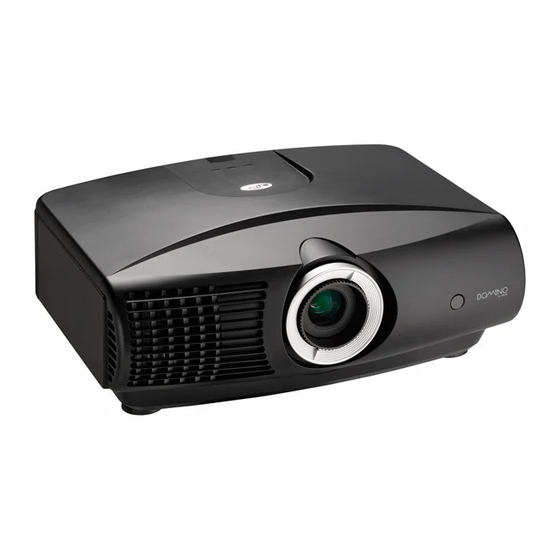
- Page 1 D60 Digital Projector User Manual...
-
Page 2: Table Of Contents
Table of contents Important safety instructions.. 3 Using a security cable lock ... 20 Utilizing the password function ..20 Overview ......... 5 Adjusting the projected image 22 Shipping contents......5 Adjusting the projection angle ..22 Remote control batteries ... 5 Correcting picture distortion.. -
Page 3: Important Safety Instructions
Important safety instructions Your projector is designed and tested to meet the latest standards for safety of information technology equipment. However, to ensure safe use of this product, it is important that you follow the instructions mentioned in this manual and marked on the product. Please read this user manual before you operate your projector. -
Page 4: Moisture Condensation
Notice Please keep the original packing for possible future shipment. If you need to pack your projector after use, adjust the projection lens to an appropriate position, put the lens cushion around the lens, and fit the lens cushion and projector cushion together to prevent damage during transportation. Moisture condensation Never operate the projector immediately after moving it from a cold location to a hot location. -
Page 5: Overview
Overview Shipping contents The projector is shipped with the cables required for connection to video equipment. Some of the items may not be available depending on your region of purchase. Please check with your place of purchase. Some of the accessories may vary from region to region. (EU) (UK) (US) -
Page 6: Projector Features
Projector features • Full HD compatible The projector is compatible with Standard Definition TV (SDTV) 480i, 480p, 576i, 576p, and High Definition TV (HDTV) 720p, 1080i and 1080p formats, with the 1080p format providing a true 1:1 image reproduction. • High picture quality The projector provides excellent picture quality due to its high resolution, excellent home theater brightness, super high contrast ratio, vivid color and rich gray-scale... -
Page 7: Projector Exterior View
Projector exterior view Front and upper side view Rear IR sensor Vent (heated air exhaust) Dust filter grill (cool air intake) Front IR sensor Projection lens Rear view Connector panel (see below for details) Main AC power switch Power cable socket Under and side view Adjustable feet 10. -
Page 8: Controls And Functions
Controls and functions Front and upper side view Focus ring Adjusts the focus of the projected image. Zoom ring Adjusts the size of the projected image. POWER indicator light Lights up or flashes when the projector is operating. See "Indicators" on page 46 details. -
Page 9: Remote Control
Remote control Arrow buttons (Left , Up , Right Down ) Moves the current On-Screen Display (OSD) menu selection in the direction of the arrow being pressed when the OSD menu is activated. See "Using the menus" on page 19 for details. -
Page 10: Positioning Your Projector
System Display Setup 1. Press MENU on the remote control and then press until the System menu is Language English Splash Screen SIM2 highlighted. My Screen Projector Position Floor Front Disable 2. Press to highlight Projector Position and press until the correct... -
Page 11: Obtaining A Preferred Projected Image Size
Obtaining a preferred projected image size The distance from the projector lens to the screen, the zoom setting, and the video format each factors in the projected image size. The projector should always be placed horizontally level (like flat on a table), and positioned directly perpendicular (90°... -
Page 12: How To Determine The Position Of The Projector For A Given Screen Size
How to determine the position of the projector for a given screen size Determine the aspect ratio of your screen, 16:9 or 4:3. Refer to the table and find the closest match to your screen size in the left columns labelled "Screen Dimensions". -
Page 13: Projection Dimensions
Projection dimensions Refer to "Dimensions" on page 48 for the center of lens dimensions of this projector before calculating the appropriate position. Installation for a 16:9 ratio screen Floor Installation Ceiling Installation Ceiling Screen Diagonal Projection Distance Center of the lens Diagonal Offset Offset... - Page 14 Installation for a 4:3 ratio screen The illustrations and table below are provided for those users who already have 4:3 aspect ratio screens or intend to purchase 4:3 aspect ratio screens to view 16:9 ratio projected images. Ceiling Installation Floor Installation Ceiling Diagonal Image Height...
-
Page 15: Connecting With Video Equipment
Connecting with video equipment You can connect the projector to any type of video equipment, such as a VCR, DVD player, digital tuner, cable or satellite decoder, video game console or digital camera. You can also connect it to a desktop or laptop PC or Apple Macintosh system. However, it has no built-in speakers and cannot be connected to audio equipment. -
Page 16: Connecting Hdmi Devices
Connecting HDMI devices You should use an HDMI cable when making connection between the projector and HDMI devices. HDMI device: DVD player, digital tuner, etc. From audio output To audio input terminals terminals HDMI cable You should also connect the separate audio cable to a suitable audio amplifier. Connecting RGBHV devices Use a RGBHV video cable with 5 BNC male connectors for connection. -
Page 17: Connecting S-Video Or Video Devices
Connecting S-Video or video devices From audio output To audio input terminals terminals S-Video cable Video cable You need only connect S-Video or composite Video cable from the same device, never both at the same time. You should also connect the separate audio cable to a suitable audio amplifier. -
Page 18: Using The Projector
HDMI 1 and HDMI 2, press HDMI again. System Setup Display • Using the OSD menu Language English Splash Screen SIM2 Press MENU and then press until the System menu is My Screen Projector Position Floor Front highlighted. Auto Off Disable... -
Page 19: Using The Menus
Picture Mode Cinema Mode Setup Display Load Settings From Brightness + 50 Language English Contrast + 50 Splash Screen SIM2 Color + 50 My Screen Tint Projector Position Floor Front Sharpness Auto Off Disable Reset Picture Settings Sleep Timer Disable... -
Page 20: Securing The Projector
Securing the projector Using a security cable lock The projector has to be installed in a safe place to prevent stealing. If not, purchase a lock, like Kensington lock, to secure the projector. You can locate a Kensington lock slot on the left side of the projector. -
Page 21: Entering The Password Recall Procedure
Press and hold PICTURE MODE on the remote control for 3 Please write down the recall code, seconds. The projector will display a coded number on the and contact your nearest SIM2 Customer Center. screen. Write down the number and turn off your projector. -
Page 22: Adjusting The Projected Image
Adjusting the projected image Adjusting the projection angle There are four adjuster feet on the bottom of the projector. These can be used if necessary to change the projection angle. Screw the feet in or out as appropriate to aim and level the projection angle. -
Page 23: Using The Preset And User Modes
Using the preset and user modes Selecting a picture mode The projector is preset with several pre-defined picture modes so that you can choose one to suit your operating environment and input source picture type. To select a picture mode that suits your need: •... -
Page 24: Resetting The Picture Mode
Setting the User 1/User 2/User 3 mode There are three user-definable modes if the current available picture modes are not suitable for your need. You can use one of the picture modes (except the selected User mode) as a starting point and customize the settings. In the Image menu, highlight Picture Mode and press Image Information... -
Page 25: Fine-Tuning The Picture Quality
Fine-tuning the picture quality No matter what picture mode you have selected, you are able to fine-tune those settings to fit every presentation purpose. Those adjustments will be saved to the Picture mode you are at when you exit the OSD menu. Adjusting Brightness Highlight Brightness in the Image menu and adjust the values by pressing... -
Page 26: Advanced Picture Quality Controls
Advanced picture quality controls There are more advanced functions in the Color menu to be adjusted to your preference. To save the settings, just press MENU to leave the OSD menu. Setting Black Level Highlight Black Level and press on the remote control to Color Display Image... -
Page 27: Setting A Preferred Color Temperature
Setting a preferred color temperature To set a preferred color temperature: Color Temp. User 1 Fine Tuning Highlight Color Temperature and select User 1, User 2, or Red Gain Green Gain User 3 by pressing on the remote control. Blue Gain Red Offset Green Offset Press... - Page 28 In the Color menu, highlight Color Management and press Color Image Display ENTER. The Color Management page displays. Black Level 0 IRE Highlight Primary Color and press to select a color Clarity Control Color Temperature Normal from among Red, Yellow, Green, Cyan, Blue, and Magenta. Color Temperature User_ Fine Gamma Selection Brilliant Color...
-
Page 29: Selecting The Aspect Ratio
Adjusting contrast ratio via IRIS The contrast ratio is the measurement of the difference between the brightest whites and the darkest blacks a display can show. This projector has a very high contrast ratio which can reveal subtle color detail not possible with projectors which have a lower contrast ratio. You can adjust the contrast level to allow for ambient lighting levels within the room which may affect color detail. - Page 30 About the aspect ratio Anamorphic (ANA): Scales an image so that it is displayed in the center of the screen with a 16:9 aspect ratio. This setting stretches and resizes linearly, except that it treats the vertical 16:9 picture and horizontal dimensions independently. It stretches the height of the source image until it reaches the full projected height, and stretches the width of the source image until it reaches the full projected width.
-
Page 31: Operating In A High Altitude Environment
Using anamorphic lenses (optional) Anamorphic lenses allow you to convert 16:9 projectors to the full 2.35:1 aspect ratio of most of major motion pictures, showing the best movies without letterbox bars at top and bottom of images while increasing resolution by 33% and brightness by 20%. Pressing LB on Using the remote... -
Page 32: Displaying More Than One Image Source Simultaneously
Displaying more than one image source simultaneously Your projector is capable of displaying pictures simultaneously from two input sources, which can be used to enhance your presentation in an interesting way. Ensure the signals you want to display are correctly connected to the projector. To display the PIP window: •... -
Page 33: Creating Your Own Startup Screen
Auto Source Search. Creating your own startup screen In addition to selecting the projector preset startup screen from among SIM2 or Blue screen, you can make your own startup screen that is a picture projected from your computer or video source. -
Page 34: Turning The Power Off
Turning the power off To turn the projector off, press POWER ( ) on the remote control and a warning message appears. Press POWER again. • The Power indicator light flashes orange and the fans run for about 90 seconds to cool the lamp. The projector will not respond to any commands until the cooling process is complete. -
Page 35: On-Screen Display (Osd) Menus
On-Screen Display (OSD) menus On-Screen Display (OSD) structure Please note that the on-screen display (OSD) menus vary according to the signal type selected. Main menu Sub-menu Options Cinema Mode/Dynamic Mode/Standard/ Picture Mode User 1/User 2/User 3 Load Settings From Brightness 0–100 Contrast 0–100... - Page 36 Language Splash Screen SIM2/Blue/My Screen My Screen Floor Front/Ceiling Front/Floor Rear/Ceiling Projector Position Rear Disable/5 min/10 min/15 min/20 min/25 min/ Auto Off System 30 min Disable/30 min/60 min/90 min/120 min/150 Sleep Timer min/180 min Background Color Purple/Black/Blue Menu Display Time...
-
Page 37: Image Menu
Image menu FUNCTION DESCRIPTION (default setting/value) Pre-defined picture modes are provided so you can optimize your Picture Mode projector picture set-up to suit your program type. See "Selecting a (Cinema Mode) picture mode" on page 23 for details. Selects a picture mode that most suits your need for the picture quality and further fine-tune the picture based on the selections Load Settings From listed below. -
Page 38: Display Menu
(English) Allows you to select which screen will display during projector start- Splash Screen up. Three options are available: SIM2 logo screen, Blue screen, or (SIM2) My Screen. Captures and stores the projected picture as My Screen. See My Screen "Creating your own startup screen"... -
Page 39: Setup Menu
Menu Display Time (10 sec) Sets the length of time the OSD will remain active after your last key press. The range is from 5 to 30 seconds in 5-second increments. Menu Settings Menu Position (Center) Sets the On-Screen Display (OSD) menu position. Selects an input source to be projected. - Page 40 Some picture adjustments are available only when certain input sources are in use. Unavailable adjustments are not shown on the screen. FUNCTION DESCRIPTION Shows the current signal source. Source Shows the selected mode in the Image > Picture Mode menu. Picture Mode Shows the native resolution of the input source.
-
Page 41: Additional Information
Additional information Care of the projector Your projector needs little maintenance. The only thing you have to do on a regular basis is keep the lens clean and clean or replace the air filter. Never remove any parts of the projector except the lamp or the air filter. - Page 42 To clean the filter Shut down the projector if turned on and Use a small vacuum cleaner (designed for wait until the fans stop running. computers and other office equipment) or use a soft brush (such as a clean artist’s paintbrush) to vacuum or sweep the dust away.
-
Page 43: Lamp Information
Display up to 2500-3000 hours with proper usage. To keep the lamp life Language English as long as possible, you can do the following settings via the OSD Splash Screen SIM2 My Screen Projector Position Floor Front menu. Auto Off... -
Page 44: Timing Of Replacing The Lamp
Timing of replacing the lamp When the Lamp indicator lights up red or a message appears suggesting it is time to replace the lamp, please install a new lamp or consult your dealer. An old lamp may cause a malfunction in the projector and in some instances the lamp may explode. The Lamp indicator light and Temperature warning light will light up if the lamp becomes too hot. - Page 45 This lamp contains mercury. Consult your local hazardous waste regulations to dispose of this lamp in a proper manner. Turn the power off and disconnect the Slowly pull the lamp out of the projector. projector from the wall socket. Turn off all connected equipment and disconnect all other cables.
-
Page 46: Indicators
Indicators There are three indicators which show the status of the projector. Check the following for information about the indicator lights. If there is anything wrong, turn the projector off and contact your dealer. When the projector is in a normal state, ... Lamp Temp Power... -
Page 47: Troubleshooting
Troubleshooting Problem Cause Remedy Plug the power cable into the AC inlet on the rear of the projector, and plug There is no power from the the power cable into to the power power cable. outlet. If the power outlet has a switch, make sure that it is switched (See page 18) The projector does... -
Page 48: Specifications
Specifications All specifications are subject to change without notice. Optical Projection system Single-chip DLP system. DMD chip 0.95" DLP (1920 x 1080) Lens F=2.4 to 2.7, f=38.87 to 46.63 mm Projection screen size 41" to 250" Lamp 200W Electrical Compatibility PC: 640 x 400 to 1920 x 1080 (16:9) Video: NTSC, PAL, SECAM, YPbPr NTSC(480i)/480p/PAL(576i)/ 576p, HDTV (720p/1080i/1080p) -
Page 49: Timing Chart
Timing chart Supported timing for RGBHV input (Analog or Digital PC signals)/HDMI input (Digital PC signals) Format Resolution Refresh rate(Hz) H. Freq.(KHz) Pixel Freq.(MHz) 31.469 25.175 37.861 31.5 640 x 480 640 x 480 37.5 31.5 43.269 35.156 37.879 800 x 600 800 x 600 48.077 46.875... - Page 50 Supported timing for DVI-D and HDMI (HDCP) input Format Resolution Refresh rate(Hz) H. Freq.(KHz) Pixel Freq.(MHz) 480/60i 720 x 487 29.97 15.734 480/60p 720 x 483 59.94 31.469 576/50i 720 x 576 15.625 576/50p 720 x 576 31.25 720/50p 1280 x 720 37.5 74.25 720/60p...
-
Page 51: Warranty And Copyright Information
Further, SIM2 Multimedia reserves the right to revise this publication and to make changes from time to time in the contents hereof without obligation of SIM2 Multimedia to notify any person of such revision or changes. -
Page 52: Regulation Statements
Regulation statements FCC statement (for United States users) This equipment has been tested and found to comply with the limits for a Class B digital device, pursuant to Part 15 of the FCC Rules. These limits are designed to provide reasonable protection against harmful interference in a residential installation.
Need help?
Do you have a question about the D60 and is the answer not in the manual?
Questions and answers