Table of Contents
Advertisement
Quick Links
Advertisement
Table of Contents

Subscribe to Our Youtube Channel
Related Manuals for Barco MFCD 1219 (TS


Summary of Contents for Barco MFCD 1219 (TS
- Page 1 MFCD 1219 (TS) User Manual...
- Page 2 (This page intentionally left blank.)
-
Page 3: Copyright Notice
- graphical, electronic, or mechanical including photocopying, taping or information storage and retrieval systems - without written permission of Barco © 2010 Barco N.V. All rights reserved. -
Page 4: Table Of Contents
Table of Contents Table of Contents Preface ....................5 Environmental information............7 Safety Instructions................ 7 Recommendations for using your display system ....10 Overview.................... 12 Introduction ................12 Package contents ............... 13 Controls and connectors............. 14 Installation ..................15 Precautions ................. 15 Wall mounting ................ -
Page 5: Preface
BarcoView software products are the property of BarcoView. They are distributed under copyright by Barco N.V. or BarcoView, LLC., for use only under the specific terms of a software license agreement between Barco N.V. - Page 6 Preface reception, which can be determined by turning the equipment off and on, the user is encouraged to try to correct the interference by one or more of the following measures: • Reorient or relocate the receiving antenna. • Increase the separation between the equipment and receiver. •...
-
Page 7: Environmental Information
Preface Environmental information Disposal Information The lamps inside the display contain mercury. Do not throw the display in the trash. Dispose of it as required by local ordinances or regulations. This equipment has required the extraction and use of natural resources for its production. - Page 8 Preface Electrical shock Type of protection (electrical): Class I equipment Degree of safety (flammable anesthetic mixture): Equipment not suitable for use in the presence of a flammable anesthetic mixture with air or with oxygen or nitrous oxide. Power connection • Power requirements: The display must be powered using the 12 VDC power supply that is supplied with the display.
- Page 9 Be sure to entrust the attachment of this product to the wall to authorised contractors of Barco and pay adequate attention to safety during the installation and usage. Barco is not liable for any damage or injury caused by mishandling or improper installation. More warnings in the Installation chapter.
-
Page 10: Recommendations For Using Your Display System
To do this, go to “Power Options Properties” in the “Control Panel”. Barco recommends setting DPMS activation after 20 minutes of non-usage. 2. Use a screen saver to avoid image retention Prolonged operation of an LCD with the same content on the same screen area may result in a form of image retention. - Page 11 To learn more about LCD technology and missing pixels, consult the dedicated white paper available at www.barcomedical.com. 4. Enhance user comfort Every Barco multi-head display system is color matched with the highest specification in the market. Barco recommends keeping color-matched displays together.
-
Page 12: Overview
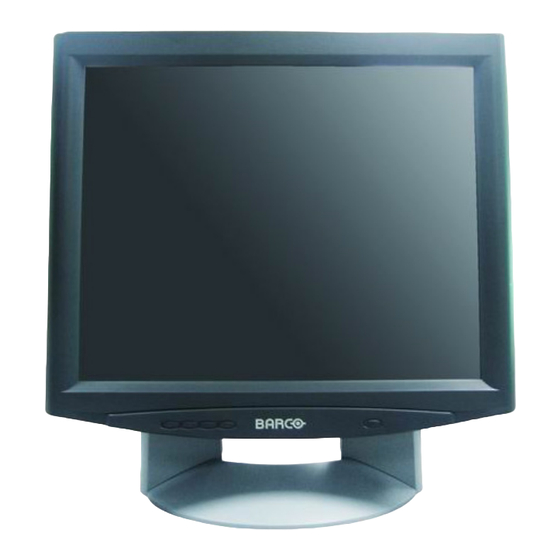
Overview Overview Introduction The MFCD 1219 (TS), BARCO’s full color 19” LCD display, guarantees perfect image quality in medical imaging applications. The display combines a TFT (thin film transistor) liquid crystal display panel structure and a built-in backlight with inverter for a better picture quality. -
Page 13: Package Contents
The MFCD 1219 TS is equipped with a touch panel. Instructions on how to install and use the touch panel driver and controls can be found in the "TouchKit, Barco TouchScreen controller installation and user manual" on the supplied CD-ROM. -
Page 14: Controls And Connectors
Overview Controls and connectors 5 6 7 8 12V DC power input DVI input (DVI-D supported only) Analog video input USB port for touch panel connection to PC (MFCD 1219 TS only) < (left) Key > (right) Key Menu key Auto Key Power LED The LED is off when the display is off. -
Page 15: Installation
If you do not need to mount the panel to the wall, please skip this item. Step 1: Remove the panel from the foot Position one hand under the panel at the front side. Position the other hand at the rear, under the push-button with BARCO logo (9). - Page 16 Installation Firmly press down the push-button (9) with one hand while carefully lifting the panel up with the other hand. Remove the panel from the foot. Step 2: Fix the mounting plate to the wall Screw the mounting plate to the wall with the 4 supplied screws (A).
-
Page 17: Connecting The Signals
Installation Please make sure that the four shafts are securely placed in the notches of the mounting plate. To secure the panel, slide forward the locks on both sides of the mounting plate. Lock the panel with one screw at both sides (D). Connecting the signals... -
Page 18: Starting Up
Installation To connect the video & sync signals: Connect one end of the appropriate video cable to the corresponding video input of the monitor. • Analog video: Connect to input (3) • DVI: Connect to input (2) Connect the other end of the video cable to the video output of your video source. - Page 19 Installation Note: The recommended resolution for best image quality is 1280x1024 at 60 Hz. The microcontroller in the display checks if the connected video signal has been adjusted before, and if these adjustments have been stored in the memory. There are 2 possibilities: The video signal has been adjusted and stored in the memory.
-
Page 20: Install The Software
Installation Install the software MediCal QAWeb Agent software: Insert the CD-ROM in the CD-ROM drive. The CD-ROM starts automatically. Please follow the instructions on the screen. The CD-ROM contains user instructions about the usage of the MediCal QAWeb Agent. Touch panel software: Please refer to the TouchKit installation &... -
Page 21: On-Screen Display (Osd)
On-screen display (OSD) On-screen display (OSD) How to use the OSD 1 2 3 The OSD is a window on your screen that allows you to view and change display settings. To change an OSD setting, proceed as follows: Press the Menu key (3) on the front to display the OSD main menu. -
Page 22: Description Of The Menu Items
On-screen display (OSD) Press the Menu key (3) to enter the new value and return to the menu. The current settings are saved automatically when you return to the previous level or exit the OSD menu by pressing the Menu key (3) when the Exit symbol is selected. - Page 23 On-screen display (OSD) Brightness / Contrast menu Function Description Brightness To adjust the overall image and background brightness level. This function controls the back- light drive level. Contrast To adjust the image brightness in relation to the background (the background is unchanged). This function controls the digital gain adjustment.
-
Page 24: Color Menu
On-screen display (OSD) Color Menu Function Description Native Set the image color temperature to the LCD panel’s native, uncorrected color temperature User This is a submenu to manually adjust the image color temperature. When you select this item, a menu appears where you can manually adjust Red, Green and Blue to obtain the desired color temperature. -
Page 25: Geometry Menu
On-screen display (OSD) Geometry menu This menu is available only when an analog video signal is selected. Function Description Auto adjust- Selects the Auto adjustment submenu, which con- ment tains the following functions: Auto Adjust performs the Auto Geometry, Clock and Phase functions. -
Page 26: Settings Menu
Allows to switch the power LED on/off. Note: The DPMS system will power down the display when the connected computer is left idle for a certain time. Barco recommends to switch DPMS on to prevent image burn-in (image retention) on the LCD panel. - Page 27 On-screen display (OSD) OSD Settings submenu Function Description OSD Timeout Determine how long (in seconds) the OSD menu waits before closing automatically when no action is performed H OSD Position Adjust the horizontal position of the OSD window V OSD Position Adjust the vertical position of the OSD window OSD Direction Switch the direction of the OSD from landscape/...
-
Page 28: Information Menu
On-screen display (OSD) Information menu Function Description Serial No. Indicated the display serial number. FW version Displays the current internal firmware version. Display run Indicates the total time the display has been oper- time ating, including the time in stand-by. Backlight run Indicates the total time the display has been oper- time... -
Page 29: Maintenance
Maintenance Maintenance Panel Take care not to damage or scratch the panel. Clean with a soft woolen or cotton towel. Use a watery solution or a mild commercial glass cleaning solution. Cabinet Do not use chemical cleaning products, benzene, toluene, xylene or other solvents. -
Page 30: Appendix A: Possible Resolutions
Appendix A: Possible resolutions Appendix A: Possible resolutions The following modes are preset as factory defaults. Pixel Hor. Vert. Resolution freq. freq. freq. Standard Analog Digital (MHz) (kHz) (Hz) 640 x 350 25.175 31.47 640 x 480 25.175 31.47 VGA/VESA 30.24 35.00 31.50... -
Page 31: Appendix B: Technical Specifications
Appendix B: Technical specifications Appendix B: Technical specifications Picture panel 19-inch diagonal viewable screen TFT (thin film transistor) active matrix, color liquid crystal display, RGB interface Touch panel (MFCD Resistive technology 1219 TS only) Interface: USB 1.1 Input mode: stylus or finger Touch active force (stylus Æ... - Page 32 -20°C to 60°C NOTICE: DUE TO OUR POLICY OF CONTINUOUS PRODUCT IMPROVEMENT, THE ABOVE SPECIFICATIONS ARE SUBJECTED TO CHANGE WITHOUT NOTICE. BARCO SHALL NOT BE LIABLE FOR TECHNICAL OR EDITORIAL ERRORS OR OMISSIONS CONTAINED HEREIN; NOR FOR INCIDENTAL OR CONSEQUENTIAL DAMAGES WHATSOEVER RESULTING FROM FURNISHING, PERFORMANCE OR USE OF THIS MATERIAL.
- Page 33 Appendix B: Technical specifications (This page intentionally left blank.)
- Page 34 Appendix B: Technical specifications (This page intentionally left blank.)
- Page 35 Appendix B: Technical specifications (This page intentionally left blank.)
- Page 36 K5904239-00 August 2010 Barco nv Medical Imaging President Kennedypark 35 B-8500 Kortrijk, Belgium www.barco.com...
Need help?
Do you have a question about the MFCD 1219 (TS and is the answer not in the manual?
Questions and answers