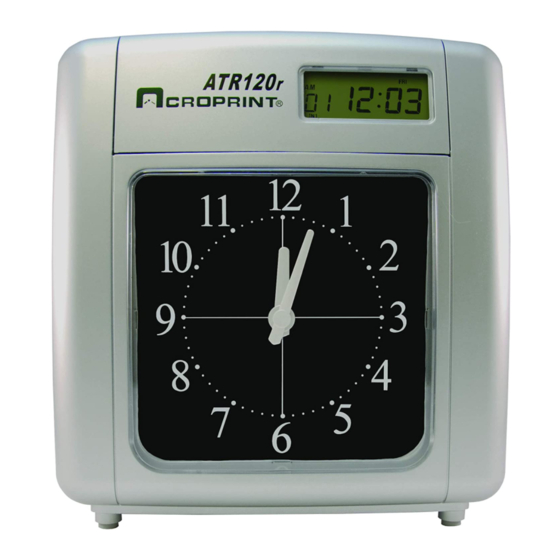
Acroprint ATR120 User Manual
Micro-computer electronic time clock
Hide thumbs
Also See for ATR120:
- Service manual (87 pages) ,
- User manual (30 pages) ,
- Quick start manual (3 pages)
Table of Contents
Advertisement
Advertisement
Table of Contents

Related Manuals for Acroprint ATR120


Summary of Contents for Acroprint ATR120
-
Page 1: User Manual
Micro-computer Electronic Time Clock User Manual... - Page 2 For more information on Acroprint products Acroprint offers a complete line of standard Time Recorders, state-of-the-art Electronic Time Recorders, Document Time Stamps, Watchmen’s Systems, HRx Human Resource Software, and Time & Attendance Systems. Time for Business…. 5640 Departure Drive Raleigh, NC 27616-1841 919.872.5800...
-
Page 3: Table Of Contents
Table of Contents Introduction ................. 1 Overview......................1 Specifications ....................1 Accessories ......................1 Features ......................2 Package Contents................. 2 III. Location of Components ............. 3 Getting Started................3 Installing clock dial battery................3 Setting the ATR120..............4 Programming Hints ..................4 Selecting day of week ..................5 Setting the time ....................7 Setting the year, month, and date ..............7 Setting Daylight Saving Time ................8... - Page 4 IX. Troubleshooting................. 20 Location of fuses....................21 Error codes .....................21...
-
Page 5: Introduction
Introduction Overview The ATR120 is an electronic across-the-card time clock, which can be used for a weekly or a biweekly pay period. The unique ATR121 Time Card offers a weekly time card on the front and a biweekly time card on the back. The day progresses across the card from left to right in six columns. -
Page 6: Features
Features · Compact design for desktop or wall mounting · Weekly or bi-weekly pay periods · Digital display shows time and date and is synchronized with dot matrix printer · 9-pin dot matrix printer that allows for 12 or 24-hour & 60/100 print format ·... -
Page 7: Iv. Getting Started
III. Location of Components 1. Anti-dust cover 2. Time card receiver 3. In/Out advance buttons (6) 4. Analog clock (Clock dial) 5. Display 6. Program mode switch 7. Reset (return to original factory settings) 8. Wall-mounting keyholes 9. Fuse access door IV. -
Page 8: Setting The Atr120
To open the front cover, turn the clock on its back and remove the two outer screws on bottom of clock. Stand the clock upright with the back facing you. With both thumbs press down on IN1 and OUT3 buttons while using your fingers to push cover away. The clock dial panel is shipped locked into place. -
Page 9: Selecting Day Of Week
clock to function as program switches. With the dust cover open you will find that these program switches are numbered 1 – 6 to simplify programming the ATR120 The first switch on the top left of the clock (IN1) functions as the feature selection switch and will advance you through the program mode. - Page 10 · Press button four once. The display reads 2-1 . The 2 indicates this is a weekly pay period. OUT3 flashes in the lower right hand corner of the display. This will flash until the changes are saved. · Press button five to choose the current day of the week for your weekly pay period.
-
Page 11: Setting The Time
Press button six to save your settings. OUT3 is no longer displayed. · Setting the time · Make sure the ATR120 is in programming mode. · Press button one once to start setting the current time. This mode starts the clock-timing device. -
Page 12: Setting Daylight Saving Time
Setting Daylight Saving Time · Press button one once. If you are entering the programming mode for the first time, you will need to press button one three times to set Daylight Saving Time. The display reads S1 0-0 with S1 indicating the start of Daylight Saving Time. ·... -
Page 13: Setting The Day Change Time
example, on the first date of Daylight Saving Time, the clock will advance from midnight to 01:00. At midnight on the last day, the clock will change from 00:00 to 23:00. Setting the day change time · Press button one once. If you are entering the programming mode for the first time, you will need to press button one four times to set the Day Change Time. -
Page 14: Setting The Two-Color Printing And Internal Signal Tone
Setting the two-color printing and internal signal tone Time cards can be audited much easier by highlighting in red, punches outside the normal work schedule. Using the internal audible signal will remind your employees of start and stop times in their work schedule. You can even have a warning signal two minutes before start time to alert your employees. - Page 15 Event Print in Print in Signal Print Red & Print Black Max 32 Black Only Signal & Signal OUT1 IN1 IN2 OUT1 IN2 08:00 08:01 12:00 13:00 13:01 17:00 17:30 07:30 Event Time Description of Event 8:00 SIGNAL Only to denote start of work schedule 8:01 Color changes to RED to denote late or early lunch punches 12:00...
- Page 16 necessary to set the day(s) the event should occur on. The event will occur on the day(s) shown across the top of the display. It is recommended that a program chart be used to create a schedule to assist in programming this feature.
-
Page 17: Setting Signal Duration
Setting signal duration The ATR120 can be set to produce a signal lasting from zero (0) 0 to sixty (60) seconds, with the default being five (5) seconds. · Press button one once. If you are entering the programming mode to set or adjust of the signal duration, press button one seven times. - Page 18 Use this chart to plan your Auto Column Shift times. EVENT OUT1 OUT2 OUT3 To program the auto column shift: · Press the first button one time to advance to programming the auto column shift feature. If you are entering the programming mode to adjust the auto column shift position you will need to press the first button eight times.
-
Page 19: Setting How The Hour Will Print
In Punch (Lunch) OUT2 Out Punch end of shift In Punch Overtime Period OUT3 Out Punch Overtime Period · Select the column position by pressing button three. The column position icon at the bottom of the display will stop flashing. ALL days of the week will appear at the top of the display. -
Page 20: Setting The Password
Setting the password The ATR120 allows for the use of a four-digit number as a password to protect programmed settings. When the password is set, you will be asked to enter it each time you enter the programming mode. It is recommended that if a password is used that you write it down and store it in a safe place. -
Page 21: Wall-Mounting
we recommend installing the ATR120 on a separate power circuit. We do not recommend using a power strip. Always follow basic safety precautions when using this product to reduce the risk of injury, fire, or electric shock. Caution: · Read and understand all instructions in the ATR120 User's Manual before installing and operating this time clock. -
Page 22: Operating Your Atr120
2. Following the diagram, insert screws at positions B and C. Place a screw anchor in the wall at position D. 3. Use the two screws (M4X10) to attach the wall-mounted frame to the bottom of the time clock. 4. Line up the keyholes on the back of the time clock with the screws in the wall. -
Page 23: Maintenance
To print, insert a time card into the receiver with the pay period selected, facing you. Note: The clock cannot differentiate the pay period and will print on either side of the time card. The card is automatically pulled in and printed. - Page 24 Next, remove and discard the pin and clip. Remove the ribbon cassette by first sliding it left and then upwards as shown by the illustration (A & B). Place the new ribbon into the ATR120. It is not necessary to replace the pin and clip.
-
Page 25: Location Of Fuses
Location of fuses The fuse panel is located on the back of the ATR120 in the lower left corner. To access fuses, disconnect the power from the clock and remove the screw securing door. Replace blown fuse with only the same rated fuse. Do not substitute. 1. - Page 26 For any other Error Codes contact your dealer or Acroprint Time Recorder. To return to the original Factory settings, press the reset switch, located on the back of the clock next to the PRO switch. When resetting the clock make sure the PRO/NOR is in the NOR position.
- Page 28 5640 Departure Drive Raleigh, NC 27616 919.872.5800 IN USA 800.334.7190 www.acroprint.com P/N 06-0314-000 Rev. A...
Need help?
Do you have a question about the ATR120 and is the answer not in the manual?
Questions and answers