Table of Contents
Advertisement
Advertisement
Table of Contents

Related Manuals for Acroprint ES1000


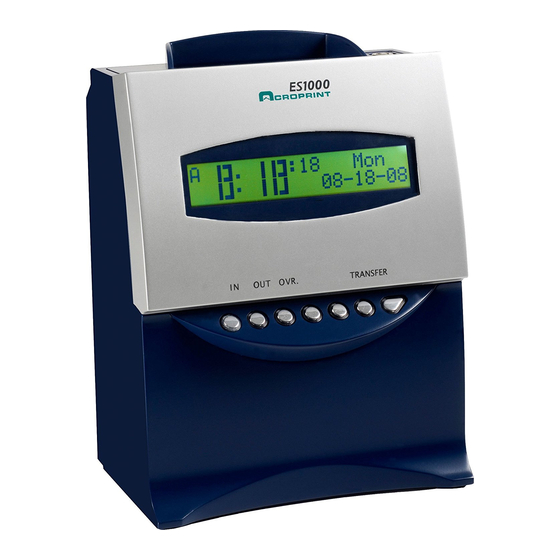
Summary of Contents for Acroprint ES1000
- Page 1 USER'S MANUAL...
- Page 2 If you feel, however, that some explanations are inadequate, unclear, or difficult to understand, please do not hesitate to contact Acroprint. No part of this publication may be reproduced, stored in a retrieval system, or transmitted, in any form or by any means, mechanical, photocopying, recording or otherwise without the written consent of Acroprint Time Recorder.
- Page 3 Precautions This user's manual is prepared for safe and proper use of the unit. Please follow all the instructions to avoid possible danger to yourself or others and damage to the unit. Signs Various warnings and cautions are provided throughout this manual along with signs. Remember each sign and its explanation listed below for your safety and proper operation of the unit.
- Page 4 If foreign matter should get in the unit (including a piece of metal, water, or liquid), disconnect the plug from the outlet immediately and contact your dealer for servicing. There is a danger that further use may cause a fire or electric shock. Do not plug or unplug the unit with a wet hand.
-
Page 5: Table Of Contents
Table of Contents Introduction and Features of the ES1000 Getting Started Unpacking the ES1000 Overview Installing the Ribbon Cassette Wall Mounting the ES1000 Where to Install the ES1000 Overview of Operation What You Can Do with the ES1000 Settings Preparation for Setting Overview of Function Buttons Setting the Hour Display Format Setting the Time... - Page 6 Printing List of Program Settings Additional Features Override Printing Card Transfer Card Resetting All Cards Resetting Resetting Installing the Optional Battery Backup Connecting External Signal Control Troubleshooting Specifications For accessories, visit Acroprint on-line at www.acroprint.com or call 800.334.7190 or (919) 872.5800 (outside the USA)
-
Page 7: Introduction And Features Of The Es1000
1. Introduction and Features of the ES1000 The ES1000 Totalizing Time Recorder provides fast, easy and accurate calculations of your employee hours worked. The ES1000 can handle a Weekly, a Bi-Weekly, a Semi-Monthly or a Monthly pay period for up to 100 employees. -
Page 8: Getting Started
2. Getting Started Unpacking the ES1000 Keys Ribbon Cassette Operation Manual Wall Mount Screws, Brackets and Template Overview <Front view> <Back view> Wall-mounting holes Card slot Key hole Front cover Display Function buttons External signal and full operation battery (optional) compartment... -
Page 9: Installing The Ribbon Cassette
Installing the Ribbon Cassette Make sure the power is on before installing. Unlock cover and pull up the top Turn the knob on the cassette in the side of the card insertion slot and arrow-indicated direction to make the pull it towards you. ribbon taut. - Page 10 4 Precautions to take when replacing the ribbon Take the following precautions when inserting a new ribbon cassette. Install the ribbon cassette so that the ribbon is between the print head and the ribbon mask (see the figure on the left). Printing failure may occur if the ribbon is placed behind the ribbon mask (see the figure below).
-
Page 11: Wall Mounting The Es1000
Wall Mounting the ES1000 The ES1000 may be platform or wall mounted using the wall mount screws supplied. To mount unit on wall, take the following steps: Install wall mount screws (supplied) into a wall 3.94 inches (10 cm) apart. Be sure to keep about 0.12 inch ( 3 mm) of the screw head out of the wall. -
Page 12: Overview Of Operation
3. Overview of Operation Once the AC line cord is plugged into the outlet, the unit can be used immediately. Basic operations, including the time and ending dates, are preset. The ES1000 is designed to work only with the ES1010 Time Cards. The clock will not function correctly using other style time cards, and using other cards may cause damage to sensors. -
Page 13: What You Can Do With The Es1000
What You Can Do With the ES1000 Schedule [Time Zone Rule] You can select days of the week which your desired schedule is applied to. All other days of the week will be regarded as "weekend or non-scheduled work days", which you can set threshold hours and duration of auto break deduction. - Page 14 In addition to the start time and duration for the maximum settings of three "break times", the following settings are available to fulfill your needs. Start and End Time for Irregular (Red) Printing Once you set the schedule for irregular printing, printing color automatically changes according to the start/end time you've set.
- Page 15 [Type 3] Example: Pay Period: Weekly, Total regular hours: 40 hours/week Break time: start =12:00 & 60 min./day Daily Total Au Mo 9:00A Mo 6:00P 8:00 8:00 18:00 Tu 9:00A Tu 8:00P 10:00 30:00 We 9:00A We 10:00P 12:00 38:00 Th 9:00A Th 6:00P 8:00...
- Page 16 Priority Rule to the Days Not Scheduled in the Time Zone Schedule By selecting "calculation priority" setting, weekend or non-scheduled work days' worked hours can be always regarded and accumulated as "Overtime" prior to other rules. If you don't select this setting, weekend or non-scheduled work days' worked hours will be accumulated in accordance with setting for the calculation type.
-
Page 17: Settings
4. Settings Preparation for Setting Caution: If time cards were punched prior to original settings or if you wish to change Pay Periods or when the Day Advances or change the Minute print format you will need to reset ALL Time Cards. Please refer to the ALL Cards Resetting section under Additional Features. Removing and replacing front cover. -
Page 18: Overview Of Function Buttons
Over View of Function Buttons With the front cover off, you will be able to access program buttons. [SETTING START/END] button Push this button when you go into/get out of the setting mode. [DATE/TIME] button Use the [DATE/TIME] button when you want to change the date and/or time. You can select the desired setting mode by pushing this button. -
Page 19: Setting The Hour Display Format
Setting the Hour Display Format Push the [SETTING START/END] button before you start setting. At that moment, " " is shown on a display and you go into setting mode. 1 AM/PM 2 24hour Push the [DATE/TIME] button for 2 DISPLAY seconds. -
Page 20: Setting The Time
Setting the Time Push the [SETTING START/END] button before you start setting. At that moment, " " is indicated on a display and you go into setting mode. Example Change the time from 10:08 to 10:09. Hour Second Push the [DATE/TIME] button for 2 Minute seconds. -
Page 21: Setting The Date
Setting the Date Push the [SETTING START/END] button before you start setting. At that moment, " " is indicated on a display and you go into setting mode. Example Change the date from Oct. 20, 2004 to Oct. 21, 2004. Year Month Push the [DATE/TIME] button for 2... -
Page 22: Setting Pay Period And Pay Period Ending Date
Setting Pay Period and Pay Period Ending Date The clock default is "weekly pay period". All time cards will be reset automatically after pay ending date. You will not be allowed to change pay period while in a current pay period. Error message E-49 will be displayed. -
Page 23: Weekly
Weekly 1 Monthly Push the [FUNCTION] button for 2 2 Weekly Ending day seconds. 3 Bi-Weekly 4 Semi-Monthly Once a number on the display starts PAY PERIOD flashing, make sure the " " mark is located under the "PAY PERIOD" mark. -
Page 24: Bi-Weekly
Bi-Weekly 1 Monthly Push the [FUNCTION] button for 2 2 Weekly Ending day seconds. 3 Bi-Weekly 4 Semi-Monthly Once a number on the display starts PAY PERIOD flashing, make sure the " " mark is located under the "PAY PERIOD" mark. -
Page 25: Semi-Monthly
Semi-Monthly 1 Monthly The1st Push the [FUNCTION] button for 2 2 Weekly ending date seconds. 3 Bi-Weekly The 2nd 4 Semi-Monthly ending date Once a number on the display starts PAY PERIOD flashing, make sure the " " mark is located under the "PAY PERIOD"... -
Page 26: Setting The Day Advance Time
Setting the Day Advance Time The Day Advance Time refers to the time when printing shifts to the next line on a time card for the next day. This function enables the punch out time record to print on the same line of the previous working day even if leaving time is after midnight. -
Page 27: Selecting The Print Format
Selecting the Print Format You will not be allowed to change minute print format while in a current pay period. Error message E-49 will be displayed. You may change a current minute print format after you reset all time cards. Please refer to "Card Resetting" section of this manual. Push the [SETTING START/END] button before you start setting. -
Page 28: Enabling Override And Transfer Functions
Enabling Override and Transfer Functions Enabling these functions allows employees to move time totals on card or transfer to another card. (Not recommended.) See Additional Features sections for how these features are used. Push the [SETTING START/END] button before you start setting. At that moment, "... -
Page 29: Selecting Rounding Rules
Selecting Rounding Rules For "Rounding", there're 2 settings: "Types of Rounding" and "Rounding Unit". For "Types of Rounding", there're "Hours Rounding" and "Punch Time Rounding", and you can choose one. For "Hours Rounding", the recorder calculates the hours from "IN" punch to "OUT" punch, and then, rounds that result with the "Rounding Unit"... - Page 30 ROUND In case of the example, push the [+] or [-] button to set the right-side number at "4" to select rounding unit of "15 minutes" and then push the [SET] button. At that moment, FUNCTION the display will change from flashing to steady, and the setting is now completed.
-
Page 31: Schedule (Setting Calculation Rules)
Schedule (Setting Calculation Rules) Selecting the schedule or calculating rules for the schedule determines the features that may be set. First determine which zone will best meet your needs. In most cases the Free Zone schedule meets most company's needs. Free Zone or "Open Shift"... -
Page 32: Setting The Schedule
Setting the Schedule Program Free Zone Time Zone Description Rule* Rule Calculation Rule Start Time for Irregular Printing (Black Red) End Time for Irregular Printing (Red Black) Limit of Regular Hours per Day Limit of Regular Hours per Week Duration of Round Time (Start & End Shift Times) Duration of Grace Time (Start &... - Page 33 Make sure the left-side number SCHEDULE indicates "01" and push the [SET] button. FUNCTION Push the [+] or [-] button and set at 1 to select "Free Zone" rule. Order Option Calculation Rules Free Zone SCHEDULE Time Zone Push the [SET] button to fix the setting FUNCTION value.
- Page 34 Duration of break time or the length of the "lunch" (hours/minutes) that can be deducted. Set the " 17 Duration of break time". Push the [SET] button again to set Program No. the left-side number at "17" by pressing the [+] button. Once you SCHEDULE push the [SET] button, flashing of display...
- Page 35 Limit hours for OUT punch. This is the time "on the clock" from the last IN punch before the clock should consider a forgotten punch. This allows for the next punch to be treated as an IN punch. Set the " 19 Limit hours for the OUT punch". Program No.
-
Page 36: Time Zone Or Fixed Shift (Ideal When Everyone Is On The Same Schedule)
Time Zone or Fixed Shift (ideal when everyone is on the same schedule.) You can select days of the week which your desired schedule is applied to. All other days of the week will be regarded as "weekend or non-scheduled work days", which you can set threshold hours and duration of auto break deduction. - Page 37 Push the [SETTING START/END] button before you start setting. At that moment, " " is indicated on a display and you go into setting mode. Set the " 01 Calculation rule". Selecting "1: Free Zone" is recommended for most operations. 1 Free Zone Program No.
-
Page 38: Ribbon Color Change
Ribbon Color Change If you have selected the "Time Zone" calculation rule, Program numbers 2 and 3 allow for programming employee punches, outside the normal work schedule, to print in "RED" to flag early out or late in punches. The example below punches after 8:01 AM and before 5:00 PM will print in RED. - Page 39 Set the " 03 End time for irregular printing (red black)". Program No. Next, push the [SET] button again to set the left-side number at "03" SCHEDULE by pressing the [+] or [-] button. Once you push the [SET] button, flashing of the display will change to "Hour".
- Page 40 Minute In this case, push the [+] or [-] button to set at "00". And then, SCHEDULE push the [SET] button. At that moment, the display will change from flashing to steady. FUNCTION SCHEDULE FUNCTION Set the " 11 Duration in minutes, Break #1". Program No.
- Page 41 Set the " 13 Duration in minutes, Break #2". Program No. Minute Make settings for the "Duration in minutes, Break #2" in the same SCHEDULE manner as for the "Duration in minutes, Break #1", as illustrated in the figure on the left. FUNCTION Program #14 and #15 (not shown) are for Break #3.
- Page 42 Set the " 17 Duration of break time". Program No. Push the [SET] button again to set SCHEDULE the left-side number at "17" by pressing the [+] button. Once you push the [SET] button, flashing of FUNCTION display will change "Minutes".
-
Page 43: Overtime Calculation
Overtime Calculation Basically, all worked hours are accumulated as regular hours. By setting maximum length of regular hours per day or week, you can fix how to divide worked hours into regular hours and overtime. Semi-monthly and Monthly pay period overtime calculations are based on daily overtime only. - Page 44 Push the [+] or [-] button to set the SCHEDULE desired hours. In case of the example, push the [+] or [-] button to set at "6" and push the [SET] FUNCTION button. At that moment, the display will change from flashing to steady. Range of values: 1-24 hour(s) ("...
- Page 45 [Total Regular Hours per Week] Example: Pay period: Weekly, Total regular hours: 40 hours/week Break time: start =12:00 & 60 min./day Daily Total Mo 9:00A Mo 6:00P 8:00 8:00 18:00 Tu 9:00A Tu 8:00P 10:00 We 9:00A 12:00 30:00 We 10:00P Th 9:00A 8:00 38:00...
- Page 46 Hour Push the [+] or [-] button to set the desired hours. In case of the SCHEDULE example, push the [+] button to set the first one digit at "0" and push the [SET] button. At that moment, the flashing of the display will change to the last two digits.
- Page 47 [Combination of "Daily Regular Hours" and "Total Regular Hours"] If you set limits for both "Daily regular hours" (Daily OT) and "Total regular hours" (Weekly OT), then daily worked hours shall be calculated based on the rules for "Daily regular hours", and will take precedence over the weekly setting.
-
Page 48: Round And Grace Time For Start/End Time (St/Et)
Round and Grace Time for Start/End Time (ST/ ET) Start time End time (ST) (ET) 06 Duration of 07 Duration of 07 Duration of 06 Duration of round time grace time grace time round time for ST for ST for ET for ET min. - Page 49 The right-side numbers indicate SCHEDULE round-back period (min.) for OUT punch after the end time. In this case, push the [+] or [-] button to set at "30". And then, push the [SET] button. At that moment, the display will change from flashing to steady. Set the "...
- Page 50 Set the " 08 Red printing for grace time period". Program No. Again, push the [SET] button to set the left-side number at "08" by SCHEDULE pressing the [+] button. At that moment, flashing of the display will change to the middle numbers which control "red"...
-
Page 51: Setting The Weekly Program For External Time Signal
Setting the Weekly Program for External Time Signal You can set weekly time schedule for external signal up to 48 programs. Each program can have different duration. Push the [SETTING START/END] button before you start setting. At that moment, " "... - Page 52 MO TU WE In case of the example, push the [+] WEEKLY or [-] button to set "9" and push the PROGRAM FOR EXT. [SET] button. At that moment, SIGNAL flashing of the display will change from "Hour" to "Minute". FUNCTION MO TU WE Push the [+] or [-] button to set...
- Page 53 Confirming the Weekly Program Refer to the Step 1 and 2 in the previous setting section. Every time you push the [+] button, the program number changes (01 02 03 ...) and you can confirm each setting. After confirming the settings, push the [SETTING START/END] button to get out of setting mode.
-
Page 54: Setting The Auto Daylight Saving Change
Setting the Auto Daylight Saving Change Daylight saving time function D.S.T. execution time At 2:00 a.m. on the first day of summer time, the clock automatically gains one hour to show 3:00 a.m. When 2:00 a.m. comes on the last day of the summer time period, it loses one hour and returns to 1:00 a.m. - Page 55 Push the [SETTING START/END] button before you start setting. At that moment, " " is indicated on a display and you go into setting mode. Push the [FUNCTION] button for 2 seconds. " " mark means Month Date Year "starting date" setting. DAYLIGHT Once a number on the display starts SAVING...
- Page 56 " " mark means "ending date". Set the "ending date". Month Date Year Next, push the [SET] button. At that moment, flashing of the display will DAYLIGHT change from "Year" to "Month". SAVING TIME FUNCTION Month DAYLIGHT SAVING TIME FUNCTION Month Push the [+] or [-] button to set at "10"...
-
Page 57: Deleting The Daylight Saving Time Settings
Deleting the Daylight Saving Time Settings To delete and cancel the daylight saving time settings, change the display of "Month" of the starting setting to " ". Example To change "April 3, 2005" of "starting date" and delete daylight saving time settings. Push the [SETTING START/END] button before you start setting. -
Page 58: Selecting The Language
Setting the Language This function is available if weekly or bi-weekly ending has been selected in the pay period setting. The print language can be selected from the following three. Push the [SETTING START/END] button before you start setting. At that moment, "... -
Page 59: Setting The Password
Setting the Password When the password is set, you are asked to enter it. If the password you entered does not coincide with the setting, you cannot change the setting values. You may select any 4-digit number from 0001 to 9998 as your password. Note: Numbers "0000"... -
Page 60: How To Change Settings When The Password Is Set
How to Change Settings When the Password Is Set Once the password is set, you are requested to enter the current password before changing any settings. Push the [SETTING START/END] button before you start setting. At that moment, " " is indicated on a display and you go into setting mode. Example The current password is "1234"... -
Page 61: Canceling The Password
Canceling the Password The code "0000" must be entered to cancel the password. Push the [SETTING START/END] button before you start setting. At that moment, " " is indicated on a display and you go into setting mode. Example The curent password is "1234" and cancel it. Push the [FUNCTION] button for two seconds. - Page 62 Push the [+] or [-] button to set at "00" and then, push the [SET] button. At that moment, the display will change from flashing to steady, PASSWORD and the setting is now completed. FUNCTION Date Push the [SETTING START/END] button to get out of setting mode.
-
Page 63: Printing Hours Summary
5. Printing Hours Summary With this function, you can check hours summary per card number and total on card. You can select "hours summary" for either the active time cards in use or the cards which were already closed in the previous/current period. Push the [SETTING START/END] button before you start setting. -
Page 64: Printing List Of Active Card Numbers
6. Printing List of Active Card Numbers With this function, you can check what numbers of time cards are used in the current pay period. Push the [SETTING START/END] button before you start setting. At that moment, " " is indicated on a display and you go into setting mode. Page No. -
Page 65: Printing List Of Program Settings
7. Printing List of Program Settings With this function, you can check what rules are currently set in the clock. Push the [SETTING START/END] button before you start setting. At that moment, " " is indicated on a display and you go into setting mode. Page No. -
Page 66: Additional Features
8. Additional Features Override Printing When you select "Time Zone" rule for calculation, printing line will change to the next line at the "Day Advance Time". However, "OVERRIDE" function enables the punch out time records to the same line of the previous working day even if exit punch time crosses the "Day Advance Time". -
Page 67: Card Transfer
Card Transfer When the card that you are using becomes full before reaching the "Pay Period" day, it will show "END" on the display and the buzzer will sound. When the "END" appears, you can use the "Card Number Transfer" mode to transfer the card and have a new card take over from the old one. - Page 68 Supervisor's Operation In this mode, you can transfer the card numbers by pushing buttons as well as inserting time cards. Open the front cover and push the "SETTING START/END" button. At that moment, " " is indicated on a display. The number Push the "CARD TRANSFER"...
-
Page 69: Card Resetting
Card Resetting When you want to reset the card manually before reaching the "Pay Period" day, you can go into the "Card Resetting" mode. Example The number of the card you want to reset is "003". Push the [SETTING START/END] button before you start setting. At that moment, "... -
Page 70: Resetting
9. Resetting To return all settings to their factory defaults. Please note that all settings will be deleted and will revert to the factory defaults when the reset switch is pushed. To make new settings, please refer to setting section. Note: Pressing the reset switch does not reset the time cards. -
Page 71: Installing The Optional Battery Backup
10. Installing the Optional Battery Backup This option allows for printing without AC power. Order Acroprint Part Number 58-0108-000, optional battery pack, for this feature. Remove the cover of the battery compartment on the back of the unit by pushing down the top side of the cover, and then release it from the two clasps. -
Page 72: Connecting External Signal Control
11. Connecting External Signal Control If external signal(s) are required, the addition of a relay (not supplied) will be necessary. Please consult your local electrician. When a signal is activated the internal contacts close completing the circuit. These internal contacts are "dry" and supply no voltage. Voltage applied to these contacts must not exceed 30 volts. - Page 73 Remove two screws holding the wire clamp. Wire clamp Insert wires into two terminals for external time signal relay and tighten both screws. Then, tuck away the cord and place it as shown in the figure. Secure the wire clamp with screws. Insert the cover into the slot as shown on the left.
-
Page 74: Troubleshooting
12. Troubleshooting Error No. appears Error contents Action E-00 CPU error Contact the store from whom you bought the unit. E-01 The remaining life of lithium battery for memory back-up is short. E-03 The front and back of the time card inserted is Correctly insert the time card. -
Page 75: Specifications
Acroprint part number 58-0108-000 Lithium battery CR2450THC Time cards Acroprint time card (Form No. ES1010) External time signal Time Program (External Alarm device: No voltage signal output) Temperature: -5˚C to +45˚C, +23˚F to +113˚F Humidity: 20 to 80%, no condensation The unit operates normally at temperatures of 5˚C or below, but the... - Page 76 5640 Departure Drive Raleigh, North Carolina 27616 USA (919) 872-5800 In USA (800) 334-7190 Fax: (919) 850-0720 www.acroprint.com Q0170-6120-1 P/N 06-0331-000 Rev. A...
Need help?
Do you have a question about the ES1000 and is the answer not in the manual?
Questions and answers