Table of Contents
Advertisement
Quick Links
The Lead in Sing-Along Entertainment
CAUTION:
To assurethisplayerwillworkat itsbest please
and keepforfuture reference.
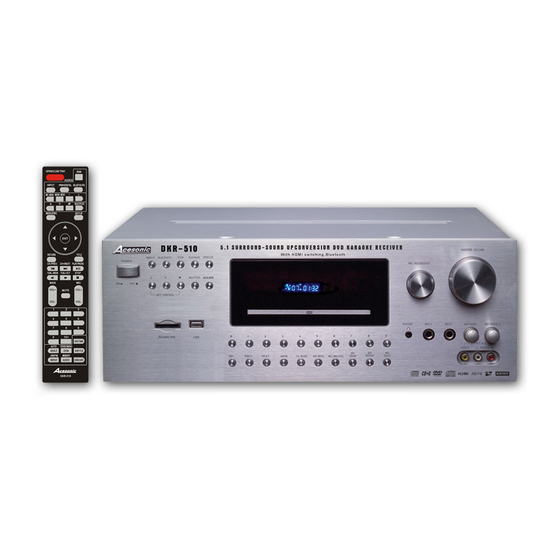
DKR-510 640 WATTS 5.1 SURROUND-SOUND
UPCONVERSION DVD KARAOKE RECEIVER
WITH HDMI SWITCHING,BLUETOOTH
USER'S MANUAL
DKR-510
5.1 SURROUND-SOUND UPCONVERSION DVD KARAOKE RECEIVER
INPUT
BLUETOOTH
STOP
PLAY/PAUSE
OPEN/CLOSE
b
MULTIPLEX
MUSIC.MENU
KEY CONTROL
0
SD/MMC/MS
USB
IPod Dock
10+
CD+G
,
-
-
with HDMI switching, Bluetooth, IPod Dock
5.1CH
1
2
3
4
5
6
7
8
MIC
MIC
MIC
PREV
NEXT
AM/FM
CH MODE
MIC MENU
MIC1 / MIC2 VOL
REPEAT
ECHO
DELAY
www acesonic com
www acesonic com
MASTER VOLUME
MIC VOL / ADJUST
PHONE
MIC1
MIC2
MIC BASS
MIC TREBLE
9
FRONT AUX
VIDEO
L
AUDIO
R
CD+G
BLUETOOTH
BLUETOOTH
.
.
.
.
CH-/PREV. CH+/NEXT
TUN.-/REW TUN.+/F.F
Advertisement
Table of Contents

Related Manuals for Acesonic DKR-510


Summary of Contents for Acesonic DKR-510
- Page 1 MIC TREBLE SD/MMC/MS FRONT AUX VIDEO AUDIO IPod Dock PREV NEXT AM/FM CH MODE MIC MENU MIC1 / MIC2 VOL REPEAT ECHO DELAY CD+G BLUETOOTH CD+G BLUETOOTH www acesonic com www acesonic com CAUTION: To assurethisplayerwillworkat itsbest please and keepforfuture reference.
-
Page 2: Table Of Contents
CONTENT 1. Safety Cations 2. Brief Instruction of Controls 3. Preparations 3.1 Accessories 3.2 Battery installation of remote controller 3.3 Connection cable 3.4 Video conversion 4. Speaker connection 5. Connection 5.1 HDMI connection 5.2 External DVD/VCR/HDP/AUX connection 5.3 Hooking up a DVD recorder 5.4 Hooking up a TV monitor 5.5 Hooking up a AV amplifier 5.6 Connecting AM/FM antennas... -
Page 3: Safety Cations
1. Safety Cautions CAUTION RISK OF ELECTRIC SHOCK DO NOT OPEN ㄩ CAUTION TO REDUCE THE RISK OF ELECTRIC SHOCK, DO NOT REMOVE COVER (OR BACK). NO USER SERVIC- EABLE PARTS INSIDE .REFER SERVICING TO QUALIFIED SERVICE PERSONNEL. The lightning flash with arrowhead symbol,within an equilateral triangle, is intended to alert the user to the presence of uninsulated "dangerous voltage"... -
Page 4: Brief Instruction Of Controls
2.Bri f instruction of control FRONT PANEL DKR-510 5.1 SURROUND-SOUND UPCONVERSION DVD KARAOKE RECEIVER MASTER VOLUME with HDMI switching, Bluetooth, IPod Dock INPUT BLUETOOTH STOP PLAY/PAUSE OPEN/CLOSE MIC VOL / ADJUST 5.1CH MULTIPLEX MUSIC.MENU KEY CONTROL MIC BASS MIC TREBLE PHONE MIC1 MIC2... - Page 5 REAR PANEL SUB WOOFER SURROUND SOUND SPEAKERS 13 14 15 16 17 18 19 20 1. FM/AM ANTENNA IN Use FM/AM antenna to connect to these jacks. 2. HDMI OUTPUT Use HDMI cable to Connect to external video device like monitor with HDMI input. 3.
- Page 6 Remote Control Function 1.OPEN/CLOSE TRAY - To switch to DVD mode, or open/close tray. 2.YPbPr/DIGITAL INPUT- Cycles though YPbPr 1(w/coaxal audio), YPbPr 2(w/ optical audio), Coaxal audio only, and Optical audio only. 3.OTHER INPUTS Cycles though 5 different inputs: DVD/USB/CARD, iPod, AM/FM, Front AUX, AUX 1, and AUX 2.
-
Page 7: Preparations
3. Preparation 3.1 Accessories Remote Control 1 pc Antenna 1 pc Operating Instruction 1 pc Power wire 1 pc (Check contents after opening) NOTE: 1. Put the lead attachment plug into the socket of INPUT VOLTAGE, and ensure it is insert tight. 2.The consumption voltage of local factory setting is 110 V/60Hz. -
Page 8: Video Conversion
3.4 VIDEO Upconversion Chart This feature will automatically transfer all formats of video signal into the formats that output the video signal of DKR-510 to monitor. Four types of video signal for the video input / output circuit of DKR-510 Digital video signal: HDMI Analog video signal: Component video, S-video and video HDMI... - Page 9 Connection diagram of DKR-510 to 5.1 chanal speakers Please check and connect to the LEFT / RIGHT channel and positive (red) and negative (black) of DKR-510. Make sure the connection of channel and the two poles are correct. Don’t touch the speaker terminals to avoid electric shocks when the power is on. Front Surround Right...
-
Page 10: Connection
5.Audio & Video Connection 5.1 HDMI connection TV,MONITOR HD DVD Satellite Tuner INPUT OUTPUT OUTPUT OUTPUT HDMI HDMI HDMI HDMI SUB WOOFER SURROUND SOUND SPEAKERS 5.2 External DVD/VCR/HDP/AUX connection TV,MONITOR DVD/VCR/HDP/AUX OUTPUT VIDEO S-VIDEO AUDIO OPTICAL COAXIAL YPbPr INPUT HDMI SUB WOOFER SURROUND SOUND SPEAKERS... -
Page 11: Hooking Up A Dvd Recorder
5.3 Connect to a DVD Recorder DVD RECORDER INPUT OUTPUT INPUT OUTPUT INPUT OUTPUT VIDEO VIDEO AUDIO AUDIO S-VIDEO S-VIDEO SUB WOOFER SURROUND SOUND SPEAKERS 5.4 Connect to a TV monitor TV MONITOR INPUT VIDEO S-VIDEO YPbPr SUB WOOFER SURROUND SOUND SPEAKERS... -
Page 12: Hooking Up A Av Amplifier
5.5 Hooking up a AV Amplifier AMPLIFIER AUDIO INPUT SUBWOOFER CENTRE SURROUND FRONT SUB WOOFER SURROUND SOUND SPEAKERS 5.6 Connecting AM/FM Antennas FM wire antenna (supplied) AM loop antenna (supplied) SUB WOOFER SURROUND SOUND SPEAKERS... -
Page 13: Amplifier-Function
6. Amplifier Function 1.Be sure cut off power, connecting source outputs with corresponded input jacks. 2.Turn on the power, waiting 3-4 seconds till the speakers function connected. 3.Input select Select audio source by press the key INPUT on the front panel, then adjust the knob MIC VOL/ADJUST. -
Page 14: Disc Player Function
7. Disc Player Function 7.1 Disc Player Basic operation Press PREV key: Once all the connections and settings have been Prev PREV done, the unit is ready for normal use. Prior to playback, make sure the following operations have been carried out. 1. -
Page 15: Dvd Functions
7.2. DVD Function 7.2.6 Time 7.2.1 Title W h e n p l a y i n g a D V D , p r e s s T I M E k e y . T h e f o l l o w i n g w i l l b e d i s p l a y e d : Press TITLE key to get title menu. - Page 16 7.2.9 Angle 7.2..8 Repeat During a sport match, concert or theatrical In DVD mode, press REPEAT key. The following program, press ANGLE key continually on will be displayed: remote controller to select various angles to view the same image REPEAT Repeat Chapter (This operation works only for the disc with multi angle encoded).
-
Page 17: Setting Of The Disc Player
7 . 3 S e t t i n g o f t h e D i s c P l a y Note: 1).lrrespective of what screen format you P r e s s t h e S E T U P b u t t o n o n t h e r e m o t e have selected, if your screen displays in c o n t r o l l e r , t h e S E T U P M E N U ( m a i n ) 4:3 format, the picture will be shown in that... -
Page 18: Audio
Bass Management HD Resolution Follow the operation instructions stated in Follow the operation instructions stated in ※ Audio in combination with desired option ※ Video in combination with desired option in the following figure. in the following figure. Language Bass Management Aspect Ratio : 4:3 View Mode... -
Page 19: Rating
Surround Speakers Surr. Delay Follow the operation instructions stated in ※ Follow the operation instructions stated in ※ Audio in combination with desired option Audio in combination with desired option in in the following figure. the following figure. Surround Speakers Surr. -
Page 20: Operation Of Mp3 Function
8.Operation of Mp3 function Mp3 is an audio compression mode using Level 3 of the international standard MPEG, whereby sound signal is compressed in a rate of 12:1 A Mp3 disc can record music for play of over 600 minutes or record over 170 songs, rivalrous CDs in sound quality. To play a Mp3 disc Select the track using numbered buttons 1.Follow the basic operating instructions to insert a Mp3 disc, this machine will start to search the... -
Page 21: Radio Application
12.RADIO application 1. Before using radio function, you must attach the supplied antenna. Adjust the antenna to obtain optimum reception. Sel ect i n p u t f u n c t i o n . "RADIO 2. Press AM/FM button on the front panel or on the remote control, to select AM band or FM band. 3. -
Page 22: Bluetooth Function
14. BLUETOOTH function ACE DKR-510 ACE DKR-510. ACE DKR-510 Amplifier ACE DKR-510 c. Press BLUETOOTH key on the DKR-510 front panel or remote control to display ON. Amplifier. - Page 23 ACE DKR-510 H. Press BLUETOOTH key on the DKR-510 front panel or remote control to display ON.
- Page 24 Note: A system can be connected with only BLUETOOTH device each time. efore se rching for a new device, please cancel the existing connection.
-
Page 25: Trouble Shooting Guide
Sometimes, the troubles lie within another component. Remember to try inspecting other component and electrical appliances in use. If the trouble can not be rectified even after exercising the steps list below, call Acesonic servic center +1(626)820-0670 to inquire about repairs. Suggested Solution Problem... -
Page 26: Technial Specification
5.1 channel output X1 AC-3 output AC 110V / 60Hz / AC 220V/50Hz Power Voltage ≒345W Power consumption Amplifier/DVD Size 435x165x420mm 12kg Amplifier/DVD Weight Specifications are subject to change without notice. Acesonic Corp. City of Industry CA, U.S.A. Sale:+1-626-820-0608 Technicians: +1-626-820-0605 www.acesonic.com...
Need help?
Do you have a question about the DKR-510 and is the answer not in the manual?
Questions and answers