Table of Contents
Advertisement
Advertisement
Table of Contents

Related Manuals for Acesonic 400 Disc DVD CD G Karaoke Changer DGX-400


Summary of Contents for Acesonic 400 Disc DVD CD G Karaoke Changer DGX-400
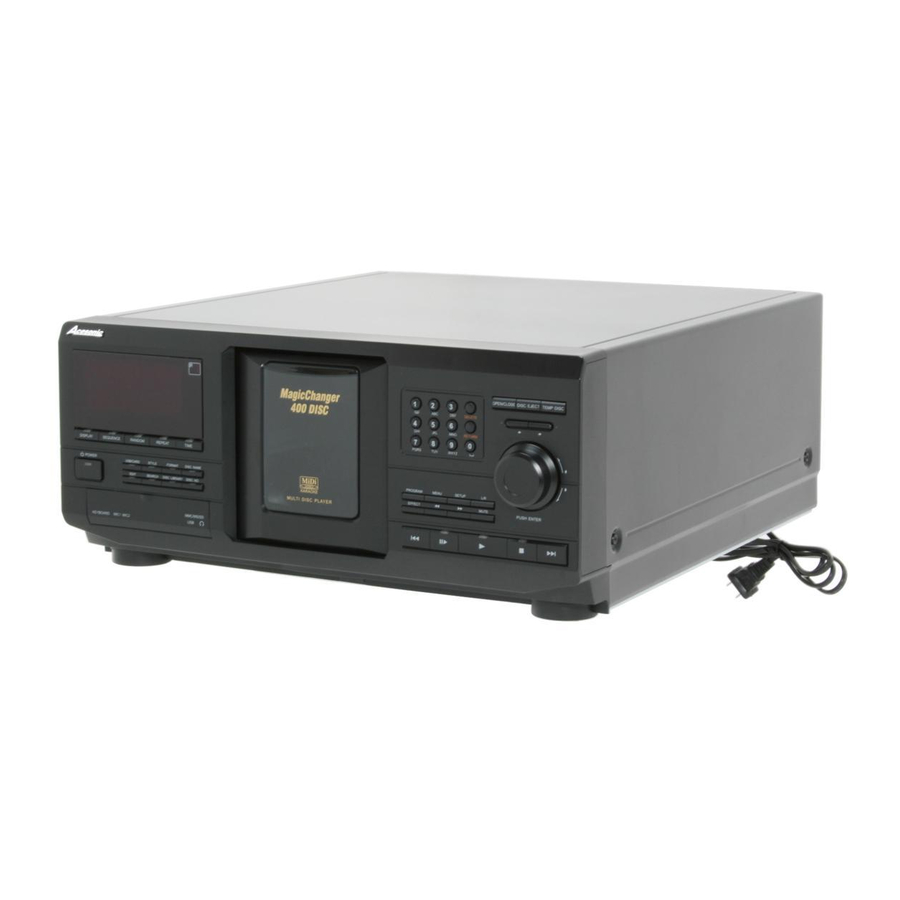
- Page 1 400 Disc DVD CD G Karaoke Changer With USB /MMC/ SD/M Reader USER MANUAL CAUTION: www.acesonic.com To ensure your player will work at its best, read this manual carefully before attempting to operate the machine. Keep this manual in a safe place for future reference.
-
Page 2: Accessories
**DESIGN AND SPECIFICATION ARE SUBJECT TO CHANGE WITHOUT NOTICE Confirm the following items upon opening the box: 1. User Manual 2. One AV cable 3. One remote control Re cord your pr oduct i nfor ma ti o n i n t h e t ab l e p ro v id ed b el ow an d ref er to it whene ver co nt a ct in g yo ur d ea le r ab ou t y o ur pu rchas e. -
Page 3: Feature And Capabilitie
Features and Capabilities Ma i n F u n c t i on s *T h e u n i t n o t onl y sto res 4 00 di sc s, bu t it can also manag e eac h in d i v i d u a l di scs' info rmat io n . -
Page 4: Table Of Contents
A c c e s s o ri e s - - - - - - - - - - - - - - - - - - - - - - - - - - - - - - - 1 F e a t u r e s an d C apab ili ties - - - - - - - - - - - - - - - - - - - - - - - 2 T a b l e o f Co nte nts - - - - - - - - - - - - - - - - - - - - - - - - - - 3 - 4 S a f e t y P reca utio n s - - - - - - - - - - - - - - - - - - - - –... - Page 5 Pl a yi n g Dis cs - - - - - - - - - - - - - - - - - - - - - - - 33- 4 8 P l ay i n g M IDI Di sc s - - - - - - - - - - - - - - - - - - - 33 - 3 7 C o n fi r ming Pl ayb ack M o d e - - -- - - - - - - - - - - - - - - 3 8 S ea r c hing f or a S cen e - - - - - - - - - - - - - - - - - 39 - 4 0 R e pe a t P lay bac k - - - - - - - - - - - - - - - - - - - - - - 41...
-
Page 6: Safety Precautions
Safety Precautions Wa r n i n g: T o r ed uce th e ris k of f ir e or elect ric s hock, do n ot ex pose t h i s a p para tus to rain or mo isture . To avoi d ele ctrical shoc k, d o n o t op en th e cab inet . -
Page 7: Note
*Any disc that is not listed above will cause the player to display “NO DISC” in the DISPLAY WINDOW. Future media and disc formats maybe supported with firmware upgrade, when available. *Encoding methods of some media formats may affect the playback (e.g. Unable to fast forward or fast backward or load time). -
Page 8: Maintenance
1 . K e ep in g Your Unit Dust proof Y o u s houl d kee p the f ront cover clos ed in case dust ente rs th e r o t a r y tab le. 2 . -
Page 9: Disc Information
This player can play CD-G Disc mark G R A P H I C S Sound Sound Sound Content /Image Time 74 min. 74 min. 12cm 12cm 12cm Dimensions PBC menu: It is recorded in VCD2.0 disc,showing the content of the disc and convenient for customers to look up program CD+G: Audio with... -
Page 10: Front Panel
DISPLAY SEQUENCE RANDOM REPEAT POWER USB/CARD STYLE FORMAT EDIT SEARCH DISC LIBRARY 5 6 7 8 9 10 11 12 43 44 45 1. DISPLAY button 2. POWER button 3. SEQUENCE button: select the disc format to enter the sequence play mode; select "CLOSE"... -
Page 11: Rear Panel
P O W E R CLASS 1 LASER PRODUCT CAUTION CAUTION:TO REDUCE THE RISK OF ELECTRIC SHOCK DO NOT REMOVE COVER NO USER-SERVICEABLE PARTS INSIDE REFER SERVICING TO QUALIFIED SERVICE PERSONNEL 1. FRONT RIGHT SPEAKER OUTPUT 2. FRONT LEFT SPEAKER OUTPUT 3. -
Page 12: D I S P L A Y Windo
Disc format PBC mode Sequence mode Favorite disc Random mode Disc D I S C R A N D C O N T FAVORITE DVD S V CD-G P R O G A - B P B C MIDI WMA MP3 MP4 1DISC HDCD A L L... -
Page 13: R E M O T E C Ontr
1. POWER button 2. OPEN/CLOSE button: open/close the front cover. 3. MUTE button: open/close the audio output. 4. L/R button: switch the left and right 5. GOTO button: select the playing start-point randomly by GOTO function. 6. SLOW button: slow the speed of playing forward. 7. -
Page 14: Remote Control Operation
Remote Control Operation Power source for the remote controll. The remote control is powered by two Caution for battery replacement. Load the new batteries with their polarities (+ and -) aligned correctly. Keep the batteries from heat source to avoid causing short-circuit. If you do not intend to use the remote control for a long period of time, please remove the batteries and store them in a cool and dry Remove the spent batteries immediately and dispose of... -
Page 15: Hooking Up The Player
Hooking Up The Player Connecting to TV with AV input VIDEO S-VIDEO Yellow Connecting to S-VIDEO Connecting to AUDIO L Connecting to AUDIO R COAXIAL SCORE IN RS 23 2C Remote Receiver of Outer Connect to PC's serial port(RS232) Note: 1.Refer to the user manual to connect the player to the TV and amplifier.. - Page 16 Hooking Up The Player Connecting to digital output Connecting to TV VIDEO Front left speaker Back left speaker Note the optical or coaxial output jack can't output MIDI music. MIDI music only can be output by mix Yellow R S 2 3 2 C Connecting to S-VIDEO of TV Yellow...
- Page 17 Hooking Up The Player Connect the player to a TV with AV input, an amplifier with karaoke score out and AC-3 digital audio. Yellow COAXIAL SCORE IN OUTPUT SUB WOOFER RS232 C Connecting Connecting to S-VIDEO to TV VIDEO VIDEO S-VIDEO Yellow Front...
-
Page 18: Back Panel
Hooking Up the Player 1.Karaoke Setup Yellow COAXIAL SCORE IN White Connecting to TV video Connecting to AUDIO L RS232 C Connecting to AUDIO R Yellow White AUDIO VIDEO SENSOR MIC RECEIVER SENSOR OUTPUT Note: If you connect a microphone to the score-in jack on the back panel of the player, the MIC jacks on the front panel will be Y/Y/G Cr/Pr/R... - Page 19 Hooking Up The Player 3.Connecting to amplifier. Connecting to TV VIDEO Yellow AUDIO VIDEO Note: If you connect a microphone to the score-in jack on the back panel of the player, the MIC jacks on the front panel will be Yellow White COAXIAL...
-
Page 20: P R O P E R Op Era Tio
Proper Operation Connect the player to the TV and the stereo amplifier instructions operate the player 1.Switch the input selector on your TV so that the signal from the player appears on the TV screen. 2.If you are using a stereo amplifier, please turn the power 3.Press the main... -
Page 21: Managing Discs
Managing Discs 1.Inserting Discs 1.1 Press the [OPEN/CLOSE] button open automatically lease wait. You can press [OPEN/CLOSE] again to close the front cover. When VFD displays "CLOSE", the front cover has been closed completely. DISC 1.2 After opening the front cover, you can rotate the knob on the front panel to make the rotary table turn until the disc slot where you want to insert a disc is at the loading position of the front cover, VFD displays "NEXT". -
Page 22: R Em Ov Ing D Is Cs
Managing Discs 2 . R em ov ing D is cs 2 .1 P ress [ D IS C EJ E C T] w he n t h e f r o n t c o ve r i s c l os e d ; t h e V F D w i l l d is pla y “O P EN ”... -
Page 23: Playing Temporary Disc
Managing Discs 3.Playing Temporary Disc 3.1 Press [TEMP DISC] when the front cover is closed, he rotary table will turn and send disc 400 to the playing position. If disc 400 doesn't exist, the screen displays "NO DISC". 3.2 Press [TEMP DISC] when the front cover is open, the rotary table will turn and send the disc slot of 400 to the loading position of the front cover. -
Page 24: Program Play
Managing Discs Select "CLOSE" in the menu, sequence equence play is available The sequence play is enable after the player has finished fore-reading all discs. 6.Program Play You can play the playlist function; it is only available to the disc which contains more than two playbills. 1.Press [PROGRAM]. - Page 25 Managing Discs 7.1.2 Press the number buttons to input the disc number which you want to select. The VFD displays the disc number you input. If the disc No. you input exceeds 400, the first digit will change to zero automatically. You can also change the disc number either by rotating the knob or pressing the direction button .
- Page 26 Managing Discs 7.2.3 Press up/down button you want to select. You can search the disc with disc name by pressing the [SEARCH] button .(Please refer to "search by disc name") 7.2.4 Press [ENTER] or the knob, close the current menu: ♂...
- Page 27 Managing Discs 7.3.5 Press up/down button to the disc name you want to select. You can search the disc with disc name by pressing th [SEARCH] 7.3.6 Press the button of [ENTER] or the knob, close the current menu, ♂ If the front cover is closed, the player will set the disc you select to the playing position.
- Page 28 Managing Discs 7.4.3 Press the up/down button the style you want to select. 7.4.4 Press [ENTER] to enter the disc name list, it contains all disc names belonging to the current style type, the VFD displays the disc name which the cursor points to. 7.4.5 Press up/down button the disc name you want to select.
- Page 29 7.5.3 Press up/down button to the disc format you want to select. 7.5.4 Press [ENTER] to enter disc name list belonging to the current disc format the cursor points to. 7.5.5 Press up/down button the disc name you want to select. You can search the disc with disc name by pressing [SEARCH].
-
Page 30: M A N A G In G The Fav Orit Es Lis T
8.Managing the Favorite List 8.1 Add Disc into the Favorite List When you select a disc by Disc Name, Attach, Style or Disc Format, you can add the disc which the cursor points to into the favorite list when you are in the step of "selecting a disc name"... -
Page 31: Editing Disc Information
Managing Discs 9.The Function of Searching a Disc by Disc Name 9.1 When you select a disc by Disc Name, Attach, Style or Disc Format, you can enter the interface of "search by disc name" by pressing the [SEARCH] the state of selecting a disc name. 9.2 Press the number buttons to input char is wrong you can press the [DELETE] is in the front of the cursor;... - Page 32 Press the number buttons to input disc No. f the disc No. you input has already been edited, the system will show all information of this disc automatically. You can change the disc number by pressing button left/right or rotating the knob number will appear.Press the number buttons to input the disc name, f the content of inputis wrong, you can press [DELETE] to delete the char in the front of the cursor.
- Page 33 1 .S wi tch to a cer t a in d a ta s ou r c e an d p r e s s [E N T E R ] , t h e s y s t em w i l l s wi t c h t o pl ay t he d at a so u r ce y o u s e le c t .
-
Page 34: Pl A Yi N G Dis
1 . P la yi ng MI DI d isc s (MIDI dis cs not inc luded w ith p l a yer ) Y ou c an s e le c t MI D I d i s cs t h a t a r e p r o v i d e d b y A c e s o ni c a c c o rd i n g t o y ou r tast e s. - Page 35 1.4 Melody Press [MELODY] to adjust the setup of melody. If you press [MELODY] If you press [MELODY] The function of this button is MELODY only in MIDI disc, this button doesn't work if the song vocal . 1.5 Male/Female Tone Press the [M/F] button Press the [M/F]...
- Page 36 Playing Discs 1 .1 0 Re p ea t : R e p la y i n g t h e c u r r en t s o n g P ress [R E P EA T ] ; T V sc r e en wi l l d i s pl a y “REP 1 ”, an d r ep l a ys t h e cu r r e n t so n g .
- Page 37 1.11.4 Singer Type: includes Chinese Mainland Male Singer / Female Singer/Band, Hongkong and Taiwan Male Singer /Female Singer/Band, Oversea Male Singer/Female Singer /Band and Other. You can search songs by singer type, TV screen displays as [1.11-6] 1.11.5 Language Type: includes Chinese, Cantonese, Formosan, English and Other.
- Page 38 1.11.14 Score Setup: includes Score Switch, Difficulty Level, Vocal Switch and Random Score. Score Switch: Open/Close The Difficulty Levels of Singing: includes Beginner (easier), Familiar (easy), Normal, Expert(hard) and Master(harder). Vocal: Open/Close Random Score: Open/Close. 1.11.15 Language Setup: you can choose the language according to your 1.12 Adjust the volume of MIC, ECHO and 3D EFFECT 1.12.1 Switch to sub-menu MIC1 by pressing [EFFECT] repeatedly, TV screen displays as [A]...
-
Page 39: C O N Fi R Ming Pl Ayb Ack M O D
2.Confirmi Play back 2.1 In DVD Mode Indicate the status of ongoing time, title and chapter. Press [DISPLAY] the first time, TV screen displays as [A] Disc tpye Track # TT 03/03 VIDEO Press the [DISPLAY] 1/2 ENG anguage Press [DISPLAY] for the third time, be canceled. - Page 40 3.Searching the Image You Want (This function is only available for the discs such as DVD, SVCD, VCD and MPEG4) 3.1 In the playing mode, you can search the image you want forward or backward by pressing [ ] or [ Search Forward Fast Press [ ] for the first time, TV screen displays "FORWARD X2...
- Page 41 3.2 Search for the scenes using Press [GOTO], TV screen displays as [A] Move the cursor to the position of hour/minute/second "00:00:00" by pressing [LEFT] or [RIGHT], then input the time you need Switch to play the scenes or [PLAY] or wait for a few seconds. When the player plays DVD disc , functions such as select title, select chapter and select time are available, TV screen displays as [B] TITLE...
-
Page 42: R E Pe A T P Lay Bac K
Press [PAUSE/STEP] for the first time, TV screen displays " When the player is PAUSE , the image is still and the sound will disappear. Press [PAUSE/STEP] for the second time, TV screen displays "STEP When the player is in the status of STEP, you can press [PAUSE/STEP] repeatedly to search the image you want step by step earch. -
Page 43: C O Mm O N B Utt On
4.3 Playing the Selected Section Repeatedly Press the [A-B] button repeated section you want. ress [A-B] for the second time to set the end point of the repeated section you want. Press [A-B] for the first time, TV screen displays "REPEAT A-" Press [A-B] for the second time, TV screen displays "REPEAT A-B"... -
Page 44: Zooming The Image
6.Zooming the Image You can use the ZOOM function To different discs , the related operations are different. Press [ZOOM] for the first time, TV screen displays as [6-1]. The image will be zoome d in 2x Press [ZOOM] for the second time, TV screen displays as [6-2]. -
Page 45: Chang Ing The Angle
7.Chang the Angle Some discs can be enjoyed from different angles during play is only available for disc First, make sure you have opened the DISPLAY Press [ANGLE], TV screen displays as[A] Display the current Display the total amount of angle in the disc The player will change an angle each different discs, the amounts of angles which can be chosen are different. -
Page 46: Practice Songs
f you don't want to display subtitle subtitle language by pressing [SUBTITLE] a few times , TV screen displays as[D] 10.Use Select Menu VCD, SVCD The function of MENU (for VCD and SVCD discs, menu is also named as PBC) All the information in the disc can be selected in the menu. - Page 47 13.Set ting the Sound Effect (This function is available for DVD, SVCD, VCD, CD, MP3, MPEG4) Press [EFFECT] to enter the effect menu, use the buttons and [ENTER] to set each item in effect menu one by one. sound 13.1 The Surround tems such as CONCERT, CHURCH, PASSIVE, WIDE, LIVE can be selected.
-
Page 48: F Un C Ti On Se Tu
14. Function Setup 14.1 System Setup Press the [SETUP] button TV SYSTEM: NTSC, PAL60, PAL, AUTO. SCREEN SAVER: ON/OFF VIDEO: INTERLACE-YUV, P-SCAN, YPBPR, S-VIDEO, PC-VGA TV TYPE: 4 3PS ,4 3LB PASSWORD: 0000 RATING: NO ADULT, KID SAFE, VIEW ALL DEFAULT: RESTORE EXIT SETUP 14.2 Language Setup... -
Page 49: Speaker Setup
14.4 Video Setup Press [SETUP], select the function of video setup , TV screen displays as [14-4] BRIGHTNESS: setup image brightness. CONTRAST: setup image contrast degree. HUE: setup image HUE. SATURATION: setup image saturation. EXIT SETUP 14.5 Speaker Setup Press [SETUP], select speaker setup , TV screen displays as [14-5] DOWNMIX: LT/RT, STEREO, VSS, 5.1CH, OFF SUBWOOFER: Subwoofer OFF ON... - Page 50 The remote does not work. There is no image, no color The image is rolling vertically There is no sound There is no sound from the microphone There whistl ing noises when insert the microphone Video/I mage not clear When playing a some place , the player cannot continue The disc does not play Abnormal sound...
-
Page 51: Specification
Power Consumption Dimensions Weight City of Industry CA,U.S Sale:(626)820-0645 Technicals:(626)820-0670 2.0(+0.2 -1.0) (V) 20Hz-20kHz ≡80(dB) (dB) ≡70(1kHz) ≒-60(1kHz) ≡70(1kHz) ≡250 AUTO/NTSC/PAL 1.0 0.2 (Ohm) 90-250V~,50/60Hz ≒25W (m center meter) 430(L) X 535(W) X 188(H) Acesonic Corp. 161 S. 8th Ave.
Need help?
Do you have a question about the 400 Disc DVD CD G Karaoke Changer DGX-400 and is the answer not in the manual?
Questions and answers