Table of Contents
Advertisement
User Manual
NOTE: To ensure this system works safely and to its fullest potential, please read the User Manual
carefully before use and keep it handy for future reference.
CAUTION:
To assure this player will work at its best, please
read this user's manual carefully before operation
and keep for future reference.
DGX-212
®
HDMI Multi-Format Karaoke Player
with 4X CDG to MP3G Converter with Digital Recording
v.1.0
www.acesonic.com
Advertisement
Table of Contents
Troubleshooting

Related Manuals for Acesonic DGX-212


Summary of Contents for Acesonic DGX-212
- Page 1 NOTE: To ensure this system works safely and to its fullest potential, please read the User Manual carefully before use and keep it handy for future reference. www.acesonic.com CAUTION: To assure this player will work at its best, please read this user’s manual carefully before operation...
-
Page 2: Table Of Contents
(“ripping”) CD+G files to the MP3+G format. If you need speakers or other audio components, they can be obtained from Acesonic, or you can use any standard audio equipment that conforms to contemporary standards. If you are familiar with audio equipment, use the enclosed Quick Start Guide for setup. -
Page 3: Important Information Before You Start
Important Information Before You Before Operation Start About This Manual Compatible Media and File Formats The display window information and On Screen Display (OSD) items are all in UPPER This unit supports the following disc and file CASE letters. formats: DVD, AVI, Video CD, Video CD 2.0 Precautions CD+Graphics, Audio CD, HDCD... -
Page 4: Compatible Video Formats
Before Operation Notes Regarding Discs With some DVDs, the player starts playback automatically after inserting the disc, whether or not PLAYBACK CONTROL is on or off. The image may be poor, noisy or grainy due to defects on the actual disc, and some functions as described in this manual may not be possible on all discs. -
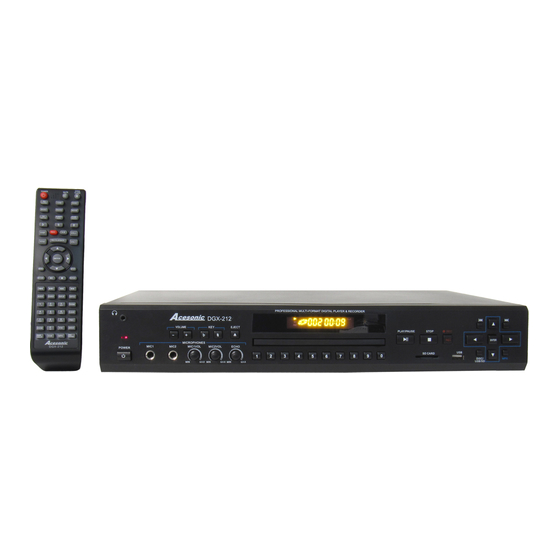
Page 5: Front Panel Functions And Operations
FRONT PANEL FUNCTIONS AND OPERATION: 10 15 1. POWER - Press the button to turn the unit on or off. PREV or NEXT - Press to go to the previous or next track 2. MIC 1 & 2 INPUT jacks - Connects microphones with 1/4 in. plugs. OPEN/CLOSE - Used to open and close disc tray. -
Page 6: Remote Control Functions
Remote Functions 1. POWER BUTTON - Turns the player on or off. 2. SD CARD - Press to change to SD card mode. 3.MUSIC BUTTON - In USB/SD Card mode, use this button to call out all the music files and display on the screen. - Page 7 Remote Functions STEP BUTTON- Press to play the frame step by step. Press the PLAY button once to return to normal playback. 22. STOP BUTTON - Press to STOP playback. 23.RETURN BUTTON - This button is used to return to a menu screen while playing.
-
Page 8: Player Connections
NOTE: Your DGX-212 has a variety of ways to provide you audio and video. The RCA Composite cable is included with the unit, and you can buy cables from Acesonic USA, Inc. to access the unit's HDMI,S- video, Component Video and digital output formats (coaxial and optical). - Page 9 Player Connections Player Connections MAKING THE CONNECTION BETWEEN the PLAYER and 5.1 CH. SURROUND SOUND AMPLIFIERS You can connect this player with 5.1 channel amplifiers as shown below: *NO Microphone audio will be outputted in 5.1 Channel mode Rear Speaker (left) Rear Speaker (right) Subwoofer Speaker (for mid &...
-
Page 10: Basic Operation: Playback
The DGX-212 may support 2.5” external hard drives that do not require an external power source but we cannot guarantee it will support all models. Acesonic recommends using a USB flash drive formatted to FAT32 but due to the many different brands available, we cannot guarantee every USB flash drive will work. -
Page 11: Basic Operation: Karaoke
Basic Operation Karaoke - USING MICROPHONE The system has 2 microphone inputs for connecting up to 2 microphones at once. Karaoke - To recording singing(See Page12 -13): 1. Play MP3, CD,CDG,MP3G or VCD song from disc, MP3, MP3G song from USB or SD card. -
Page 12: Basic Operation: System Setup
Basic Operation SYSTEM SETUP Unload the Disc then: Press to open the SETUP KEY Setup MENU. TV SYSTEM 1) Press ] to choose Direction KEY “TV SYSTEM” 2) Press ] to show Direction KEY Sub-MENU. 3) Press [ / ] to select the from [NTSC/ PAL/PAL60/AUTO] . Direction KEY POWER RESUME 1) Press... -
Page 13: Basic Operation: Language Setup
Basic Operation LANGUAGE SETUP Unload the Disc then: Press to open the SETUP KEY Setup MENU. Press ] to select the Direction KEY “LANGUAGE SETUP”. ub MENU: OSD LANGUAGE AUDIO LANGUAGE SUBTITLE LANGUAGE MENU LANGUAGE OSD LANGUAGE 1) Press ] to choose Direction KEY “OSD LANGUAGE”. -
Page 14: Video Setup
VIDEO SETUP Unload the Disc then: Press to open the Setup MENU. SETUP KEY Press ] to select the VIDEO SETUP. Direction KEY The Sub-MENU BRIGHTNESS - Select from level 0 ~12 CONTRAST - Select from level 0~12 HUE - Select from level -6~+6 SATURATION - Select from level 0~12 SHARPNESS - Select from level 0~8 SPEAKER SETUP... -
Page 15: Recording & Cdg Disc Ripping
BASIC RECORDING OPERATION FOR MP3+G WHAT IS MP3+G An MP3+G file is a karaoke-based file format that consists of two parts, an audio file in MP3 format and a graphics file that displays on-screen lyrics. These two files combined are called an MP3+G file. An MP3+G file will occupy about the same disc space required for a standard CD+G track. -
Page 16: Ripping Cdg Disc Into Mp3G Files
BASIC RECORDING OPERATION FOR MP3+G 4. Next, go to TRACKS, to select one or few or all tracks which you desire to transfer to MP3+G format. Click here if you want to check/uncheck all tracks 5. Go to START, you will see the ripping information. To start the ripping process, press ENTER. There are two status bars showing the progress while ripping. -
Page 17: Other Advanced Operations
Advanced Operations Playing From A Specific Position Repeating Playback Press REPEAT. If you press REPEAT in stop mode, Locating a desired scene from the DVD menu press PLAY to start playback. Each time you press DVD discs generally have their own menus showing the REPEAT, the repeat mode cycles among REP-ALL, REP- contents of the disc. -
Page 18: Creating Song List
Searching by name: Advanced Operations You can search songs by inputting a song name in USB/SD CARD mode after you create the song list file Create Song List: (see Page6, #43 for more detail) 1. In the Disc/USB/SD Card mode, you can have a create your own song list from current MP3/MP3G songs in the disc/USB/SD Card. -
Page 19: Troubleshooting Chart 1
DGX-212. If the trouble cannot be rectified even after exercising the steps listed in the Troubleshooting Charts (pages 18 and 19), call our Acesonic U.S.A. service center at (626) 820-0645 to inquire about technical support. We will make every effort to diagnose and repair your unit, restoring it to full operability. -
Page 20: Troubleshooting Chart 2
Troubleshooting Symptom Possible Causes Karaoke Operations 11. There's no sound from * Only HDMI & RCA mix output will support Karaoke Output. See page 6. the microphone * You need to adjust the volume of microphone. 12. There's feedback and screeching * The microphones are too close to the speakers 13. -
Page 21: Safety, Warnings And Precautions
Safety Warnings & Precautions FOR CANADA/POUR LE CANADA Caution: To prevent electric shock, match the wide CAUTION blade of the plug to the wide slot, and fully insert. RISK OF ELECTRIC SHOCK Attention: Pour eviter les chocs electriques, introduire DO NOT OPEN la lame la plus large de la fiche dans la borne CAUTION: TO REDUCE THE RISK OF ELECTRIC SHOCK. - Page 22 Safety Warnings and Precautions 10. Refer all servicing to qualified service personnel. Servicing is required when the unit has been damaged in any way, such as when the power-supply cord or plug is damaged, liquids have been spilled or objects introduced into the enclosure, the device has been exposed to rain or moisture, the product does not operate normally or it has been dropped.
-
Page 23: Information
Player with Digital Recording 161 S. 8th Avenue One (1) Year Manufacturer Warranty Lifetime Technical Support City of Industry Designed in U.S.A. CA 91746-3208 Technical Support: (626) 820-0645 U.S.A. techsupport@acesonic.com Web site: www.acesonic.com © 2012 Acesonic USA, Inc. All rights reserved...
Need help?
Do you have a question about the DGX-212 and is the answer not in the manual?
Questions and answers