
Related Manuals for GE 45146- - Keypad Transmitter Remote


Summary of Contents for GE 45146- - Keypad Transmitter Remote
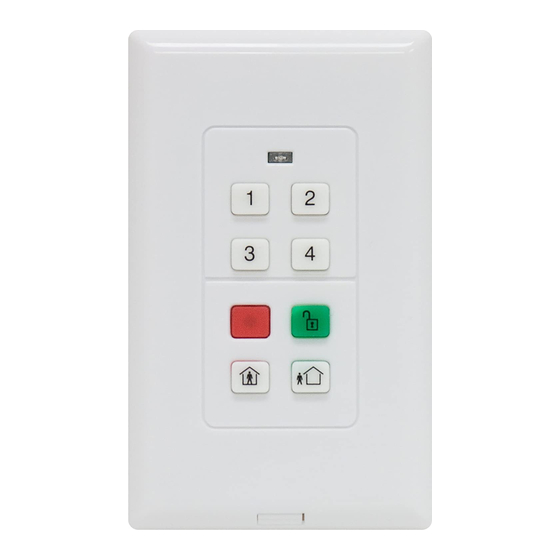
- Page 1 Wireless Alarm System Wireless Keypad User’s Manual Choice Choice ALERT ALERT ™ ™ Control all sensors, accessories and remote transmitters from one location...
-
Page 2: Table Of Contents
Table of Contents Important Safeguards Introduction Assigning a Wireless Keypad to a Device Location 6 Programming Security Codes into the Wireless Keypad Changing the Master Code or either Alternate User Code Erasing Alternate User Codes Placement of the Wireless Keypad Mounting the Wireless Keypad on a Wall Removing Top Cover from the Mounting Plate Attaching Top Cover to Mounting Plate Operating the Wireless Keypad... - Page 3 Before connecting or operating the Wireless Keypad, please read these instructions carefully and save this manual for future reference. Congratulations The GE Choice Alert™ Wireless Alarm System is one of the most affordable and expandable wireless alarm systems available. You’ll discover that the system offers many features typically found in custom installed Alarm systems. The Choice Alert system is reliable and easy-to-use.
-
Page 4: Important Safeguards
Important safeguards PreCautions 1. Do not attempt to disassemble the Wireless Keypad, unless described in the user’s manual. There are no user serviceable parts. 2. Handle with Care – Avoid striking or shaking. Improper use or storage could damage the Wireless Keypad. Modifying or tampering the device or its internal components can cause a malfunction and void the Wireless Keypad’s warranty. -
Page 5: Introduction
Introduction The Wireless Keypad allows you to wirelessly control your Choice Alert System. With this keypad, you will be able to arm, disarm and immediately activate the alarm with up to three personalized security codes. Parts Check List Identify all the parts before proceeding. Wireless Keypad 2 - Screws 2 - Plastic anchors... -
Page 6: Assigning A Wireless Keypad To A Device Location
Activating the Battery The Wireless Keypad is packaged with the battery installed, but not activated. To activate the battery, remove the yellow battery isolation strip on the side edge; pull to remove. Once the strip is removed, the Wireless Keypad will be active. Assigning a Wireless Keypad to a Device Location The Control Center is designed to store up to four remote transmitters, such as the Wireless Keypad. -
Page 7: Programming Security Codes Into
Step 3. Press the red Panic button on the wireless keypad. The Control Center will sound a long beep and the LED will stop flashing. This confirms the Wireless Keypad has been assigned to the selected device number. Programming Security Codes into the Wireless Keypad The Wireless Keypad operates independently from the Control Center. -
Page 8: Alternate User Code
Step 2. Enter a number (1, 2, or 3) for the User code you would like to change (1=Master code, 2= User 2 code, 3 = User 3 code). Step 3. Press and release the Green button. Step 4. Enter the new 4-digit code. Press and release the Green button. -
Page 9: Placement Of The Wireless Keypad
Step 1. Press and release Green button. Enter Current Master code. Press and release the Green button. The LED will light. Note: You have approx 30 seconds to make a selection at each step, or the LED will flash 3 times and turn off. If it does, you’ll have to start over. -
Page 10: Mounting The Wireless Keypad On A Wall
Mounting the Wireless Keypad onto a Wall (using double sided tape strips) Select a suitable location that provides protected, easy access. Be sure to test the device before mounting. Clean both surfaces with 50/50 mix of isopropyl alcohol and water. Using the provided double sided tape strips, peel one side and firmly apply to the indented areas on the back of the mounting plate. -
Page 11: Removing Top Cover From The Mounting Plate
Step 3. (a) If mounting into drywall, use the plastic anchors. Using a 3/16” drill bit, drill holes and insert anchors for a snug fit. Align mounting plate holes to anchor holes, insert screws and screw in until plate has secure fit. Do not over-tighten screws. Step 3. -
Page 12: Using The Panic Button
button. If the Control Center is in range, the Armed light will begin flashing on the Control Center and the Control Center will begin beeping for 45 seconds indicating the alarm has been set. Arming the Alarm in Home mode Enter a 4-digit user code (See Programming Security Codes into the Wireless Keypad) and press the Home button. -
Page 13: Erasing A Wireless Keypad From A Control Center
Replacing a Wireless Keypad If a Wireless Keypad is lost or broken, you can replace it (with another Wireless Keypad or any remote access device). Simply assign the new Wireless Keypad to the same device number in the Control Center location. Erasing a Wireless Keypad from a Control Center CAUTION: Erasing a Wireless Keypad from the Control Center will also erase any sensors in the associated zone. -
Page 14: Resetting Master Code
Control Center may seem to have batteries that last longer than a Wireless Keypad located farther away. As battery power reduces, the transmission distance reduces. 3V Battery Step 1. Remove the top cover (see Removing the Top cover from the Mounting Plate). Slide the battery out from the battery slot. You may need to use small screwdriver or paper clip to push battery from the back. -
Page 15: Battery Warnings
Step 1. Remove battery. Step 2. Press and hold both the panic (RED) button and the Disarm (GREEN) button at the same time. Step 3. While pressing both the buttons, reinsert the battery. The LED will flash rapidly for a short time and willl then flash slowly. Release the buttons. It will take approximately four hours for the reset to complete. -
Page 16: F.a.q.'s
Wireless Keypad Remote F.A.Q.’S Q. I bought a Wireless Keypad and the Control Center will not recognize it. Why? A. First, make sure that the battery is new and has been correctly installed, paying attention to polarity symbols (“+”, “-”). Confirm that the Wireless Keypad has been correctly assigned to a Device. -
Page 17: Fcc Warning
FCC Warning Any unauthorized changes or modifications to the equipment would void the user’s warranty and may conflict with both state and federal laws. The Choice Alert system complies with part 15 of the FCC rules. Operation is subject to the following conditions: 1) The Choice Alert system may not cause harmful interference. - Page 18 WARNING Limitations of Alarm Products This product should be tested periodically to make sure it is working properly. The product, if used properly, may reduce the risk of burglary, robbery, or other adverse events. However, JASCO is not an insurer, this product is neither insurance nor a guarantee that such an event will be prevented, and users should protect themselves with proper insurance.
- Page 19 is a trademark of the General Electric Company and is used under license to Jasco Products Company LLC, 10 E. Memorial Road, Oklahoma City, OK 73114. This Jasco product comes with a 1 year limited warranty. Visit www.jascoproducts.com for details. 45145-1 9/30/09...
Need help?
Do you have a question about the 45146- - Keypad Transmitter Remote and is the answer not in the manual?
Questions and answers