SVAT PI1000 Instruction Manual
Svat - pi1000 covert security dvr with hidden surveillance camera
Hide thumbs
Also See for PI1000:
- Specifications (2 pages) ,
- Instruction manual (24 pages) ,
- Instruction manual (40 pages)
Table of Contents
Advertisement
Quick Links
Download this manual
See also:
Instruction Manual
INSTRUCTION MANUAL
INSTRUCTION MANUAL
Instruction Manual
COVERT DVR
COVERT DVR
Covert DVR
w/ Integrated Color Camera
w/ Integrated Color Camera
w/ Integrated Color Camera
SVAT ELECTRONICS
SVAT ELECTRONICS
now you can see
now you can see
COMPLETE SYSTEM
MODEL#
Model #
PI1000
PI1000
www.svat.com
WWW.SVAT.COM
Advertisement
Table of Contents

Related Manuals for SVAT PI1000


Summary of Contents for SVAT PI1000
-
Page 1: Instruction Manual
SVAT ELECTRONICS SVAT ELECTRONICS now you can see now you can see COVERT DVR COVERT DVR Covert DVR w/ Integrated Color Camera w/ Integrated Color Camera w/ Integrated Color Camera COMPLETE SYSTEM INSTRUCTION MANUAL INSTRUCTION MANUAL Instruction Manual MODEL# Model #... - Page 2 This warranty does not cover shipping costs, insurance, or any other incidental charges. You MUST call SVAT before sending any product back for repair. You will be sent a Return Authorization number with return instructions. When returning the product for warranty service, please pack it carefully in the original box with all supplied accessories, and enclose your original receipt or copy, and a brief explanation of the problem (include RA #).
-
Page 3: Table Of Contents
TABLE OF CONTENTS WHAT IS INCLUDED ........................1 INTRODUCTION ........................2 FEATURES ..........................2 NAME & FUNCTION OF EACH PART ....................3 INSTALLATION ..........................4 FUNCTION DESCRIPTIONS ......................5 POWERING ON ..........................6 MONITORING MODE ........................6 SD CARD INFORMATION ......................6 RECORD MODE ..........................7 PLAYBACK MODE ........................9 SYSTEM SETUP .........................11 Main Menu .......................10 Time/Date ........................12 Motion Detection ......................12... -
Page 4: Introduction
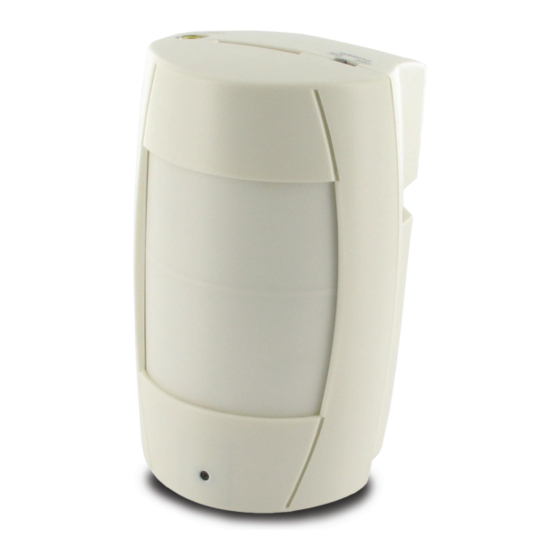
INTRODUCTION Congratulations on your purchase of the PI1000! The PI1000 is a Digital Video Recorder (DVR) hidden inside a motion sensor with a built-in high quality pinhole camera. This device allows you to record video footage discreetly using 3 different recording modes: Manual, Scheduled, and Motion Detection. Record footage directly to the included SD card and view your captured video by connecting to a TV, computer or laptop (SD card reader required). -
Page 5: Name & Function Of Each Part
BUTTONS AND CONNECTIONS 8 9 10 1. Imitation Motion Sensor 2. Pinhole Camera: The camera is located in this small hole 3. Power Switch: To switch off the power correctly, always press the MENU button first to stop recording, then switch off the device 4. -
Page 6: Installation
INSTALLATION Please refer to the instructions below for camera mounting and bracket installation: Regular Bracket 1. Screw the bracket into the bracket base. 2. Screw the bracket base into a wall, be sure to use wall anchors. 3. Tighten the top tab on the bracket to lock the camera into position. Extended Bracket 1. -
Page 7: Function Descriptions
INSTALLATION Video Output and Power Adapter Connection Connect video cable to video output on television and connect power cable to a power source. FUNCTION DESCRIPTIONS There are 5 main buttons to control the DVR. Depending on if the menu is open or the footage is paused the different buttons have different purposes. -
Page 8: Powering On
POWERING ON 1. To turn the device on, connect the power cable or insert batteries into the battery compartment. 2. Slide the power switch located on the top of the device to the On position. 3. After power on, the system automatically enters live monitoring. If the system was previously set to scheduled or motion activated recording, it will automatically resume the recording mode. - Page 9 RECORDING MODES THREE RECORDING MODES • Manual Record Set recording for anytime and turn off manually. Press the button to enter manual recording mode (start recording). This will prompt record with the manual record settings • Scheduled Motion Detection Record Set a time period to record only when movement is detected.
-
Page 10: Record Mode
RECORD MODE PERSONALIZED SETUP Different recording modes may have different recording settings including video size, recording frames and video quality. When specific recording modes are triggered, the system starts recording according to that specific setup. This kind of design provides flexibility to ensure efficient recording time and quality. For example: To schedule the PI1000 to record while you are at work (9:00AM-5:00PM), you can set up Schedule Record to record at low video quality with less recording frames to extend the recording time. -
Page 11: Playback Mode
PLAYBACK MODE There are two selectable playback modes: • Normal Playback mode: Accessed by pressing the play button on the back of the DVR, plays back all footage starting with oldest footage and moving to newest recorded footage Search and Play: •... -
Page 12: Main Menu
PLAYBACK MODE SEARCH AND PLAY • To access the search playback list go to Menu and select Search and Play • The Search and Play list will come up and list off all of the recordings you have starting with the oldest footage at the top of the list and newest footage at the bottom of the list The directory shows dates and the number of video files recorded on that date. -
Page 13: System Setup
SYSTEM SETUP MAIN MENU 1. Item Selection (menu/submenu) Title. 2. Menu Layer Indication. The device consists of three menu layers: First Menu Layer (Main Menu) Second Menu Layer Third Menu Layer 3. MENU Content: Basic Menu Operations. • Press the Record (up) or Play (down) buttons to move the highlight bar and cursor ( ) up or down... -
Page 14: Time/Date
SYSTEM SETUP DATE/TIME SETUP 1. Date Format: • Y / M / D • M / D / Y • D / M / Y 2. Date/ Time Adjustment: Clock is 24 hr (example 16:00 would be 4:00 pm) and year settings are from 2000 to 2099. -
Page 15: Manual And Schedule Record
SYSTEM SETUP MANUAL AND SCHEDULE RECORD SETUP Manual Record This option allows you to adjust the video size (resolution), frame rate and image quality of manual recording footage. Manual record is when the record button is pressed to start recording. •... - Page 16 SYSTEM SETUP Motion Record This option allows you to enable or disable motion record as well as adjust the times and video settings in which you would like your DVR to record based on motion detection. RECORD: Enable or disable motion schedule recording by selecting ON or OFF with the fast forward (+) and rewind (-)
-
Page 17: Sd Card Options
SYSTEM SETUP SD CARD OPTIONS The SD card is the included memory card that gets inserted into the top of your DVR. This option shows you how much total space is on the SD card, how much space is currently available as well as allows you to format the SD card. Formatting the SD card will erase all footage on the DVR. -
Page 18: Factory Default
SYSTEM SETUP FACTORY DEFAULT This option allows you to restore the settings set on your DVR back to the factory default settings. Once you enter this option the words "RECALL DEFAULT NOW?" appear on screen: • Pressing the fast forward (+) button will restore the DVR back to the factory/ default settings... -
Page 19: Camera Specifications
SPECIFICATIONS OSD Language Display English Time and Date Stamp Display Disk Full Warning Full Stop / Overwrite (Selectable) Automatic Overwrite Option LED Indicators Power, Record, Play, Menu Housing Material ABS Plastic Housing Color Pure White Battery Operable Yes, 4 x AA Battery Life 12 hours (lithium batteries) Power Input... -
Page 20: Notes
NOTES PI1000... - Page 21 NOTES PI1000...
- Page 22 WWW.SVAT.COM DISCLAIMER SVAT does not endorse the use of any SVAT products for any illegal activities. SVAT is not responsible or liable in any way shape or form for any damage, vandalism, theft or any other action that may occur while a SVAT product is in use by the purchaser.
Need help?
Do you have a question about the PI1000 and is the answer not in the manual?
Questions and answers