
Related Manuals for SVAT CLEARVU10


Summary of Contents for SVAT CLEARVU10
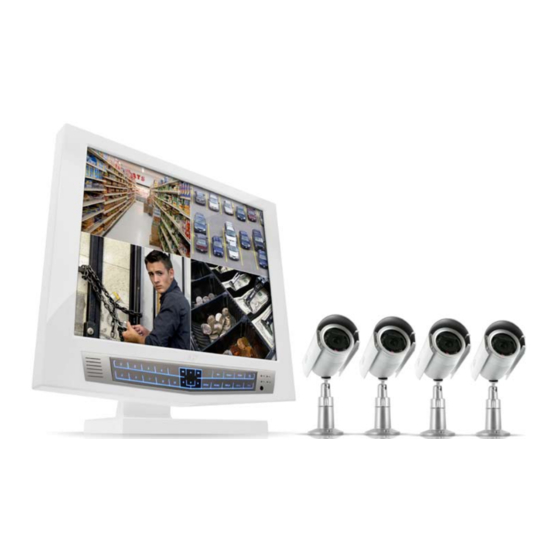
- Page 1 SVAT ELECTRONICS now you can see 8CH All-In-One 19" LCD-DVR Ultra Slim System w/ 4 Indoor/Outdoor Hi-Res Night Vision Security Cameras COMPLETE SYSTEM INSTRUCTION MANUAL V1.0 CLEARVU10 www.svat.com...
- Page 2 Online live web chat: www.svat.com/support Toll free fax: 1.888.771.1701 Note: This is manual version 1.0 for this product. You may find updated versions by visiting our website at www.svat.com CLEARVU10 SVAT ELECTRONICS now you can see NEED HELP? Toll free telephone:...
- Page 3 (include RA #). This warranty is valid only in Canada and the continental U.S. This warranty cannot be re-issued. Tearing the tamper-proof sticker on the DVR case will void the product warranty. CLEARVU10 SVAT CANADA 4080 Montrose Road Niagara Falls, ON...
-
Page 4: Table Of Contents
Power Off the DVR (Recording Stops) ... 18 Turn Off the LCD Screen (Recording Continues) ... 18 LIVE DISPLAY ... 18 MULTI-SCREENS ...19 Customize the Multi- Screen Display ... 19 CLEARVU10 TABLE OF CONTENTS SVAT ELECTRONICS now you can see... - Page 5 Audio Menu ... 43 Buzzer Menu ... 44 System Menu ... 45 Date/Time Menu ... 45 Network Menu ... 46 Mail Menu ... 47 User Management Menu ... 47 Adding a New User ... 48 CLEARVU10 SVAT ELECTRONICS now you can see...
- Page 6 CONNECTING TO AND VIEWING THE DVR REMOTELY (WITHIN YOUR NETWORK) .79 Getting Started ... 79 Creating a Connection Group ... 79 Entering the DVR’s Information ... 80 Adjusting Your Display On Screen ... 80 CLEARVU10 SVAT ELECTRONICS now you can see...
- Page 7 Sending a Still Image To Your Printer ...104 Searching The Log Viewer For Events ...104 USING THE BACKUP PLAYER TO VIEW ARCHIVED FOOTAGE ON YOUR PC ...105 TROUBLESHOOTING GUIDE ... 106 Compatible PTZ Protocol ...109 CLEARVU10 SVAT ELECTRONICS now you can see...
-
Page 8: Introduction
INTRODUCTION Congratulations on your purchase of the CLEARVU10! Use this ultra slim, all-in-one security system to monitor your home or business, and experience the convenience in viewing video on the built-in 19” LCD screen. Correct installation and use of this system will greatly increase the security in your home or business. -
Page 9: What Is Included
Stylishly Integrated 19" LCD The LCD profile is amazingly slim. View crisp clean video on the 19" screen. The CLEARVU10 instantly transforms your viewing space into a vibrant, clutter-free, security base station. View Video Online w/ No Service Fees (Supports DDNS) View live or recorded footage from any computer with Internet Explorer, anywhere in the world (other web browsers are not compatible). -
Page 10: Optional Accessories
SVAT ELECTRONICS now you can see Advanced Motion Activated Recording You can set the DVR to record only when motion is detected and alert you with an audible alarm. You can even set individual cameras to detect motion, and only video from those cameras will be recorded. Motion Mask allows you to block areas with constant motion, ensuring that only suspicious activity is recorded. -
Page 11: Buttons & Connections
BUTTONS & CONNECTIONS CLEARVU10 19" LCD DVR 1. Monitor Speaker 2. Channel Selection Buttons - Select to display individual cameras in live display and playback. Can also be used to enter numeric passwords (when prompted) 3. Pause Button 4. Navigation / Reviews / Control Buttons •... -
Page 12: Things To Consider Before Installation
4 PIN DIN male connection on the 60 ft. video/power wire. 3. Plug the camera’s power adapter into an AC outlet. CLEARVU10 MOUNTING 1. Decide if the camera will be wall-mounted or sit on a desk/tabletop. The camera can be adjusted for either mounting scenario by rotating the camera to the required position. -
Page 13: Additional Devices To The Dvr
Plug in the included USB mouse into one of the USB ports on the side of the DVR for convenient onscreen navigation of menus and display settings. NOTE: This manual is written with the mouse being the main tool for navigation. CLEARVU10 NOTE: For detailled instructions and information on the cameras incluced with this system, please refer to the Camera Manual oN PG.110... -
Page 14: Usb Cd/Dvd Writer, External Hard Drive, Or Usb Flash Drive
ARCHIVING RECORDED FOOTAGE You can connect a plug and play CD/DVD Writer to this CLEARVU10 to back up and archive recorded footage that is on the DVR. Simply plug your external device into the DVR and follow the instructions on pg. 70 to back up your footage to the drive. -
Page 15: Microphone (Not Included)
CONNECTING A TV/EXTERNAL SPEAKER (NOT INCLUDED) FOR LISTENING TO LIVE AUDIO OR 2 WAY COMMUNICATION CONNECTING AN ADDITIONAL MONITOR (NOT INCLUDED) CLEARVU10 If you connect a microphone to one of the AUDIO IN jacks, you can communicate with computers that are remotely connected to the DVR. After connecting the microphone, simply enable live audio and the channel which it is connected to (see pg.43 for more information on audio... -
Page 16: Using The Remote Control For Onscreen Navigation
5 NAVIGATION / REVIEWS / CONTROL BUTTONS Up Button Review/ Playback Button Changes the Playback Speed Down Button Changes the Reverse Speed Reverse Playback Button Pause Button CLEARVU10 6 MENU BUTTONS Display Button Search Button PTZ Button Key Lock Button Sequence Button Zoom Button... -
Page 17: Connecting And Powering On
8 channels. NOTE: When powered on for the first time, the CLEARVU10 will automatically begin recording if cameras are connected. The DVR will continue to record on this setting until it is manually changed to a different mode. -
Page 18: Shutting Down
A title for each camera will be shown, and changing the title for each camera, please see MAKING CHANGES TO THE CAMERA TITLE MENU, pg.35. For more information on different recording modes, please see RECORDING MODES, pg.22. CLEARVU10 button on the DVR until the password window pops up. next to each camera title shows that the camera is continuously recording. For more information on... -
Page 19: Multi-Screens
MULTI-SCREENS The CLEARVU10 gives you several different viewing options for your cameras. You can choose between Sequence Mode, Single camera, Quad (4 camera), 6 camera, 8 camera, and 8 Camera (Grid). TO CHANGE YOUR CAMERA DISPLAY To change your camera display, click the right mouse button on the Live Display screen. -
Page 20: Digital Zoom Mode
When viewing a camera in full screen, you can zoom in to a particular area and enlarge it up to 8 times its original size on screen to get a closer look at entrances, movement, or suspicious activity. CLEARVU10 SVAT ELECTRONICS... -
Page 21: Using Zoom Mode
DVR is in a shared room. The DVR can only be locked and unlocked with a password. For additional information on ADMIN rights and other user settings, see MAKING CHANGES TO THE USER MANAGEMENT MENU, pg.47. NOTE: A mouse or remote control is required in order to deactivate Key Lock Mode. CLEARVU10 5. Clicking the button zooms the yellow square one step closer. Holding down this button will zoom in further at a much faster rate. -
Page 22: Locking The Screen
7. Enter the password (the default password is ‘1234’) on the remote or the DVR’s button panel and press ENTER. 8. Key lock is now disabled, and you are able to access menus and change settings. RECORDING MODES The CLEARVU10 offers 3 different recording modes. CLEARVU10 6. Right Click on the live display screen to bring up the Key lock screen 7. Enter the password (the default password is ‘1234’) on the remote or the DVR’s button panel and press ENTER. -
Page 23: Playback Mode
8 camera (grid). 11. When you are finished reviewing footage in playback mode, press CLEARVU10 beside each camera title indicates that the camera is in continuous recording mode. icon will display next to the camera title when the camera , meaning that the camera is in Motion Detection mode, but is not on the DVR’s button panel. -
Page 24: Advanced Search
Orange blocks mean that there is archived video for the time period, and blue blocks mean that video was not recorded during the time. CLEARVU10 SVAT ELECTRONICS now you can see... -
Page 25: Searching By Event
Live Display screen. NOTE: Pressing PLAY puts the DVR into playback mode. For information and detailed instructions on navigating through Playback mode, please see PLAYBACK MODE pg.23. CLEARVU10 SVAT ELECTRONICS now you can see... -
Page 26: Main Menu
1. To access the GENERAL menu, click the right mouse button on the Live Display screen. 2. Click the SETUP icon. 3. Enter your password (the default password is ‘1234’) and select OK. 4. Click the GENERAL button. CLEARVU10 SVAT ELECTRONICS now you can see... -
Page 27: Display Menu
BORDER: Turn the border around each channel in multi screen display mode ON or OFF. BORDER COLOR: If the border is turned ON, you can change it to be gray, white, blue, red, yellow, or green. CLEARVU10 in the top right corner of the window. -
Page 28: Monitor Menu
DE-INTERLACE MODE: Can be turned ON or OFF. When turned ON, De-Interlace mode helps provide smoother playback of video footage. ALARM POP-UP MODE: Choose the amount of time (between 1-60 seconds) that the camera will be displayed full screen when an alarm is detected. CLEARVU10 SVAT ELECTRONICS now you can see 1. -
Page 29: Sequence Menu
TITLE. A virtual keyboard will pop up. 4. Enter a title for the sequence by clicking each letter individually. The title can be up to 7 characters and can include both numbers and letters. CLEARVU10 SVAT ELECTRONICS now you can see... - Page 30 9. To edit this screen, double click on this box. The outline will turn from green to orange. 10. If you continue to single click this box, you will see the box transform into the various screen layouts. CLEARVU10 SVAT ELECTRONICS now you can see...
- Page 31 SAVE & EXIT will save your sequence and exit, EXIT will take you back to the previous screen without saving your changes, and CANCEL will take you back to the editing menu. CLEARVU10 SVAT ELECTRONICS now you can see...
-
Page 32: Spot-Out Monitor
1. Connect an RCA wire (not included) to the VIDEO OUT SPOT port on the DVR. 2. Connect the other end of the RCA wire to the RCA VIDEO IN port on the TV/monitor. CLEARVU10 SVAT ELECTRONICS now you can see... -
Page 33: Spot-Out Menu
9. After clicking APPLY, click in the top right corner of the window to exit the DISPLAY menu and return to the GENERAL menu screen. CLEARVU10 NOTE: Each of the settings within the Screen Saver menu are described in detail below. -
Page 34: Camera Menu
PTZ SETUP configures settings for PTZ cameras (not included). MOTION SENSOR allows you to set each camera’s sensitivity to motion. CLEARVU10 SVAT ELECTRONICS now you can see on the DVR’s button panel. Recording will continue. -
Page 35: Camera Title Menu
NOT be displayed onscreen (a blue screen will appear in its place). This allows you to keep your camera locations discreet. CAMERA TITLE: Allows you to name each camera individually for easy reference. Example: Front door, back door, warehouse. CLEARVU10 SVAT ELECTRONICS... -
Page 36: Camera Title
1 and 100 (the default is 50). 9. When you have completed changing settings for that particular camera, you can use the 10. When you have made all desired adjustments, click CLEARVU10 buttons to select another camera channel. to exit the setup screen. -
Page 37: Ptz Setup Menu
GENERAL menu by clicking the right mouse button on the Live Display screen. 2. Click the SETUP icon. 3. Enter your password (the default password is ‘ 1234’) and select OK. 4. Click the GENERAL button. CLEARVU10 SVAT ELECTRONICS now you can see in the... - Page 38 NOTE: You can access additional settings by through the Advanced Options menu. Simply click the AUTO FOCUS: Allows you to turns the automatic focus ON or OFF SPEED CONTROLS: Sets the Pitch, Zoom, Focus, and Iris speeds between 1 and 10 CLEARVU10 SVAT ELECTRONICS now you can see in the to access this menu.
-
Page 39: Controlling The Ptz Camera Through The Dvr
Pressing the DISP and SETUP buttons will allow you to select which preset you would like, and pressing RUN will run the preset. For more information on setting presets, refer to your camera’s instruction manual. CLEARVU10 SVAT ELECTRONICS... -
Page 40: Motion Sensor Menu
AREA SETUP menu for each camera and disable areas so that movement from specific entrances does not trigger recording. For more information, refer to ADJUSTING AREA SETUP, below. CLEARVU10 SVAT ELECTRONICS now you can see... -
Page 41: Adjusting Area Setup
Everything within this area will NOT trigger motion recording (indicated by blue shading). When the area you want is inside the box, let go of the mouse button. The squares will then turn blue. CLEARVU10 SVAT ELECTRONICS now you can see... - Page 42 12. You will be prompted to save these changes NOTE: In order for these settings to take effect, you must create a motion detection schedule for each camera in the RECORD menu. Please refer to MAKING CHANGES TO THE ACTIVATION MENU, pg.67 for more information. CLEARVU10 SVAT ELECTRONICS now you can see...
-
Page 43: Sound Menu
Audio monitoring only works with Channels 1-4. Any other channels will have their audio recorded, but will not have the option to be hooked up for live audio monitoring. CLEARVU10 NOTE: Each of the settings within the AUDIO menu are described in detail below. -
Page 44: Buzzer Menu
5. After clicking APPLY, click in the top right corner of the window to exit the SOUND menu and return to the GENERAL menu screen. CLEARVU10 in the top right corner of the window. SVAT ELECTRONICS... -
Page 45: System Menu
DATE/TIME menu, click APPLY. If you wish to exit without saving changes, click in the top right corner of the window. CLEARVU10 NOTE: Each of the settings within the DATE/TIME menu are described in detail below. SVAT ELECTRONICS now you can see... -
Page 46: Network Menu
NOTE: If you make any changes to the Date/Time that sets the time to be either in the past or earlier than the current Date/Time on this setting screen, you will receive a warning that overlapped dates and times will be erased. You will have the choice to select OK or CANCEL. All previous footage (that is currently conflicting) will be overwritten and erased. MAKING CHANGES TO THE NETWORK MENU CLEARVU10 SVAT ELECTRONICS now you can see NOTE: The settings in this menu relate... -
Page 47: Mail Menu
USER – Minimal access. USER members can only view live footage and make adjustments to the live view settings. USER members can NOT play back recorded footage, access any menus or recording options, or power off the DVR CLEARVU10 SVAT ELECTRONICS... -
Page 48: Adding A New User
12. Follow steps 5-7 to enter the users e-mail address. The @ and . icons can be accessed by clicking the making sequence title, click to exit the onscreen keyboard. 13. Use the buttons to turn e-mail notifications ON or OFF. CLEARVU10 to exit the onscreen keyboard. SVAT ELECTRONICS now you can see button. When you have finished... -
Page 49: Editing Existing Users
EDITING EXISTING USERS 1. Double click the user which you wish to edit. 2. The EDIT screen will pop up 3. Double click the box next to PASSWORD and the onscreen keyboard will pop up. CLEARVU10 SVAT ELECTRONICS now you can see... - Page 50 NOTE: The USER ID can not be edited after it is entered. Only the password, group, email address, and email notification option can be edited. If you wish to change the user name, you must delete the user entirely and create a new USER ID. CLEARVU10 to exit the onscreen keyboard.
-
Page 51: Deleting Users
6. The DVR will begin normal operation and will show the default display of all 8 channels. CLEARVU10 NOTE: Users can not be restored once they are deleted. NOTE: All USER ID’s and passwords are case sensitive. SVAT ELECTRONICS... -
Page 52: Updating The System Management Menu
4. When you have finished selecting your system name, click 5. Click APPLY to save your system name. If you wish to exit without saving changes, click CLEARVU10 NOTE: Each of the settings within the SYSTEM MANAGEMENT menu are described in detail below. -
Page 53: Updating The System's Firmware
2. While in the SYSTEM MANAGEMENT menu, click PRESS next to the F/W UPDATE option. 3. A screen will pop up listing the USB device and firmware version. 4. Press START. 5. Press OK when prompted. CLEARVU10 SVAT ELECTRONICS now you can see... - Page 54 SYSTEM DATA: System settings can be saved to a USB drive. These settings can be reloaded in the case of accidental changes to settings or for transferring your settings to another CLEARVU10. All information and settings are saved except for the system name and network settings.
-
Page 55: Saving System Data
4. After clicking APPLY, click in the top right corner of the window to exit the DISPLAY menu and return to the GENERAL menu screen. CLEARVU10 SVAT ELECTRONICS now you can see... -
Page 56: Event/Sensor Menu
APPLY. If you wish to exit without saving changes, click in the top right corner of the window. CLEARVU10 NOTE: Each of the settings within the HDD EVENT menu are described in detail below. SVAT ELECTRONICS now you can see... -
Page 57: Alarm Input Menu
CLEARVU10 NOTE: The ALARM IN and ALARM OUT menus configure settings for an external alarm device (for example, a motion sensor) or an independent alarm which will sound when an event is detected. -
Page 58: Buzzer Out Menu
The LATCHED setting means that the alarm will sound for a set duration of time, which you will decide in step 6. CLEARVU10 SVAT ELECTRONICS now you can see buttons to enable or disable this feature. -
Page 59: Email Notfication Menu
NOT receive e-mail alerts. For detailed information on the MAIL settings and instructions on how to properly set up your DVR for networking, please refer to the DVR NETWORKING GUIDE ,pg.72. CLEARVU10 buttons to set the duration of the alarm to be between 5 and 300 seconds or until a... -
Page 60: Disk Manage Menu
4. When you have made all the desired changes to the DISK MANAGE menu, click APPLY. If you wish to exit without saving changes, click in the top right corner of the window. CLEARVU10 NOTE: Each of the settings within the DISK MANAGE menu are described in detail below. SVAT ELECTRONICS now you can see... -
Page 61: Formatting The Dvr's Hard Drive
NOTE: Formatting the DVR erases all recorded footage. Your recording and system settings will NOT be erased. If you wish to restore your DVR’s settings to its factory defaults, please see UPDATING THE SYSTEM MANAGEMENT MENU, pg.54. CLEARVU10 SVAT ELECTRONICS... - Page 62 2. A warning message stating that all recorded data will be erased. Choose OK. 3. A progress window will pop up to show you the status of the format. 4. Once formatting is complete, the window will disappear and you will return to the DISK MANAGE screen. CLEARVU10 SVAT ELECTRONICS now you can see...
-
Page 63: Record Menu
If you are not already in the RECORD menu, access the RECORD menu by clicking the right mouse button on the Live Display screen. Click the SETUP icon. Enter your password (the default password is ‘ 1234’) and select OK. Click the RECORD button. CLEARVU10 SVAT ELECTRONICS now you can see... -
Page 64: Recording Operations Menu
(motion, alarm, etc) occurs. You can choose intervals between 5-180 seconds. CLEARVU10 in the top right corner of the window. You will be asked whether you want to save... -
Page 65: Timer/Motion Setup Menu
2. Click the SIZE/FPS/QUALITY/AUDIO title at the top of the screen. 3. If you have chosen WEEKLY under SCHEDULE MODE in the RECORDING OPERATIONS menu, you will need to choose the day of the week which you would like to edit. CLEARVU10 SVAT ELECTRONICS now you can see... - Page 66 9. Repeat these settings for any other time periods for the day, or week day, as needed. 10. When you have made all the desired changes to the TIMER/MOTION SETUP menu, click the be asked whether you want to save or cancel your changes. CLEARVU10 SVAT ELECTRONICS now you can see...
-
Page 67: Activation Menu
(0) representing 12 – 1 AM and the last block (23) representing 11 PM – 12AM. 4. Use the mouse to click the first (or only) hour of time you wish to edit. CLEARVU10 SVAT ELECTRONICS now you can see... - Page 68 9. When you have made all the desired changes to the RECORDING OPERATIONS menu, click the in the top right corner of the window. You will be asked whether you want to save or cancel your changes. CLEARVU10 SVAT ELECTRONICS now you can see...
-
Page 69: Alarm Setup Menu
NOTE: The settings and process of changing settings in the ALARM SETUP menu is identical to the settings and process of changing settings in the TIMER/MOTION SETUP menu. For detailed instructions, please refer to pg.65 for more information. CLEARVU10 SVAT ELECTRONICS... -
Page 70: Archive Menu
Live Display screen. 3. Click the ARCHIVING icon. 4. Enter your password (the default password is ‘ 1234’) and select OK. NOTE: If the DVR reads “no archiving device” next to the SELECT DEVICE title, exit out of the ARCHIVING menu and enter again. CLEARVU10 SVAT ELECTRONICS now you can see... - Page 71 (MB), lists the log file and its size (if applicable). Click OK to begin the backup. 13. The footage is extracted to a temporary area on the hard drive. CLEARVU10 to exit the onscreen keyboard. SVAT ELECTRONICS now you can see...
-
Page 72: Dvr Networking Guide
In order for the DVR to transmit its video, it must be properly connected to an Internet-ready router. Once the connection is complete, you will be able to access important IP information that will allow you to access the DVR over the Internet. CLEARVU10 SVAT ELECTRONICS... -
Page 73: Connecting The Dvr To Your Router
2. Click the SETUP icon. 3. Enter your password (the default password is ‘1234’) and select OK. 4. Click the GENERAL button. 5. Click the SYSTEM button. 6. Click the NETWORK title on the left hand side of the screen. The window below will pop up, displaying information which is specific to your DVR. CLEARVU10 button on the DVR until the SVAT ELECTRONICS now you can see... -
Page 74: Configuring Settings
Internet. A smaller TX speed will result in choppier video, but will not create as much of a lag on the network. TIP: For complete online accessibility of your DVR, make sure that the DHCP, DDNS, and WEB SERVICE boxes are checked and enabled. CLEARVU10 SVAT ELECTRONICS... -
Page 75: Preparing Your Computer
6. Close out of the Options window. NOTE: If you do not have the ActiveX installed and the previous step did not download it, go to http://www.download.com and search for ActiveX. Download the ActiveX Download control. CLEARVU10 SVAT ELECTRONICS now you can see... -
Page 76: Installing The Remote Viewer Software On Your Pc
2. When the software is launched, you will be greeted with a welcome screen. Click ‘Next’ . 3. You will be asked to confirm installation. Click ‘Next’ . 4. Wait while the DVR remote client software is installed. CLEARVU10 SVAT ELECTRONICS now you can see... -
Page 77: Understanding The Remote Dvr Viewer Software
Player” allows you to view footage from your DVR that you have archived to a USB drive. 7. Double click the Remote Agent icon on your desktop to begin using the remote viewer software. UNDERSTANDING THE REMOTE DVR VIEWER SOFTWARE CLEARVU10 SVAT ELECTRONICS now you can see... - Page 78 DVR SETUP BUTTON Accesses the setup menu and allows you to make changes to the Record, Camera, Sound, Event/Sensor, and System menus. CLEARVU10 DVR DROP DOWN LIST Select the DVR you wish to view from a list of your personal DVR systems.
-
Page 79: Connecting To And Viewing The Dvr Remotely (Within Your Network)
. The Connect Manager screen will open. CREATING A CONNECTION GROUP 1. In the “Group” window on the left, right click “Site” and choose “Add Group”. 2. Enter a name to easily identify the connection group (Office, Home, etc) and press OK. CLEARVU10 SVAT ELECTRONICS now you can see... -
Page 80: Entering The Dvr's Information
3. To remove a camera from being displayed, choose the drop down marked as ‘x’ . NOTE: In some instances, you may have be prompted to disconnect and reconnect to the DVR for the changes to take effect. CLEARVU10 SVAT ELECTRONICS now you can see... -
Page 81: Additional Group Settings
Settings & Configuration” for each DVR. Additionally, please note that only one group can be connected at a time. For example, you would need to disconnect from the’ ‘ OFFICE’ group before connecting to the ‘ PARKING LOT’ group. ADDITIONAL CONFIGURATION 1. In the local setup window, click the “Configuration” tab. 2. Use the mouse to check or uncheck boxes and select the following custom settings: CLEARVU10 SVAT ELECTRONICS now you can see... -
Page 82: Connecting To And Accessing Your Dvr Online
NOTE: Your router may require a user name and password. If you do not know it, ask the person who configured your network. portforward.com will provide you with each router’s default user name and password. CLEARVU10 SVAT ELECTRONICS now you can see... -
Page 83: Connecting Via A D-Link Router
5. Repeat all instructions listed in Step 4 (above), except enter port 6100 instead of port 80. 6. When complete, select the “Apply” button located at the bottom of the page to save your changes. 7. Port forwarding is now complete! CLEARVU10 SVAT ELECTRONICS now you can see... -
Page 84: Finding Your External Ip
For Vista users: if you are prompted with the “Windows needs your permission to continue” security notice, click Continue. For Vista users: if you are prompted with a message asking you to install software, click Install. CLEARVU10 SVAT ELECTRONICS now you can see... -
Page 85: If Successful
Check all your network connections and go through the above steps again to make sure a configuration error was not made. If you still can not view the DVR, use the troubleshooting on the next page to help you verify each step as you complete it. CLEARVU10 SVAT ELECTRONICS... - Page 86 I have done the following: Visited http://www.whatsmyip.org Recorded my external IP address as ______________________. Opened Internet Explorer and entered my external IP into a browser window. Accessed and viewed my DVR through my external IP address. CLEARVU10 SVAT ELECTRONICS now you can see...
-
Page 87: Forwarding Outside Your Network
NOTE: The message may take up to 24 hours to arrive in your inbox. If you do not see the message in your inbox, check your junk or spam folders in case it was sent there. CLEARVU10 SVAT ELECTRONICS now you can see... - Page 88 11. Type in a host name (subdomain name). We recommend you use your name, company name, or something that is easy for you to remember. 12. Choose a domain name from the dropdown menu. We recommend using the dyndns.org suffix. CLEARVU10 SVAT ELECTRONICS now you can see...
-
Page 89: Finalizing Setup
FINALIZING SETUP Now you must set your DVR to be associated with the DynDNS account you just created. This will ensure that when your external IP address changes, all other settings will change accordingly. CLEARVU10 SVAT ELECTRONICS now you can see... -
Page 90: Configuring The Dvr's Ddns Information
You need to change the address next to DDNS SERVER so that it is the same as the DynDNS you just created. Click the empty box next to DDNS SERVER. A virtual keyboard will pop up. CLEARVU10 SVAT ELECTRONICS now you can see... -
Page 91: Setting Your Dvr To Send Email Alerts
You must also have notifications enabled in the E-MAIL NOTIFICATION MENU. For more information on making changes to the E-MAIL NOTIFICATION and enabling notifications, please see pg.59. CLEARVU10 SVAT ELECTRONICS now you can see... -
Page 92: Sending A Test Email
‘from’ field of the e-mail with the DVR name. If you have more than one DVR, naming will help identify one system from another. For example, office@dvrlink.net and cottage@dvrlink.net will help you identify where the alert is coming from. CLEARVU10 SVAT ELECTRONICS... -
Page 93: Configuring Mail Settings
NOTE: Only one person can access the DVR’s settings at a time. If someone else is accessing a menu (remotely or on the DVR itself) you will receive an error message and will not be able to access the menus until the person exits out of the menu. CLEARVU10 SVAT ELECTRONICS now you can see... -
Page 94: Record Menu
DVR. Information and instructions on how to make changes to the DVR’s RECORD menu are outlined earlier in the manual, and can be used as a guide to change settings via the Remote Software. For more information on the DVR’s Record settings, please refer to RECORD MENU, pg.63. CLEARVU10 SVAT ELECTRONICS now you can see... -
Page 95: Camera Menu
DVR. Information and instructions on how to make changes to the DVR’s CAMERA menu are outlined earlier in the manual, and can be used as a guide to change settings via the Remote Software. For more information on the DVR’s Record settings, please refer to CAMERA MENU, pg.34. CLEARVU10 SVAT ELECTRONICS now you can see... -
Page 96: Sound Menu
DVR. Information and instructions on how to make changes to the DVR’s SOUND menu are outlined earlier in the manual, and can be used as a guide to change settings via the Remote Software. For more information on the DVR’s Sound settings, please refer to SOUND MENU, pg.43. CLEARVU10 SVAT ELECTRONICS now you can see... -
Page 97: Event/Sensor Menu
DVR. Information and instructions on how to make changes to the DVR’s EVENT/SENSOR menu are outlined earlier in the manual, and can be used as a guide to change settings via the Remote Software. For more information on the DVR’s Event/Sensor settings, please refer to EVENT/ SENSOR, pg.56. CLEARVU10 SVAT ELECTRONICS now you can see... -
Page 98: System Menu
DVR. Information and instructions on how to make changes to the DVR’s SYSTEM menu are outlined earlier in the manual, and can be used as a guide to change settings via the Remote Software. For more information on the DVR’s Event/Sensor settings, please refer to SYSTEM, pg.45. CLEARVU10 SVAT ELECTRONICS now you can see... -
Page 99: Referring To The Event Viewer For Events And Activity
SVAT ELECTRONICS now you can see REFERRING TO THE EVENT VIEWER FOR EVENTS AND ACTIVITY 1. The Remote Software will keep a log of all events while the computer is connected to the DVR. To view a list of events click the EVENT VIEWER button . -
Page 100: Using The Remote Software's Search Mode To Play Back Previously Recorded Footage
PC can access the DVR DVR SETUP BUTTON Accesses the setup menu and allows you to make changes to the Record, Camera, Sound, Event/Sensor, and System menus. CLEARVU10 button to access the Search Menu. DIVISION BUTTON Different screen modes. ARCHIVING BUTTON Allows you to choose and save footage to your PC for review or archiving. - Page 101 Displays the playback speed of the video currently playing. DECREASE PLAYBACK SPEED Slows the speed of the video being played to 1x, 2x, 4x, 8x, or 32x. CLEARVU10 REFRESH TIMECLOCK BUTTON Loads all video footage up to the point that button was pressed SCROLL UP BUTTON Allows you to move through the camera list.
-
Page 102: Finding Previously Recorded Footage
1. Pre-recorded footage can be archived to the PC that is connected to the DVR by clicking the ARCHIVE CLEARVU10 to select and adjust the specific time of the footage you would like to review. If you do not know to begin playing the selected . -
Page 103: Saving Still Shots (Screen Caps) To Your Pc
4. Click “Save”. The still shot is now saved to your computer. NOTE: The still shot is saved in the same style as the current screen display. For example, quad screen single screen, etc. CLEARVU10 SVAT ELECTRONICS now you can see... -
Page 104: Sending A Still Image To Your Printer
“Go to time line”. 7. The specific event you selected will show up on the Remote Software screen. 8. Press to play the video associated with the event. NOTE: For more information on playing back footage through the Remote Viewer, refer to PLAYING BACK PREVIOUS FOOTAGE. pg.102 for instructions. CLEARVU10 SVAT ELECTRONICS now you can see... -
Page 105: Using The Backup Player To View Archived Footage On Your Pc
3. Choose the file you wish to open and press “Open”. 4. Press the button to begin playback of the selected file. 5. You can use the controls under the display to adjust playback direction and speed, or stop footage as needed. CLEARVU10 SVAT ELECTRONICS now you can see... -
Page 106: Troubleshooting Guide
Timer recording is not working properly. Can not save the customized Sequence screen which I have created CLEARVU10 in the top right corner of the window. • Check the power cord connection to the DVR and the outlet and ensure that the DVR has power. - Page 107 Video footage plays slow and choppy when viewing the DVR over a remote connection. My browser keeps freezing CLEARVU10 • Your chosen dates/times do not contain any video or data. Choose a larger, or alternate time frame. •...
- Page 108 (Internet) Connection I am not receiving any notification emails from the DVR. Remote control is not working CLEARVU10 • Check all your network connections. • Repeat the steps on pg.72 again to make sure a configuration error was not made.
-
Page 109: Compatible Ptz Protocol
Recording Qualities ...Low, Standard, High, Highest Recording Modes ... Continuous, Scheduled, Motion, Alarm Recording Media ...160GB HDD Storage Capacity ...Unlimited (160GB Included) Autostart Recording ...Yes Auto Resume Recording ...Yes HDD Type ... Internal CLEARVU10 Protocol Panasonic WV-CSR604 Panasonic WV-CSR850 Panasonic Kalatel Honeywell... -
Page 110: Outdoor Camera (Cv67)
Microphone ...No Motion Detection ...No Viewing Angle ...60 Degrees Electronic Shutter ...1/60 ~ 1/100000 sec BLC ...No CLEARVU10 Alarm Sensor Inputs ...Yes, 8 Alarm Sensor Connection ...Terminal Block Firmware Upgradeable? ... Yes, via USB port Remote Control ...Yes Supported ...USB Peripherals,USB flash drive, external CD writer, external DVD writer Alarm Sensor Inputs ...Yes, 8... -
Page 111: Complete Cv67 Camera Manual
SVAT ELECTRONICS now you can see Hi-Res Security Camera Indoor/Outdoor CCD Color Camera w/ Night Vision ACCESSORY - CAMERA Model# CV67 www.svat.com INSTRUCTION MANUAL Version 1.0... -
Page 112: What Is Included
1.WHAT IS INCLUDED Window 1 Indoor/Outdoor Night Vision CCD Color Camera Warning Stickers 2. CAMERA FEATURES AND FUNCTIONS CLEARVU10 TABLE OF CONTENTS 60ft 4 PIN DIN to RCA (male) Video/Power Wire CCD Cameras 1. Sun Shield helps prevent glare from bright lights. -
Page 113: Installation
BNC to RCA adapter before connecting the camera. CLEARVU10 1. Screw the mounting bracket into the camera’s mounting hole, turning it clockwise. 2. Mount the camera in the desired location no more than 60 feet from the TV/Monitor/VCR/DVR unless you have purchased additional wiring. -
Page 114: Troubleshooting
Video Output ...60ft 4 PIN DIN to RCA (male) Video/Power Wire TV System ...NTSC Microphone ...No Motion Detection ...No Viewing Angle ... 60 Degrees Electronic Shutter ...1/60 ~ 1/100000 sec CLEARVU10 BLC ...No AGC ...Automatic ELC ...Automatic Line Lock ...No Iris Control ...No White Balance ...Automatic... -
Page 115: Drilling Template
SVAT ELECTRONICS now you can see 7. DRILLING TEMPLATE To wall mount the camera, drill three holes using a 3/16" drill bit and the template below. Insert the supplied wall anchors into holes and secure camera to wall with supplied screws. -
Page 116: Customer Information Card
SVAT ELECTRONICS now you can see NOTES AREA Customer Information Card Contact Name: Company: Address: Postal Code: Phone Number: Email: Model Number of Product: Serial Number of Product: Purchase Date: Place of Purchase: NOTE: We recommend that you keep a record of your purchase receipt with your manual for any future returns or support issues. - Page 117 SVAT ELECTRONICS now you can see NOTES AREA CLEARVU10...
- Page 118 SVAT ELECTRONICS now you can see NOTES AREA CLEARVU10...
- Page 120 VISIT US ON THE WEB! • Product Information • User Manuals • Quick Start Guides www.svat.com SVAT ELECTRONICS • Specification Sheets • Software Updates • Firmware Upgrades now you can see...
Need help?
Do you have a question about the CLEARVU10 and is the answer not in the manual?
Questions and answers