
Related Manuals for Elation Design 60 Tri


Summary of Contents for Elation Design 60 Tri
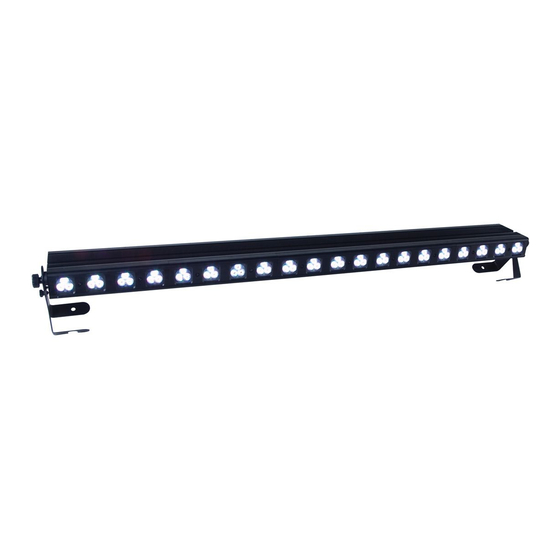
- Page 1 Design LED 60 TriStrip Rev. 3/04/2009 - visage Elation Professional™ 6122 S. Eastern Ave. Los Angeles, CA. 90040 www.elationlighting.com...
- Page 2 Design LED 60 TriStrip™ ©Elation Professional, Los Angeles Ca. www.ElationLighting.com...
-
Page 3: Table Of Contents
10. DMX Channel Traits………………………………………………………………………22 11. Cleaning and Maintenance………………………………………………………………33 12. Warranty…………………………………………………………………………………... 34 13. Photometric Data………………………………………………………………………… 36 14. Dimensional Drawings………………………………………………….……………….. 37 15. Lens Change………………………………..……………………………………………. 38 16. Circuit Schematic………...………………………………………………………………. 39 17. Technical Specifications…………………………………………...………….………… 40 ©Elation Professional, Los Angeles Ca. TABLE OF CONTENS www.ElationLighting.com... -
Page 4: General Information
You may also visit us on the web at www.elationlighting.com for any comments or suggestions. For service related issue please contact Elation Professional Service Hours are Monday through Friday 9:00 a.m. to 5:00 p.m. Pacific Standard Time. - Page 5 Items returned without a R.A. number clearly marked on the outside of the package will be refused and returned at customer’s expense. You may obtain a R.A. number by contacting customer support at (323) 582-3322. ©Elation Professional, Los Angeles Ca. www.ElationLighting.com...
-
Page 6: Safety Instructions
2. SAFETY INSTRUCTIONS To guarantee proper and consistent operation, it is important to follow the guidelines in this manual. Elation Professional will not accept responsibility for damages resulting from the misuse of this fixture due to the disregard of the information printed in this manual. - Page 7 15. Please be aware that damages caused by modifications to the device are not subject to warranty. Important Notice: Damages resulting from the disregard of safety and general user instructions found in this user manual are not subject to any warranty claims. ©Elation Professional, Los Angeles Ca. www.ElationLighting.com...
-
Page 8: Features
3 DMX-channels • Flicker-free operation for television and film • Compact design: fits in 12” box truss • Brilliant light output • Linkable power supply (in and out power connectors) - Up to 8 units ©Elation Professional, Los Angeles Ca. www.ElationLighting.com... -
Page 9: General Guidelines
Most damages are the result of improper operation. Please use the original packaging to transport the fixture in for service. For your own safety, please read this user manual carefully before installing the device. ©Elation Professional, Los Angeles Ca. www.ElationLighting.com... -
Page 10: Fixture Overview
IEC connector for a power cord. Always replace the fuse with an exact match unless otherwise specified by an authorized Elation Service Technician. Using a fuse other than that specified could seriously damage the unit and will void your manufactures warranty. ©Elation Professional, Los Angeles Ca. www.ElationLighting.com... - Page 11 17. Cooling Fans – These fans regulate the internal operating temperature of the fixture. To prevent overheating or failure be sure to never block or obstruct these fans in any way. ©Elation Professional, Los Angeles Ca. www.ElationLighting.com...
-
Page 12: Mounting And Installation
Refer to regulations BGV C1 (formerly VBG 70) and DIN VDE0711-217 for proper installation in Europe To ensure proper installation, only qualified staff should attempt installation. Mounting points Overhead mounting requires extensive experience, including amongst others calculating ©Elation Professional, Los Angeles Ca. www.ElationLighting.com... - Page 13 0.5m away from any flammable materials (decoration etc.). When clamp mounting; always use and install the supplied safety cable as an added safety measure to prevent accidental damage in the event of a clamp failure. See the image below. ©Elation Professional, Los Angeles Ca. www.ElationLighting.com...
- Page 14 Be sure to only use the designated rigging point for a safety cable. Never secure a safety cable to the hanging bracket. ©Elation Professional, Los Angeles Ca. CAUTION! www.ElationLighting.com...
-
Page 15: Understanding Dmx
(the illustration on the next page is of a 3-Pin XLR connector). If you are making your own cables, be sure to use two conductor shielded digital DMX cable rated ©Elation Professional, Los Angeles Ca. www.ElationLighting.com... - Page 16 Connect an XLR cable to the female XLR output of your controller and the other side to the male XLR input of the fixture (Please refer to the diagram below.). You can chain multiple moving heads together through serial linking. Remember to daisy-chain the “in” and “out” data connections. ©Elation Professional, Los Angeles Ca. www.ElationLighting.com...
-
Page 17: Dmx Termination
When using the fixture with a DMX controller the fixture should be given a DMX starting address. The starting DMX address ensures the fixture will respond to the correct control signal. This “starting address” is the channel number from which the fixture starts to “listen” ©Elation Professional, Los Angeles Ca. www.ElationLighting.com... - Page 18 DMX input jack. The DMX controller is switched off or defective. The DMX cable or connector is defective. A DMX terminator has been inserted into the last fixture in your DMX chain. ©Elation Professional, Los Angeles Ca. www.ElationLighting.com...
-
Page 19: Display Menu
SLAV( MANU CNTL( BLAC( COLR( CHAS CHS1( CHS2( CHS3( CHS4( ©Elation Professional, Los Angeles Ca. A001( ) (1-512) Set the display open or close when no ON/OFF( ON/OFF( 3 CH( 4 DMX CHANNELS (RGB+MASTER DIM) 4 CH( 6 CH( 15 CH(... - Page 20 2) SPED: This function is used to adjust the hold time for the scenes in the built-in chase programs. 3) FADE: This function is used to adjust the fade time between each scene in the built-in programs. ©Elation Professional, Los Angeles Ca. FADE( 0-255 STRB(...
-
Page 21: Dmx Operation
In 63-channels mode the internal programs are accessed via channels 61. In 15-channels mode the internal programs are accessed via channels 13. In 6-channels mode the internal programs are accessed via channels 4. The chart below details the channel value for each ©Elation Professional, Los Angeles Ca. Internal Channel... - Page 22 5. The chart below details the different strobe functions available. Open 1------95 Strobe from slow to fast 96----127 Open 128---159 Pulse strobe from slow to fast 160---191 Open 192---223 Random strobe 224---255 Open ©Elation Professional, Los Angeles Ca. www.ElationLighting.com...
-
Page 23: Dmx Channel Traits
3-Channel mode: In this mode channel one controls all the red LEDs, channel two controls all the green LEDs, and channels three controls all the blue LEDs. CHANNEL 1:Red CHANNEL 2:Green CHANNEL 3:Blue 3-Channel Mode: The chart below details the DMX channel layout for 3-channel assignment. ©Elation Professional, Los Angeles Ca. www.ElationLighting.com... - Page 24 DMX channel’s functions and their values (3-Channel Mode): Channel 1 - Red: 0-255 Red (0-Black, 255 - 100% Red) Channel 2 - Green: 0-255 Green (0-Black, 255 - 100% Green) Channel 3 - Blue: 0-255 Blue (0-Black, 255 - 100% Blue) ©Elation Professional, Los Angeles Ca. www.ElationLighting.com...
- Page 25 CHANNEL 3: Blue CHANNEL 4: Dimming and speed DMX channel’s functions and their values (4 Channel Mode): Channel 1 - Red: 0-255 Red (0-Black, 255-100% Red) Channel 2 - Green: 0-255 Green (0-Black, 255- 100% Green) ©Elation Professional, Los Angeles Ca. www.ElationLighting.com...
- Page 26 This channel has two functions depending on the operating mode. When running the built-in programs this channel will control the program speed. 0-255 Dimming (0%-100%) ~ Normal Operation 0-255 Speed (min to max) ~ When running built-in programs on channel 4 ©Elation Professional, Los Angeles Ca. www.ElationLighting.com...
- Page 27 0-255 Blue (0-Black, 255- 100% Blue) Channel 4 - Internal programs: 0-10 No function 11-40 Internal program 1 41-70 Internal program 2 71-100 Internal program 3 101-130 Internal program 4 131-160 Internal program 5 ©Elation Professional, Los Angeles Ca. www.ElationLighting.com...
- Page 28 0-255 Dimming (0%-100%) ~ Normal Operation 0-255 Speed (min to max) ~ When running built-in programs on channel 4 ©Elation Professional, Los Angeles Ca. www.ElationLighting.com...
- Page 29 CHANNEL 5: Green CHANNEL 6: Blue CHANNEL 7: Red CHANNEL 8: Green CHANNEL 9: Blue CHANNEL10: Red CHANNEL 11: Green CHANNEL 12: Blue CHANNEL 13: Auto Programs (Built-in Programs) CHANNEL 14: Strobe CHANNEL 15: Dimmer/Speed ©Elation Professional, Los Angeles Ca. www.ElationLighting.com...
- Page 30 Blue (0-Black, 255- 100% Blue) Channel 7 - Red: 0-255 Red (0-Black, 255-100% Red) Channel 8 - Green: 0-255 Green (0-Black, 255- 100% Green) Channel 9 - Blue: 0-255 Blue (0-Black, 255- 100% Blue) ©Elation Professional, Los Angeles Ca. www.ElationLighting.com...
- Page 31 Internal program 8 Channel 14 - Strobe: No function 1~95 Strobe effect slow to fast 96-127 No function 128-159 Pulse effect in sequences 160-191 No function 192-223 Random strobe effect slow to fast 224-255 No function ©Elation Professional, Los Angeles Ca. www.ElationLighting.com...
- Page 32 0-255 Dimming (0%-100%) ~ Normal Operation 0-255 Speed (min to max) ~ When running built-in programs on channel 4 ©Elation Professional, Los Angeles Ca. www.ElationLighting.com...
- Page 33 63-Channel Mode will function similarly to 15-Channel mode. Where 15-Chanel mode controls all like colors in blocks of 5 at a time 63-channnle mode will allow you to control each individual color in each pixel. ©Elation Professional, Los Angeles Ca. www.ElationLighting.com...
-
Page 34: Cleaning And Maintenance
There are no user serviceable parts inside this, please refer all other service issues to an authorized Elation service technician. Should you decide to service the fixture yourself please order genuine Elation parts directly from Elation. ©Elation Professional, Los Angeles Ca. www.ElationLighting.com... -
Page 35: Warranty
United States of America, including possessions and territories. It is the owner’s responsibility to establish the date and place of purchase by acceptable evidence, at the time service is sought. B. For warranty service, send the product only to the Elation Professional factory. All ®... - Page 36 The consumer’s and or Dealer’s sole remedy shall be such repair or replacement as is expressly provided above; and under no circumstances shall Elation Professional® be liable for any loss or damage, direct or consequential, arising out of the use of, or inability to use, this product.
-
Page 37: Photometric Data
Design LED 60 TriStrip™ PHOTOMETRIC DATA ©Elation Professional, Los Angeles Ca. www.ElationLighting.com... -
Page 38: Dimensional Drawings
Design LED 60 TriStrip™ 14. DIMENSIONAL DRAWINGS ©Elation Professional, Los Angeles Ca. www.ElationLighting.com... -
Page 39: Lens Change
The lens cover is held in place by ¼ turn locking fasteners. To remove the cover; 1) Turn the locking fasteners in a counter-clockwise direction. 2) Once the fasteners are loose lift the cover to expose the lens assembly (see illustration below). 3) Remove or replace the filters and reassemble. ©Elation Professional, Los Angeles Ca. www.ElationLighting.com... -
Page 40: Circuit Schematic
Design LED 60 TriStrip™ CIRCUIT SCHEMATIC ©Elation Professional, Los Angeles Ca. www.ElationLighting.com... -
Page 41: Technical Specifications
Weight (net) Please Note: Specifications and improvements in the design of this unit and this manual are subject to change without any prior written notice. ©Elation Professional, Los Angeles Ca. 98~240v 50/60Hz Internal Voltage Taps 120V = 4A/250V, GMA (5x20mm fine-wire fuse) - Page 42 Design LED 60 TriStrip™ ©Elation Professional, Los Angeles Ca. www.ElationLighting.com...
- Page 43 Design LED 60 TriStrip™ ©Elation Professional, Los Angeles Ca. www.ElationLighting.com...
- Page 44 Elation Professional 6122 S. Eastern Ave. Los Angeles, CA. 90040 323-582-3322 / 323-582-3108 fax www.ElationLighting.com /Info@ElationLighitng.com Rev. 3/04/2009 - visage...
Need help?
Do you have a question about the Design 60 Tri and is the answer not in the manual?
Questions and answers