Table of Contents
Advertisement
Quick Links
Advertisement
Table of Contents

Related Manuals for Elation DESIGN WASH 250


Summary of Contents for Elation DESIGN WASH 250
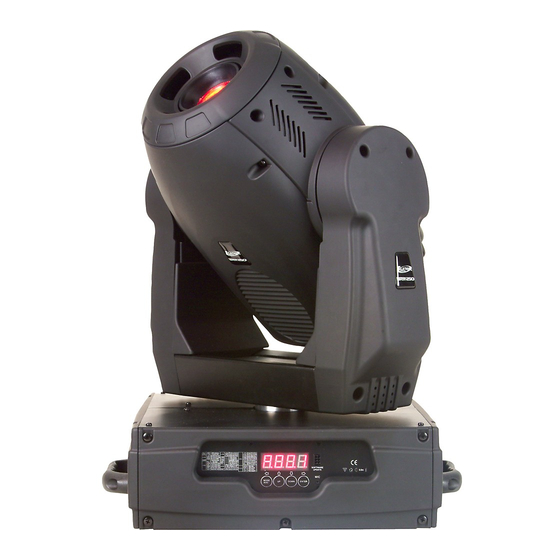
- Page 1 PROFESSIONAL MOVING HEAD USER’S MANUAL DESIGN WASH 250...
- Page 2 : • 8 and 16 bit resolution and change the speed : for smooth and precise motion pan : 630° (standard), 540°(optional) / tilt : 265° rotation strobe/shutter: 0-10Hz • DESIGN WASH 250 USER MANUAL V1.0 NR...
-
Page 3: Safety Instructions
Make sure the power cord is never crimped or damaged by sharp edges. If this would be the case, replacement of the cable must be done by an authorized dealer. CA UTION IM PORTA NT DESIGN WASH 250 USER MANUAL V1.0 NR... -
Page 4: General Guidelines
Most damages are the result of unprofessional operation. Please use the original packaging if the device is to be transported. CA UTION The housing may heat up CA UTION DESIGN WASH 250 USER MANUAL V1.0 NR... -
Page 5: Installation Instructions
For the installation, you need one: Philips MSD250/2 GY9.5 lamp Procedures: 1) Unscrew the 2 screws (A,B)on the bottom of the housing, holding the plate where the lamp is underneath. Carefully remove the metal plate. CA UTION CA UTION DESIGN WASH 250 USER MANUAL V1.0 NR... -
Page 6: Mounting The Device
The operator has to make sure the safety relating and machine technical installations are approved by an expert before taking the device into operation for the first time. These installations have to be approved by a skilled person once a year. CA UTION CA UTION DESIGN WASH 250 USER MANUAL V1.0 NR minutes after... - Page 7 The electric connection must only be carried out by a qualified electrician. Before mounting make sure that the installation area can hold a minimum point load of 10 times the device’s weight. Connect the fixture to the mains with the power plug. DESIGN WASH 250 USER MANUAL V1.0 NR...
-
Page 8: Dmx-512 Control Connection
3-pin XLR input of the moving head. You can chain multiple Moving head together through serial linking. The cable needed should be two core, screened cable with XLR input and output connectors. Please refer to the diagram below. DESIGN WASH 250 USER MANUAL V1.0 NR... - Page 9 If you set the same address, all the units will start to “listen” to the same control signal from the same channel number. In other words, changing the settings of one channel will affect all the fixtures simultaneously. DESIGN WASH 250 USER MANUAL V1.0 NR...
-
Page 10: Control Board
Up-button or Down-button. Confirm every selection by pressing the Enter-button. You can leave every mode by pressing the Mode/esc-button . The functions provided are described in the following sections. DESIGN WASH 250 USER MANUAL V1.0 NR... - Page 11 Clear lamp time Steps of Program Run Auto Save Scene 0 1 XX(00~FFH) Edit the channels of each scene 3 0 XX(00~FFH) T XXX(001~999) Time for each scene ON/OFF Edit program via controller DESIGN WASH 250 USER MANUAL V1.0 NR...
-
Page 12: Main Functions
2. Press [ENTER] for selecting the desired extension menu. 3. Select "ALON" or "MAST" by pressing [UP] or [DOWN] button. 4. Press [ENTER] to confirm or Press [MODE/ESC] to return to the main menu. DESIGN WASH 250 USER MANUAL V1.0 NR... - Page 13 2. Press [UP] or [DOWN] button to select “LAMP”. - Lamp on/off With this function you can switch the lamp on or off via the Control Board. 1. Select “OPEN” by pressing [UP] or [DOWN] button. channel. DESIGN WASH 250 USER MANUAL V1.0 NR...
- Page 14 1. Select “RTIL” by pressing [UP] or [DOWN] button. 2. Press [ENTER], the display shows “ON” or “OFF”. 3. Press [UP] to select “ON” if you wish to enable this function or press [DOWN] button to “OFF” if you don’t. DESIGN WASH 250 USER MANUAL V1.0 NR...
- Page 15 With this function you can Reset the device via the Control Board. 1. Select “REST” by pressing [UP] or [DOWN] button. 2. Press [ENTER] to reset or Press [MODE/ESC] to return to the main menu. or 540 DESIGN WASH 250 USER MANUAL V1.0 NR...
- Page 16 2. Press [ENTER], the display shows “T-XX”, “X” stands for the channel number. 3. The current channel will be tested. 4. Select the desired channel by pressing [UP] or [DOWN] button. 5. Press [ENTER] to confirm or Press [MODE/ESC] to return to the main menu. DESIGN WASH 250 USER MANUAL V1.0 NR...
- Page 17 3. Press [UP] to select “ON” if you wish to enable this function or press [DOWN] button to “OFF” if you don’t. 4. Press [ENTER] to confirm or Press [MODE/ESC] to return to the main menu. - Main menu 5 DESIGN WASH 250 USER MANUAL V1.0 NR...
- Page 18 1. Select “SC01” by pressing [UP] or [DOWN] button. 2. Press [ENTER], the display shows “SCXX”, “X” stands for the scene No. to be edited. 3. Change the scene No. by pressing [UP] or [DOWN] DESIGN WASH 250 USER MANUAL V1.0 NR...
- Page 19 10. Repeat steps 5-11 until all desired scenes are downloaded. 11. Press [MODE/ESC] to exit. The number of steps can be defined under “STEP” and the scenes can be called up under “RUN” DESIGN WASH 250 USER MANUAL V1.0 NR...
- Page 20 Channel 7 - Speed pan/tilt movement 0-225 max to min speed 226-235 blackout by movement 236-245 blackout by all wheel changing 246-255 no function Channel 8 - Effect wheel 0-70 Open / white DESIGN WASH 250 USER MANUAL V1.0 NR...
- Page 21 128-135 136-143 144-151 152-159 160-167 168-175 176-183 184-191 192-199 200-207 208-215 216-223 224-231 232-239 240-247 248-255 DESIGN WASH 250 USER MANUAL V1.0 NR Macro16 Macro17 Macro18 Macro19 Macro20 Macro21 Macro22 Macro23 Macro24 Macro25 Macro26 Macro27 Macro28 Macro29 Macro30 Random CMY...
- Page 22 140-159 Internal program 3 160-179 Internal program 4 180-199 Internal program 5 200-219 Internal program 6 220-239 Internal program 7 240-255 Internal program 8 Channel 15 – Pan fine Channel 16 – Tilt fine DESIGN WASH 250 USER MANUAL V1.0 NR...
-
Page 23: Error Message
If the external flexible cable or cord of this device is damaged, it shall be exclusively replaced by the manufacturer or his service agent or a similar qualified person in order to avoid a hazard. DESIGN WASH 250 USER MANUAL V1.0 NR... -
Page 24: Technical Specifications
Packing dimensions: 61.5 x 46.5 x50 cm Net weight: 26 KGS Gross weight: 31KGS Remark: errors and omissions for every information given in this manual excepted. All information is subject to change without prior notice. DESIGN WASH 250 USER MANUAL V1.0 NR...
Need help?
Do you have a question about the DESIGN WASH 250 and is the answer not in the manual?
Questions and answers