Advertisement
Quick Links
R
EPLACING THE
T
S
ANDBERG
TORAGE
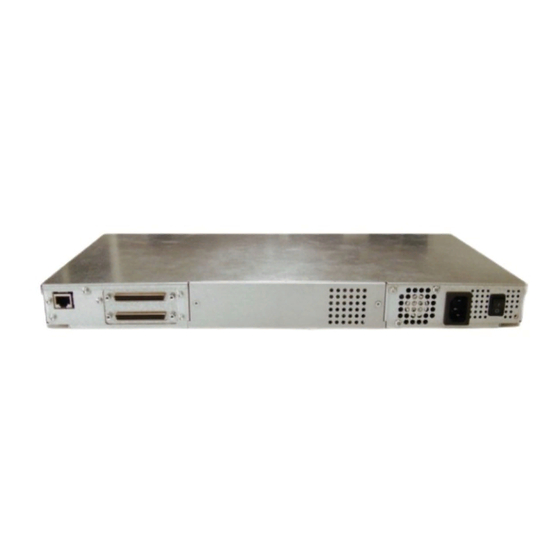
This document explains how to replace the tape drive in the Tandberg StorageLoader VXA
autoloader. You must obtain your replacement tape drive from Tandberg Data.
1 P
REPARING FOR
Note
If your autoloader is installed in a rack, it is not necessary to remove the autoloader from
the rack to replace the tape drive. It is also not necessary to disconnect the SCSI or
FireWire cable, terminator or ESD label, or Ethernet cable from the back of the
autoloader as long as they do not interfere with your access to the tape drive.
To prepare for replacement:
1.
Obtain a #1 Phillips screwdriver and a small flat-blade screwdriver.
2.
Ensure that the environment is free of conditions that could cause electrostatic discharge
(ESD). If possible, use an antistatic mat and a grounded static protection wristband during
installation. If a mat and wristband are not available, touch a known grounded surface, such
as a computer's metal chassis.
3.
Power off the autoloader and disconnect the power cord.
Before performing this procedure, be sure that the autoloader's power
Warning
switch is off and that the power cord is disconnected from the
autoloader and the outlet.
Vor der Ausführung von Installations- oder Wartungsarbeiten ist darauf
Warning
zu achten, daß der Autoloader-Netzschalter auf "Aus" gestellt ist und daß
das Anschlußkabel von der Autoloader und der Steckdose entfernt ist.
Antes de realizar cualquier procedimiento de instalación o de
Warning
mantenimiento, comprobar que el interruptor de alimentación de la
biblioteca está apagado y que el cable de alimentación no está
enchufado ni a la biblioteca ni a la toma de corriente.
Copyright 2003–2005. Tandberg Data and Exabyte , Exapak, VXA, and VXAtape are registered trademarks; M2, MammothTape,
SmartClean, EZ17 and NetStorM are trademarks; People Working for You and SupportSuite are service marks of Tandberg Data. All other
product names are trademarks or registered trademarks of their respective owners.
433693-01
October 2006
T
D
APE
RIVE IN THE
L
OADER
R
EPLACEMENT
VXA
www.tandberg.com
Advertisement

Summary of Contents for Tandberg Data REPLACE TAPE DRIVE IN STORAGELOADER VXA 433693-01
- Page 1 Copyright 2003–2005. Tandberg Data and Exabyte , Exapak, VXA, and VXAtape are registered trademarks; M2, MammothTape, SmartClean, EZ17 and NetStorM are trademarks; People Working for You and SupportSuite are service marks of Tandberg Data. All other product names are trademarks or registered trademarks of their respective owners.
-
Page 2: Tape Drive
EMOVING THE RIVE To remove the tape drive from the autoloader: Locate the tape drive cover plate at the back of the autoloader (see Figure Tape Drive Cover Plate Figure 1 Tape drive cover plate location Using a #1 Phillips screwdriver, remove the two screws securing the cover plate (see Figure 2). - Page 3 Pull on the tabs on the tape drive brackets and slide the tape drive directly out of the autoloader (see Figure Tabs Figure 4 Removing the tape drive Using a #1 Phillips screwdriver, remove the two screws from each of the brackets attached to the tape drive (see Figure 5).
- Page 4 NSTALLING THE RIVE This section describes how to install a new tape drive into the autoloader. To install a VXA-2 tape drive, see: Installing a VXA-2 tape drive To install a VXA-320 (VXA-3) tape drive, see: “Installing a VXA-320 (VXA-3) tape drive” on page 6 Installing a VXA-2 tape drive To install your new tape drive:...
- Page 5 With the faceplate’s side catch tabs clear of the metal tabs on the tape drive chassis, rotate the faceplate in the direction of the blue arrow (see Figure Side Catch Tabs Figure 8 Rotating the faceplate up from the tape drive chassis With the faceplate rotated upward, disengage the upper tabs from the top of the tape drive chassis and remove the faceplate (see Figure...
- Page 6 With the tape drive right side up, slide the tape drive into the autoloader until the bracket flanges rest against the flanges on the autoloader’s back panel. Connect the serial cable to the tape drive (see Figure 3). The connector is keyed to ensure the proper orientation.
- Page 7 Remove the faceplate as follows: Loosen the two M2.0 screws using a #1 Phillips screwdriver. Remove the screws and set them aside for later use (see Figure 11). Remove screws Figure 11 Removing the VXA-320 (VXA-3) faceplate’s screws Rotate the faceplate in the direction of the blue arrow as shown in Figure Rotate Figure 12 Rotating the VXA-320 (VXA-3) faceplate up from the tape drive chassis...
- Page 8 The serial connector on the SCSI VXA-2 tape drive differs from the serial Important connector on the VXA-320 (VXA-3) tape drive. If your Tandberg StorageLoader VXA originally contained a SCSI VXA-2 tape drive and you are installing a VXA-320 (VXA-3) tape drive, you will need a jumper cable to connect the serial cable to the tape drive.
-
Page 9: Resuming Operation
If you disconnected the SCSI or FireWire cable, terminator or ESD label, or Ethernet cable from the autoloader, reconnect them. Reconnect the power cord and power on the autoloader, as described in the Tandberg StorageLoader VXA Product Manual. Calibration of the new tape drive occurs automatically during power on. - Page 10 Press to display the cell selection screen: L o a d D r i v e F r o m C e l Press to scroll through the occupied cell locations until the one you want appears. Press to start the load operation. When the specified cartridge cell is in position at the tape drive, the cartridge is loaded into the drive.


Need help?
Do you have a question about the REPLACE TAPE DRIVE IN STORAGELOADER VXA 433693-01 and is the answer not in the manual?
Questions and answers