Advertisement
Quick Links
with
READ THE INSTRUCTIONS INSIDE CAREFULLY.
KEEP THIS USER MANUAL FOR FUTURE REFERENCE.
For future reference, record the serial number of your colour monitor.
SERIAL No.
The serial number is located on the rear of the monitor.
This monitor is E
S
NERGY
TAR
equipped with VESA DPMS.
The E
S
@ emblem does not represent EPA endorsement
NERGY
TAR
of any product or service.
As an E
NERGY
product meets the E
NERGY
@ compliant when used with a computer
S
" guidelines for energy efficiency.
TAR
I
17
31
45
Advertisement

Related Manuals for Hitachi CM751 - SuperScan 751 - 19" CRT Display


Summary of Contents for Hitachi CM751 - SuperScan 751 - 19" CRT Display
- Page 1 CM753ET MANUEL UTILISATEUR... 59 EasyMenu ! with EasyMenu is HITACHI’s On Screen Display function for easy operation. READ THE INSTRUCTIONS INSIDE CAREFULLY. KEEP THIS USER MANUAL FOR FUTURE REFERENCE. For future reference, record the serial number of your colour monitor.
- Page 2 NOTE: The information in this manual is subject to change without notice. The manufacturer assumes no responsibility for any errors that may appear in this manual. TRADEMARK ACKNOWLEDGEMENT VGA is a registered trademark of International Business Machines Corporation. VESA is a trademark of a nonprofit organization, Video Electronics Standard Association. ENERGY STAR’...
- Page 3 FEATURES......................CAUTIONS ......................INSTALLATION ....................STANDARD SETTINGS..................OPERATION......................POWER SAVING SYSTEM ................PLUG & PLAY....................SPECIFICATIONS ..................... The following features are provided by the Colour Monitor. Sharpest Focus and Highest Contrast Flat screen Enhanced Dot Pitch (EDP) CRT with anti-glare, dynamic focus circuit, dark glass, and an INVAR shadow mask gives the sharpest focus and highest contrast to minimize eye fatigue.
- Page 4 w NEVER REMOVE THE REAR COVER ! The rear cover MUST be removed only by authorized service personnel. This colour monitor contains high voltage components. THE RECEPTACLE SHOULD BE CLOSE TO THE MONITOR AND EASILY ACCESSIBLE ! INSTALL THE UNIT IN AN ADEQUATE ENVIRONMENT ! DO NOT expose this monitor to rain or moisture to prevent electric shock or fire hazard.
- Page 5 W CAUTION for 200 - 240V operation only This equipment relies on the protective devices in the building installation for short-circuit and over- current protection. Refer to the following table for the suitable number and location of the protective devices which should be provided in the building installation. Protective devices in single - phase equipment or sub - assemblies Location Protection...
- Page 6 W FCC (Federal Communications Commission) STATEMENT WARNING WARNING : This equipment has been tested and found to comply with the limits for a Class B digital device, pursuant to Part 15 of the FCC Rules. These limits are designed to provide This equipment reasonable protection against harmful interference in a residential installation.
- Page 7 W FOR THE CUSTOMERS IN THE U.K. THIS PRODUCT IS SUPPLIED WITH A TWO PIN MAINS PLUG FOR USE IN MAINLAND EUROPE. FOR THE U.K. PLEASE REFER TO THE NOTES ON THIS PAGE. -IMPORTANT FOR UNITED KINGDOM WORDING FOR CLASS I EQUIPMENT INSTRUCTION BOOKS AND LABELS The mains lead on this equipment is supplied with a moulded plug incorporating a fuse, the value of which is indicated on the pin face of the plug.
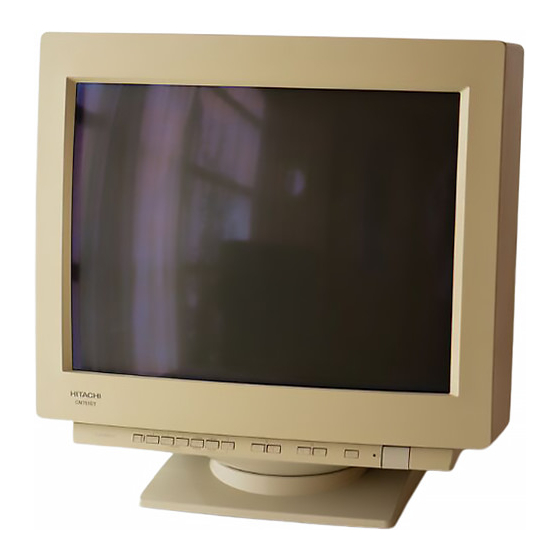
- Page 8 Install the monitor in the following way, taking care to maintain safety. 1. Installation Install the monitor on a horizontal base. , j ! Front Cover CRT Surface Connector Power Switch Control Panel Tilt & Swivel Base FRONT VIEW REAR VIEW 2.
- Page 9 Use a signal cable with the D-Sub Mini 15pin Connector. If the graphics board supplies more than one type of sync. signal, the sync. signal type will be automatically selected by the monitor, with the priority shown in the following table. 4.
- Page 10 Microprocessor-based preset functions can store 26 sets of geometry settings including the standard settings. The following industrial standard settings have been preprogrammed by the factory. Video Mode Name Horizontal Video Model ;;;;;E; / CM753ET ( (with Resolution and Frequency Vertical Frequency) VGA 640 X 480 - 6 0 Hz 31.47 kHz &...
- Page 11 Adjust Switch Select Switch Page 9 “DEGAUSSING” Page 9 “POWER ONIOFF” Page 9-12 “ADJUSTMENT” Page 13 “STORE” POWER ON/OFF 0 Press the Power Switch (a), to switch the power ON/OFF. When power is ON, the power LED lights. DEGAUSSING 0 Press the switch B, to degauss manually. W Use this function only when you see colour impurities on the screen after turning ON the monitor.
- Page 12 Select Adjust Function Item Switch Switch makes Contrast brighter excluding background. & --O+ Contrast -& makes Contrast darker excluding background. & --Of & makes Brightness brighter including back- c=+$ ground Brightness & makes Brightness darker including background. --O+ 4;rp moves the position to the right. --O+ &...
- Page 13 ADJUSTMENT (Continue) Select Item Switch ight incushion ight shrinks the right top side, and expands rapezoid the right bottom side. changes the colour to olour Select No.4 : User (if available) makes the Red stronger. &and m =&q$ When the Red reaches the upper simultaneously.
- Page 14 ADJUSTMENT (Continue) Adjust Select Function Item Switch Switch * b401RE lo\ol and @J -I. Moire simultaneously. ?eduction the horizontal moire changing makes the operation of the horizontal moire changing circuit stronger. moire changing circuit weaker. & o.perftes the vertical moire changing ”...
- Page 15 STORE 0 Press the switch m, to store the currently adjusting data,as follows. Storing Condition Restoring Condition kern H.Position When the monitor One setting is allowed for each video mode. H.Size can store a maximum 26 sets of geometry detects the same video V.Position settings including the standard settings (refer to mode.
- Page 16 AUTOMATIC SIGNAL CHECK 0 When the monitor has detected the change of the signal input condition, the monitor will indicate the condition automatically, as follows. Indication Condition Sample of “EasyMenu” The EasyMenu indicates the horizontal When the monitor detects ,.._.__________...______.. frequency and vertical frequency.
- Page 17 This monitor complies with VESA and power saving m NERGY requirements. The power saving system works only when used with VESA DPMS compliant PC’s and/or graphic controllers. Power Saving States VESA DPMS Power Power LED Video H. Sync. V. Sync. Mode Lighting Green 125 W (typical)
- Page 18 19 inch picture tube, 0.22 mm horizontal dot pitch, (0.21mm horizontal mask pitch) , lnvar shadow mask, Black matrix, Short persistence phosphors, Dark Tint Anti-Reflection coat. Input Signal Video : 0.70 Vp-p, Analog Sync. : Separate H, V or Composite HN TTL level or Sync.
Need help?
Do you have a question about the CM751 - SuperScan 751 - 19" CRT Display and is the answer not in the manual?
Questions and answers