Table of Contents
Advertisement
Advertisement
Table of Contents

Related Manuals for SABINE 2007 NAVIGATOR


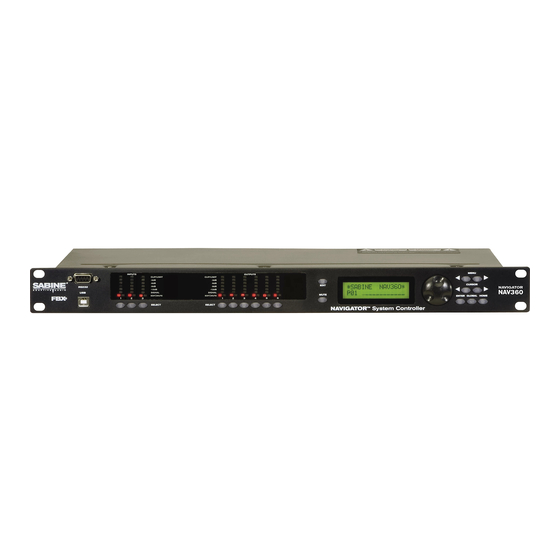
Summary of Contents for SABINE 2007 NAVIGATOR
- Page 2 UMMARY OF EATURES 13301 US Highway 441 Alachua, FL 32615 Phone (386) 418-2000 Fax (386) 418-2001 www.Sabine.com...
- Page 3 Council Directive: 73/23/EEC and 89/336/EEC (EMC Directives) Standards to which conformity is declared: EN 60065: 1993 EN 60742: 1995 EN 55103-1: 1997 EN 55022: 08:94 + a1:05:05 EN 55103-2: 1997 Manufacturer's Signature: Date: SEPTEMBER 30, 2005 Name: Doran Oster, Sabine President...
-
Page 4: Summary Of Features
Store and recall files, setups, programs • Control and link up to 16 Navigators (4802 and 8802 units only) • Future-proof FREE Flash RAM upgrade capability: upgrade your firmware and software using Sabine’s Navigator Upgrade Wizard Navigator Optional Hardward and Software Features •... - Page 5 OTES...
-
Page 6: Table Of Contents
ABLE OF ONTENTS Table of Contents Notes Summary of Features ................................3 Section One: Introduction ..............................6 Section Two: Front & Back Panel Views ..........................7 Section Three: Navigator Applications ..........................8 3.1 INSTALLED AUDIO ..................................8 3.2 PRODUCTION AUDIO ................................. 9 Section Four: Using Navigator Front Panel Controls ...................... -
Page 7: Section One: Introduction
NTRODUCTION Section One: Introduction Congratulations on your purchase of the Sabine Navigator. These products are our latest versions of the popular Navigator System Processors. The new Navigators come in four basic input/output configurations. The NAV240 is a 2 by 4 , the NAV360 is a 3 by 6, the NAV480 and NAV4802 are 4 by 8, and the NAV8802 is an 8 by 8. -
Page 8: Section Two: Front & Back Panel Views
&B ECTION RONT ANEL IEWS Section Two: Front & Back Panel Views Data wheel Edits parameter values NAV240 Front Panel Menu keys EDIT Button Cursor keys Engages Channel Edit mode Scroll through Moves cursor through USB Connector Input & Output available menus available parameters Connect your computer for... -
Page 9: Section Three: Navigator Applications
ECTION HREE AVIGATOR PPLICATIONS Section Three: Navigator Applications 3.1 INSTALLED AUDIO House of Worship NAV4802 Laptop Control Conference Room - Distributed Audio NAV8802... -
Page 10: Production Audio
ECTION HREE AVIGATOR PPLICATIONS 3.2 PRODUCTION AUDIO Stereo 3-way, with Subs NAV480 Laptop Control Left, Center, Right NAV360 Navigator2 Op Guide 071010 KJS.pmd... -
Page 11: Section Four: Using Navigator Front Panel Controls
ECTION SING AVIGATOR ONTROLS Section Four: Using Navigator Front Panel Controls 10. 11. RED Mute LED BLUE Edit LED for each channel for each channel 1. MUTE Button: Select this to turn the Channel Select Buttons into MUTE buttons. Each press of a Channel Select button toggles that channel’s Mute Status, and the RED Mute LED will light indicating the channel is muted. -
Page 12: Quick Start Guide To The Navigator Front Panel
ECTION SING AVIGATOR ONTROLS 4.1. QUICK START GUIDE TO THE NAVIGATOR FRONT PANEL · After powering up the unit, the following initialization screen is displayed on the LCD: · The initialization process takes about 8 seconds and during that period the unit boots and displays the Navigator firmware version. -
Page 13: Section Five: Operating The Navigator
ECTION PERATING THE AVIGATOR Section Five: Operating the Navigator INPUT MENUS Each of the Navigator input channels has a separate Menu key. There are 7 function menus for each input channel, and you cycle through these by pressing the Menu keys. The first line in the LCD indicates which input channel you are editing, and shows the name of that channel if you have added one (for example, IN_1: ____), The menus are arranged in a linear fashion. - Page 14 ECTION PERATING THE AVIGATOR FBX Feedback Exterminator NAV4802 & NAV8802 NAV240, 360, 480 See Section 5.6 for a complete de- scription of how to operate the FBX Feedback Exter- · EQ#: Selects one of the 8 available FBX filters. minator ·...
- Page 15 ECTION PERATING THE AVIGATOR FBX-Mode NAV4802 & NAV8802 NAV240, 360, 480 · SETUP MODE: This screen is used to engage FBX Setup mode. Use this for setup only - not for use during the show. This step provides maximum gain before feedback. Follow on-screen instructions and raise gain slowly.
-
Page 16: Output Menus
ECTION PERATING THE AVIGATOR OUTPUT MENUS Each output channel of the Navigator has a separate menu key. There are 6 menus for each output channel. The menus cycle in a linear fashion, just like the input menus. Use the Cursor keys to select a parameter to edit, and use the Data Wheel to make your edits. - Page 17 ECTION PERATING THE AVIGATOR Crossover NAV4802 & NAV8802 NAV240, 360, 480 · FTRL: Choose the type of low frequency filter (high pass). Types can be Buttwrth (Butterworth), Link-Ri (Linkwitz-Riley) or Bessel. · FRQL: Filter cut-off frequency of low frequency crossover point (high pass).
-
Page 18: Global Parameters Menus
ECTION PERATING THE AVIGATOR Input Source NAV4802 & NAV8802 NAV240, 360, 480 · 1, 2, 3, 4 – Input channel source for the current output channel. This is your sub-mixer for each output of the Navigator. Values range from 0.00 (Maximum level) to -40, then OFF, which mutes that input for the output you are editing. - Page 19 ECTION PERATING THE AVIGATOR Program Store The Navigator has a built in non-volatile memory that can store up to 30 different program setups. A program can be stored using this menu. The old program with the same program number will be replaced. Once the program is stored in the flash memory, it can be recalled at a later time, even after power down.
- Page 20 ECTION PERATING THE AVIGATOR General System Parameters NAV240, 360, 480 NAV4802 & NAV8802 · FREQ MODE: Selects the frequency control mode for EQ and crossover filters. The coarse adjustment is 36 steps/octave; choose All Frequencies (1 Hz resolution) for fine adjustments. ·...
-
Page 21: Input/Output Reference Guide
ECTION PERATING THE AVIGATOR Security (continued) · LOCK: Engages lock (Yes) or unlock (No) for the corresponding menu. · PASSWORD: Enter your 4-character password here. Initial password creation must be done within Navigator Remote Software. Entering the same password here initiates the lockout function. Press Enter and your Navigator front panel controls will be locked according to the menu selections you made. -
Page 22: Feedback Control And Parametric Equalization
Constant Q. However, the top end of these filters get wider and wider as the filter gets deeper. In other words, they take out more of the program as the filter gets deeper. Sabine Constant Q filters uses the most stringent and meaningful definition. -
Page 23: Fbx Operating Instructions
ECTION PERATING THE AVIGATOR 5.6. FBX OPERATING INSTRUCTIONS Follow these steps to obtain the maximum gain before feedback, with minimal or no loss in the tonal quality of your program. You should always setup one channel at a time by turning down the other channels of the mixer or power amplifiers. - Page 24 ECTION PERATING THE AVIGATOR 2. You’ve set as many filters as you need or want, even though you haven’t used them all. Press EXIT to prevent any more Fixed filters from setting, or any of the set Fixed filters from notching more deeply.
-
Page 25: Section Six: Using Navigator Remote Software
Try these tips if you are 1. Software Version. Make sure the software version installed in your computer is compatible with the firmware version of your Navigator. Read the release notes at www.Sabine.com. having difficulty connect- ing your Navigator unit(s) 2. -
Page 26: Installing And Using The Software
OFTWARE 6.3. INSTALLING AND USING THE SOFTWARE Follow the on screen instructions for installing the Sabine Remote Control Software for the Navigator. If you are using the Navigator in a network see Section 6.7 for details. After the installation you should have a Navigator software icon on your desktop. We also suggest you install the Navigator Upgrade Wizard software. -
Page 27: Navigator Remote Control Screens
ECTION SING AVIGATOR EMOTE ONTROL OFTWARE 6.5. NAVIGATOR REMOTE CONTROL SCREENS Connection Screens These screens are used for making the software connection to your Navigator in Live Mode. See section 6.3 for more information on connecting your Navigator. Connection Setup Screen Connection Status Displays 1. - Page 28 ECTION SING AVIGATOR EMOTE ONTROL OFTWARE Main Screen - Mixer View This view allows you to work with the Navigator processing in a traditional mixer view. Each input and output has its own set of processing. Your inputs and outputs also have select buttons for routing - just like a mixer.
- Page 29 ECTION SING AVIGATOR EMOTE ONTROL OFTWARE This is one of the most commonly used screens. Controls for all other screens work in a similar way. Guide to Crossover Screen Controls: • View: Use these buttons to choose which Output graph you will view. You can view multiple output response curves.
-
Page 30: Saving Your Work: Navigator Files And Programs
- you will get a warning asking you to confirm. If you want keep previously uploaded programs you should rename the files in the Sabine Navigator directory. The upload process creates 30 files, with default names Program 1.ndat, Program 2.ndat, etc. -
Page 31: Creating A Navigator Network (Nav4802 And Nav8802 Only)
1. Install the Lantronix DeviceInstaller software. This software requires that your computer has .NET Framework 1.1 or higher. The DeviceInstaller utility comes on your Navigator CD Rom, or you can download it from Sabine.com. It does not make an icon on your desktop, so you must run it from Start - Programs. - Page 32 ECTION SING AVIGATOR EMOTE ONTROL OFTWARE 8. Click the ‘Assign’ button 9. Select the same Navigator in the main window again and click the ‘Configure’ menu button 10. Select the ‘Ports’ tab and click ‘Edit Settings’ 11. Change the Baud Rate to 115200, Data bits to 8, Parity to None, Stop bits to 1, and Flow Control to None.
-
Page 33: Section Seven: Using Optional Navigator Hardware And Software Features
Setup\Setup.exe. After running the installer, there will be an icon on your desktop labeled “Sabine Wall panel Setup”. 2. To get started, double-click the “Sabine Wall Panel Setup” icon on your desktop. 3. Begin by clicking the “Add Menu” button. This creates a blank menu which you will edit to contain the commands you need. - Page 34 ECTION EVEN SING AVIGATOR PTIONAL ARDWARE AND OFTWARE EATURES NTROL OFTWA Programming the Wall Panel - Transferring the settings to the wall panel The next step is to transfer these new menus into your wall panel controller. This is done using the programming port board and cable that comes with your wall panel.
- Page 35 ECTION EVEN SING AVIGATOR PTIONAL ARDWARE AND OFTWARE EATURES Using Multiple Wall Panels and Multiple Navigators Your application may require the ability to control one or more Navigators from one or more Wall Panels. Because there is only one Wall Panel connector on each Navigator, you must connect either multiple Navigators or Wall Panels by daisy-chaining the Wall Panels.
- Page 36 - proceed as shown in the Transferring the Settings section of this operating guide. Customer Service If you have any other questions regarding the NAVRC-100 Wall Panel please contact us at sabine@sabine.com or call 800-626-7394. Navigator Wall Panel OpGuide 070831.pmd rr...
-
Page 37: Digital Input/Output Option
Navigators with the Digital Input/Output option include a DB25 connector on the back panel. You will need a DB25 to XLR male/female snake in order to patch the digital inputs and outputs. Sabine uses the Yamaha standard for wiring the DB25 connector for AES/EBU connections. Your Navigator may come with a DB25 to DB25 adaptor that maintains the Yamaha standard for the pin wiring (see the wiring diagram for this adaptor on the next page). - Page 38 ECTION EVEN SING AVIGATOR PTIONAL ARDWARE AND OFTWARE EATURES Digital I/O Option: Wiring diagram for Yamaha AES/EBU Adaptor (for reference only) Output NAV Side (Yamaha) Side Signal MALE FEMALE IN1- IN2+ OUT1- OUT2+ OUT3- OUT4+ IN1+ IN2- OUT1+ OUT2- OUT3+ OUT4- Wall Panel Control Option: Dipswitch Settings for setting the unique address of up to 32 Wall Panels.
-
Page 39: Section Eight: Navigator Engineering Specifications
Operating system firmware stored in Flash RAM. All 2 x 26 Character Backlit LCD (240, 360, 480) future upgrades for firmware and software downloadable Level Meters: 5 Segment LED from Sabine website using Upgrade Wizard. Buttons: Mute and Edit Function Controls Select Controls, Menu Controls Notes:... -
Page 40: Section Nine: Cautions & Warranty
ECTION AUTIONS AND ARRANTIES Section NIne: Cautions & Warranty Warn ing! This equipment must be earthed. Caution! Risk of electric shock. Do not open. Caution! Shock hazard. Do not remove covers. No user serviceable parts Warning! inside. Refer servicing to qualified service personnel. Warning! To reduce the risk of fire or electric shock, do not expose this product to rain or moisture. - Page 41 Limited Warranty THIS LIMITED WARRANTY VALID ONLY WHEN PURCHASED AND REGISTERED IN THE negligence. Sabine does not assume liability for personal injury or property damage arising out of or UNITED STATES OR CANADA. ALL EXPORTED PRODUCTS ARE SUBJECT TO WARRANTY...
Need help?
Do you have a question about the 2007 NAVIGATOR and is the answer not in the manual?
Questions and answers