Table of Contents
Advertisement
Quick Links
STAND FAN
USER MANUAL
FS45-23MRD
Warning notices: Before using this product, please read this manual carefully and keep it for future reference.
The design and specifications are subject to change without prior notice for product improvement.
Consult with your dealer or manufacturer for details.
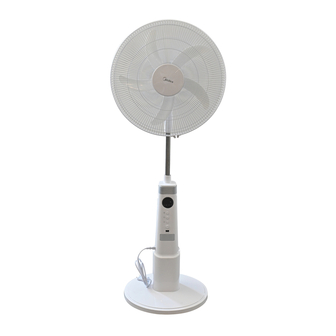
The diagram above is just for reference. Please take the appearance of the actual product as the standard.
Advertisement
Table of Contents

Related Manuals for Midea FS45-23MT


Summary of Contents for Midea FS45-23MT
- Page 1 STAND FAN USER MANUAL FS45-23MRD Warning notices: Before using this product, please read this manual carefully and keep it for future reference. The design and specifications are subject to change without prior notice for product improvement. Consult with your dealer or manufacturer for details.
-
Page 3: Table Of Contents
THANK YOU LETTER Thank you for choosing Midea! Before using your new Midea product, please read this manual thoroughly to ensure that you know how to operate the features and functions that your new appliance offers in a safe way. -
Page 4: Safety Instructions
SAFETY INSTRUCTIONS Intended Use The following safety guidelines are intended to prevent unforeseen risks or damage from unsafe or incorrect operation of the appliance. Please check the packaging and appliance on arrival to make sure everything is intact to ensure safe operation. If you find any damage, please contact the retailer or dealer. - Page 5 Caution Read rules for safe operation and instructions carefully. ● This appliance is not intended for use by persons ● (including children) with reduced physical, sensory or mental capabilities, or lack of experience and knowledge, unless they have been given supervision or instruction concerning use of the appliance by a person responsible for their safety.
- Page 6 Warning If the supply cord is damaged, it must be replaced by ● manufacturer or its service agent or a similarly qualified person in order to avoid a hazard. To protect against the risk of electrical shock, do not ● immerse the unit, cord or plug in water or other liquid.
-
Page 7: Specifications
SPECIFICATIONS Product Model FS45-23MRD Voltage 220-240V~ Frequency 50/60Hz Power Rated Current 0.5A Power Factor... -
Page 8: Product Overview
PRODUCT OVERVIEW Component Name Fan head Rear grill Install screw Plastic nut Tighten knob Spinner Cable terminal protection box Fan body Blade Chassis Front grill Plastic nut NOTE All the pictures in this manual are for explanation purpose only. Any discrepancy between the real object and the illustration in the drawing shall be subject to the real subject. -
Page 9: Product Installation
PRODUCT INSTALLATION Installation Procedures NOTE Before installation, first remove chasis screws from the pole, remove the Spinner and Plastic nut from the motor shaft, and then install. 1 Chassis installation Align the lower pole and the chassis, and then fasten securely with chassis screws. 2 Cable terminal protection box installation 2.1 The terminal of the fan head is connected to the terminal of the fan body. - Page 10 3 Fan head installation 3.1 Install and fix the fan body by way of tightening or loosening install screw. 3.2 Pull out and fix the internal pole (column) after adjusting the height by way of tightening or loosening the knob. Height Adjustment Install screw...
- Page 11 6 Blade installation After the installation of blade, rotate the blade with your finger to make sure the blade works normally. Clockwise 7 Spinner installation Screw counterclockwise the spinner tightly, and then install the front grill. Clockwise 8 Installation of Front Grill 8.1 From top to bottom align the clips of the front grill with the uppermost mesh of the rear grill.
- Page 12 8.2 Press the grills in order with both hands. A sound of “click” will be heard when installed right. A straightly placed Logo indicates the grills have been correctly aligned. 8.3 Self-Catch Installation. 9 Tilt angle adjustment To adjust the air flow upward or downward, push the grilles lightly to the desired direction.
-
Page 13: Operation Instructions
OPERATION INSTRUCTIONS Operating Instructions Of The Machine Body Wind Speed or Timer indicator Timer indicator Battery Level indicator Wind Speed Timer Light Adjustment ON/OFF Button Function description When there is no external power supply, the whole machine is ● battery powered. Press the switch button and the whole machine enters the standby state. - Page 14 Button Function description When the machine is powered by battery, the battery icon ● BATTERY shows the current battery power; INDICATOR In the case of external power charging; the battery icon will always be displayed as a marquee. Remote Control •...
- Page 15 Screen-off function • In case of no operation for 60 seconds during normal operation, the indicator light on the body will be automatically off, but the fan will continue to operate. Press the ON/OFF button to turn off the fan when the screen is off, and press the other button to restore display.
-
Page 16: Cleaning And Maintenance
CLEANING AND MAINTENANCE The fan requires minimal maintenance. Do not try to fix it by yourself. Refer it to qualified service personnel if service is needed. 1. Before cleaning and assembling, unplug the fan power. 2. To ensure adequate air circulation to the motor, keep vents at the rear of the motor free of dust. -
Page 17: Troubleshooting 1
TROUBLESHOOTING Operation of your appliance can lead to errors and malfunctions. The following tables contain possible causes and notes for resolving an error message or malfunction. It is recommended to read the table below carefully in order to save your time and money that may cost for calling to the service center. -
Page 18: Trademarks, Copyrights And Legal Statement
Midea may constitute trademark infringement or unfair competition in violation of relevant laws. This manual is created by Midea and Midea reserves all copyrights thereof. No entity or individual may use, duplicate, modify, distribute in whole or in part this manual, or bundle or sell with other products without the prior written consent of Midea. -
Page 19: Data Protection Notice
European Economic Area. Further information are provided on request. You can contact our Data Protection Officer via MideaDPO@midea.com. To exercise your rights such as right to object your personal date being processed for direct marketing purposes, please contact us via... - Page 22 MideaDPO@midea.com MideaDPO@midea.com...
- Page 34 FS45-23MRD 240-220...
- Page 40 FS45-23MRD...
Need help?
Do you have a question about the FS45-23MT and is the answer not in the manual?
Questions and answers