Table of Contents
Advertisement
Quick Links
Original Instructions
Instrukcje oryginalne
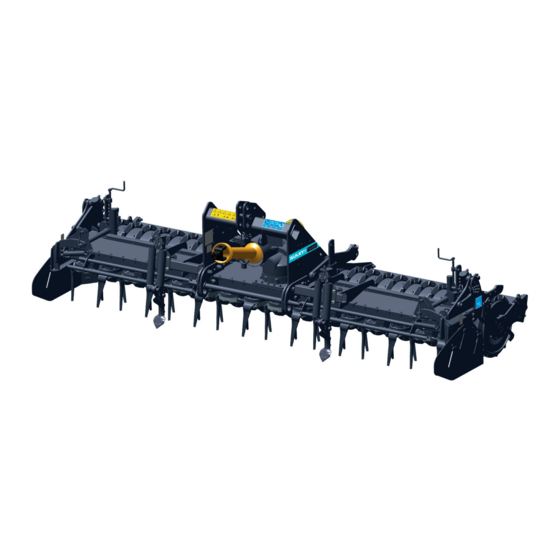
HR 190-220-300
Rotary harrow
PLEASE READ CAREFULLY BEFORE USING THE MACHINE
INSTRUKCJA INSTRUKCJI W JĘZYKU POLSKIM
Réf: 402 256-00 EN - PL - RU
BUREL SOLUTION
P.A. de la Gaultière
35220 CHATEAUBOURG - France
Tél :(33)02 99 00 84 84
E-Mail : info@burel-group.com
Web : www.sulky-burel.com
03/03/2020
Advertisement
Table of Contents

Related Manuals for Sulky HR 300


Summary of Contents for Sulky HR 300
- Page 1 Original Instructions Instrukcje oryginalne HR 190-220-300 Rotary harrow PLEASE READ CAREFULLY BEFORE USING THE MACHINE INSTRUKCJA INSTRUKCJI W JĘZYKU POLSKIM Réf: 402 256-00 EN - PL - RU BUREL SOLUTION P.A. de la Gaultière 35220 CHATEAUBOURG - France Tél :(33)02 99 00 84 84 E-Mail : info@burel-group.com...
- Page 3 Please do not hesitate to give us your suggestions and com- ments based on your experience. They are always useful for improving our products. We hope your HR 190-220-300 will provide long and trouble- free service. Yours sincerely. J. BUREL...
- Page 4 DOKUMENTACJ I TECHNICZNEJ 35220 C HATEAUBOURG RANCE . . . OTARY HARROW ACHINE ESCRIPTION RONY WIRNIKOWEJ PIS MASZYNY HR 190-220-300 ERIAL NUMBER ERIAL NUMBER ERIAL NUMBER CCESSORIES SPRZĘT HE MACHINE CONFORMS TO THE RELEVANT ASZYNA JEST ZGODNA Z ODPOWIEDNIMI « » 2006- «...
- Page 5 Safety regulations These symbols are used in these instructions every time recommendations are provided concerning your safety, the safety of ● others or the correct operation of the machine. These recommendations must be given to all users of the machine. ●...
- Page 6 11 - Caution! When power take-off has been 11 - All components and protection mechanisms disengaged, moving parts may continue to rotate that show signs of severe corrosion must be replaced for a few moments. Do not approach until they immediately.
- Page 7 Ogólne przepisy bezpieczeństwa pracy W niniejszej instrukcji obsługi użyto poniższych symboli za każdym razem, gdy opisane zalecenia dotyczą Państwa bezpieczeństwa jak i osób postronnych lub działania samej maszyny. Wszelkie zalecenia należy przekazać każdemu użytkownikowi maszyny. Ryzyko Wskazówka dotycząca uszkodzenia Ryzyko wypadku korzystania z maszyny...
- Page 8 2 - Podczas montowania układu hydraulicznego producenta. Stosować wyłącznie oryginalne części pozostawianie w środowisku naturalnym lub należy zwrócić szczególną uwagę na podłączenie firmy Sulky! palenie opon. Należy je oddać do dystrybutora lub przewodów zgodnie z zaleceniami producenta. 9 - Przed przystąpieniem do prac związanych ze do autoryzowanego punktu zbiórki.
- Page 9 Правила безопасности ● Данные символы используются в инструкции, когда речь идет о рекомендациях относительно обеспечения безопасности и правильного функционирования машины. ● Данные рекомендации в обязательном порядке следует передать лицам, допущенным к эксплуатации машины. Риск Указание по Риск несчастного повреждения применению случая...
- Page 10 2 - Во время сцепки или расцепления машины 14 - При повреждении защитных устройств характеристикам, определяемым и трактора переведите рычаг управления вала отбора мощности и валов карданной производителем. Используйте только гидравлическим отводом в положение, передачи их следует немедленно заменить. оригинальные детали производителя. препятствующее...
-
Page 11: Table Of Contents
DELIVERY Pages • A Recommendations for use 14-17 • B Delivery 18-19 • C Handling 20-21 START-UP Pages • A Tractor control 22-23 • B Hitching to the tractor 28-29 • C Universal joint shaft 30-33 MACHINE USE AND SETTINGS Pages •... - Page 12 DOSTAWA Strony • A Zalecenia dotyczące użytkowania 14-17 • B Dostawa 18-19 • C Unoszenie i przenoszenie 20-21 URUCHAMIANIE Strony • A Kontrola ciągnika 24-25 • B Podłączenie do ciągnika 28-29 • C Wał napędowy przegubowo-teleskopowy (Wał Cardana). 30-33 OBSŁUGA I USTAWIENIA MASZYNY Strony •...
- Page 13 ДОСТАВКА Стр. • A Рекомендации по использованию 14-17 • B Доставка 18-19 • C Погрузочно-разгрузочные работы 20-21 ВВОД В ЭКСПЛУАТАЦИЮ Стр. • A Проверка трактора 26-27 • B Сцепка с трактором 28-29 • C Карданный вал 30-33 ИСПОЛЬЗОВАНИЕ И НАСТРОЙКИ МАШИНЫ Стр.
- Page 14 Delivery / Dostawa / Доставка...
-
Page 15: A Recommendations For Use
It is important to check the quantity of crop residue in order eCommendationS For uSe to guarantee work of acceptable quality for the rotating The HR 190-220-300 rotating harrow is designed and harrow and prevent any premature damage to it. constructed to work the ground for agricultural purposes The rotation speed of the rotors must be suited to the and in very different situations. - Page 16 Delivery / Dostawa / Доставка...
- Page 17 It is not advisable to turn too tightly when working. Sulky cannot be held liable in any way in the event of an accident arising due to the use of the machine that does not comply with the instructions.
- Page 18 Delivery / Dostawa / Доставка...
-
Page 19: B Delivery
Delivery / Dostawa / Доставка elivery - Check that you have received delivery of the power harrow in full. Use its order form as reference. Each accessory must be present. - The transmission (universal joint) - The operating manual Only claims made on taking delivery of the machine will be considered. - Page 20 Delivery / Dostawa / Доставка...
-
Page 21: C Handling
Delivery / Dostawa / Доставка andling - Only the rings provided should be used to handle the machine. The machine must be lifted by people who are trained and authorised to carry out this task. Use ties suitable for the load and in good condition. The weight of the machine is available in the Maintenance chapter in the Specifications section. - Page 22 Start-up / Uruchamianie / Ввод в эксплуатацию ������ ���� ����+���� −��������������+(0,������������������) ����+���� M1 mini = = …………………… Kg ������ ���� ����+���� +��������������−����������(����+����) ���� = …………………… Kg = ������ + ���� + ������ = …………………… Kg = �������� − ���������� = …………………… Kg...
-
Page 23: A Tractor Control
Start-up / Uruchamianie / Ввод в эксплуатацию raCtor Control To be checked: • The total authorised weight. • The permitted weight per axle. • The authorised support weight on the tractor’s linkage. • The permissible load capacity for the tyres fitted to the tractor. •... - Page 24 Start-up / Uruchamianie / Ввод в эксплуатацию ������ ���� ����+���� −��������������+(0,������������������) ����+���� M1 mini = = …………………… Kg ������ ���� ����+���� +��������������−����������(����+����) ���� = …………………… Kg = ������ + ���� + ������ = …………………… Kg = �������� − ���������� = …………………… Kg...
- Page 25 Start-up / Uruchamianie / Ввод в эксплуатацию ontrola Ciągnika Sprawdzić: • Dopuszczalną masę ciągnika. • Dopuszczalne obciążenia na osie ciągnika. • Dopuszczalny nacisk na zaczep ciągnika. • Dopuszczalne obciążenia ogumienia zamontowanego w wyposażeniu ciągnika. • Czy dopuszczalny nacisk na zaczep jest wystarczający. Wszystkie informacje znajdą...
- Page 26 Start-up / Uruchamianie / Ввод в эксплуатацию ������ ���� ����+���� −��������������+(0,������������������) ����+���� M1 mini = = …………………… Kg ������ ���� ����+���� +��������������−����������(����+����) ���� = …………………… Kg = ������ + ���� + ������ = …………………… Kg = �������� − ���������� = …………………… Kg...
- Page 27 Start-up / Uruchamianie / Ввод в эксплуатацию П роверка трактора Необходимо проверить: • Общий допустимый вес. • Допустимые нагрузки на ось. • Допустимую нагрузку на опорное соединение в точке сцепки с трактором. • Допустимую грузоподъемность шин трактора. • Достаточна ли допустимая нагрузка сцепки? Все...
- Page 28 Start-up / Uruchamianie / Ввод в эксплуатацию...
-
Page 29: B Hitching To The Tractor
- Contact your dealer and consult us if you wish to fit a non- Sulky seed drill. You must consult Sulky if you want to adapt a seed drill other than the models quoted above. The warranty will be cancelled automatically if no written authorisation is provided by the manufacturer. - Page 30 Start-up / Uruchamianie / Ввод в эксплуатацию...
-
Page 31: C Universal Joint Shaft
Start-up / Uruchamianie / Ввод в эксплуатацию To ensure that the PTO shaft and machine operate niverSal Joint ShaFt correctly, it is essential to adjust the length of the top - Only use the transmission shaft that was supplied with link on flat ground to make sure that the machine is the harrow. - Page 32 Start-up / Uruchamianie / Ввод в эксплуатацию...
- Page 33 Start-up / Uruchamianie / Ввод в эксплуатацию Transmission shaft angle: Recommendations: - To maintain your universal joint in good working order, - When setting the length, place the two half-transmission keep to the working positions without exceeding the shafts side by side in the short position and mark off. maximum angle of 25°...
- Page 34 Machine use and Settings / Obsługa i ustawienia maszyny / Использование и Настройки машины...
-
Page 35: A Flush Level Setting
= 341 tr/min eleCting the rotary SPeed The ratio = 2.04 Calculation Sulky cannot be held responsible for damage caused by improper use of the machine. The choice of rotor speed and forward speed gives the Gear change required crumbling performance. - Page 36 Machine use and Settings / Obsługa i ustawienia maszyny / Использование и Настройки машины...
-
Page 37: C Adjusting The Working Depth
Machine use and Settings / Obsługa i ustawienia maszyny / Использование и Настройки машины Note: dJuSting the working dePth Engage the power take-off slowly when the harrow’s tines When in use, the power harrow is in the horizontal position; are not in the ground, and gently lower the hydraulic lift make adjustments using the top link, with the tractor until the set depth is reached (roller at upper stop). - Page 38 Machine use and Settings / Obsługa i ustawienia maszyny / Использование и Настройки машины...
-
Page 39: D Adjusting The Side Defl Ector Plates
Machine use and Settings / Obsługa i ustawienia maszyny / Использование и Настройки машины dJuSting the Side deFleCtor PlateS The side deflector is an «automatic” one. There is no need to make any adjustment to the deflector depending on the depth adjustment of the rotating part. If, however, despite setting the depth you still see a mound of earth, you may adjust the deflector’s position . - Page 40 Machine use and Settings / Obsługa i ustawienia maszyny / Использование и Настройки машины 2-3 mm...
-
Page 41: E Roller
Machine use and Settings / Obsługa i ustawienia maszyny / Использование и Настройки машины Centralised adjustment oller Cleaning the roller Packer or Tracker roller Remove the two screws from the two sides and The roller scrapers are pre-set in the factory, nevertheless loosen the screws . - Page 42 Maintenance / Konserwacja / ТЕХНИЧЕСКОЕ ОБСЛУЖИВАНИЕ...
-
Page 43: A Checks
Maintenance / Konserwacja / ТЕХНИЧЕСКОЕ ОБСЛУЖИВАНИЕ heCkS When the machine is new and after a few hectares, check the following parts: The screws are tightened after 5 / 10 /50 hours of use, then every 500 hours. The tightening torque is 200 N.m - Check regularly that all the bolts are tightened. - Page 44 Maintenance / Konserwacja / ТЕХНИЧЕСКОЕ ОБСЛУЖИВАНИЕ...
-
Page 45: B Lubrication
EP 220 EP 220 III) Obudowa marowanie – Modele bron wirnikowych HR 190 i 220 są trwale I) Smarować wał napędowy według zaleceń producenta przesmarowane smarem EP 00, natomiast model 300 wału zgodnie ze wskazówkami z załączonej do wału wymaga smarowania smarem EP460. - Page 46 Maintenance / Konserwacja / ТЕХНИЧЕСКОЕ ОБСЛУЖИВАНИЕ...
-
Page 47: C Replacing The Tines
Maintenance / Konserwacja / ТЕХНИЧЕСКОЕ ОБСЛУЖИВАНИЕ Reference: ePlaCing the tineS The tines on the harrow must be replaced before excess Right-hand tine 680 146 wear causes damage to the rotors. Left-hand tine 680 145 a) Bolted tines When new, the tines have a length (L) of 330mm Right-hand carbide tine 680 132 The tines must be changed when they reach a length (l) of... - Page 48 Maintenance / Konserwacja / ТЕХНИЧЕСКОЕ ОБСЛУЖИВАНИЕ...
- Page 49 Maintenance / Konserwacja / ТЕХНИЧЕСКОЕ ОБСЛУЖИВАНИЕ b) “Rapid-fit” quick-fit tines When new, the tines have a length (L) of 330mm The tines must be changed when they reach a length (l) of 170mm. Beyond this length the manufacturer’s warranty is cancelled automatically.
- Page 50 Maintenance / Konserwacja / ТЕХНИЧЕСКОЕ ОБСЛУЖИВАНИЕ...
-
Page 51: D Cleaning
Maintenance / Konserwacja / ТЕХНИЧЕСКОЕ ОБСЛУЖИВАНИЕ leaning Clean the machine from top to bottom. For cleaning and maintenance, wear protective glasses and gloves to prevent injury. Wash the machine in a recycling area for mud and hazardous materials. zySzCzenie Oczyścić maszynę od góry do dołu. Podczas mycia i prac utrzymania, stosować... - Page 52 Accessories / Wyposażenie opcjonalne / Оборудование...
-
Page 53: A Setting The Levelling Bar
Accessories / Wyposażenie opcjonalne / Оборудование etting the levelling bar Mounting the levelling bar at the rear makes it possible to improve the granulation of the seed bed. Do not apply too deep an adjustment so as to avoid slowing down the evacuation of the soil, especially in wet conditions. - Page 54 Accessories / Wyposażenie opcjonalne / Оборудование...
-
Page 55: B Track Eradicator
Accessories / Wyposażenie opcjonalne / Оборудование raCk eradiCator In order to reduce the tracks left by the tractor wheels when preparing the seed bed after ploughing, the rotary harrow may be fitted with track eradicators. - Place the mountings onto the harrow’s gear trough and attach symmetrically on the left and on the right. - Page 56 Accessories / Wyposażenie opcjonalne / Оборудование 4 4 5 5...
-
Page 57: C Side Markers
Accessories / Wyposażenie opcjonalne / Оборудование The markers are equipped with a shearing bolt safety: arkerS type H 10 x 90 class 8.8 Markers are designed for tractor centreline marking. They are pre-adjusted in the factory. - Use the specified type of safety screw. - Push down on the marker with one hand while releasing its movement by retracting the lock . - Page 58 Accessories / Wyposażenie opcjonalne / Оборудование...
-
Page 59: D Standard Hydraulic Rear Linkage
Accessories / Wyposażenie opcjonalne / Оборудование tandard hydrauliC rear linkage The hydraulic coupling is designed to lift a maximum load of 1.7T. The hydraulic coupling is only compatible with Category II tools. When using together with a PTO seed drill, be wary of free movement (optional limiter available). - Page 60 Characteristics / Dane techniczne / Характеристики...
- Page 61 Characteristics / Dane techniczne / Характеристики Limb crushing risk, you must not put your hands into the tiCker PoSitionS casing closing or opening zone. Lost or damaged stickers must be replaced immediately. Risk of crushing by the markers, you must not remain When replacing a part, if it has a safety sticker, this must be within the marker progress zone when they are operating.
- Page 62 Characteristics / Dane techniczne / Характеристики...
- Page 63 Characteristics / Dane techniczne / Характеристики eChniCal SPeCiFiCationS HR 190 Cage-mounted Tracker Roller Tracker Roller Packer roller Gravity roller roller 20 rows 24 rows Weight (kg) 1342 1627 1680 1717 1602 Distance between the linkage pin and the centre of gravity (mm)
- Page 64 Characteristics / Dane techniczne / Характеристики...
- Page 65 Characteristics / Dane techniczne / Характеристики ane teChniCzne HR 190 Wał pierścieniowy Wał pierścieniowy Wał rurowy Wał Packer Tracker Ø 550 mm Tracker Ø 500 mm Wał gumowy Ø 500 mm Ø 550 mm dla 20 rzędów siewnika dla 24 rzędów siewnika Gravity Ø...
- Page 66 Characteristics / Dane techniczne / Характеристики...
- Page 67 Characteristics / Dane techniczne / Характеристики т ехничеСкие характериСтики HR 190 Ролик Ролик Tracker Ролик Tracker Ролик Packer Ролик Gravity планчатый 20 рядов 24 ряда Масса (Кг) 1342 1627 1680 1717 1602 Расстояние между валом сцепного устройства и центром тяжести (мм) HR 220 –...
Need help?
Do you have a question about the HR 300 and is the answer not in the manual?
Questions and answers