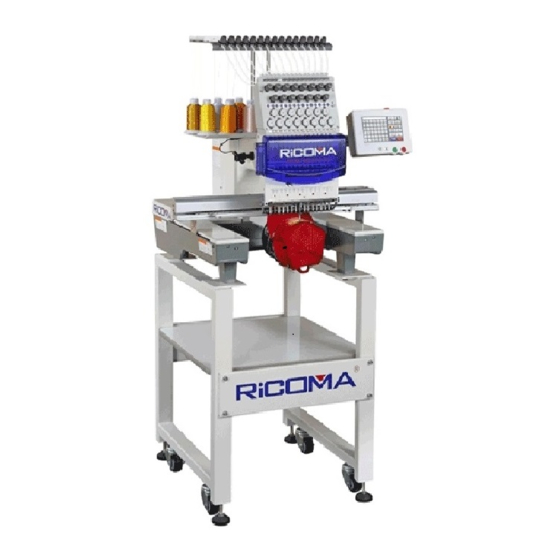
Summarization of Contents
Part 1 Control System
1.1 System Overview
Explains the importance of reading the manual for correct system usage and easy reference.
1.2 Precautions
Outlines safety precautions, warnings, and prohibitions for operating and maintaining the embroidery machine.
1.3 Working Environment
Specifies the ideal environmental conditions including ventilation, temperature, and humidity for operating the machine.
1.4 System Power Supply and Grounding
Details the required power supply specifications and grounding for safe and proper electrical control system operation.
1.5 Operation Panel and Key Function
Covers key functions, touch key icons, and system features like multilingual support and memory capacity.
Part 2 Embroidery Design Input Operation
2.1 Input USB Drive Design to Memory
Guides users on loading embroidery designs from a USB drive into the machine's internal memory.
2.2 Delete Designs in Embroidery Design Management
Details the procedure for selecting and deleting embroidery designs from the machine's management interface.
Part 3 Selecting Designs in Embroidery Design Management
3.1 Select Embroidery Design for Embroidering
Explains how to select a desired embroidery design for processing and switch to preparation status.
3.2 Delete Single Embroidery Design
Describes the process to select and delete individual embroidery designs from the management interface.
3.2 Output Embroidery Design to USB Drive
Details how to select and transfer embroidery designs from the machine back to a USB drive.
Part 4 Embroidery Design
4.1 Embroidery Status Mode
Explains the two main embroidery statuses: preparation status and operation status, and how to switch between them.
4.2 Preparation Status
Covers operations like origin return, trimming, parameter setting, and design selection in preparation status.
4.3 Operation Status
Details operations available in operation status, including origin setting, offset, color changing, and trace functions.
4.4 Embroidery Operation Status
Explains how to adjust main axis speed during the embroidery process.
4.5 Embroidery Start/Stop Operation
Covers starting, stopping, and backing up embroidery processes, including low-speed start.
4.6 Switch Control and Indicators of Sequin Machine
Explains switch controls and indicators for sequin embroidery functions and operation.
Part 6 On Board Lettering
On Board Lettering
Guides on using the machine's built-in lettering feature to create custom text designs.
Part 7 Manual Operation for Color Changing
Manual Operation for Color Changing
Explains how to manually change colors and switch needle bars during the embroidery process.
Part 8 Manual Trimming
Manual Trimming
Describes how to perform manual trimming of threads on the embroidery machine.
Part 9 Hoop Origin Operation
9.1 Manual Hoop Origin Setting
Details the process of manually setting the hoop's origin point for accurate embroidery positioning.
9.2 Automatic Searching for Absolute Origin of Hoop
Explains how the machine automatically finds the hoop's absolute origin for accurate positioning and recovery.
9.3 Set Software Limits
Describes setting software limits for hoop movement, particularly for 'Other' hoop types.
Part 10 Hoop Setting
Hoop Setting
Explains how to set hoop sizes and dimensions for cap frames and standard hoops (A-F).
Part 11 Production Statistics
Production Statistics
Describes how to generate and view production statistics like stitch count, production quantity, and thread breaks.
Part 12 Main Axis Origin Operation
Main Axis Origin Operation
Explains how to reset the main axis to its origin position (100 degrees) for proper operation.
Part 13 Language Switching
Language Switching
Details how to navigate the menu to change the system's display language.
Part 14 Embroidery Parameters Settings
Embroidery Parameters Settings
Guides on modifying commonly used embroidery processing parameters to meet specific operational requirements.
Part 15 Machine Parameters Setting
Machine Parameters Setting
Advises that machine parameters should only be adjusted by professional technicians.
Part 16 User Management
User Management
States that user management functions are exclusively for professional technicians.
Part 17 Restriction Releasing
17.1 Lock Removal
Explains how to release system restrictions by inputting passwords provided by the supplier.
Part 18 System Test
18.1 Input Test
Describes how to perform input tests to check signal integrity of various machine components.
18.2 Output Test
Details how to conduct output tests to verify the functionality of the machine's outputs like hook, trimming, and sequin.
18.3 Main Axis Test
Explains tests for the main axis, including XY axis movement, rotation speed, and encoder functionality.
18.4 Machine Head Test
Details how to test the machine head for breakage detection functionality.
Part 19 System Information
19.1 System Number and Version Information Checking
Guides on how to access and check the system's identification number and software version.
System Update
Details the procedure for updating the control system software, including precautions and steps.
Part 20 IP Setting
IP Setting
Explains how to configure the machine's IP address for network connectivity, ensuring no conflicts.
Part 21 System Initialization
System Initialization
Describes the process of re-initializing the system for recovery from accidental self-locking or default setting issues.
Part 22 Appendix
22. 1 Parameter Table
Provides a comprehensive table listing various embroidery parameters, their functions, default values, and ranges.
22. 2 System Errors and Countermeasures List
Lists common system errors, their fault causes, and recommended countermeasures for troubleshooting.


Need help?
Do you have a question about the RCM-1501TC-7S and is the answer not in the manual?
Questions and answers