Table of Contents
Advertisement
Advertisement
Table of Contents

Related Manuals for Ricoma SWD Series


Summary of Contents for Ricoma SWD Series
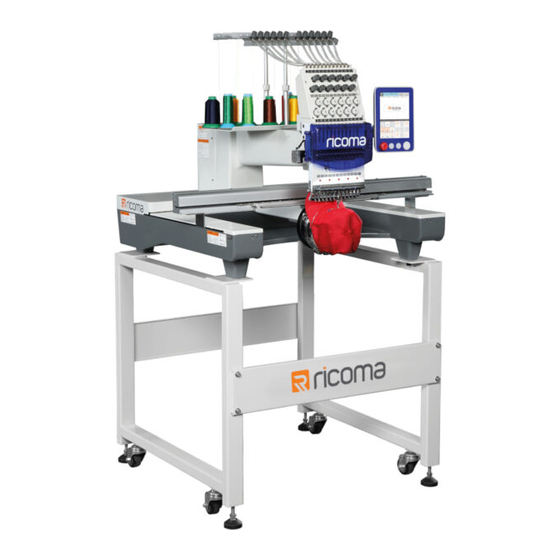
- Page 1 QUICK START GUIDE SWD SERIES RICOMA INTERNATIONAL CORPORATION 3450 NW 114th Ave., Miami, FL 33178 Telephone: (305) 418-4421 | Toll Free: 1-888-292-6282 Fax: (305) 418-5036 | Email: service@ricoma.us Copyright 2019 © Ricoma www.ricoma.us All rights reserved...
-
Page 2: Table Of Contents
How to insert the hoop into the machine ..................... Floating Menu ..............................39 How to remove the hoop from the machine ....................Manual Color Change/Needle Display ......................Return to Stop Point ............................40 Trimming ................................40 Ricoma Quick Start Guide Ricoma Quick Start Guide... - Page 3 Hooping placement recommendations ......................Needle Lifetime ..............................53 Backing and needle recommendations ......................Needle Break Causes .............................54 Blade sizes ..............................54 Needle finishes ...............................55 Types of needlepoints ...........................56 The relationship between needles and threads ................... Ricoma Quick Start Guide Ricoma Quick Start Guide...
-
Page 4: Machine Contents
USB drive Bobbin case Cleaning brush Toolbox and Ethernet cable Amann starter kit Power cord welcome kit Spare parts including but not limited to screws, springs, reciprocators, needle bar guides, pickers and bobbin Ricoma Quick Start Guide Ricoma Quick Start Guide... -
Page 5: Machine Components
• Place the stand columns upside down. Figure 2 Thread Rack • Attach the Ricoma connecting plates to the stand columns upside Figure 6 Your embroidery machine contains a thread rack that will hold your down using the hex head screws fitted with a lock-washer and washer. -
Page 6: Adjusting The Position Of The Panel
Figure 12 thread path. 2. Remove the old spool from the spool pin, and place a new spool in its place. Figure 15 Ricoma Quick Start Guide Ricoma Quick Start Guide... -
Page 7: Raising The Thread Rack
RAISE THE THREAD RACK Raising the Thread Rack in Machine Setup. Figure 19 1. Thread each spool through the eyelets on the upper thread rack until they reach the top tension knobs. See Figure 20. Ricoma Quick Start Guide Ricoma Quick Start Guide... -
Page 8: Installing The Needle Selecting A Needle
See point G in Figure 24. project. Go to the Needles section to learn more about selecting the proper needle for your embroidery. Ricoma Quick Start Guide Ricoma Quick Start Guide... -
Page 9: How To Install The Needle
The Anatomy of the Bobbin Case Before threading and inserting the bobbin into the machine, see Figure 29 to view the parts of the bobbin case that will be referenced. Figure 34 Figure 29 Ricoma Quick Start Guide Ricoma Quick Start Guide... -
Page 10: Installing The Cap Driver
See Figure 41. Flat Hoops and Brackets Your Ricoma SWD Series embroidery machine includes a set of 11 hoops. There are six different hoop Figure 37 sizes, ranging from A to F. Hoop A is the smallest hoop and hoop F is the largest hoop. - Page 11 To correctly insert the hoop onto the brackets, make sure the open-ended slot (the U-shaped notch) is facing the machine. See Figure 45. Figure 45 Figure 48 Figure 49 Ricoma Quick Start Guide Ricoma Quick Start Guide...
-
Page 12: Hooping And Attaching The Sash Frame
The center will vary on the size of the garment you are embroidering and the size of the Figure 54 onto each of the short sides of the frame. See Figure 56. design you are stitching. Ricoma Quick Start Guide Ricoma Quick Start Guide... -
Page 13: Hooping Recommendations
• Never pull the fabric or tighten the hoop to even it out. Stretching the material while hooped will cause puckering, pinching and design placement issues. 5. Place the backing under the bill stop (the metal tab on the top of the ring). See Figure 64. Figure 64 Ricoma Quick Start Guide Ricoma Quick Start Guide... -
Page 14: Hooping The Back Of A Cap Using A Round Hoop
6. Place the top ring over the fabric, and align it with the bottom ring. FLOAT 7. Join the top and bottom ring, as you would with flats. Rewinds or fast-forwards the design by stitch count Ricoma Quick Start Guide Ricoma Quick Start Guide... -
Page 15: Design Menu
HOW TO IMPORT AND SELECT A DESIGN how to perform these functions on your control panel. Your Ricoma embroidery machine reads DST files, the most common of all embroidery file types. If 1. Remove the embroidery status. See page 29. -
Page 16: How To Delete A Design From Your Machine's Memory
1. With embroidery mode unlocked, select the Design menu to enter the USB/embroidery machine’s you’re embroidering with. You may select the hoop that corresponds with the hoop you’re using under memory interface. the Preset Hoops key on the main menu. Ricoma Quick Start Guide Ricoma Quick Start Guide... - Page 17 3. When you have finished editing your design, press the green your design to. See Figure 79. check on the top right of your screen to save your changes. Figure 79 Figure 83 Ricoma Quick Start Guide Ricoma Quick Start Guide...
-
Page 18: Color Sequence Settings
Most of the time, you will want your embroidery machine to be on fully automatic hoop’s sewing area. Ricoma Quick Start Guide Ricoma Quick Start Guide... -
Page 19: Design Tracing
1. Click on the design tracing icon and perform a standard trace. After the standard trace is complete, 3. Select the “Offset” key. See Figure 92. a new message will appear. 2. Select “Trace design outline” to contour trace. Figure 92 Ricoma Quick Start Guide Ricoma Quick Start Guide... -
Page 20: Embroidery Speed
• The pantograph will move at a slower speed when you adjust Figure 99 the frame using the directional arrows to, and the frame will move to that point of the design. Ricoma Quick Start Guide Ricoma Quick Start Guide... -
Page 21: Manual Color Change/Needle Display
Before pressing the start button, click on this key and the frame will return to the last point you stitched. You may then resume the design from where you left off without losing your original Figure 102 placement. Figure 104 Ricoma Quick Start Guide Ricoma Quick Start Guide... -
Page 22: Common Errors
2. Rest the thread on the holding spring, leaving about 1 inch of thread hanging. See Figure 116. Figure 112 3. Rewind the design approximately 10 to 12 stitches. See the Floating Figure 116 Menu section for more on rewinding an embroidery design. Ricoma Quick Start Guide Ricoma Quick Start Guide... -
Page 23: Replacing A Needle
To differentiate a thread break from the bobbin running out, take a look at the thread from the working needle. If it’s still attached to the fabric, the bobbin most likely ran out of thread. Ricoma Quick Start Guide Ricoma Quick Start Guide... -
Page 24: Hook Timing
0.1mm to 0.3mm. See Figure 124. panel once again. Note: If you need to reset the timing of your machine please contact Ricoma technical support. Most of the time, your machine’s main axis will align itself after this step, and you may continue TENSION operating your machine. -
Page 25: Adjusting The Top Thread Tension: Spring Lever
Tension comes preset on new bobbin case and should not require adjustment. too loose to function properly. Conversely, if the spring lever is positioned all the way down, the threads will be too tight to function properly. Ricoma Quick Start Guide Ricoma Quick Start Guide... -
Page 26: Thread Breaks
2. Do not use tape to tie off thread ends. Tape leaves a sticky residue that causes friction and thread breaks. 3. Check for burrs in the thread guides, needle eye, needle plate and rotary hook. Ricoma Quick Start Guide Ricoma Quick Start Guide... -
Page 27: Thread Break Troubleshooting
This will help you see if the correct backing, topping and hooping methods have been applied. This will also help you verify if the tension of the thread and bobbin are correct. We recommend using 100% polyester Isacord thread. Ricoma Quick Start Guide Ricoma Quick Start Guide... -
Page 28: Needle Break Causes
These types of needles also reduce thread friction. Reduced thread friction lessens the frequency of thread breaks, and saves time and labor. Titanium needles are a beautiful golden color and are available in the most popular sizes. Ricoma Quick Start Guide Ricoma Quick Start Guide... -
Page 29: Types Of Needlepoints
$9, this would be about one cent per thousand stitches. Bobbin thread yield is about 35,000 to 42,000 stitches for size “L” bobbins. The amount of yardage per bobbin varies according to the needles is RG. thread type and stitch length of your design. Ricoma Quick Start Guide Ricoma Quick Start Guide... -
Page 30: The Bobbin
“springing” the tension plate, causing it to fail to hold any tension on the bobbin thread. Your Ricoma machine requires an “L” size bobbin. Polyester bobbin thread is preferred over cotton bobbin thread, as it tends to leave Nylon less lint. -
Page 31: Top Thread Fiber Choices
• Making sure the densities are appropriate for metallic threads memory caused it to regain its original length, the embroidery was often puckered. Today’s polyesters • Checking if there are too many shorter stitches, or small turning stitches Ricoma Quick Start Guide Ricoma Quick Start Guide... -
Page 32: Stabilizer
Backing is available in both black and white colors. White is the most common, and is used for most embroidery projects. Some embroiderers use black backing on darker garments, especially if there is any chance the backing might be seen or bleed through, such as on pique knit shirts. Ricoma Quick Start Guide Ricoma Quick Start Guide... -
Page 33: Tear-Away
Poly mesh will add support without compromising the stability of See Figure 132. the garment. You may use this backing when embroidering a stretchy tech golf shirt. In this case, you may layer two sheets of poly mesh. Figure 132 Ricoma Quick Start Guide Ricoma Quick Start Guide... -
Page 34: Cap Embroidery
• When embroidering caps, we recommend running the machine between 450 to 650 stitches per minute. • When embroidering flats, we recommend running the machine between 650 to 850 stitches per minute. Ricoma Quick Start Guide Ricoma Quick Start Guide... -
Page 35: Hooping Placement Recommendations
Denim • Monogram size should be 3 inches on the hem or 3 to 5 inches above the hem • Use a heavy cut-away or tear-away/wash-away • 75/11 light ball point needle Ricoma Quick Start Guide Ricoma Quick Start Guide... - Page 36 Lycra or Spandex • Use a medium cut-away or water-soluble tear-away • 70/10 medium ball point needle Nylon Windbreaker • Use a light to heavy cut-away • 5/11 light ball point needle Ricoma Quick Start Guide Ricoma Quick Start Guide...
- Page 37 11555 NW 124 Street, Medley, FL 33178, USA. Baochangli Industrial Park, Jinlong Road 3, TEL: (305) 418-4421 | FAX: (305) 418-5036 Shenzhen, P.R. China (Post: 518118) Toll Free: 1-888-292-6282 TEL: +86-755-2585-7576 | FAX: +86-755-2585-7773 Website: www.ricoma.us | Email: info@ricoma.us Website: www.ricoma.cn | Email: info@ricoma.cn...
Need help?
Do you have a question about the SWD Series and is the answer not in the manual?
Questions and answers