Table of Contents
Advertisement
Quick Links
Advertisement
Table of Contents

Related Manuals for Amcrest NV4232


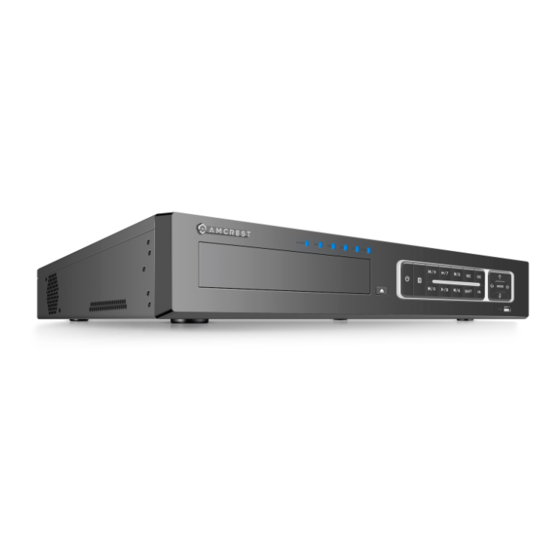
Summary of Contents for Amcrest NV4232
- Page 1 Quick Start Guide Version 1.0.4 Revised November 24 , 2020...
-
Page 2: Table Of Contents
Accessing the Web User Interface ..................35 Accessing the Web User Interface Remotely ..............36 Web Interface Walkthrough ....................38 Amcrest View Pro App Setup ....................39 Enabling P2P on the NVR ....................39 Amcrest View Pro Setup ..................... 40 FCC Statement ........................ -
Page 3: Welcome
NOTE: This document is applicable to all Amcrest 2XXXX-HS, 4XXXX-HS, and 5XXXX-HS series NVRs. This document provides a quick setup and overview of your Amcrest NVR and its features. For access to a full user manual or further information regarding your device please visit: http://amcrest.com/support... - Page 4 Rear Panel The rear panel of the NVR may differ model to model. Below is a representation of the rear panel for the NV2XXX, NV2XXX-HS, NV4XXX, and NV4XXX-HS Series. PoE Ports Non-PoE Ports Applicable for Amcrest NV4232 and NV4232E-HS Series NVRs...
- Page 5 Front Panel Name Icon Function CD Drive Use this button to open/close the built-in CD drive (if applicable) Power button Power button press this button for three seconds to boot up or shut down NVR. Shift Shift In the textbox, click this button to switch between numeral, English (Small/Capitalized), donation etc.
- Page 6 PoE PORT PoE port For PoE series products, you can use this port to provide power to the network cameras. Applicable for Amcrest NV52XXX and NV52XXX-HS Series NVRs Button Icon Description Press and hold this button for five seconds to shut off or power Power Button on the NVR.
- Page 7 Manually stop/start a recording. Use the directional keys or Record numeric keys to select the recording channel. I In a textbox, click this button to switch between numeric Shift SHIFT characters or provide capitalization to a word, etc. Click this button to pause or resume playback. In text mode, Play/Pause/5 input number 5.
-
Page 8: Hardware Setup
A hard drive must be installed to record or save any footage. If no hard drive is installed, you can only view the cameras from the NVR. If a microSD card is installed in the camera you can still view the recordings from the microSD card using the Amcrest View Pro application and... - Page 9 NVR in accordance with the the rear and side panels. clip and place the upper cover back onto the device. For further assistance on how to install the hard drive, feel free to contact us at: https://amcrest.com/contacts Setting Up the Cables...
-
Page 10: Nvr Initialization
The following instructions will show you how to set up the cables for the NVR, cameras, as well as a monitor or TV screen. To set up the cable connections, there are 5 major steps: 1. Connect a monitor or TV screen to your NVR. The NVR is compatible with any monitor or screen that uses a VGA or HDMI connection. - Page 11 Once you have entered a new password for your device, confirm the password in the next field. Lastly, you will be asked to enter a prompt question for your account. This is useful if you have forgotten your password and would like an easier way of recovering your password. Please use a prompt question that will help you remember the password for your device.
- Page 12 The first page of the Startup Wizard will appear which allows you to setup any General, Network, Remote Devices, and Record Control Settings for the NVR. Before proceeding please note, most Amcrest products are H.265 compatible. H.265 provides a more advanced technology than H.264 and allows the device to reduce file sizes which in turn helps to reduce required bandwidth without sacrificing frames per second (FPS) or resolution.
- Page 13 General The first screen that appears in the startup wizard is the GENERAL menu. The General menu allows you to edit the name of the NVR, display number of devices, languages, etc. Once you are satisfied with the settings on this screen click Next to continue. Date &...
- Page 14 Note: Make sure to toggle the NTP toggle switch to the off position if you do not want to sync your device to an NTP server. Holiday This screen allows the user to set and modify holiday settings which allows the NVR to record or send snapshots based on specific schedules set by the user.
- Page 15 The next screen that appears is the P2P screen. This screen allows you to connect your NVR to your mobile device via the Amcrest View Pro app. The P2P status should read as “Online”. To download the app, use your mobile device’s camera and scan the Cell Phone Client QR code.
- Page 16 Camera Registration The next screen that appears is the Camera Registration screen. This is where you can begin adding cameras to the NVR. If the cameras are not directly connected to the back of the NVR, please make sure they are active and on the same network as the NVR before proceeding. To begin adding a device, click on Device Search to allow the NVR to scan for connected devices on your network.
- Page 17 If the status of your camera is red, it indicates the camera is not properly connected to the NVR. This could be because the password for the camera is not entered properly in the system. To modify the password for your camera, click on the edit icon (pencil) located in the Edit column in the Added Device menu.
- Page 18 To activate H.265 compression, click on the H.265 Auto Switch. For more information on H.265 compression, please visit: amcrest.com/support Click on Next to proceed. Schedule (Rec) The next screen you will see is the Rec screen which allows you to set recording schedules for regular (24/7 continuous recordings), motion detection, alarm, motion &...
-
Page 19: Main Menu Overview
Main Menu Overview The screenshot below is the main menu screen for the Amcrest NVR console interface: Below are short descriptions for each of the menu items on the main menu: PLAYBACK: View, search, and play recorded videos. -
Page 20: Adjusting Camera Settings For Maximum Resolution, Fps, And Bitrate
Adjusting Camera Settings for Maximum Resolution, FPS, and Bitrate Most Amcrest products are H.265 compatible. H.265 provides a more advanced technology than H.264 and allows the camera to reduce file sizes which in turn helps to reduce required bandwidth without sacrificing frames per second (FPS) or resolution. - Page 21 In the Camera menu, select Encode and click on the Compression drop down menu and select H.265. Click Apply to save your settings. Adjusting Bitrate Since H.265 compression uses roughly 30% less resources than H.264, the camera will typically come defaulted to a preset bitrate when switching to H.265. For instance, when switching to H.265 on a 4K camera, the bitrate may be defaulted to 8192 Kb/S, however, adjusting the bitrate to a lower value may help to increase the overall efficiency of the camera while viewing playback or watching live view.
-
Page 22: Motion Detection, And Recording Setup
Note: Adjusting the bitrate to anything lower than the recommended bitrates above may result in degradation to recordings or to live view. For best results, if you are adjusting multiple cameras, it is highly recommended to adjust each camera individually. This may be a trial and error process since most network environments are unique and may vary, however, the bitrate should range between 1792-2048 Kb/S if using a 4K camera. - Page 23 3. Click on Apply to save the settings to your device. Setting Up Recording Schedules 1. From the Main Menu, click on STORAGE in the MANAGEMENT section: Make sure you are on the SCHEDULE > REC page. This is where you can configure your video recording schedules.
- Page 24 To edit a recording schedule, select a recording option from the colored boxes. Each recording option is color coded: Green: Regular (24/7 recording), Yellow: MD (Motion Detection), Red: (Alarm), Orange: MD&Alarm (a combination of motion detection and alarm recordings), and POS.
- Page 25 To the left of each day, there are small boxes which can be marked to ‘link’ days together. This is useful if you want to save time by instantly making changes to multiple days simultaneously. In the below example, Sunday and Monday are linked, so any blocks that are added or removed for Sunday will automatically and immediately reflect the same for Monday and vice versa: Another way to configure recording schedules is by manually setting time periods.
-
Page 26: Setting Up Email Alerts
over to other days by checking them individually or checking All. Make sure to click Save when finished. Now that you have finished configuring the recording schedules, you may need to copy these settings over to other channels (or cameras). By default, D1 (Channel 1) will be selected unless you immediately selected All in the channel window previously. -
Page 27: Setting Up Motion Alerts
2. Enter the SMTP information for your email. In this example we will be using Gmail, however other email services can also be used. If using Gmail, type in “smtp.gmail.com” 3. Enter a port number. This is based on the type of encryption used by your email service. In this example we will be using port 465, which uses an SSL encryption type. - Page 28 2. Select Video Detection to access the Motion Detect menu. This is the main configuration page for your motion detection settings. Select which channel you are configuring from the Channel drop down menu. 3. Ensure the toggle switch for motion detection is enabled and adjust any motion detection settings or motion schedules accordingly.
- Page 29 Adjusting Region Settings You can set up “regions‟ for motion detection using the region grid on your NVR. By default, the entire area of view for your cameras will be highlighted with red blocks indicating that all areas of the live view screen will have active motion detection. However, to prevent false events from occurring, you can use your mouse to block out certain areas.
- Page 30 To choose another region, hover your mouse pointer near the top center of the region window, and a small window will appear. Keep your mouse pointer inside that small window and select either region 2, 3, or 4: You will be able to click individual blocks or click-and-drag an area with the new selected color to highlight portions of the screen.
-
Page 31: Accessing Playback
Please note, each NVR has its own capabilities in relation to the number of cameras it can playback or support. Please refer to the specifications sheet for your specific device or for more details on playback please visit amcrest.com/support. To view recordings from the search menu, select the camera you wish to view from the Camera... - Page 32 A timeline of the recordings will appear in the interface. Click the Play button ( ) to play all recordings available on the timeline. Additionally, all days with recordings available will be highlighted in the calendar portion of the interface with a dot. To select specific days/months or years, use the navigation arrows provided in the calendar.
-
Page 33: How To Upgrade System Firmware
1. You must access the NVR’s web interface with its IP address. 2. You must install the Amcrest web browser plugin. 3. You must use a compatible web browser such as Internet Explorer (recommended), Firefox (49.0.2) or Safari 11. Google Chrome users can also use the Chrome app to access their NVRs if needed. -
Page 34: Amcrest Ip Config
3. After the progress bar completes, if you see a Windows Security Alert popup, click Allow access (if applicable). 4. This brings you to the main screen of the Amcrest IP Config Software. Your NVR will automatically be found on your network and appear in the list (if properly connected with an Ethernet cable to your router). -
Page 35: Accessing The Web User Interface
4. In the Network settings page locate the TCP/IP option on the left panel list. Then, locate where it says IP Address on the main center page of the window. 5. Write it down. It will look something like ‘192.168.xx.xxx’, or ’10.0.XX.XXX’ depending on your network, router, or service provider. -
Page 36: Accessing The Web User Interface Remotely
Enter a valid email address and then select and answer the security questions provided in the dropdown menu. Click OK when done. When the NVR has been setup successfully you will hear a beep from the NVR and a prompt in the browser letting you know that the initialization is complete. - Page 37 5. Click on the DDNS menu located in the Network tab in the left panel. In the DDNS menu, click on the Enable checkbox to enable DDNS. Make sure the AMCREST DDNS type is selected and a domain name for the NVR (one you create) is entered in the Domain Name field. As an...
-
Page 38: Web Interface Walkthrough
For example, if the DDNS domain name is http://abc123456789.amcrestddns.com and your HTTP Port is 12345, the URL would be http://abc123456789.amcrestddns.com:12345 Remote access not working? Please contact Amcrest Support via one of the following options: Visit http://amcrest.com/contacts and use the email form... -
Page 39: Amcrest View Pro App Setup
The system is now up to date. Amcrest View Pro App Setup The Amcrest View Pro app allows instant access to all live camera streams from any location. This is the primary application most users prefer when using Amcrest systems. The app supports a multitude of features and includes both a plug-and-play setup as well as a manual network setup. -
Page 40: Amcrest View Pro Setup
Download and install the Amcrest View Pro app for the App Store or Google Play Store. Open the app on your mobile device and allow the app to load. -
Page 41: Fcc Statement
Note: To locate the serial number, you must either have physical access to the NVR or computer access to the web interface to access the P2P menu. The SN QR code will be the serial number for your device. For more information regarding the Amcrest View Pro app, please visit: https://amcrest.com/support FCC Statement 1. -
Page 42: Ic Warning Statement
This quick start guide is for reference only. Slight differences may be found in the user interface. All the designs and software here are subject to change without prior written notice. All trademarks and registered trademarks mentioned are the properties of their respective owners. © Copyright Amcrest 2020...
Need help?
Do you have a question about the NV4232 and is the answer not in the manual?
Questions and answers