Table of Contents
Advertisement
Quick Links
Advertisement
Table of Contents

Related Manuals for EXFO OX1-M


Summarization of Contents
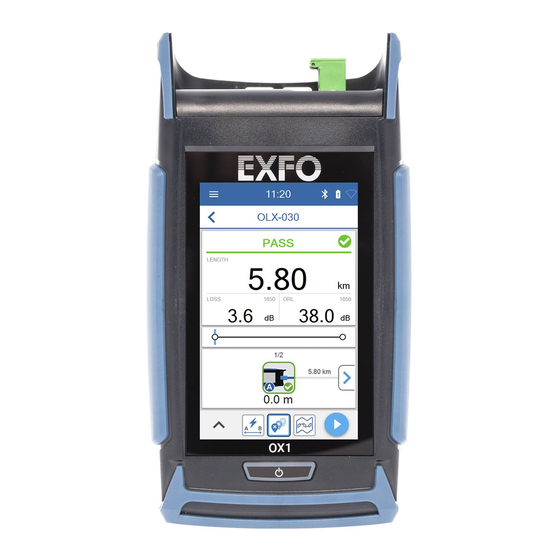
Introducing the OX1 Optical Xplorer
Main Features
Overview of the OX1 Optical Xplorer's key capabilities and functionalities.
Front Panel Features
Details of the OX1 Optical Xplorer's front panel components and their functions.
Top and Bottom Panel Features
Details of the OX1 Optical Xplorer's top and bottom panel components and ports.
Available OX1 Models
Lists and describes the different configurations and models of the OX1 Optical Xplorer.
LED Indicator Description
Explanation of the LED indicators on the unit and their meanings for battery status.
Battery Status and Power Sources
Details on battery status icons and available power sources for the OX1 unit.
Power Sources Details
Further information on power sources, including vehicle charging and battery types.
Test Functions and Tools
Overview of the OX1's test functions: Flash Advisor, Fault Xplorer, and Link Mapper.
Technical Specifications
Information on how to find the product's technical specifications on the EXFO website.
Document Conventions
Explanation of warning, caution, and important symbols used throughout the user guide.
Safety Information
General Safety Information
Essential safety precautions for operating and handling the OX1 unit.
General Safety Guidelines
Additional safety instructions and symbol explanations for product usage.
Other Safety Symbols
Explanation of various safety symbols that may appear on the unit.
Laser Safety Information
Warnings and precautions related to laser radiation emitted by the unit.
Laser Safety Precautions
Details on Class 1M laser product safety, including wavelength and peak power.
Electrical Safety Information
Warnings and precautions for safe electrical operation and handling of the unit.
Electrical Safety and Equipment Ratings
Safety precautions for outdoor use and detailed equipment operating/storage ratings.
Equipment Ratings Details
Information on pollution degree, overvoltage category, and input power ratings.
Getting Started with Your Unit
Installing the Hand Strap
Step-by-step guide for attaching the provided hand strap to the unit.
Hand Strap Installation Steps
Continuation of the hand strap installation process with visual aids.
Securing the Hand Strap
Final step for securing the hand strap, making the unit ready for use.
Turning On Your Unit
Instructions on how to power on the OX1 unit for the first time.
Turning Off Your Unit
Methods for turning off the unit: sleep mode and complete shutdown.
Configuring Your Unit at First Startup
Guide to initial setup: language, license, date, time, and units.
Initial Unit Configuration Steps
Steps to complete the initial setup wizard, including language and regional parameters.
Understanding Fiber Xplorer™
Introduction to the Fiber Xplorer interface and its navigation.
Fiber Xplorer Interface Elements
Detailed breakdown of the Fiber Xplorer screen elements and their functions.
Working With Launch and Receive Test Cords
Guidelines for using EXFO-recommended launch and receive cords for optimal performance.
Configuring Test Cords Settings
Steps to configure launch and receive test cords within the unit's settings.
Setting Test Cord Lengths
Procedure to set the length for launch and receive test cords.
Customizing Test Cord Lengths
How to select custom lengths for test cords and change distance units.
Configuring Test Cords in Fiber Xplorer
Steps to configure test cords directly within the Fiber Xplorer application.
Setting Test Cord Lengths in Fiber Xplorer
Procedure to set custom lengths for test cords within Fiber Xplorer.
Cleaning and Connecting Optical Fibers
Instructions for properly cleaning and connecting optical fibers to the unit's port.
Temperature Management
Guidelines for managing unit temperature for optimal performance and preventing shutdown.
Setting up Your Unit
Adjusting Display Brightness
How to adjust the display brightness for better visibility and battery saving.
Display Brightness Adjustment
Detailed steps to adjust the screen brightness using the unit's interface.
Enabling or Disabling Sound Notifications
Instructions to enable or disable audible notifications for measurements and tones.
Configuring Sound Notifications
Steps to toggle sound notifications on or off through the unit's settings.
Sound Notification Settings
Adjusting the sound notification setting for the unit's audio alerts.
Selecting the Language of Operation
How to change the user interface language on the OX1 unit.
Changing the Unit Language
Steps to select and confirm a new language for the OX1 unit's interface.
Adjusting the Date, Time, and Time Zone
Guide to setting the unit's date, time, and time zone for accurate measurements.
Configuring Time Format
How to select between 12-hour (AM/PM) and 24-hour time formats.
Synchronizing Date and Time
Enabling/disabling automatic synchronization of date, time, and time zone.
Manual Date, Time, and Time Zone Adjustment
Steps to manually adjust the date, time, and time zone on the unit.
Manual Time Zone Configuration
Procedure for manually setting the date, time, and time zone values.
Selecting the Distance Units
How to choose between metric and imperial units for displaying distance.
Distance Unit Configuration
Steps to select metric (meters, kilometers) or imperial (feet, kilofeet) units.
Configuring Sleep Mode Duration
Setting the time delay before the unit automatically enters sleep mode to save power.
Sleep Mode Timer Settings
Steps to set the duration for the automatic sleep mode on the unit.
Selecting Test Wavelengths
How to choose which wavelengths to use for link measurements.
Wavelength Selection in Settings
Steps to select desired wavelengths via the unit's settings menu.
Wavelength Selection in Fiber Xplorer
How to select test wavelengths directly within the Fiber Xplorer application.
Test Wavelength Selection Guide
Procedure to select test wavelengths within the Fiber Xplorer interface.
Finalizing Wavelength Selection
Confirming wavelength selection, which is applied to the next measurement.
Custom Pass/Fail Thresholds and EXFO Advisor
Using custom thresholds or EXFO Advisor for pass/fail status and quality ranking.
Configuring Pass/Fail Criteria
Steps to access and set custom pass/fail criteria or EXFO Advisor.
Setting Custom Threshold Values
How to activate and edit threshold values for link parameters.
Editing Threshold Values
Procedure to enter new values for link loss and other thresholds.
Configuring Thresholds in Fiber Xplorer
Steps to configure custom thresholds or EXFO Advisor within Fiber Xplorer.
Setting Thresholds in Fiber Xplorer
Activating and editing threshold values for link parameters in Fiber Xplorer.
Editing Thresholds in Fiber Xplorer
Procedure to enter new values for link loss and other thresholds in Fiber Xplorer.
Configuring IOR Value
How to edit the Index of Refraction (IOR) value for accurate distance measurements.
IOR Value Setting
Steps to input the IOR value for the 1550 nm wavelength.
Setting IOR Value for 1550 nm
Procedure to enter and confirm the new IOR value for measurements.
Reverting to Factory Settings
Options for resetting unit settings to default values or factory configuration.
Factory Reset Options
Steps to select and confirm desired reset options (settings, unit, battery info).
Testing Fibers
Performing Measurements
Overview of test functions: Flash Advisor, Fault Xplorer, Link Mapper.
Measurement Setup Parameters
Setting parameters like wavelengths, thresholds, and test cords before measuring.
Performing a Fiber Measurement
Step-by-step guide to clean connectors, connect fiber, and start a measurement.
Starting and Viewing Measurements
How to start a test and view results, which are saved automatically.
Working With Link Results
Viewing pass/fail status, length, loss, and ORL values for the tested link.
Link Results Details
Accessing loss and ORL values by wavelength and viewing test cord lengths.
Working With Link Overview
Graphic representation of the entire link, faults, or elements from start to end.
Working With Link View
Displaying faults or elements one at a time with navigation arrows.
Link View Element Icons
Icons representing splices, connectors, macrobends, and out-of-range elements.
Performing Tests With Detected Light
Using appropriate models and settings when light is detected on the network.
Using the Power Checker
Measuring Power or Loss
Procedure for performing absolute power and link loss measurements.
Setting Thresholds for Power Checker
Defining minimum and maximum power/loss values for pass/fail status.
Power Checker Threshold Configuration
Setting thresholds for all wavelengths or per wavelength.
Editing Power Checker Threshold Values
Steps to activate and edit threshold values for power and loss.
Setting Power Checker Thresholds
Entering new values for power thresholds and confirming settings.
Setting Power Checker Thresholds via Settings
Accessing power checker thresholds through the unit's settings menu.
Configuring Power Checker Thresholds
Selecting threshold application (all wavelengths/per wavelength) and editing values.
Editing Power Checker Thresholds
Steps to activate and edit power thresholds for the power checker.
Entering Power Checker Threshold Values
Procedure to enter new power values and confirm the settings.
Setting Reference Values on Power Checker
How to set a reference value for loss measurements on the power checker.
Taking Reference Measurement
Using the 'TAKE REF.' button to save the current power as the new reference.
Using the Light Source
Light Source Operation
Using the OX1 as a light source for tests with a power meter.
Setting the Light Source Timer
How to activate and set a timer for the light source emission.
Light Source Timer Configuration
Entering the duration for the automatic light source timer.
Starting and Stopping Light Emission
How to start light emission and stop it when tests are complete.
Managing Test Results
Viewing Measurements
How to view saved measurements directly from the unit.
Accessing Measurement List
Steps to access the list of stored measurements via the main menu.
Viewing Measurements from List
How to view detailed information about specific measurements from the list.
Measurement List Interface
Understanding the measurement list display, including pass/fail status.
Viewing Measurements in Fiber Xplorer
Using navigation arrows in Fiber Xplorer to view saved measurements.
Changing an Element Type
Modifying element types (splice to connector) to reanalyze measurements.
Element Type Modification
Steps to change an element type using the blue arrows in results.
Indicating Modified Element Type
How a '*' sign indicates a modified element type in the unit and Fiber Xplorer.
Deleting Measurements
Instructions for manually deleting measurements that are no longer needed.
Accessing Measurement Deletion
Steps to access the measurement list and initiate deletion.
Selecting and Deleting Measurements
How to select measurements for deletion and confirm the action.
Maintenance
Cleaning SC Connectors
Procedure for cleaning the unit's SC optical connector using a mechanical cleaner.
SC Connector Cleaning Procedure
Steps for inserting the cleaner and verifying connector surface.
Cleaning Touchscreen and Recharging Battery
How to clean the touchscreen and details on recharging the unit's battery.
Battery Recharging Guidelines
Important information on initial charging, factors affecting charge time, and temperature.
Battery Storage and Recharge Procedures
Guidelines for storing units/batteries and the process to recharge the battery.
Replacing the Battery
Safety warnings and instructions for replacing the unit's main battery.
Battery Replacement Precautions
ESD precautions and warnings regarding battery replacement.
Battery Replacement Steps (Part 1)
Steps for removing the back panel and disconnecting the battery connector.
Battery Replacement Steps (Part 2)
Steps for removing the old battery and connecting the new one.
Battery Replacement Steps (Part 3)
Steps for placing the new battery and securing it.
Battery Replacement Steps (Part 4)
Ensuring correct wire placement and connecting the battery connector.
Battery Replacement Steps (Part 5)
Steps for replacing the back panel and securing it with screws.
Resetting Battery Information
Procedure to reset battery information after replacement via Settings > Reset options.
Battery Information Reset Confirmation
Confirming the battery information reset and initial charge cycles.
Verifying the Optical Output
Using a wizard to verify optical output and connector condition.
Optical Output Verification Steps
Steps to prepare and initiate an optical output verification test.
Performing Optical Output Diagnosis
Following on-screen instructions for the optical output diagnosis.
Interpreting Optical Output Results
Understanding verification results and recommendations, and options to repeat test.
Click-Out Optical Connector Condition Check
Procedure to determine if the internal or replaceable connector needs replacement.
Checking Click-Out Connector Condition
Cleaning and inspecting the optical port and internal connector.
Replacing the Click-Out Optical Connector
Instructions for replacing the Click-Out connector on Pro models.
Removing the Click-Out Optical Connector
Steps to disconnect the fiber/USB cable and position the unit for removal.
Click-Out Connector Removal Process
How to push the release tab and pull the connector out of the unit.
Installing the Click-Out Optical Connector
Steps for removing dust cap, inspecting, and cleaning the connector.
Reinstalling the Click-Out Optical Connector
Steps to slide the connector into place and verify installation.
Recalibrating the Unit
Information on calibration standards and recommended recalibration interval.
Calibration Follow-up and Procedures
Guidelines for calibration follow-up, including next calibration date calculation.
Connecting to a Smart Device via Bluetooth
Establishing interactions between the unit and a smart device using Bluetooth Low Energy.
Bluetooth Connection Status
Understanding Bluetooth connection status icons in the title bar.
Establishing Bluetooth Connection Steps
Steps to enable Bluetooth and install the TestFlow mobile application.
Connecting Unit to Smart Device
Connecting the unit to the smart device via the TestFlow mobile application.
Selecting OX1 Unit for Bluetooth Connection
Selecting the desired OX1 unit from the list of nearby devices.
Closing Smart Device Connection from Unit
Steps to disconnect the mobile app connection from the unit's settings.
Enabling or Disabling Wireless Communication
Managing Bluetooth and Wi-Fi communication on the unit and smart device.
Enabling/Disabling Wireless Communication from Unit
Using toggles in settings to enable/disable Wi-Fi or Bluetooth communication.
Enabling/Disabling Wi-Fi via Smart Device
Steps to enable/disable Wi-Fi communication through the TestFlow mobile application.
Wi-Fi Communication Settings
Tapping the Wi-Fi line to access and configure wireless network settings.
Working With a Wireless Network
Configuring a wireless network via TestFlow app to connect the unit to the internet.
Wireless Network Requirements
Supported wireless router characteristics (IPv4, WPA/WPA2) and unsupported standards.
Wi-Fi Connection Status Icons
Understanding Wi-Fi icons indicating connection status and network security.
Configuring a Wireless Network
Steps to configure desired Wi-Fi networks using the TestFlow mobile application.
Accessing Wireless Network Settings
Accessing OX1 settings via the TestFlow app's Optical Xplorer tool.
Configuring Specific Wireless Network
Tapping the Wi-Fi line to select and configure a specific wireless network.
Entering Network Security Key
Entering the password for secured Wi-Fi networks to establish connection.
Connecting to a Wireless Network
Automatically connecting to the last used network or attempting reconnection after failure.
Enabling Wi-Fi for Network Connection
Ensuring Wi-Fi communication is enabled on the unit before connecting.
Selecting Available Configured Network
Tapping on a configured network to connect the unit to it.
Removing Configured Networks
Preventing automatic connections by removing networks from the list.
Network Removal Process
Steps to tap and remove a specific wireless network from the unit's list.
Confirming Network Removal
Confirming network removal by tapping 'Forget' in the TestFlow mobile application.
Upgrading Applications and Firmware
Instructions for upgrading unit applications and firmware via a wireless network.
Preparing for Software Upgrade
Connecting unit to power and ensuring internet access for upgrades.
Performing Software Update
Steps to check for, download, and install software updates on the unit.
Recycling and Disposal
Information on proper recycling and disposal of the product and its accessories.
Troubleshooting
Solving Common Problems
Common issues with the unit and their possible causes and solutions.
Troubleshooting Battery Issues
Solutions for battery recharging problems and issues after battery replacement.
Troubleshooting Wireless Network Issues
Resolving problems with wireless network configuration and automatic connection.
Troubleshooting Wi-Fi Connection Problems
Solutions for connecting to configured networks and Wi-Fi compatibility issues.
Restoring Your Unit to Normal Operation
Procedure to revert the unit to its initial state due to major problems.
Unit Restoration Procedure (Part 1)
Steps for preparing the unit, turning it off, and removing the back panel.
Unit Restoration Procedure (Part 2)
Visual guide for accessing the unit's on/off button after panel removal.
Unit Restoration Procedure (Part 3)
Pressing the reset and on/off buttons to initiate the restoration process.
Unit Restoration Procedure (Part 4)
Cautionary advice on using fingers or non-metallic objects for the reset button.
Unit Restoration Procedure (Part 5)
Steps for replacing the back panel and securing it after the restoration.
Launching Factory Reset Recovery
Tapping 'FACTORY RESET' to launch the recovery operation.
Accessing the Online Documentation
How to access the user guide from the unit or a smart device.
Viewing Getting Started Guide
Steps to view the getting started guide from the unit's Support menu.
Accessing User Guide via QR Code
Scanning the QR code on the unit with a smart device to access the user guide.
Accessing User Documentation via TestFlow App
Viewing user documentation through the TestFlow mobile application.
Viewing OX1 User Guide in TestFlow
Accessing the OX1 user guide through the Optical Xplorer tool's Help menu.
Contacting the Technical Support Group
Contact information for EXFO technical support, including phone numbers and email.
Sharing Measurements With Technical Support
Steps to share measurement files with the EXFO technical support group.
Initiating Measurement Sharing
Tapping 'Share measurements with EXFO' to begin the sharing process.
Selecting Measurements for Sharing
Selecting specific measurement files to share via check boxes and tapping SHARE.
Viewing System Information
Accessing unit model, serial number, software/hardware versions, and contact info.
Warranty Information
General Warranty Information
Details on EXFO's one-year warranty against defects and applicable specifications.
Warranty Liability and Exclusions
EXFO's liability limitations and warranty exclusions for products and accessories.
Service and Repairs
EXFO's commitment to product service and repair for five years post-purchase.
EXFO Service Centers Worldwide
Contact information and locations for EXFO's authorized service centers globally.
Need help?
Do you have a question about the OX1-M and is the answer not in the manual?
Questions and answers