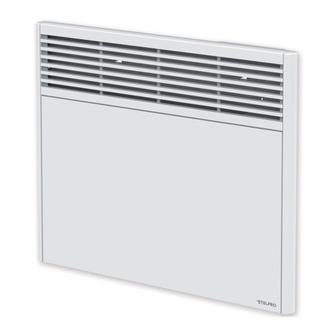
Summary of Contents for Stelpro ORLEANS SORH1502
- Page 1 SOR SERIES HIGH-END CONVECTOR REPLACEMENT COMPONENT LIST INCLUDED This unit complies with CSA standards...
- Page 2 If needed, refer to a specialist who will be able to calculate these heat losses and optimize the required capacity or consult the “Online heating calculation” section of the Stelpro website (residential buildings). To heat a large room and to increase your comfort, it is recommended to install several units instead of one.
-
Page 3: Specifications
SPECIFICATIONS LENGTH MODEL WATTS VOLTS HIGH MODELS - HEIGHT: 708 mm (27 7/8 in.) SORH1002 1000/750 240/208 15.1 SORH1502 1500/1125 240/208 24 1/2 19.4 SORH2002 2000/1500 240/208 30 1/4 10.5 23.2 LOW MODELS - HEIGHT: 330 mm (13 in.) SORL1002 1000/750 240/208 29 1/2... -
Page 4: Installation
INSTALLATION INSTALLATION OF WALL RACK 1. Release the unit from the wall rack by depressing the hooks. 2. Place the wall rack on the floor and against the wall where the unit is to be installed. 3. Using a pencil and the holes provided in the wall rack, make marks on both sides of the rack at the desired height for the bottom of the wall rack. -
Page 5: Adjusting The Temperature Setpoint
OPERATION BUILT-IN ELECTRONIC THERMOSTAT FOR SMART HOMES (ST218) ADJUSTING THE TEMPERATURE SETPOINT - By pressing either button on the thermostat, the temperature setpoint will be displayed as flashing digits. - The temperature setpoint is set by using the UP ( ) or DOWN ( ) buttons to raise or lower the setpoint respectively by increments of 0.5 °C (1 °F) each time the buttons are pressed. -
Page 6: Display Backlighting
BUTTON FUNCTIONS BUTTONS DISPLAY ADVANCED MENUS SINGLE BUTTON ADJUSTMENT OF TEMPERATURE SETPOINT NAVIGATION AND EDITING OF PARAMETERS BOTH BUTTONS SIMULTANEOUSLY MODE SELECTION (COMFORT, ECO, OFF) SELECTION AND CONFIRMATION OF PARAMETERS BOTH BUTTONS HELD SIMULTANEOUSLY FOR 3 SECONDS ACCESS TO ADVANCED MENUS EXIT FROM ADVANCED MENUS ZIGBEE CONNECTIVITY 3 - OFF: The backlighting is off. -
Page 7: Maintenance
°STELPRO MENU OFF MODE (OFF) Information about the convector is available in this menu. It is also See the SELECTING THE OPERATION MODE section for procedure to possible to reset the convector to its factory settings (menu 7.7). activate the OFF mode. -
Page 8: Troubleshooting
TROUBLESHOOTING PROBLEM DEFECTIVE PART OR PART TO CHECK - Defective thermostat - Open circuit breaker or fuse The unit does not work - Thermal protection activated - Faulty connections - Defective wall mounted thermostat The unit runs continuously - Heat losses greater than the unit capacity - Defective thermal protection The housing is extremely hot - Blocked air vents... - Page 9 REPLACEMENT COMPONENT LIST THERMAL WALL ELEMENT THERMOSTAT THERMOSTAT MODEL HOUSING FRONT PANEL PROTECTION SUPPORT (TYPE X) CONTROL POWER SUPPLY (AUTO.) SOR0502 M-SOR0500A* M-SOR0500B* M-SOR0500C0 PROT-005-1 ELF-SOR0201X SOR1002 M-SOR1000A* M-SOR1000B* M-SOR1000C0 ELF-SOR0501X SOR1502 M-SOR1500A* M-SOR1500B* M-SOR1500C0 ELF-SOR0701X SOR2002 M-SOR2000A* M-SOR2000B* M-SOR2000C0 ELF-SOR1001X SORH1002 M-SORH1000A*...
-
Page 10: Limited Warranty
Moreover, it does not cover the cost of disconnection, transport, and installation. The warranty is limited to the repair or the replacement of the unit or the refund of its purchase price, at the discretion of Stelpro. Any parts replaced or repaired within the warranty period with the written authorization of Stelpro will be warranted for the remainder of the original warranty period.


Need help?
Do you have a question about the ORLEANS SORH1502 and is the answer not in the manual?
Questions and answers