Table of Contents
Advertisement
Quick Links
Advertisement
Table of Contents

Related Manuals for Stelpro SONOMA STYLE


Summary of Contents for Stelpro SONOMA STYLE
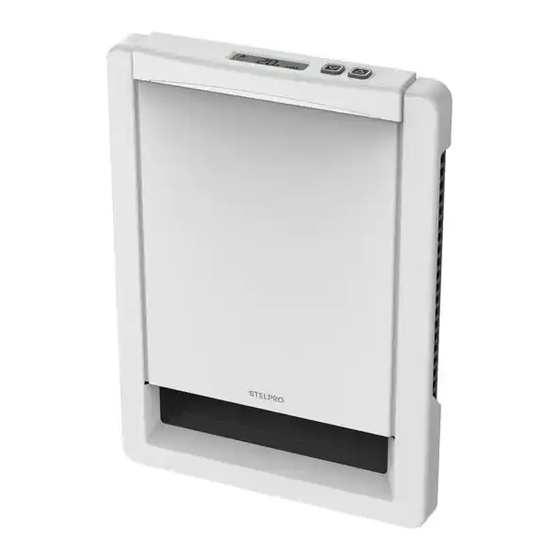
- Page 1 OWNER'S MANUAL IT’S GOT BRAINS. AND LOOKS. ASSOS...WCW ASSOS...W ASSOS...MW THANK YOU FOR YOUR PURCHASE! QUESTION? PROBLEM? CONTACT STELPRO CUSTOMER SERVICE. WWW.STELPRO.COM CONTACT@STELPRO.COM 1-866-766-6020 THIS UNIT COMPLIES WITH CSA STANDARDS...
-
Page 2: Important Instructions
The unit must cool down for few minutes since it will stay warm losses and optimize the required capacity or consult the “Calcu- for some time after shut down. lation Tools/Heating Calculator” section of the °STELPRO Design Do not insert or allow foreign objects to enter any air vent as this website. -
Page 3: Tools Required
* Thanks to its built-in smart electronic thermostat (depending on the model) or a MAESTRO wall thermostat, your fan heater is compatible with the MAESTRO environment. By connecting a SONOMA STYLE fan heater to a Zigbee network controlled by the MAESTRO controller-thermostat and mobile app, you can optimize your comfort. - Page 4 WARNING: This product must be installed by a certified electrician according to the electrical and building codes effective in your region. WHERE TO INSTALL YOUR FAN HEATER Make sure that objects or furniture near the heater can Install your fan heater in an unobstructed location at least withstand the heat it gives off.
-
Page 5: For Installation
CUTTING THE POWER SUPPLY To protect yourself from the risk of electric shock, turn off the power to the lead wires from the electrical panel. PREPARING THE SURFACE FOR INSTALLATION 1. Locate the studs and any other structures that might be inside the wall. - Page 6 4. Perforate one of the six pre-cut holes. Choose the hole according to the ATTENTION : Be sure to push in the right hole by power cable’s position placing the back box in the correct direction. The in the wall and the notches must be positioned at the bottom [C].
-
Page 7: Connecting The Wiring
ATTACHING THE BACK BOX TO THE WALL 2. According to your 1. Insert the fan heater’s back box in the installation, screw* opening you’ve made in the wall, making the box to the wall sure it is level. stud using two mounting holes [A]. -
Page 8: Attaching The Front Panel
ATTACHING THE MECHANICAL HOUSING TO THE BACK BOX 1. Put the mechanical housing 2. Pivot the mechanical housing 3. Secure with the screws set [A] in the back box by toward the wall. Be careful aside in step 4.2. inserting it into the bottom not to trap the wires or caps. - Page 9 2. Press the top of the front panel against the wall, keep- ing it slightly tilted [C] and centered with respect to the mechanical housing. 3. Carefully slide the front panel down until the hooks be- hind the front panel [D] are engaged and then pivot it toward the wall.
- Page 10 USING THE FAN HEATER WARNING: Before using your fan heater, make sure that it has been installed by a certified electrician in accordance with the electrical and building codes in your area. Do not operate without front panel. The following sections outline how to control the fan heater with its built-in electronic thermostat (ASSOS..MW and ASSOS..W models).
- Page 11 Menu 2 Nightlight mode (backlight settings) Menu 3 Type of installation settings (In-wall/Surface) Menu 3 Locking/Unlocking keypad settings Menu 4 °STELPRO information Menu 4 4.1: Fan heater version Open window detection settings Menu 5 4.2: Zigbee radio version Menu 6 Type of installation settings (In-wall/Surface) 4.3: Date manufactured...
- Page 12 Connecting the thermostat Disconnecting the thermostat to your Zigbee network from the Zigbee network The fan heater’s thermostat is compatible with the Zigbee You may need to disconnect the thermostat from your Zigbee smart home protocol. To control it, you must connect it to network, if you change controllers or channels, for example.
- Page 13 “Connection” (temperature sensor is defective). Heating will re- mode. Then, try to connect again. main inactive. Contact STELPRO Customer Service. • The auxiliary temperature sensor is defective. The device will still control the temperature, but it will not...
- Page 14 Heating is not operational. • Check whether the fan heater’s wiring is correctly connected. See Connecting the wiring, page 7. • If the problem persists, the thermostat or one of the heating elements may be defective. Contact STELPRO Customer Service.
-
Page 15: Technical Informations
• 240Vac / 2000W • 240Vac / 2000W Frequency 60Hz Control intended to be delivered exclusively to the equipment manufacturer (STELPRO). Intended Delivery Location It will never be sold seperatly as a replacement kit. A breaker is used as the protective device. -
Page 16: Claim Procedure
(other carefully. Subject to the terms of this warranty, STELPRO than that prescribed by STELPRO) or a use other than that for warrants its products and their components against defects in which the unit was designed; 3) a natural disaster or an event out workmanship and/or materials for the following periods from the of STELPRO’s control, including, but not limited to, hurricanes,...
Need help?
Do you have a question about the SONOMA STYLE and is the answer not in the manual?
Questions and answers