
Related Manuals for Arcam AV888


Summary of Contents for Arcam AV888
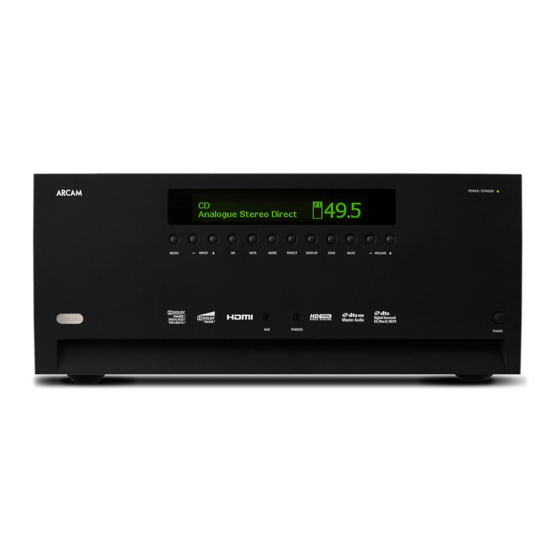
- Page 1 AVR500 / AVR600 / AV888 AVR surround amplifier / AV processor H a n d b o o k POWER/STANDBY MENU Ð INPUT INFO MODE DIRECT DISPLAY ZONE MUTE Ð VOLUME + AVR600 V I D E O S C A L I N G PHONES POWER...
-
Page 2: Important Safety Instructions
Class II product CAUTION ATTENTION This equipment is a Class II or double RISK OF ELECTRIC RISQUE DE CHOC ELECTRIQUE SHOCK DO NOT OPEN NE PAS OUVRIR insulated electrical appliance. It has been safety designed in such a way that it does not CAUTION: To reduce the risk of electric shock, do not remove cover (or back). - Page 3 Class II produit CAUTION ATTENTION Ce produit est un appareil électrique à RISK OF ELECTRIC RISQUE DE CHOC ELECTRIQUE SHOCK DO NOT OPEN NE PAS OUVRIR isolation double (appareil de classe II). consignes Il a été conçu pour ne pas nécessiter de ATTENTION : afin de réduire les risques de choc électrique, n’ouvrez pas le boîtier de l’appareil.
-
Page 5: Table Of Contents
It may be that the unit has been installed and set up as part of your Hi-Fi installation by a qualified Arcam dealer. In this case, you may wish to skip the sections of this handbook dealing with installation and setting up, and move directly to the sections dealing with using the unit. -
Page 6: Before You Begin
The AVR500/AVR600 is a high-quality and high- Since many of these source components are also The installation of the AVR500, AVR600 or AV888 in a listening room is an important process which requires performance home-cinema processor and amplifier built capable of generating video signals, the AVR500/ to Arcam’s quality design and manufacturing standards. -
Page 7: Placing The Unit
The amplifier is supplied with a moulded mains plug We recommend the use of high-quality screened cables The AVR500, AVR600 and AV888 are audio devices direct sunlight and sources of heat or damp. already fitted to the lead. Check that the plug supplied that are designed for the particular application. - Page 8 Trademark acknowledgements Arcam is a registered trademark of A & R Cambridge Ltd. Dolby Volume FLAC FLAC Decoder Copyright © 2000, 2001, 2002, Ogg/Vorbis Ogg/Vorbis Decoder Copyright © 2002, WMA & This product is protected by certain intellectual 2003, 2004, 2005, 2006, 2007, 2008 Josh Coalson Xiph.org Foundation...
-
Page 9: Audio/Video Connections
Please see Page 8 avoid damage to the amplifier and how to arrange your for the AVR600 & AV888. For the AVR500 please skip speakers for best performance. ahead to Page 14. General The inputs are named to make it easier to reference connected devices (e.g. -
Page 10: Avr600/Av888 Rear Panel Connectors
TRIG Z1 XLR-equipped amplifier. Z3 IR TRIG Z2 NOTE For information, see page 53. Please read the ‘Placing the unit’ , ‘Power’ and IR OUT TRIG Z3 ‘Interconnect cables’ sections on page 5 before connecting up your AVR600 or AV888! - Page 11 Connect this output to the Component video input of your display device. NOTE Analogue RGB video output is not available from the AVR500, AVR600 or AV888. The analogue three-wire high quality video output is always configured as Component video.
-
Page 12: Digital Audio
The headphone socket is always active, CD-R, digital VCR or Minidisc player. processing in the unit, therefore Connect the left and right except when AVR600/AV888 is muted. functions such as speaker size outputs to the left and right When a digital source is selected,... -
Page 13: Trigger Connectors
IR OUT TRIG Z3 Z2 IR TRIG Z1 directly to other Arcam equipment which have an IR whenever the unit was switched mono 3.5mm jacks. Tip is the input. This function can be useful as an IR ‘repeater’ modulated signal, sleeve is ground. -
Page 14: Connection Guide - Avr600/Av888
Connection guide - AVR600/AV888 Ð dVd player TAPE AUDIO PHONO SIRIUS TAPE DIGITAL The diagram shows how to make audio and video VIDEO connections from a typical DVD player. The preferred video hook-up, in order of preference is: use the HDMI connector (if HDMI output is <... - Page 15 Connecting an iPod using the arcam rdock The combination of the AVR600/AV888 and Arcam’s optional rDock or rLead accessory provides a great TAPE AUDIO TAPE PHONO platform for your iPod. VIDEO Connect the rDock as shown, power on the rDock, slot in your iPod and select as the source.
-
Page 16: Avr500 Rear Panel Connectors
Video connectors digital connectors aerials, control and communication Component, S-Video and Optical and electrical digital FM/AM radio, DAB radio (optional), rLead/ Composite connectors, see audio connectors, see page 16. rDock, RS232, Network/USB (optional), IR and AVR500 page 15. trigger connectors, see page 20. audio connectors Zone 2 connectors, rear panel... - Page 17 SCART connectors. You will need to use a SCART to video. ‘RGB+Sync on phono’ breakout cable, available from your Arcam dealer. NOTE When setting up the menus (later in this manual), you will need to select whether the three-wire high quality video input is Component or RGB for each input.
-
Page 18: Subwoofer Outputs
MENU Ð INPUT INFO MODE DIRECT DISPLAY ZONE MUTE Ð VOLUME + digital audio analogue audio MCH input Front panel aUX input connectors inputs This multichannel analogue The front panel input can be audio input can be connected used as an analogue or optical TAPE, CD, AV, DVD, SAT, VCR, PVR TAPE, CD, AV, DVD, SAT, VCR, AVR600... - Page 19 The socket and systems is Xantech. See www.xantech.com is designed for mono 3.5mm jacks: tip is the trigger more information, or ask your Arcam dealer. output, sleeve is ground. NOTE tip: Trigger output The IR inputs on the unit are designed for modulated signals.
-
Page 20: Connection Guide - Avr500
Connection guide – AVR500 dVd player The diagram shows how to make audio and video connections from a typical DVD player. The preferred video hook-up, in order of preference is: use the HDMI connector (if HDMI output is < provided by the player), otherwise connect the three Component or four RGB+Sync video connectors. - Page 21 Connecting an iPod using the arcam rdock The combination of the AVR500 and Arcam’s optional rDock or rLead accessory provides a great platform for your iPod. Connect the rDock as shown, power on the rDock, slot in your iPod and select as the source.
-
Page 22: Radio Connectors
Z3 IR TRIG Z2 Z3 IR TRIG Z2 Arcam dealer or try both horizontal and vertical depending on the region where it was sold. The type of from categories ranging from Pop, Rock, Country, R&B, positions for best reception. aerial you need depends on your listening preferences... - Page 23 NOTE The AVR600 provides power for the Sirius receiver, so an external power supply is not needed. Connecting an aerial Connecting an aerial A suitable FM aerial must be An AM aerial is required to connected to the AVR500/ receive AM/medium wave radio AVR600 before FM radio can be signals, so a simple loop aerial SIRIUS...
-
Page 24: Other Connectors
TRIG Z2 details. that complies with the ‘mass guidelines are presented in this handbook. Please storage device‘ class is compatible. contact your Arcam dealer or specialist installer for IR OUT TRIG Z3 RS232 serial connector more information about introducing the AVR500,... -
Page 25: Speakers
Connecting subwoofers The AVR600 and the AV888 allow up to three active subwoofers to be connected to the SUBWOOFER OUTPUT outputs. The AVR500 has two subwoofer connections. - Page 26 Place the two surround the ‘Spkr Types’ section of the Setup Menus for how back speakers such that there is an arc of to configure the AVR500/AVR600/AV888 for this approximately 150 degrees between each setup. surround back speaker and the centre speaker.
-
Page 27: Operation
Tape operation (aVR600/aV888 only) Audio-Visual input ‘ARCAM’ , followed by the volume setting and the name of Three analogue audio outputs are provided for DVD player input the selected input. After initialization is complete, the recording, . - Page 28 Extended Menu, allowing Arcam), you can update the firmware in your AVR500/ When headphones are plugged into the front panel you to perform the following: AVR600/AV888 using the back panel RS232 port socket, the outputs for Zone 1 are muted and...
-
Page 29: Front Panel Operation
This indicates the status of the AVR500/AVR600/ Used to enter selections made in the Zone 3 control. AV888. When first turned on, the LED is orange, Setup menu. Also forces the analogue to indicate that the unit is ‘initialising’; this and digital video outputs to the default Mute changes to green when fully powered and ready. -
Page 30: Remote Control
The CR102 is a sophisticated ‘universal’ backlit remote remote control that can control up to eight devices. It is pre- programmed for use with the AVR500, AVR600, AV888 control and many other Arcam products (FM/DAB tuners, CD players and DVD players). - Page 31 Device Mode key before AV888 as well as a range of other equipment, many of This equipment has been tested and found to A blue backlight comes on for five seconds whenever...
- Page 32 4. For the first digit of your four-digit code, press tables. Some of the modes are locked to Arcam operation but < the codes, try another code listed under your brand.
- Page 33 (multichannel) input on the (for sources) ipoD EFFECT iPod via an optional rLead/rDock, the keys below are to control the AVR500/AVR600/AV888. Pressing this AVR500/AVR600/AV888 & used to navigate music files in Device Mode. button does not affect the currently selected input on the...
- Page 34 DVD functions of Arcam DVD players, beginning of the next track. AV888 is not equipped with tuner modules). Pressing although this can be changed (see page 30). Pressing this When using the network client, the keys below are used...
- Page 35 Pressing this button also selects as the work with your equipment. Pressing this button also AVR500/AVR600/AV888 source. selects as the AVR500/AVR600/AV888 source. Toggles power between standby and on. Toggles power between standby and on Starts the playback Turns Programme-In-Programme (PIP) &...
- Page 36 You will need to configure this Device Mode to work with your equipment. Pressing this button also work with your equipment. Pressing this button also selects as the AVR500/AVR600/AV888 source. selects as the AVR500/AVR600/AV888 source. Toggles power between standby and on.
- Page 37 Cd device Mode The c Device Mode button configures the CR102 to control the CD functions of Arcam CD players, although this can be changed (see page 25). Pressing this button also selects as the AVR500/AVR600/AV888 source. Press and release to skip back to the Toggles power between standby and on.
-
Page 38: Essential Setup
Speaker types Before you use your AVR500, AVR600 or AV888 it is MCH sub level essential that you enter some information about your If a subwoofer is present, this setting allows for a 10dB You need to set the type of speakers that you have system configuration into the Setup menus. -
Page 39: Auto Speaker Setup
If you do not have a full 7.1 speaker configuration output level / gain control set to a higher or lower value, function built into your AVR500, AVR600 or AV888. auto speaker there will be periods of silence between some speaker... -
Page 40: Setup Menus
The Setup menus allow you to configure all aspects of your AVR500, AVR600 or AV888. The next few Menu panel Adjustment panel pages will go through the menu items and explain their The left-hand panel lists the setup The upper right-hand panel lists the function. -
Page 41: Video & Audio Connection Settings
Video Outputs keys to select from the list the video type > Component you are using on this source. Each input on the AVR500/AVR600/AV888 has multiple S-Video Mode Audio Source HDMI: the unit is forced to use the HDMI video connection possibilities for both audio and video, <... - Page 42 0 and this should normally produce a good result < Not Calculated: (Information only) Auto Speaker which the settings below relate. when the speaker levels of the AVR600 (or AV888 and Left/Right: Full frequency stereo information. All Setup has not been run or has errors so cannot be <...
- Page 43 AVR500/AVR600/AV888 interprets the video on this Digital: the unit is forced to use the optical ( processed (i.e. not Stereo Direct mode). It is stored in <...
-
Page 44: Auto Setup
Centre – Front Left – Calculating EQ: Data gathered from each of the < that powered Zone 2 is not available on the AV888). Surr. Left / Right – Centre – speakers is being processed. Surr. Back L / R –... - Page 45 ‘Sat’ video with AM, FM and Digital Radio audio if you < is used to configure the settings of the unit’s video AVR500, AVR600 or AV888 video processor can wished. This way you could listen to the FM or AM or For HDMI outputs processor.
-
Page 46: Zone Settings
‘Multichannel sources’ section. infra-red eye in Zone 2, this setting controls which parts of the AVR500, AVR600 or AV888 to turn on and off: When Local Only, the Standby IR command only affects the zone it was received in (Zone2 or Zone3). - Page 47 E-45...
-
Page 48: Decoding Modes
The AVR500, AVR600 channel output from two-channel source material. Stereo. < or AV888 will derive separate channels corresponding to There are three different modes available in Pro Logic II: TheAVR500/AVR600/AV888 stores the settings for each the standard home theatre layout. -
Page 49: Multichannel Source Modes
‘Surround EX’ encoded (which is normally indicated on the disc packaging and should be detected automatically by the AVR500/AVR600/AV888), but may be used at other times if desired. Pro Logic IIx Movie This mode is used to derive information for the individual surround back channels from the surround channels, using the Pro Logic IIx Movie decoder. -
Page 50: Dolby Volume
AVR500, AVR600 or AV888. recording/output levels. This is the Volume Leveller However, the Volume Leveller and Calibration Offset function of Dolby Volume. - Page 51 E-49...
-
Page 52: Tuner Operation
Tuner – aVR500/aVR600 only Tuning/Channel Selection Saving and selecting Presets The AVR500/AVR600 is fitted with an internal AM/FM When switching to the internal source, the Preset selection uses the keys on the TunER remote to browse and O to select the preset when the tuner. - Page 53 Sirius satellite radio Locking Channels (aVR600, US & Canada only) The Sirius module in the AVR600 has a parental lockout feature which allows you to assign a 4-digit code to any In this section it is assumed that you already have channels you do not wish to be generally available to a ‘SiriusConnect™...
-
Page 54: Network/Usb Operation
The ‘home’ page will display all available storage devices, easy browsing of internet radio stations and podcasts. To as well as your ‘favourites’ folder. Navigate through these set up this service for your AVR500, AVR600 or AV888, devices using the keys. Folders that please visit www.arcamradio.co.uk... -
Page 55: External Amplifiers
(aVR600/aV888 only) aV888 only All pre-amplifier analogue outputs are buffered, have The AV888 processor provides XLR connectors for each a low output impedance and are at line level. They are of seven channels, to an XLR-equipped amplifier (e.g. able to drive long cables or several inputs in parallel if the Arcam P777). -
Page 56: Multi-Room Set Up
) of the Zone 2 display device, or AnAloguE AuDio in multi-room AVR600 and AV888 also allow a copy of the Zone 2 to the inputs of an additional stereo power amplifier in Z2 IR and Z3 IR analogue audio to be routed to and controlled in a third Zone 2 (for example, the Arcam P38). -
Page 57: Multi-Room Connection Guide
Multi-room connection guide Zone 3 Zone 1 Zone 2 Amplifier Ð TAPE PHONO TAPE SIRIUS DIGITAL SPEAKER IMPEDANCE ANALOGUE AUDIO IN Amplifier RIGHT LEFT Z1 IR ANALOGUE AUDIO IN VIDEO IN ETHERNET Z1 IR Z2 IR TRIG Z1 Z2 IR TRIG Z1 RIGHT LEFT OPTICAL Z3 IR TRIG Z2 MAIN... -
Page 58: Customising The Cr102
Code Learning 9. To use the learned function on the CR102, press the To delete a Shifted Learned function: Device Mode key, followed by the function key. To delete a Shifted Learned function, press S before The CR102 comes with a complete library of In this example, you’... - Page 59 1. Press and hold S until the power LED blinks twice: commands you regularly use can be reduced to a single AVR500, AVR600 or AV888 volume. You don’t need to for your comfort. It’s quite easy to reassign a favourite * * .
- Page 60 You will need to change the system code on the product twice. you wish to control, as well as the CR102. NOTE Device Mode can only be used to control Arcam amplifiers like the AVR500, AVR600 and AV888, either on its default or alternative IR system codes. E-58...
-
Page 61: Command Summary
Device codes Mode key IR punch-through Command summary The Mode key IR punch-through default is ‘on’ . The tables that begin on page 64 (in the final section of Example: To set the Mode key IR punch- direct code setup key mover this Handbook) list the four-figure codes for different through to aMP (e.g. -
Page 62: Trouble S Hooting
< AVR600/AV888. Test by pressing the button on the AVR500/AVR600/ MEnu AV888 or on the remote and look for the main menu screen on your display device. the correct video input is selected on the AVR500/AVR600/AV888. < the video source is on, is operating normally, and is in ‘play’ mode if <... - Page 63 USB – the AVR500/ < applicable). AVR600/AV888 USB port cannot be used for a direct connection to a the DVD player has been set to output ‘bitstream’ audio on the digital output <...
-
Page 64: Specifications
Composite video signal/noise 70dB Headphone output Maximum output level into 600Ω 4V p-p Output impedance <5Ω Continual improvement policy Arcam has a policy of continual improvement for its products. This means that designs and specifications are subject to change without notice. E-62... -
Page 65: Product Guarantee
Claims under guarantee This equipment should be packed in the original packing and returned to the dealer from whom it was purchased, or failing this, directly to the Arcam distributor in the country of residence. It should be sent carriage prepaid by a reputable carrier – not by post. No responsibility can be accepted for the unit whilst in transit to the dealer or distributor and customers are therefore advised to insure the unit against loss or damage whilst in transit. -
Page 66: Device Code Tables
0247 0246 Arc en Ciel 0139 0586 1193 0067 0586 Dunai 0193 0586 0247 0404 Bosch 0357 0067 0586 Arcam 0246 0247 Granada 0067 0586 0238 Continental 0139 0517 Durabrand 0067 0586 0208 0698 0744 0193 0636 1193 0067 0586 0926... - Page 67 Harwood 0039 0067 0586 Innova 0067 Kingsley 0246 Luxor 1193 0510 0522 Mitsubishi 0138 0123 0542 Nurnberg 0193 Pioneer 0790 0067 0139 0517 0238 0578 0193 0067 0208 0586 0200 0193 0586 Innovation 0067 0586 Kioto 0736 0586 Oceanic 0193 0238 0503 0376 0503 1067 0238 1067 1290 0400 0373...
- Page 68 TV (cont.) Seitech 1247 Staksonic 0039 Teleavia 0139 0373 Transtec 0246 World-of-Vision 0910 0920 0895 1319 1328 0907 Seleco 0193 0294 0376 Standard 0039 0067 0247 Telecor 0067 0586 0193 Triad 0067 0586 1247 0586 1067 0404 0247 0424 Sencora 0039 Trident 0247...
- Page 69 Combitech 0382 Goodmans 0030 0102 0270 Loewe 0111 1592 0256 Osume 0102 Sei-Sinudyne 0111 Tokiwa 0102 0308 0067 0111 0067 Condor 0308 Otto Versand 0111 Seleco 0067 Topline 0378 0378 0667 0382 Logik 0270 0102 0136 Craig 0067 0102 0270 Pace 0382 Semivox...
- Page 70 1338 1339 1793 Amstrad 1252 Aiwa 0187 1419 4Kus 1188 1299 1319 1548 1795 Thule Audio 0187 Auna 1299 1260 Arcam 0187 2010 Aiwa 0151 0219 1088 A-Trend 0744 Mark 1119 1219 1299 Techwood 0639 1584 Traxdata 0656 1188 1288 1652 Austar...
- Page 71 Bush 0743 0725 0863 Dual 0861 0743 0695 Hitachi 0694 0725 0809 Manhattan 0735 0743 Panda 0747 1137 Schneider 0861 0809 0569 Technosonic 1081 1145 1725 0760 0861 0681 0760 0809 0695 0603 0887 0735 0818 0743 Marantz 0569 Papouw 0563 Techwood 0743 1560 0569...
- Page 72 Sky XL 1442 CityCom 1206 1262 0329 Gardiner 0848 Logix 1047 1105 Philips 0230 1144 0883 0848 0534 1105 0129 0163 0848 SKY+ 1205 Garnet 1105 Lorenzen 0329 1324 1191 1702 0203 1459 Clatronic 1443 0162 Skymaster 1364 GbSAT 1244 @sat 1330 @sat...
- Page 73 Smart 1303 0162 0329 Vega 0399 1143 1262 0743 Ventana 0230 1443 Vestel 1281 Soniq 1597 VH-Sat 1191 0329 Sony 0877 1588 0312 Viasat 1353 1053 0883 Visionic 0155 1309 0162 Visiosat 0743 1159 1487 Star Sat 0162 Vivid 1192 Starland 0743 VTech...
- Page 74 A&R CAMBRiDgE lTD, pEMBRoKE AVEnuE, wATERBEACh, CAMBRiDgE CB25 9QR, EnglAnD SH222E Issue 4...
Need help?
Do you have a question about the AV888 and is the answer not in the manual?
Questions and answers