Iomega 34337 - Home Media Network Hard Drive NAS Server User Manual
Home media network hard drive cloud edition
Hide thumbs
Also See for 34337 - Home Media Network Hard Drive NAS Server:
- Quick start manual (45 pages)
Table of Contents
Advertisement
Advertisement
Table of Contents

Related Manuals for Iomega 34337 - Home Media Network Hard Drive NAS Server


Summary of Contents for Iomega 34337 - Home Media Network Hard Drive NAS Server
- Page 1 Home Media Network Hard Drive User Guide D31568300...
- Page 2 Iomega® Home Media Network Hard Drive Cloud Edition...
- Page 3 Iomega® Home Media Network Hard Drive Cloud Edition...
-
Page 4: How To Get Help
How to Get Help Iomega is committed to providing excellent customer support. To meet this goal, Iomega offers a variety of support options designed to meet the needs of a wide range of users. For complete information on the support options available for your Iomega product, visit the Iomega website. Please select your region carefully. -
Page 5: Connecting Home Media Network Hard Drive
6. Install the Iomega Storage Manager software. Once the installation completes, the Iomega Storage Manager icon will appear in the System Tray (Windows) or Menu Bar (Mac). The Iomega Storage Manager will automatically scan your network and connect to available Shares. - Page 6 Iomega® Home Media Network Hard Drive Cloud Edition Iomega, the stylized logo, and all Iomega brand blocks are either registered trademarks or trademarks of Iomega Corporation in the United States and/or other countries. Microsoft and Windows are either registered trademarks or trademarks of Microsoft Corporation in the United States and/or other countries.
-
Page 7: Regulatory Information
If necessary, consult an experienced radio/television technician for additional suggestions. Changes or modifications to the electronics or enclosure of this product must be expressly approved by Iomega; otherwise, the user's authority to operate this product might be voided by the FCC. -
Page 8: Safety Information
Iomega® Home Media Network Hard Drive Cloud Edition Safety Information Observe the following guidelines when using your Home Media Network Hard Drive: 1. Follow all instructions marked on the Home Media Network Hard Drive and in the documentation. 2. Always use the appropriate power supply plug clip for your country. -
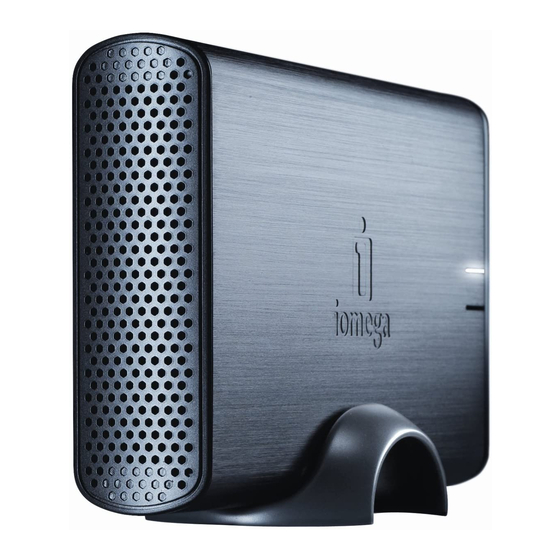
Page 9: Front Panel Overview
Iomega® Home Media Network Hard Drive Cloud Edition About the Home Media Network Hard Drive Drive Components Front Panel 1. Indicator Lights: QuikTransfer Indicator: Displays QuikTransfer backup status. Regular Flashing Blue: QuikTransfer backup in progress. Irregular Flashing Blue: QuikTransfer backup failed, see device log for more information. -
Page 10: Rear Panel Overview
Iomega® Home Media Network Hard Drive Cloud Edition 1. Security Lock: Connect a security cable to prevent theft. 2. Power Button: Use the power button to power the Home Media Network Hard Drive on and off. 3. Reset Button: Hold the RESET button for four seconds to reset security and network settings. This allows you to regain access if network settings are incorrect or you've forgotten your password. -
Page 11: Troubleshooting Routers
Iomega® Home Media Network Hard Drive Cloud Edition Troubleshooting Routers If you encounter a problem while connecting or using your Home Media Network Hard Drive, check the topics listed below for possible solutions. If you have properly set port forwarding on your router and remote access still does not work, you may have multiple routers on your network. In this situation you will most likely have two NAT (Network Address Translation) firewalls. - Page 12 Iomega® Home Media Network Hard Drive Cloud Edition setting for how long the DHCP lease is valid. If your network requires DHCP, this may be a good solution; however, it is not always guaranteed to work. You may need to occasionally update your router's port forwarding settings.
-
Page 13: Limited Warranty
Your sole and exclusive remedy for a covered defect is repair or replacement of the defective product, at Iomega's sole option and expense (shipping may be charged), and Iomega may use new or refurbished parts or products to do so. If Iomega is unable to repair or replace a defective product, your alternate exclusive remedy shall be a refund of the original purchase price. -
Page 14: Getting Started
Getting started is quick and easy with the Home Media Network Hard Drive. Before you can use your Home Media Network Hard Drive, you must connect all the cables and turn it on. Once you have connected the hardware, you can install the optional Iomega Storage Manager Software and begin using your Home Media Network Hard Drive. -
Page 15: Interface Overview
Iomega® Home Media Network Hard Drive Cloud Edition Interface Overview The user-friendly Home Media Network Hard Drive Console enables you to configure and manage your Home Media Network Hard Drive storage, attached peripheral devices, users, Shares, and media server capabilities. It also displays the overall state of your Home Media Network Hard Drive. - Page 16 Setup The Setup page opens when you first access the Home Media Network Hard Drive Console from the Home Page or the Iomega Storage Manager. On this page, you can configure some basic device features by clicking the appropriate link. The current setting of the feature displays above the link. You can also...
-
Page 17: Shares Overview
Iomega® Home Media Network Hard Drive Cloud Edition Shares Overview The Shares page displays a table that contains folders, connected drives, and any cloud storage to which your Home Media Network Hard Drive Console is connected. The Properties column displays the features that are enabled for each Share. -
Page 18: Content Viewer
Iomega® Home Media Network Hard Drive Cloud Edition Content Viewer The Content Viewer is a graphical file browser that lets you view and manage content in the Shares on your Home Media Network Hard Drive. The Content Viewer is divided into two panes. The left pane lists the Shares on the Home Media Network Hard Drive and allows you to delete or add a Share. -
Page 19: Managing Shares
Iomega® Home Media Network Hard Drive Cloud Edition Managing Shares The page describes how to: Add and Modify Shares Change Share Information Change Access Permissions Make a Share an Active Folder Adding and Modifying Shares 1. From the Home Media Network Hard Drive Console, click Shares. -
Page 20: Deleting Shares
Iomega® Home Media Network Hard Drive Cloud Edition Deleting Shares 1. From the Home Media Network Hard Drive Console, click Shares. 2. To delete an existing Share, click to expand the Share. 3. In the Information section, click Delete to delete the Share. -
Page 21: Shares Properties
Iomega® Home Media Network Hard Drive Cloud Edition Shares Properties The Shares page displays properties for the Share's different functions. The Properties column displays the features that are enabled for each Share. The following list identifies the Shares page icons: identifies a Share with Media Sharing enabled. -
Page 22: How To Set Up An Email Distribution Active Folder
Iomega® Home Media Network Hard Drive Cloud Edition Email Distribution Active Folders The Shares page displays a table that contains folders, connected drives, and any cloud storage to which your Home Media Network Hard Drive Console is connected. The Properties column displays the features that are enabled for each Share. -
Page 23: How To Set Up A Facebook Active Folder
Iomega® Home Media Network Hard Drive Cloud Edition Facebook Active Folders You can optionally enable Active Folders on a Share, which enables you to associate this Share with a specific feature or operation that occurs automatically when files are copied to the Share. -
Page 24: Flickr Active Folders
Iomega® Home Media Network Hard Drive Cloud Edition Flickr Active Folders The Shares page displays a table that contains folders, connected drives, and any cloud storage to which your Home Media Network Hard Drive Console is connected. The Properties column displays the features that are enabled for each Share. -
Page 25: How To Set Up A Photo Resize Active Folder
Iomega® Home Media Network Hard Drive Cloud Edition Photo Resize Active Folders You can optionally enable Active Folders on a Share, which enables you to associate this Share with a specific feature or operation that occurs automatically when files are copied to the Share. -
Page 26: How To Set Up A Torrent Active Folder
Iomega® Home Media Network Hard Drive Cloud Edition Torrent Active Folders You can optionally enable Active Folders on a Share, which enables you to associate this Share with a specific feature or operation that occurs automatically when files are copied to the Share. -
Page 27: How To Set Up A Youtube Active Folder
Iomega® Home Media Network Hard Drive Cloud Edition YouTube Active Folders You can optionally enable Active Folders on a Share, which enables you to associate this Share with a specific feature or operation that occurs automatically when files are copied to the Share. -
Page 28: Drive Management
Iomega® Home Media Network Hard Drive Cloud Edition Drive Management The Drive Management page shows drive model and size information. -
Page 29: Safely Removing External Storage
Iomega® Home Media Network Hard Drive Cloud Edition External Storage The External Storage page displays a list of externally connected storage devices. You can connect supported external storage to your Home Media Network Hard Drive using one of the provided USB ports. When you connect external storage to your Home Media Network Hard Drive, that device content is accessible from the Shares page. - Page 30 Iomega® Home Media Network Hard Drive Cloud Edition Protocols The Protocols page lists the protocols supported by the Home Media Network Hard Drive.
-
Page 31: Apple File Sharing
Iomega® Home Media Network Hard Drive Cloud Edition Apple File Sharing The Apple Filing Protocol (AFP) enables Apple file sharing, which is the preferred method for Mac users to access Shares. AFP is on by default. To enable AFP, click the switch on. -
Page 32: Configuring Bluetooth Settings
Iomega® Home Media Network Hard Drive Cloud Edition Bluetooth Once a Bluetooth adapter is detected, files can be uploaded to a configurable destination Share on the Home Media Network Hard Drive from a Bluetooth device. Configuring Bluetooth settings 1. To enable Bluetooth, click the switch on. - Page 33 Iomega® Home Media Network Hard Drive Cloud Edition On the Protocols page, click the switch to turn on FTP (File Transfer Protocol) and allow access to your Home Media Network Hard Drive. When you turn FTP on, you can send files to your Home Media Network Hard Drive using FTP.
- Page 34 Iomega® Home Media Network Hard Drive Cloud Edition TFTP On the Protocols page, click the switch to turn on TFTP (Trivial File Transfer Protocol) and allow access to your Home Media Network Hard Drive. When you turn TFTP on, you can send files to your Home Media Network Hard Drive using FTP.
-
Page 35: Configuring Webdav Settings
Iomega® Home Media Network Hard Drive Cloud Edition WebDAV WebDAV (Web-based Distributed Authoring and Versioning) is a protocol that provides web-based access to Shares on the Home Media Network Hard Drive. With WebDAV enabled on the Home Media Network Hard Drive, you can view, add, or delete files through your WebDAV client using either HTTP for unencrypted access or HTTPS for encrypted access. -
Page 36: Windows File Sharing
Iomega® Home Media Network Hard Drive Cloud Edition Windows File Sharing Windows File Sharing allows you to work in Workgroup mode, using Home Media Network Hard Drive Console to create users and manage access. To enable Windows File Sharing, click the switch on. -
Page 37: Setting Quiktransfer
Iomega® Home Media Network Hard Drive Cloud Edition QuikTransfer On the QuikTransfer page, you can set the default destination Share for any automatically created QuikTransfer Copy Jobs. QuikTransfer automatically copies all files from any USB external storage device plugged into your Home Media Network Hard Drive to the destination Share when the QuikTransfer button on the Home Media Network Hard Drive is pressed. -
Page 38: Enabling Torrent Downloads
Iomega® Home Media Network Hard Drive Cloud Edition Torrent Download Torrent downloads allow you to share files using a peer-to-peer file sharing protocol. With Torrent Download enabled, you can download files using the torrent protocol to your Home Media Network Hard Drive and then those files can be uploaded by other torrent users. -
Page 39: Adding Torrent Jobs
Iomega® Home Media Network Hard Drive Cloud Edition Adding torrent jobs 1. Open the Shares page. 2. Expand the Share that is enabled as a Torrent Active Folder. Any Share can be enabled as a Torrent Active Folder. For information on enabling a... -
Page 40: Deleting Torrent Jobs
Iomega® Home Media Network Hard Drive Cloud Edition Deleting torrent jobs 1. On the Torrent Download page, select a torrent you want to delete. 2. Click the under the Action column to delete the torrent. 3. Click Yes to delete the torrent. -
Page 41: Configuring Your Router For Torrent Downloads
Iomega® Home Media Network Hard Drive Cloud Edition Configuring your router for torrent downloads You must manually configure your router to forward a specific port to your Home Media Network Hard Drive. Most routers refer to this as port forwarding or application access and it is recommended that you refer to your router's documentation to learn how to set these values. -
Page 42: Quiktransfer Button
Any NAS device automatically discovered on the same subnet as your Home Media Network Hard Drive Any NAS device that you manually add to the subnet using the Iomega Storage Manager Any external storage device, such as a USB device, connected to your Home Media Network Hard Drive When selecting what data to copy on the source storage device, you can choose a specific folder or all folders. -
Page 43: Managing Copy Jobs
Iomega® Home Media Network Hard Drive Cloud Edition Managing Copy Jobs From the Copy Jobs page, you can add, start, stop, delete, or monitor Copy Jobs. After you have added Copy Jobs, the Copy Jobs page displays a list of Copy Jobs. The information section includes the name of the Copy Job, date and time it last ran, and its next scheduled time. -
Page 44: Adding And Modifying Copy Jobs
Iomega® Home Media Network Hard Drive Cloud Edition Adding Copy Jobs The page describes how to: Add and Modify Copy Jobs Setting From Information Setting To Information Setting a Schedule Adding and Modifying Copy Jobs 1. On the Copy Jobs page, click . -
Page 45: Modifying Copy Jobs
Iomega® Home Media Network Hard Drive Cloud Edition Modifying Copy Jobs 1. In the list on the Copy Jobs page, find the Copy Job from the list you want to modify and click it to expand the Information section. 2. Refer to Adding a Copy Job for information about revising the Copy Job fields. -
Page 46: Deleting Copy Jobs
Iomega® Home Media Network Hard Drive Cloud Edition Deleting Copy Jobs 1. Click from the Actions column of the table to delete the Copy Job. The Delete Copy Job pop-up window opens. 2. If you are sure that you want to delete the Copy Job, click Yes. - Page 47 Iomega® Home Media Network Hard Drive Cloud Edition QuikTransfer On the QuikTransfer page, you can set the default destination Share for any automatically created QuikTransfer Copy Jobs. QuikTransfer automatically copies all files from any USB external storage device plugged into your Home Media Network Hard Drive to the destination Share when the QuikTransfer button on the Home Media Network Hard Drive is pressed.
-
Page 48: Mozy Backup
Iomega® Home Media Network Hard Drive Cloud Edition Mozy Backup The Mozy online backup service allows you to create a Mozy account, connect your Home Media Network Hard Drive to the account, and back up Shares and folders to the Mozy cloud service. -
Page 49: Enabling Time Machine Support
Machine on your Home Media Network Hard Drive to allow Mac computers to back up to it. When you enable Time Machine, you choose a destination Share on the Home Media Network Hard Drive where the backups are stored. Any Mac computers running the Iomega Storage Manager will automatically have backup folders created within that specified Share. -
Page 50: Cloud Services Overview
Iomega® Home Media Network Hard Drive Cloud Edition Cloud Services Overview Cloud Services offer connections to virtual storage from your Home Media Network Hard Drive. Using cloud storage is easily scalable, and does not require installing extra software. You can create a personal cloud on your Home Media Network Hard Drive, and add members to that personal cloud, or you can use a subscription service as a backup for your content. -
Page 51: Enabling The Amazon S3 Feature
Iomega® Home Media Network Hard Drive Cloud Edition Amazon S3 The Amazon S3 online storage service allows you to back up your Home Media Network Hard Drive to the cloud. Enabling the Amazon S3 Feature 1. On the Amazon S3 page, click the switch on. - Page 52 Iomega® Home Media Network Hard Drive Cloud Edition Facebook Facebook is a social network to connect with friends and family. You can configure a Share as a Facebook Active Folder so that photos added to that Share are automatically uploaded to your Facebook account.
- Page 53 Iomega® Home Media Network Hard Drive Cloud Edition Flickr Flickr is a photo sharing network to share photos with friends and family. You can configure a Share as a Flickr Active Folder so that photos added to that Share are automatically uploaded to your Flickr account.
-
Page 54: Iomega Personal Cloud Overview
Iomega Personal Cloud Overview An Iomega Personal Cloud turns a Home Media Network Hard Drive into a hub for sharing data, playing games, and backing up data among computers anywhere in the world. A Personal Cloud can exist on yours or someone else's Home Media Network Hard Drive. When you create a Personal Cloud, storage on your Home Media Network Hard Drive is shared with any member computer you invite to join the cloud. -
Page 55: Creating An Iomega Personal Cloud Account
Before you can work with your Personal Cloud, you first create a Personal Cloud account and configure the settings. You can start the creation of a Personal Cloud on your Home Media Network Hard Drive from either the Iomega Storage Manager or the Home Media Network Hard Drive Console Iomega Personal Cloud page. -
Page 56: Adding Iomega Personal Cloud Members
After creating a Personal Cloud account, you add members to the Personal Cloud. Members are the individual computers or Iomega storage devices that can join the Personal Cloud, such as 'my work computer' or 'Dad's Iomega storage device'. Each member computer or Iomega storage device must get its own unique access code. -
Page 57: Disconnecting And Deleting A Personal Cloud
As an administrator, you may receive an invitation to join your Home Media Network Hard Drive to a Personal Cloud. This online help topic describes how to join a Home Media Network Hard Drive to a Personal Cloud. You can join your computer to a Iomega Storage Manager using the Personal Cloud. - Page 58 How to Manage Your Iomega Personal Cloud As an Iomega Personal Cloud administrator, you can manage various settings on your Iomega Personal Cloud that ensure that it functions as efficiently as possible. Settings include specifying an email address when sending invitations. You also enter a port number for your router to forward a specific port for your Personal Cloud.
-
Page 59: Managing Members On Your Iomega Personal Cloud
Iomega® Home Media Network Hard Drive Cloud Edition Managing Members on Your Iomega Personal Cloud As an Iomega Personal Cloud administrator, you can manage membership on your Personal Cloud. Connected members can be disconnected, or you can completely delete a member from the Personal Cloud. -
Page 60: Using Copy Jobs With An Iomega Personal Cloud
As an administrator, you can invite your friends or co-workers to join your Iomega Personal Cloud on your Home Media Network Hard Drive. One of the benefits of adding members to join your Personal Cloud is that you can create Copy Jobs that can transfer data from one Iomega storage device to another through the Personal Cloud. - Page 61 Iomega® Home Media Network Hard Drive Cloud Edition YouTube YouTube is a social site to share video content. You can set an Active Folder to automatically upload your videos to your YouTube account. You can configure a Share as a YouTube Active Folder so that videos added to that Share are automatically uploaded to your YouTube account.
-
Page 62: Date And Time
Iomega® Home Media Network Hard Drive Cloud Edition Date and Time Date and Time displays the current time set on the Home Media Network Hard Drive. 1. To change time zones, select a Time Zone from the drop-down menu, and then select how time will be set for the device: Internet Time Server By default, Automatically synchronize with an Internet time server and Use the default time server are selected. -
Page 63: Email Notification
Iomega® Home Media Network Hard Drive Cloud Edition Email Notification Email Notification provides a destination for emails sent by the device when problems are detected. To provide a destination email address, enter the following information: Destination Email Address enter a valid email address. This email address provides a destination for messages sent by the device when problems are detected by the system. -
Page 64: Energy Saving
Iomega® Home Media Network Hard Drive Cloud Edition Energy Saving The Energy Saving page provides power settings for the Home Media Network Hard Drive. Power Down Drives Click the Power Down Drives drop-down menu to select how much idle time should be allowed to elapse before the Home Media Network Hard Drive powers down the drives. -
Page 65: Factory Reset
Iomega® Home Media Network Hard Drive Cloud Edition Factory Reset Factory Reset returns the Home Media Network Hard Drive to its original state. This feature is useful if you give your Home Media Network Hard Drive to someone else. Factory Reset provides three options for returning your Home Media Network Hard Drive to its original state: Preserve users and Shares —... -
Page 66: Manual Update Process: Installing A Device Software Update
Iomega® Home Media Network Hard Drive Cloud Edition Software Updates The Software Updates page identifies the Home Media Network Hard Drive software status and provides the ability to update the software for the Home Media Network Hard Drive. This software is protected by RSA BSAFE technology. -
Page 67: Home Page Settings
Iomega® Home Media Network Hard Drive Cloud Edition Home Page Settings The Home Page Settings page allows you to customize the look of the Home Page on your Home Media Network Hard Drive. You can name the Home Page and choose to display a picture slideshow and Shares on it. -
Page 68: Network Settings
Iomega® Home Media Network Hard Drive Cloud Edition Network Settings The Network page displays your current network settings and enables those settings to be modified. On this page, you can identify your DNS servers and WINS servers and how your system's IP address is determined. Most system IP addresses and other network settings can normally be configured automatically. -
Page 69: Manually Configuring The Network
Iomega® Home Media Network Hard Drive Cloud Edition Manually Configuring the Network You can have direct control of the network setup. 1. Click Modify Network Settings. 2. Uncheck Automatically configure DNS, WINS, and all IP addresses (DHCP). 3. DNS Servers — enter the IP addresses of the DNS (Domain Name System) servers. DNS is used for translating the domain name to IP addresses. -
Page 70: Remote Access Overview
Iomega® Home Media Network Hard Drive Cloud Edition Remote Access Overview Remote access allows you to access your device's data from any web-enabled computer in the world. Review the following prerequisites prior to enabling remote access: Enable Security — Before you can enable remote access, you must have security enabled on your Home Media Network Hard Drive. If security is already enabled, you are ready to enable remote access. -
Page 71: Enabling Remote Access
Iomega® Home Media Network Hard Drive Cloud Edition Enabling Remote Access Follow this procedure to enable remote access: 1. Enable security if it is not yet enabled. On the Remote Access page, click the switch to Enable. Your Home Media Network Hard Drive begins to automatically configure remote access. First, your Internet connection is tested. If the connection is successful, a green checkmark displays on the Home Media Network Hard Drive image. -
Page 72: Accessing Your Device Remotely
Iomega® Home Media Network Hard Drive Cloud Edition Accessing Your Device Remotely Once you have enabled remote access and created your web address, you can access files stored on your Home Media Network Hard Drive from any Internet- capable computer in the world. -
Page 73: Media Server
Iomega® Home Media Network Hard Drive Cloud Edition Media Server The Home Media Network Hard Drive has a built-in media server that, when turned on, can scan for media content in specific folders that have media sharing enabled. Any media content contained in these specific folders will be scanned by the Home Media Network Hard Drive media server and be accessible to any user on your network with a media player. -
Page 74: Picture Transfer
Iomega® Home Media Network Hard Drive Cloud Edition Picture Transfer The Picture Transfer Protocol (PTP) allows pictures to be automatically copied from a USB camera connected directly to the Home Media Network Hard Drive. When Picture Transfer is turned on, and your camera is connected to your Home Media Network Hard Drive, the pictures are copied to the configured destination folder. - Page 75 Iomega® Home Media Network Hard Drive Cloud Edition Printers The Printers page displays a table of printers that are attached to the Home Media Network Hard Drive. The table contains for each printer the name, model, status, and number of documents waiting.
-
Page 76: System Status Page
Iomega® Home Media Network Hard Drive Cloud Edition System Status page The System Status page displays space usage information and status information about your Home Media Network Hard Drive. It also provides a control panel that enables you to: Blink the lights... -
Page 77: Downloading The Complete Event Log File
Iomega® Home Media Network Hard Drive Cloud Edition Event Log The Event Log page displays only the 1000 most recent events logged to the Home Media Network Hard Drive. A complete event log, however, is available for download. The following icons indicate the severity of each status message: INFORMATION Identifies that a change has been made to the state of your Home Media Network Hard Drive, usually by a user, such as attaching a peripheral. - Page 78 Iomega® Home Media Network Hard Drive Cloud Edition Languages The Languages page allows you to change the language used in email notification messages. The language used by the Home Media Network Hard Drive Console is based on the preferences configured in your browser. You can change the language used in this program by modifying your browser's preferred language settings.
- Page 79 Support The Support feature opens the Iomega web site where you can learn more information about your Home Media Network Hard Drive. The Support page provides access to a variety of content for learning more about using and supporting your Home Media Network Hard Drive. Refer to the...
-
Page 80: Device Identification
Iomega® Home Media Network Hard Drive Cloud Edition Device Identification The Device Identification page for your Home Media Network Hard Drive Console displays and enables you to change the Storage Device Name, the Storage Device Descriptive Name, and the Workgroup Name. -
Page 81: Enabling Security
Iomega® Home Media Network Hard Drive Cloud Edition Enabling Security With security turned on, only administrator users can view or change settings on the Home Media Network Hard Drive, including creating or deleting users and Shares. When you create users, you limit access to your Home Media Network Hard Drive to specific people, and when you secure Shares, you limit data access to specific users. -
Page 82: Security Overview
Iomega® Home Media Network Hard Drive Cloud Edition Security Overview Security is a feature you can enable on your Home Media Network Hard Drive to secure Shares, create users, and allow some features to be enabled. When you create users, you limit access to your Home Media Network Hard Drive to specific people, and when you secure Shares, you limit data access to specific users. -
Page 83: Using Security: How To Log In
The scope of features available is determined by your log in credentials. 1. Double-click the Iomega Storage Manager icon on your desktop. The Log In page displays. 2. Enter a valid Username and Password to log in using administrator or non-administrator credentials, or click Access public content without logging in to access limited public content without logging in. -
Page 84: Users Overview
Iomega® Home Media Network Hard Drive Cloud Edition Users Overview When security is enabled, the Users page displays all users on the Home Media Network Hard Drive and enables administrators to add and modify users. Non-administrator users can be added to limit access to Share content. Additional administrator users can be added to provide other users with the ability to configure the Home Media Network Hard Drive. -
Page 85: Manage Users
Iomega® Home Media Network Hard Drive Cloud Edition Manage Users The page describes how to: Add and Modify Users Change User Information Change Access Permissions Add and Modify Users 1. Navigate to the Users page. 2. Before you can create or modify users, you must have security enabled on your Home Media Network Hard Drive. If security is already enabled, you are ready to manage users. -
Page 86: Deleting Users
Iomega® Home Media Network Hard Drive Cloud Edition Deleting Users To delete a user: 1. From the Home Media Network Hard Drive Console, click Users. 2. To delete an existing user, click the username to expand the user. 3. In the User Information section, click Delete to delete the user. -
Page 87: Resetting The Administrator Password
Iomega® Home Media Network Hard Drive Cloud Edition Resetting the administrator password This procedure should only be used if there are no administrator users with valid passwords. If a non-administrator user, or another administrator, forgets their password, another administrator user can reset it for them if you have created more than one administrator user.
Need help?
Do you have a question about the 34337 - Home Media Network Hard Drive NAS Server and is the answer not in the manual?
Questions and answers