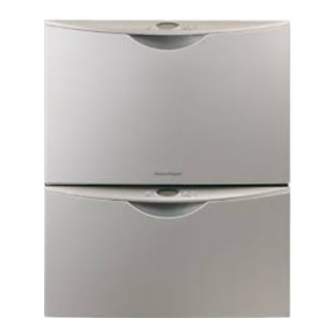
Summarization of Contents
1.0 Service Requirements
1.1 Health and Safety Precautions
Essential safety guidelines including electrical safety, ESD protection, and good working practices for servicing.
1.2 Specialised Tools
Details specific tools required for servicing, such as static straps and the Fisher & Paykel Smart Tool.
2.0 Dimensions and Specifications
2.1 Dimensions
Provides detailed measurements for the DishDrawer in both millimeters and inches.
2.2 Specifications
Outlines electrical requirements and component part numbers and specifications for the DishDrawer.
3.0 Technical Overview
3.1 Chassis
Describes the construction, material, and load-carrying structure of the DishDrawer chassis.
3.2 Drawer Fronts
Explains the construction, finish, and attachment of the prefinished drawer fronts.
3.3 Electronics
Details the micro-controller, power supply, user interface, and overheat protection mechanisms.
3.4 Motor
Details the motor type, specifications, rotor construction, and spray arm.
3.5 Wiring Cover
Describes the protective wiring cover's function and aesthetic role.
3.6 Lid System
Explains the lid operation, activation, and behavior during power failure.
3.7 Tub
Describes the main wash cavity, its components, and role in water circulation.
3.8 Filling
Details water inlet, detergent/rinse-aid dispensing, and water amount control.
3.9 Heating
Explains the heating element, water heating process, temperature maintenance, and overheat protection.
3.10 Lockring Nut
Describes the lockring nut's function in sealing and securing components.
3.11 Drain Cycle
Explains the drain pump mechanism, impeller, and drain hose routing.
3.12 Filter Plate
Details the filter system, including the drain filter and cleaning procedures.
3.13 Drying Cycle
Describes the operation of the drying fan and air circulation for dish drying.
3.14 Water Softener (where fitted)
Explains the function, regeneration process, and salt usage of the water softener.
4.0 Option Adjustment Mode
4.1 Setup Options Overview
Details how to enter setup mode and lists adjustable options like Rinse Aid, Water Hardness, Auto Power, etc.
4.1.2-4.1.8 Specific Option Settings
Guides for configuring Rinse Aid, Water Hardness, Auto Power, Cycle Beeps, Drawer Lock, Clean/Dirty Symbol, and Dry Enhancement.
4.1.9 Option Adjustment Quick Reference
Provides a quick reference guide for adjusting various option settings and their procedures.
5.0 Diagnostics
5.1 Dish Drawer Diagnostic Modes
Covers entering diagnostics, display/download, fault clearing, hardware testing, test cycles, temperature/voltage display, and showroom modes.
6.0 Diagnostics Quick Reference Charts
6.1-6.5 Diagnostic Mode Quick References
Summarized procedures for various diagnostic modes including fault display, hardware tests, and cycle tests.
7.0 Fault Codes and Performance Issues
7.1 Fault Code Descriptions
Details fault codes, their meanings, LED indicators, and potential causes.
7.2 Fault Code Troubleshooting
Offers problem-solving charts for diagnosing and resolving specific fault codes.
7.3 Poor Drying and Washing Performance
Addresses issues like poor drying, food particles, coffee stains, and cloudy film on dishes.
9.0 Service Procedures
9.1 Drawer Front Removal
Step-by-step instructions for removing the DishDrawer front panel.
9.2 Tub Removal
Procedure for safely removing the dishwasher tub from its runners.
9.3 Drawer and LCD Display Removal
Instructions for removing the drawer front and LCD display assembly.
9.4 Drying Fan Removal
Steps for removing the drying fan and its duct.
9.5 Detergent Dispenser
Procedure for removing and servicing the detergent dispenser unit.
9.6 Electronic Controller
Instructions for disconnecting and removing the main electronic controller.
9.7 Filter Plate Removal
Steps to remove and clean the filter plate assembly.
9.8 Rotor Assembly Removal
Procedure for removing the rotor assembly from the motor.
9.9 Wiring Cover Removal
Instructions for removing the wiring cover for access.
9.10 Tub Disconnection
Steps for disconnecting hoses and wiring from the tub.
9.11 Rotor Sensor Removal
Procedure for removing the rotor sensor.
9.12 Locking Ring, Element Plate and Motor Assembly Removal
Detailed steps for removing the locking ring, element, and motor assembly.
9.13 Lid Removal
Instructions for removing the dishwasher lid.
9.14 Yoke Removal
Procedure for removing the lid yoke assembly.
9.15 Lid Actuator Removal
Steps for removing the lid actuator mechanism.
9.16 Slide Rail Replacement
Instructions for replacing the slide rails for the drawer.
9.17 Chassis Circuit Board / Flood Sensor Removal
Procedure for removing the chassis circuit board and flood sensor.
9.18 Water Valve Removal
Steps for removing the water inlet valve assembly.
9.19 Fill Hose, Drain Hose, Wiring Harness Replacement
Instructions for replacing hoses and wiring harnesses.
9.20 Link Support Replacement
Procedure for replacing the link support clips for hoses and harnesses.
9.21 Toe Kick Removal
Instructions for removing the toe kick panel.
9.22 Lower Tub Cowling
Procedure for removing the lower tub cowling.
9.23 Front Trim Replacement
Instructions for replacing the front trim panel.
9.24 Water Softener
Procedure for removing and refitting the water softener unit.


Need help?
Do you have a question about the DishDrawer DS603IH and is the answer not in the manual?
Questions and answers