Fisher & Paykel V3 DD603 Installation Instructions Manual

Fisher & Paykel V3 DD603 Installation Instructions Manual

Fisher & paykel dishdrawer installation instructions

Advertisement

I N S TA L L AT IO N IN S TR U CTI O NS
(NOTE: FOR INTEGRATED PANEL PREPARATION INSTRUCTIONS REFER TO SUPPLIED SHEET)
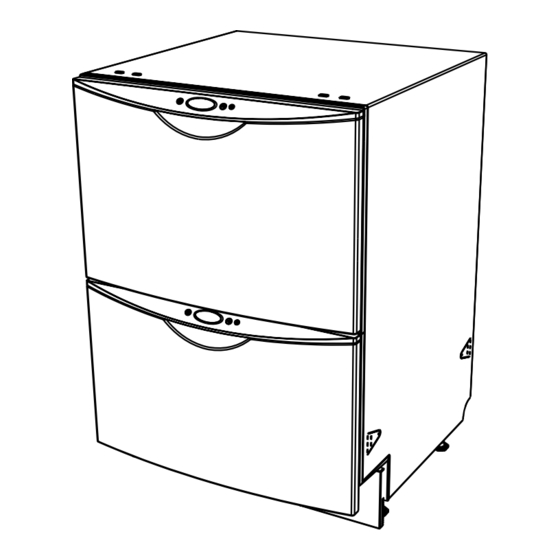
DOUBLE DD603 MODELS
DD603
PREFINISHED (shown left)
DD603
FLAT DOOR (not shown)
DD603I INTEGRATED (shown right)
NOTE TO THE INSTALLER
1. Read these instructions completely and carefully.
2. Installation of this DishDrawer
mechanical and electrical skills.
3. Be sure to leave these Instructions with the Customer.
4. At the completion of the DishDrawer
Installer must perform Final Check List as per Section 12
of these Installation Instructions.
5. Remove all packaging materials supplied with the
DishDrawer
.
®
6. This dishwasher is manufactured for indoor use only.
NOTE TO THE CUSTOMER
Keep these Installation Instructions with your User Guide
for future reference. The DishDrawer
anchored before it is operated.
requires basic
®
installation, the
®
must be securely
®
R
SINGLE DS603 MODELS
DS603
PREFINISHED (shown left)
DS603
FLAT DOOR (not shown)
DS603I INTEGRATED (shown right)
WARNING!
Before installing the DishDrawer® , remove the house fuse or open
the circuit breaker. Ensure all water connections are turned OFF. It is
the responsibility of the plumber and electrician to ensure that each
installation complies with all Codes and Regulations.
Important!
These instructions must be followed precisely to ensure correct
venting and operation of the DishDrawer® . In the event of a fault
related to the incorrect installation, the installer will be liable for any
repairs.
Important!
The DishDrawer® MUST be installed to allow for future removal
from the enclosure if service is required.
Important!
Improper installation is not covered under the Warranty.
Important!
If the DishDrawer® is to be relocated from one installation to
another it must be kept upright to avoid damage from water spillage.
US CA
part number 526607 N
05/2005
(page 1 of 12)

Advertisement

Table of Contents
loading

Summary of Contents for Fisher & Paykel V3 DD603

  • Page 1 Installation Instructions. 5. Remove all packaging materials supplied with the DishDrawer ® 6. This dishwasher is manufactured for indoor use only. NOTE TO THE CUSTOMER Keep these Installation Instructions with your User Guide for future reference. The DishDrawer ®...
  • Page 2: Parts Supplied

    141 ” (3.6m). The kit is available from the nearest Fisher&Paykel Authorized Service Agent. DO NOT extend beyond this limit. E) This Dishwasher’s maximum drain height is 37 ELECTRICAL INFORMATION POWER SUPPLY CORD A) Care should be taken when the appliance is installed or removed to reduce the likelihood of damage to the power supply cord.
  • Page 3: Double Models

    DOUBLE MODELS SERVICES SPECIFICATIONS WATER CONNECTION Recommended HOT (Maximum 140°F/60°C). Supplied hose to suit ” (9mm) male compression fitting. WATER SOFTENER MODELS Refer to your DishDrawer® User Guide for how to set up your water softener. WATER PRESSURE Maximum Water Softener Models 145 p.s.i.
  • Page 4: Double Models Plumbing Options

    DOUBLE MODELS PLUMBING OPTIONS NOTE: Prefinished Model is shown. There is no variation in plumbing between models. Option 1 is the preferred option. Drains will need to be separated to satisfy Kosher requirements. We suggest you confirm acceptability with your local Rabbi in respect to Kosher installations. OPTION 1 DishDrawer®...
  • Page 5 SINGLE MODELS SERVICES SPECIFICATIONS WATER CONNECTION Recommended HOT (Maximum 140°F/60°C). Supplied hose to suit ”(9mm) male compression fitting. WATER SOFTENER MODELS Refer to your DishDrawer® User Guide for how to set up your water softener. Maximum WATER PRESSURE Water Softener Models 145 p.s.i.
  • Page 6: Single Models Plumbing Options

    SINGLE MODELS PLUMBING OPTIONS NOTE: Prefinished Model is shown. There is no variation in plumbing between models. Option 1 is the preferred option. Drains will need to be separated to satisfy Kosher requirements. We suggest you confirm acceptability with your local Rabbi in respect to Kosher installations. OPTION 1 DishDrawer®...
  • Page 7: Removing Tub

    INSTALLATION INSTRUCTIONS PLEASE NOTE: Your model of DishDrawer® may differ from the model shown in the installation diagrams. Installation is similar for all models for either Single or Double models. to Single models only is highlighted in blue. Installation diagrams have been simplified to enable clearer instruction.
  • Page 8: Securing Product

    INSTALLATION INSTRUCTIONS STEP 3: ADJUSTING THE FEET ” STEP 4: SECURING THE PRODUCT (DOUBLE MODELS ONLY) DOUBLE MODELS ONLY Adjust the height of the product to suit the cabinetry, by turning the feet from inside the product using a wrench or M5 socket. TIP - gently take the load off each foot using the slide and then turn by hand.
  • Page 9: Electrical Connection

    INSTALLATION INSTRUCTIONS STEP 5: ELECTRICAL CONNECTION This view shows the bottom left-hand rear corner with the cover removed STEP 6: REFITTING THE TUB WARNING! If permanently connecting be The product MUST NOT be sure the power is isolated. plugged in at this stage. Be sure there is a power outlet in reach of the supplied power cord.
  • Page 10: Connecting The Inlet Hose

    INSTALLATION INSTRUCTIONS STEP 7: CONNECTING THE DRAIN HOSE(S) STEP 8: CONNECTING THE INLET HOSE DishDrawer® with Hose Joiner (see Plumbing Options). Remember to slip the wire clip(s) on the drain hose(s) first. Slip a wire clip over each drain hose, then push the hoses into the Drain Hose Joiner firmly, 5 clicks.
  • Page 11 INSTALLATION INSTRUCTIONS STEP 9: MEASURING THE TOE KICK STEP 10: TRIMMING THE TOE KICK (DOUBLE MODELS ONLY) Partially open the bottom drawer. Turn Prefinished Toe Kick upside down and hold vertically against the bottom edge of the Tub side (not the drawer front). Mark the position of the bottom edge of the Tub side on the Toe Kick.
  • Page 12: Final Checklist

    INSTALLATION INSTRUCTIONS STEP 11: FITTING THE TOE KICK TO THE PRODUCT Toe kick mounting rails STEP 12: FINAL CHECKLIST Be sure product is level, securely fastened to the cabinetry and opens and closes freely. The DishDrawer® must be free to close with no resistance from the cabinetry.

Table of Contents