Cisco WVC210 - Small Business Wireless-G PTZ Internet Video Camera Administration Manual
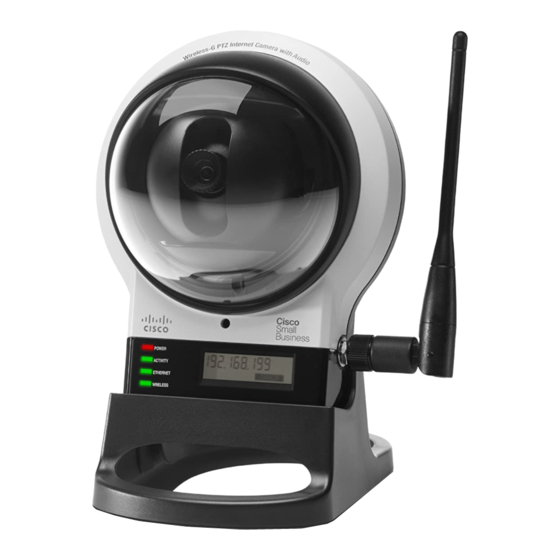
Wireless-g ptz internet video camera with 2-way audio
Hide thumbs
Also See for WVC210 - Small Business Wireless-G PTZ Internet Video Camera:
- Quick start manual ,
- Reference manual (85 pages) ,
- Datasheet (5 pages)

Subscribe to Our Youtube Channel
Related Manuals for Cisco WVC210 - Small Business Wireless-G PTZ Internet Video Camera


Summary of Contents for Cisco WVC210 - Small Business Wireless-G PTZ Internet Video Camera
- Page 1 ADMINISTRATION GUIDE Cisco Small Business WVC210 Wireless-G PTZ Internet Video Camera With 2-Way Audio...
- Page 2 Cisco and the Cisco Logo are trademarks of Cisco Systems, Inc. and/or its affiliates in the U.S. and other countries. A listing of Cisco's trademarks can be found at www.cisco.com/go/trademarks. Third party trademarks mentioned are the property of their respective owners. The use of the word partner does not imply a partnership relationship between Cisco and any other company.
-
Page 3: Table Of Contents
Chapter 2: Planning Your Wireless Network Ad-Hoc and Infrastructure Modes Wireless Network Layout Security Threats Facing Wireless Networks Additional Security Tips Chapter 3: Getting to Know the Cisco WVC210 Internet Camera Side Panel Front Panel LCD Screen Built-in Microphone Camera LEDs... - Page 4 Contents Chapter 6: Upgrading the Cisco WVC210 Internet Camera Firmware Chapter 7: Using the Web-Based Configuration Utility Launching the Web-Based Configuration Utility Home Refresh Setup Connected Users Log Out About Help Video Options Panel Setup Options Chapter 8: Configuring the Cisco WVC210 Internet Camera Software Setup >...
- Page 5 Status System Status Image Status Network Status Wireless Status Syslog Chapter 9: Sample Configurations for the Cisco WVC210 Internet Camera Configuring Instant Recording Defining Preset Locations for Auto Patrol Using Auto Patrol Configuring E-Mail Alerts Configuring Motion Detection Configuring Port Forwarding...
- Page 6 Contents Appendix A: Troubleshooting Questions and Answers Windows Help TCP/IP Shared Resources Network Neighborhood/My Network Places Appendix B: Specifications Appendix C: Where to Go From Here WVC210 Wireless-G PTZ Internet Video Camera With 2-Way Audio Administration Guide...
-
Page 7: Chapter 1: Introduction
Introduction Congratulations on purchasing your Cisco Small Business WVC210 Wireless-G PTZ Internet Camera. Cisco is the leader in Wi-Fi certified Internet cameras, and the Cisco WVC210 Network Camera is part of the largest portfolio of Wi-Fi certified cameras in the marketplace. -
Page 8: Minimum Requirements
Introduction Minimum Requirements The guide focuses on the hardware and software features of the Cisco Small Business WVC210 Wireless-G PTZ Internet Camera. Advanced video monitoring features and procedures are covered in the Cisco Small Business Video Monitoring System Administration Guide. - Page 9 Introduction Minimum Requirements Minimum System Requirements (for up to eight cameras) Pentium 4 class, 3 GHz dual-core Memory 1 GB Operating Microsoft Windows 2000, XP, or Vista System Hard Drive 4 GB of available space Graphics Card NVidia high performance or equivalent with a minimum of 256 MB Browser Internet Explorer 6.0 (or later) with ActiveX support for...
-
Page 10: Chapter 2: Planning Your Wireless Network
Planning Your Wireless Network Careful planning is required for a wireless network, to ensure that your users can access the network resources that they need and to ensure that intruders are kept out. This chapter includes the following sections: • Ad-Hoc and Infrastructure Modes, page 4 •... -
Page 11: Wireless Network Layout
Wireless Network Layout The Cisco WVC210 Internet camera is compatible with all 802. 1 1g and 802. 1 1n routers, such as model number WRVS4400N, as well as all 802. 1 1g access points, including model number WAP4410N. The camera can also communicate with... -
Page 12: Security Threats Facing Wireless Networks
Security Threats Facing Wireless Networks Security Threats Facing Wireless Networks Cisco wants to make wireless networking as safe and easy for you as possible. The current generation of Cisco products provide several network security features, but they require specific action on your part for implementation. So, keep the following suggestions in mind whenever you are setting up or using your wireless network. - Page 13 These security recommendations should help keep your mind at ease while you are enjoying the most flexible and convenient technology Cisco has to offer. WVC210 Wireless-G PTZ Internet Video Camera With 2-Way Audio Administration Guide...
-
Page 14: Additional Security Tips
Planning Your Wireless Network Security Threats Facing Wireless Networks Always remember that each device in your wireless network MUST use the same CAUTION encryption method and encryption key or your wireless network will not function properly. Additional Security Tips The following tips can help prevent hackers from gaining access into your wireless network. -
Page 15: Chapter 3: Getting To Know The Cisco Wvc210 Internet Camera
Getting to Know the Cisco WVC210 Internet Camera In this chapter, you’ll find the following sections: • Side Panel, page 9 • Front Panel, page 10 • Bottom Panel, page 11 Side Panel On the side panel, you’ll find the antenna connector. Attach the antenna here. -
Page 16: Front Panel
Built-in Microphone The built-in microphone is located above the LCD screen, in the middle of the Cisco WVC210 camera’s front panel. It has a range of approximately 6 feet (2 meters), depending on environmental conditions. WVC210 Wireless-G PTZ Internet Video Camera With 2-Way Audio Administration Guide... -
Page 17: Camera Leds
Bottom Panel The LAN port, input jacks, and the reset button are located on the bottom panel of the camera. The following illustration shows the bottom panel of the Cisco WVC210 camera. WVC210 Wireless-G PTZ Internet Video Camera With 2-Way Audio Administration Guide... - Page 18 Getting to Know the Cisco WVC210 Internet Camera Bottom Panel The following features are found on the bottom of the camera. Port, Description Jack, or Button POWER The Power port is where you connect the 5V power adapter. SPKR Use the SPKR OUT input to connect with the 3.5 mm input jack of your optional external speaker.
-
Page 19: Chapter 4: Connecting The Cisco Wvc210 Camera
Connecting the Cisco WVC210 Camera This chapter describes how to connect the camera and contains the following sections: • Camera Installation Guidelines, page 13 • Cisco Wireless Network, page 14 • Connecting to a Wired Network for Setup, page 15 •... -
Page 20: Cisco Wireless Network
Connecting the Cisco WVC210 Camera Cisco Wireless Network Cisco Wireless Network The illustration provides an example of a Cisco wireless network. WVC210 Wireless-G PTZ Internet Video Camera With 2-Way Audio Administration Guide... -
Page 21: Connecting To A Wired Network For Setup
Connecting to a Wired Network for Setup Connecting to a Wired Network for Setup You must perform the initial configuration of the Cisco WVC210 camera from a personal computer connected to the camera using a wired connection to the LAN port. - Page 22 Connecting the Cisco WVC210 Camera Connecting to a Wired Network for Setup Connect the other end of the cable to the Cisco WVC210 camera’s LAN port. STEP 5 Camera Network Switch or Router Connect the included power adapter to the camera's Power port. Insert the other STEP 6 end into a standard electrical outlet.
-
Page 23: Changing Your Network Mode
Connecting the Cisco WVC210 Camera Changing Your Network Mode Verify that the camera LEDs are lit. STEP 7 Changing Your Network Mode After the initial configuration, you can use the camera in one of two modes: wired or wireless. You cannot use the camera in both modes simultaneously. -
Page 24: Wired To Wireless
Ready LED flashes while the camera is initializing. The camera is ready for use when the Ready and LAN LEDs are solidly lit. You must perform the initial configuration of the Cisco WVC210 camera from a NOTE personal computer connected to the camera using a wired connection to the LAN port. -
Page 25: Audio Options
Connecting the Cisco WVC210 Camera Audio Options Audio Options If you want to use your own microphone instead of the camera’s built-in microphone, then follow these instructions. The microphone you use must have its own source of power, like your computer speakers. -
Page 26: Chapter 5: Installing The Cisco Wvc210 Internet Camera Software
Software The product CD for your camera includes a Setup Wizard software program, which helps to set up your Cisco WVC210 Internet camera. There are two ways to use the Wizard: 1. You can launch the Wizard from the CD without installing the software on the PC. -
Page 27: Configuring Basic Camera Settings
Installing the Cisco WVC210 Internet Camera Software Configuring Basic Camera Settings Configuring Basic Camera Settings If the Setup Wizard does not find your Cisco WVC210 camera, enable UPnP on NOTE your computer. See instructions for enabling Universal Plug and Play (UPnP) in Appendix A, “Troubleshooting.”... -
Page 28: Configuring The Network Settings
Installing the Cisco WVC210 Internet Camera Software Configuring the Network Settings • Date—Enter the current date This sets the camera’s calendar date and the information is used when the date stamp is referenced in the image captures. • Time—Enter the current time. This sets the camera’s clock and is used when the time stamp is referenced in the image captures. - Page 29 Installing the Cisco WVC210 Internet Camera Software Configuring the Network Settings The Cisco WVC210 Wireless-G PTZ Internet Camera Home window launches. STEP 7 Internet Explorer may prompt you to accept ActiveX to view video; follow the NOTE instructions to accept ActiveX.
-
Page 30: Chapter 6: Upgrading The Cisco Wvc210 Internet Camera Firmware
Upgrading the Cisco WVC210 Internet Camera Firmware The Cisco WVC210 Internet camera may not always ship with the most up-to-date firmware. You can update the camera's firmware through the web-based utility's Maintenance window. Microsoft Internet Explorer (IE) is the official supported browser for the Cisco NOTE WVC210 Internet camera. - Page 31 Click Start Upgrade, and follow the on-screen instructions. Click Cancel to cancel STEP 8 the firmware upgrade. Cisco recommends that you upgrade the camera’s firmware within your network; NOTE in other words, use a computer within the camera’s local network. If you attempt to upgrade the camera’s firmware from a remote location—using a computer outside...
-
Page 32: Chapter 7: Using The Web-Based Configuration Utility
Using the Web-Based Configuration Utility This section provides an overview of the Cisco WVC210 Internet camera’s web- based utility software. This chapter contains the following sections: • Launching the Web-Based Configuration Utility, page 27 • Home, page 28 • Setup Options, page 33 Please note that Microsoft Internet Explorer (IE) is the official supported browser for the Cisco WVC210 Internet camera. -
Page 33: Launching The Web-Based Configuration Utility
Launching the Web-Based Configuration Utility Launching the Web-Based Configuration Utility By default, the Cisco WVC210 Internet camera is set to receive an IP address from a DHCP server. If you do not have a DHCP server on your network, you can set a static IP address by pressing the Reset button on the camera for less than three seconds. -
Page 34: Home
Home icon in the toolbar. This section describes the options available to you on the Home window. Refresh Refreshes the display. Setup Provides most of the Cisco WVC210 Internet camera features. See “Setup Options,” on page 33 for more information. Connected Users Displays the number of users. -
Page 35: Log Out
The Video Options Panel on the Home window is used to control the real-time view of your camera. The icons allow you to control the basic functions of the Cisco WVC210 camera. WVC210 Wireless-G PTZ Internet Video Camera With 2-Way Audio Administration Guide... - Page 36 Using the Web-Based Configuration Utility Home Icon Description Image Resolution Use this drop-down list to select the desired video size. The options are Auto, 640 x 480, 320 x 240, 160 x 120. The default is Auto and lets the camera determine the resolution.
- Page 37 Using the Web-Based Configuration Utility Home Icon Description Start/Stop Click the black icon to start recording, and click the red Recording icon to stop recording. Consider the following: • The default location for saved recordings is \My Documents\Record. • Click Browse to choose another location to save your recordings.
- Page 38 Using the Web-Based Configuration Utility Home Icon Description Motion Detection Click to move the camera to the previously defined Motion Detection area. Instructions on defining a motion detection area can be found in “Applications > Motion Detection,” on page On-Image PT Click in the video image and adjust/move the image.
-
Page 39: Setup Options
Using the Web-Based Configuration Utility Setup Options Setup Options To access the setup options for your Cisco WVC210 Internet camera, click Setup in the toolbar. The login window appears: Enter the default username (admin) and the default password (admin) and the Setup >... - Page 40 Using the Web-Based Configuration Utility Setup Options The following section, Configuring the Cisco WVC210 Internet Camera Software, page 35 describes all of the options available in the navigation tree. The inactivity timeout for the camera’s web-based utility software is 5 minutes.
-
Page 41: Chapter 8: Configuring The Cisco Wvc210 Internet Camera Software
Camera Software This section describes the basic functions of the camera’s web-based utility. For information on how to use your camera for advanced monitoring, please see the Cisco Small Business Video Monitoring System Administration Guide. This chapter contains the following sections: •... -
Page 42: Setup > Basic Settings
Configuring the Cisco WVC210 Internet Camera Software Setup > Basic Settings Setup > Basic Settings The Setup > Basic Settings window has options for Device Settings, Network Settings, and Wireless Settings. Device Settings • Camera Name—Enter the preferred name for the camera. The camera name must not exceed 16 alphanumeric characters. -
Page 43: Network Settings
Configuring the Cisco WVC210 Internet Camera Software Setup > Basic Settings • Time Zone—Choose the time zone for your location from the drop-down list. • Adjust for Daylight Saving Time—Select this option if your location is currently using Daylight Saving Time. You must uncheck the Adjust for Daylight Saving Time check box manually when Daylight Saving Time ends in your time zone. -
Page 44: Wireless Settings
Configuring the Cisco WVC210 Internet Camera Software Setup > Basic Settings Wireless Settings • SSID—Enter the network’s SSID or network name here. The default is ciscosb. • Network Type—Select the network’s mode. Choices are: Infrastructure or Ad-hoc. • Channel No—If the camera is set to Ad-hoc mode, select the appropriate channel from the list provided to correspond with your network settings. - Page 45 Configuring the Cisco WVC210 Internet Camera Software Setup > Basic Settings WPA Personal This method offers two encryption methods, TKIP (default) and AES with dynamic encryption keys. Select the type of encryption method you want to use, TKIP or AES. Enter the Shared Key, which can have 8 to 63 characters. Then enter the Key Renewal Timeout, which instructs the device how often it should change the encryption keys.
- Page 46 Configuring the Cisco WVC210 Internet Camera Software Setup > Basic Settings whom the CA may have issued a certificate-issuing-certificate, to faithfully authenticate the users of all their certificates. • Password—The login to the RADIUS server, and must match the key stored on the RADIUS server.
-
Page 47: Setup > Advance Settings
Configuring the Cisco WVC210 Internet Camera Software Setup > Advance Settings Setup > Advance Settings The Setup > Advance Settings window has options for RTSP/RTP and Other. RTSP/RTP Real Time Streaming Protocol (RTSP) is a standard for connected client(s) to control streaming data (MPEG-4) over the World Wide Web. -
Page 48: Discovery Settings
For instructions on setting UPnP on your system, see “Questions and Answers,” on page • Enable Bonjour—Enabled by default. If enabled, the Cisco WVC210 IP Camera is accessible through a Bonjour-enabled browser, such as Microsoft Internet Explorer with a Bonjour plug-in, or the Apple Mac Safari browser. -
Page 49: Administration > Users Settings
Configuring the Cisco WVC210 Internet Camera Software Administration > Users Settings Administration > Users Settings The Administration > Users Settings window gives options for Authentication, Administrator, and User List. Authentication • Authentication—Enables an authentication check when the box is checked. The user will need to login for all activities, even to see video on Home window. -
Page 50: Administration > Maintenance
Configuring the Cisco WVC210 Internet Camera Software Administration > Maintenance Administration > Maintenance The Administration > Maintenance window gives options for Restore Factory Defaults, Restart, Firmware Upgrade, and Configuration. Restore Factory Defaults • Restore Defaults—Restores the camera to the factory default settings. -
Page 51: Audio/Video
Configuring the Cisco WVC210 Internet Camera Software Audio/Video Audio/Video Clicking on the Audio/Video window shows options for Video Settings and Audio Settings. Audio/Video > Video Settings Higher video quality settings and higher frame rate settings require more NOTE bandwidth. MPEG-4 Settings MPEG is the designation for a group of audio and video coding standards and related technology agreed upon by the ISO/IEC. - Page 52 Configuring the Cisco WVC210 Internet Camera Software Audio/Video Mobile Settings • Enable Mobile Streaming—Enable streaming video for the mobile devices by selecting this option. Resolution—Shows the default resolution of 160x120. Video Quality Control—Choose from one of the following options: Fixed Bit Rate—Select the desired fix bit rate. The default bit rate is set to 32 Kbps.
-
Page 53: Audio/Video > Audio Settings
Configuring the Cisco WVC210 Internet Camera Software Audio/Video • Enable Time Stamp—Enable this feature by checking the check box if you want to display a time stamp on your video. • Enable Text Display—Enable this feature by checking the check box, if you want to display text on the video. - Page 54 Configuring the Cisco WVC210 Internet Camera Software Audio/Video • Audio Type—When the microphone is enabled, this drop-down list allows you to select the audio compression type. Compression Settings Description G.711 A-Law A standard compression algorithm that uses 64 kbps of bandwidth and is primarily used in Europe.
-
Page 55: Applications > Mail
Configuring the Cisco WVC210 Internet Camera Software Applications > Mail Applications > Mail Clicking on the Applications > Mail window shows options for Primary and Secondary SMTP Servers and E-mail Setup. Only one SMTP server is used, even if both the primary and secondary SMTP NOTE servers are enabled. - Page 56 Subject—Enter the desired text to be shown as the subject for the e-mail when it is received. The maximum field length is 48 characters. The Cisco WVC210 camera does not support Secure Sockets Layer (SSL) NOTE protocols used by many e-mail providers, such as Gmail. Therefore you will not be able to use Simple Mail Transport Protocol (SMTP) Mail servers like Gmail that require SSL encryption.
-
Page 57: Applications > Ftp
Configuring the Cisco WVC210 Internet Camera Software Applications > FTP Applications > FTP Clicking on the Applications > FTP window shows options for Primary and Secondary FTP. Only one FTP server is used, even if both the primary and secondary FTP servers NOTE are enabled. - Page 58 Configuring the Cisco WVC210 Internet Camera Software Applications > FTP • Enable Passive Mode—Check the box to enable the Passive mode feature. • File Path Name—Enter the desired file path name on the secondary FTP server. WVC210 Wireless-G PTZ Internet Video Camera With 2-Way Audio Administration Guide...
-
Page 59: Applications > Smb/Cifs
Configuring the Cisco WVC210 Internet Camera Software Applications > SMB/CIFS Applications > SMB/CIFS The Applications > SMB/CIFS window shows options for SMB/CIFS. SMB/CIFS allows the camera to record directly into a Network Attached Storage (NAS) device. There is no need to record to a computer and keep a computer active all the time. -
Page 60: Applications > Motion Detection
Configuring the Cisco WVC210 Internet Camera Software Applications > Motion Detection Applications > Motion Detection The Applications > Motion Detection window shows options for Event and Pan/Tilt. Event Complete the Mail or FTP sections prior to enabling alerts. NOTE •... -
Page 61: Pan/Tilt
Configuring the Cisco WVC210 Internet Camera Software Applications > Motion Detection Pan/Tilt When Motion Detection is used in conjunction with pan and tilt, the results may not be as desired. For example, if you set motion detection for a doorway and then pan and tilt to a different location, the motion detection may now be pointed at the sky or the floor. -
Page 62: Applications > Ddns Settings
Configuring the Cisco WVC210 Internet Camera Software Applications > DDNS Settings Applications > DDNS Settings The Applications > DDNS window contains DDNS Settings. • Enable DDNS—Enables Dynamic Domain Name Service (DDNS). When used with a DDNS service provider, you can access your camera over the Internet using a domain name instead of an IP address. -
Page 63: Pan/Tilt Settings
Configuring the Cisco WVC210 Internet Camera Software Pan/Tilt Settings Pan/Tilt Settings The Pan/Tilt Settings window shows the Set Preset, Pan/Tilt Control, and Rotation Sequence settings for the camera. Set Preset • Set Positions—Set the desired position through adjusting the control panel. -
Page 64: Pan/Tilt Control
Configuring the Cisco WVC210 Internet Camera Software Pan/Tilt Settings Pan/Tilt Control • Pan/Tilt Movement—Check On if you want to use the Pan/Tilt Movement feature. • Default Home Position—Click to reset to the default home position. Rotation Sequence • Rotation Sequence Window—This feature determines how the camera will move when it is set to Rotate. -
Page 65: Status
Configuring the Cisco WVC210 Internet Camera Software Status Status The Status window shows options for System, Image, Network, Wireless, and Syslog. System Status • Firmware Version—Version of the firmware currently installed. • MAC Address—Displays the MAC address of the camera. -
Page 66: Wireless Status
Configuring the Cisco WVC210 Internet Camera Software Status Wireless Status • SSID—Displays the wireless network name (SSID) used by the camera. • Channel—Displays the wireless channel used by the camera. • Security—Indicates if wireless security is being used by the camera. -
Page 67: Chapter 9: Sample Configurations For The Cisco Wvc210 Internet Camera
Cisco WVC210 Internet camera. Configuring Instant Recording To configure instant recording, follow these steps: Click Home in the toolbar to go to the Cisco WVC210 Home window. STEP 1 WVC210 Wireless-G PTZ Internet Video Camera With 2-Way Audio Administration Guide... -
Page 68: Defining Preset Locations For Auto Patrol
Click Stop Recording when you want to stop recording. STEP 4 Defining Preset Locations for Auto Patrol To define preset positions for the camera patrol sequence, follow these steps: Access the setup options for your Cisco WVC210 Internet camera by clicking STEP 1 Setup. Log in as required. -
Page 69: Using Auto Patrol
The camera will stop at the last position on the list. To create the patrol sequence, follow these steps: Access the setup options for your Cisco WVC210 Internet camera by clicking STEP 1 Setup. -
Page 70: Configuring E-Mail Alerts
SSL encryption. Please contact your e-mail provider if you are not sure whether your SMTP server uses SSL encryption. To configure e-mail alerts, follow these steps: Access the setup options for your Cisco WVC210 Internet camera by clicking STEP 1 Setup. - Page 71 Sample Configurations for the Cisco WVC210 Internet Camera Configuring E-Mail Alerts If both the Primary and Secondary SMTP servers are configured, e-mail alerts are NOTE sent out only through the Primary Server. If there is an e-mail failure with the Primary Server, then the camera attempts to route the e-mail alert through the Secondary Server.
-
Page 72: Configuring Motion Detection
To set the motion detection area of the video image to be examined and adjust the sensitivity of detection, follow these steps: Access the setup options for your Cisco WVC210 Internet camera by clicking STEP 1 Setup. -
Page 73: Configuring Port Forwarding
Sample Configurations for the Cisco WVC210 Internet Camera Configuring Port Forwarding Click Set Area & Sensitivity near the bottom of the window. The Set Area and STEP 7 Sensitivity window is displayed Customize the desired areas of sensitivity. You can choose the entire window to STEP 8 monitor by selecting Full Screen. - Page 74 Enter. For this example, we used the default IP address of 192. 1 68. 1 . 1 . From the web-based configuration utility, click Firewall > Port Range Forwarding. STEP 5 This example shows the Port Range Forwarding window of the Cisco WRVS4400N router. In the Port Range Forwarding window, configure the following: STEP 6 a.
- Page 75 Sample Configurations for the Cisco WVC210 Internet Camera Configuring Port Forwarding This example shows the Summary window of the Cisco WRVS4400N router. Now you should be able to access your camera over the Internet by typing in the WAN IP address of your router, a colon, and the defined port number in the following format: http://router’s WAN IP address:port...
-
Page 76: Setting Security Precautions On The Cisco Wvc210
Sample Configurations for the Cisco WVC210 Internet Camera Setting Security Precautions on the Cisco WVC210 Setting Security Precautions on the Cisco WVC210 The following is a short list of recommended security precautions: Change the default SSID from the Setup > Basic window, scroll to Wireless STEP 1 settings. -
Page 77: Appendix A: Troubleshooting
If you can't find an answer here, check the Cisco Small Business Video Surveillance Cameras homepage at www.cisco.com/go/surveillance. Microsoft Internet Explorer (IE) is the official supported browser for the Cisco NOTE WVC210 Internet camera. - Page 78 The motion detection feature doesn't send me any e-mails. The Cisco WVC210 camera does not support Secure Sockets Layer (SSL) protocols used by many e-mail providers, such as Gmail. Therefore you will not be able to use Simple Mail Transport Protocol (SMTP) Mail servers like Gmail that require SSL encryption.
- Page 79 Troubleshooting Questions and Answers The video image is blurry. Try cleaning the dome, or adjusting the MPEG-4 or MJPEG image quality setting found in Audio/Video > Video Settings, page How do I set up UPnP so my cameras broadcast their availability to my network? UPnP networking technology provides automatic IP configuration and dynamic discovery of devices added to a network.
-
Page 80: Windows Help
Troubleshooting Windows Help Another way to enable UPnP on Windows XP is to go to My Network Places and on the left tab click on Show icons for networked UPnP devices. Windows Help Almost all wireless products require Microsoft Windows. Windows is the most used operating system in the world and comes with many features that help make networking easier. -
Page 81: Appendix B: Specifications
Specifications Cisco WVC210 Resource Description IEEE802.11g, IEEE802.11b, IEEE802.3, IEEE802.3u, Standards IEEE802.1p (QoS Priority), IEEE802.1q (VLAN), 802.11e (Wireless QoS) Ports Ethernet, Antenna, Microphone in, Speaker Out, Power Protocols TCP/IP, HTTP, DHCP, SMTP, FTP, NTP, DNS, UPnP, RTP, RTSP, and DDNS Button... - Page 82 Specifications Resource Description Tilt -34 degrees (down) to +30 degrees (up) Web UI Built in Web UI for Easy Browser-Based Configuration (HTTP) Web Browser Browser Internet Explorer 6.0 (or later) with ActiveX support for viewing, recording, playback and setting motion detection; limited support for Safari and Mozilla Firefox (no motion detection).
- Page 83 Specifications Resource Description Network Time Protocol synchronizes camera date and time with your network. SMTP Simple Mail Transfer Protocol Client allows video clips to be emailed. FTP Client FTP Client facilitates scheduling transfer of images to an FTP server. Dynamic DNS facilitates accessing the camera by DDNS name, irrespective of the camera IP address.
-
Page 84: Appendix C: Where To Go From Here
Where to Go From Here Cisco provides a wide range of resources to help you and your customer obtain the full benefits of the Cisco WVC210 Internet Video Cameras. Product Resources Support Location Online Technical Support and www.cisco.com/support Documentation Product Information www.cisco.com/go/surveillance... - Page 85 Model WVC210 Wireless-G PTZ ps9944/ Internet Video Camera with 2-Way prod_maintenance_guides_list.html Audio Administration Guide Cisco Small Business Location Cisco Partner Central site for www.cisco.com/web/partners/sell/smb Small Business (Partner Login Required) Cisco Small Business Home www.cisco.com/smb Marketplace www.cisco.com/go/marketplace WVC210 Wireless-G PTZ Internet Video Camera With 2-Way Audio Administration Guide...
Need help?
Do you have a question about the WVC210 - Small Business Wireless-G PTZ Internet Video Camera and is the answer not in the manual?
Questions and answers