Cisco PVC2300, WVC2300 - Internet Video Camera With Audio Quick Start Guide
- Administration manual (147 pages) ,
- Datasheet (6 pages) ,
- Reference manual (85 pages)
Advertisement
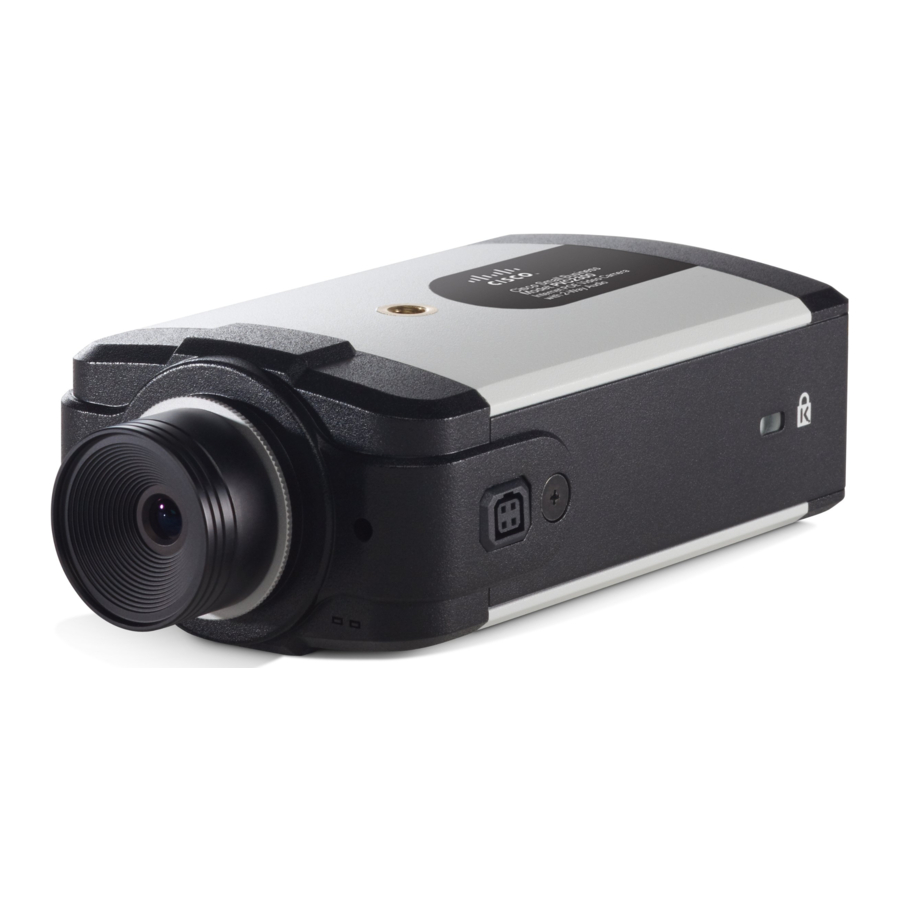
Package Contents
- 2300 Series Camera
- Stand Kit
- Power Supply (12V 1A)
- 6-Foot Ethernet Cable
- Lens Adapter Ring
- Allen Wrench
- Antenna (WVC2300)
- Setup and Documentation CD-ROM
Before You Begin
- To configure the Cisco PVC2300 and WVC2300 cameras, you need at least one computer with an active LAN IP connection.
- You must perform the initial configuration of the Cisco WVC2300 camera from a personal computer connected to the camera using a wired connection to the Ethernet port. The initial configuration cannot be performed over a wireless connection.
Once the hardware installation is complete, Cisco strongly recommends that you run the Setup Wizard on the Setup CD-ROM for first-time software installation of the camera. Advanced users can set up the Cisco PVC2300 and WVC2300 cameras directly from the web interface of the camera.
Camera Installation
Follow these steps to install the camera.
- (Optional) Attach the base of the camera stand to a permanent location by using the three included screws.
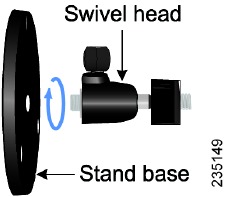
- Assemble the camera stand in one of the following ways:
- Attach the swivel head directly to the stand base.
![]()
- If an extension is necessary, attach the camera extension to the stand base and then attach the swivel head to the extension.

- Attach the swivel head directly to the stand base.
- Connect the camera stand to the bottom of the camera.

- Adjust the camera to the appropriate viewing position and secure the camera in place by tightening the locknut.
- Connect the included Ethernet network cable to your network router or switch.

- Connect the other end of the cable to the camera Ethernet port.

NOTE
If your network switch provides Power over Ethernet (PoE), proceed to step 8. The PoE function applies to the PVC2300 camera only. - If your network switch does not provide PoE, connect the included power adapter to the camera's Power port and plug the other end into a standard electrical outlet.

- Verify that the camera LEDs are lit.

The PVC2300 and WVC2300 cameras have two LEDs to let you know how the camera is functioning.LED Color Activity Action Ready
Amber
Off Camera is powered off. On Camera is powered on. Blink Camera is booting. Network
Green
Off Network connection not detected. On Network connection detected. Blink Sending and receiving data. - (Optional) If the Cisco PVC2300 or WVC2300 camera is not functioning correctly, you can press the Reset button to reset the camera. The Reset button is found next to the Ethernet port. Insert a paper clip into the opening and hold it in for twelve seconds. Be aware that resetting the camera will erase all of your settings and return the camera to factory defaults.
NOTE
If you are installing the PVC2300 camera, you are done with the camera installation. However, if you are installing the WVC2300 camera, proceed to the next step. - Connect each of the two antennas to the antenna connectors on the back of the camera.

- Place the antennas in an upright position.


Configuration
Follow these steps to configure your camera.
- Insert the Setup CD into the CD-ROM drive of your PC. If the CD doesn't run automatically, go to My Computer and click on the CD-ROM drive to launch the application.

- When the Setup screen appears, click the Start button.

- Follow the Setup Wizard instructions to configure the Cisco PVC2300 and WVC2300 cameras.


TIPS
- Refer to the complete instructions found in the Cisco PVC2300 and WVC2300 Internet Video Camera with Audio Administration Guide at the following location:
http://www.cisco.com/en/US/products/ps9944/prod_maintenance_guides_list.html. - As you go through the configuration, the default user name and password is admin. Type admin in lowercase letters in the User name and Password fields when prompted, then click OK.
- If the Setup Wizard does not find your Cisco PVC2300 or WVC2300 camera, you need to enable UPnP on your computer. Instructions on how to enable UPnP are found in the Cisco PVC2300 and WVC2300 Internet Video Camera with Audio Administration Guide.
http://www.cisco.com/en/US/products/ps9944/prod_maintenance_guides_list.html.
Wired and Wireless Modes
NOTE
This section applies to the Cisco WVC2300 camera.
After the initial configuration, you can use the camera in one of two modes: wired or wireless. You cannot use the camera in both modes simultaneously.
To switch between wired and wireless modes, power cycle the camera with an Ethernet cable attached for a wired solution, or power cycle the camera without an Ethernet cable attached for a wireless solution.
Verify the mode you are in by viewing the LEDs. Unplugging the Ethernet cable does not automatically switch the camera to wireless mode.
Adjusting the Lens
The Cisco Small Business Internet Video Camera uses an adjustable CS mount lens.
Adjust the focus by slowly rotating the camera Lens Focus clockwise or counterclockwise.
NOTE
The resolution and video quality can be adjusted from the Audio/Video > Video window in the web-based utility. Use the camera Lens Focus to fine tune the image.
Where to Go from Here
| Resource | Location |
| Product Information | www.cisco.com/go/surveillance |
| Technical Documentation | http://www.cisco.com/en/US/products/ps9944/tsd_products_support_series_home.html |
| Customer Support | www.cisco.com/en/US/support/tsd_cisco_small_business_support_center_contacts.html |
| Open Source License Notices | www.cisco.com/go/osln |
| Regulatory Compliance and Safety Information | www.cisco.com/en/US/products/ps9944/tsd_products_support_series_home.html |
| Warranty Information | www.cisco.com/go/warranty |
| Cisco Partner Central site for Small Business | www.cisco.com/web/partners/sell/smb |
Americas Headquarters
Cisco Systems, Inc.
170 West Tasman Drive
San Jose, CA 95134-1706
USA
http://www.cisco.com
Tel: 408 526-4000
800 553-NETS (6387)
Fax: 408 527-0883

Documents / Resources
References
Cisco Small Business Video Surveillance Cameras - Retirement Notification - Cisco
Cisco Small Business Video Surveillance Cameras - Retirement Notification - Cisco
Products, Solutions, and Services - Cisco
Small Business TAC Contacts - Cisco
Small Business Support - Cisco
Products - Product Warranties - Cisco
Partners - Cisco
Networking, Cloud, and Cybersecurity Solutions - Cisco
Download manual
Here you can download full pdf version of manual, it may contain additional safety instructions, warranty information, FCC rules, etc.
Download Cisco PVC2300, WVC2300 - Internet Video Camera With Audio Quick Start Guide
Advertisement


Need help?
Do you have a question about the PVC2300 and is the answer not in the manual?
Questions and answers