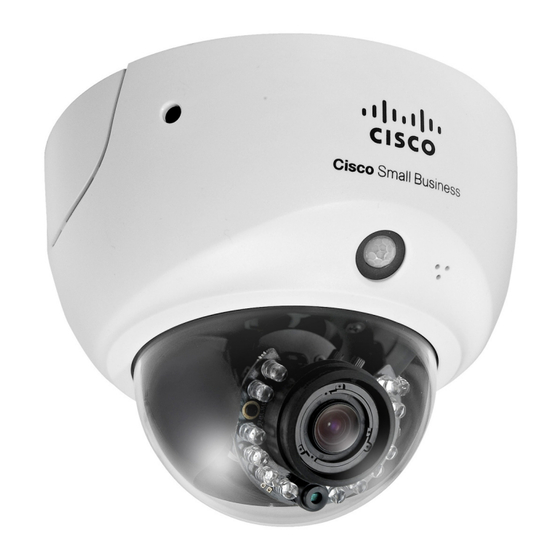
Cisco Small Business VC220 Quick Start Manual
Dome wdr day/night poe network camera
Hide thumbs
Also See for Small Business VC220:
- Datasheet (6 pages) ,
- Administration manual (108 pages) ,
- Installation and administration manual (64 pages)
Table of Contents
Advertisement
Quick Links
Download this manual
See also:
Administration Manual
Cisco Small Business
VC 220 Dome WDR Day/Night PoE Network
Camera
Package Contents
• Cisco VC 220 Network Camera
• Power Adapter
• Two L-Shaped Audio Cables
• Mounting and Installation Accessories including a TORX
screwdriver
• I/O Connector
• Setup and Documentation CD — includes localized Quick Start
Guides in French, German, Italian, and Spanish
• Quick Start Guide
Quick Start Guide
™
Advertisement
Table of Contents

Summary of Contents for Cisco Small Business VC220
-
Page 1: Quick Start Guide
Quick Start Guide Cisco Small Business VC 220 Dome WDR Day/Night PoE Network Camera Package Contents • Cisco VC 220 Network Camera • Power Adapter • Two L-Shaped Audio Cables ™ • Mounting and Installation Accessories including a TORX screwdriver •... - Page 2 Welcome Thank you for choosing the Cisco VC 220 Dome Wide Dynamic Range (WDR) Day/Night PoE Network Camera. The Cisco VC 220 network camera is a high-performance web-ready camera, and can be part of a flexible surveillance system. This guide describes how to physically install your Cisco VC 220 network camera and how to install and launch the provided Setup Wizard.
-
Page 3: Table Of Contents
After the basic hardware installation, Cisco strongly recommends that you run the Setup Wizard on the CD-ROM for first-time software installation of the camera. Advanced users can set up the Cisco VC 220 directly from the web interface of the camera. -
Page 4: Product Overview
Product Overview Descriptive Diagrams The following illustrations show the major components of the camera. Dome Cover Mounting Holes Tamper-resistant screw Light Sensor Lens IR LEDs Tilt Screw Built-in Microphone Status LED PIR Sensor Ethernet RJ45 Port Power Cord Port Recessed Reset Button Lens and Tilt Allows you to make pan/tilt 3-axis adjustments. - Page 5 10 seconds to restore factory defaults. Ethernet RJ45 Port Connects your Cisco VC 220 camera to a Power over Ethernet (PoE) switch or router, or to a PoE power injector (not provided) for connection to a non-PoE switch or router.
- Page 6 Lens” on page Allows you to connect the camera to external input/ GPIO (General output devices that can provide additional controlling Purpose I/O Terminal functions. For more information, see the Cisco VC 220 Block) Network Camera Administration Guide found at: http://www.cisco.com/en/US/products/ps9944/ prod_maintenance_guides_list.html.
-
Page 7: Installation Tips
Int. Ext. Mic. Audio Do not install the Cisco VC 220 camera around sources of AUTION heat, such as direct sunlight, radiators, ovens, or televisions. For more location recommendations, see the Cisco VC 220 Network Camera Administration Guide found at: http://www.cisco.com/en/US/products/ps9944/... -
Page 8: Mounting Your Cisco Vc 220 Camera" Section
Alignment template Your Cisco VC 220 camera is now ready for network setup. The wall mount screws come with anchors that can be used for drywall or concrete. The screw size is a metric M4 with a length of 31.75 mm. -
Page 9: Connecting The Equipment" Section
Connecting the Equipment There are two options for deploying the Cisco VC 220 camera on the network, a basic Ethernet setup and a Power over Ethernet (PoE) setup. The basic setup is described in this document. For PoE setups, see the... -
Page 10: Basic Ethernet Setup
Connect any external devices to the general I/O terminal block, if you have sensors and alarms (1). Connect your Cisco VC 220 camera to a router or a switch using an Ethernet cable (2). Connect the supplied power adapter (3) from the Cisco VC 220 camera to a power outlet. -
Page 11: Verifying The Hardware Installation" Section
Verifying the Hardware Installation After you install your Cisco VC 220 camera, check the Status LED to verify connectivity. See “Status LED” on page It is suggested that you install the software – see “Getting Started with the Configuration” on page 11 –... -
Page 12: Adjusting The Lens" Section
Suggested Next Steps Adjusting the Lens After viewing the live image on the web-based configuration utility, adjust the camera lens, zoom factor, and focus range as needed. Do not over rotate the camera lens. Doing so will damage the lens. To adjust the viewing angle: Loosen the pan screw and turn the lens module left and right. -
Page 13: Attaching The Dome Cover" Section
(Optional) Remove the tab (or tabs) from the dome cover to accommodate the cables. To avoid injury, place the pliers in the middle of the tab and pull outward. Attach the dome cover to your Cisco VC 220 camera. VC 220 Dome WDR Day/Night PoE Network Camera Quick Start Guide... - Page 14 Secure the two dome screws with a screwdriver. Ensure all parts of your Cisco VC 220 camera are securely installed. You are now ready to start using your Cisco VC 220 camera. VC 220 Dome WDR Day/Night PoE Network Camera Quick Start Guide...
-
Page 15: Where To Go From Here
Product Information www.cisco.com/go/surveillance (Including Software www.cisco.com/go/vc220 Updates) Phone Support Contacts www.cisco.com/en/US/support/tsd_cisco_small_ business_support_center_contacts.html Software Downloads Go to tools.cisco.com/support/downloads, and enter (Login Required) the model number in the Software Search box. Online Technical www.cisco.com/support Support and Documentation (Login Required) Product Documentation Administration Guide for http://www.cisco.com/en/US/products/ps9944/... - Page 16 Cisco, Cisco Systems, the Cisco logo, and the Cisco Systems logo are registered trademarks or trademarks of Cisco and/or its affiliates in the United States and certain other countries. All other trademarks mentioned in this document or website are the property of their respective owners.


Need help?
Do you have a question about the Small Business VC220 and is the answer not in the manual?
Questions and answers