
Related Manuals for Dell Alienware PRO-HS/UD2202u


Summary of Contents for Dell Alienware PRO-HS/UD2202u
- Page 1 Alienware Pro Wireless Gaming Headset User’s Guide Regulatory Model: PRO-HS/UD2202u Oct. 2024 Rev. A00...
-
Page 2: Notes, Cautions, And Warnings
WARNING: A WARNING indicates a potential for property damage, personal injury, or death. © 2024 Dell Inc. or its subsidiaries. All rights reserved. Dell Technologies, Dell, and other trademarks are trademarks of Dell Inc. or its subsidiaries. Other trademarks may... -
Page 3: Table Of Contents
Installing AWCC from the Dell Support website ........ -
Page 4: Safety Instructions
Safety instructions Keep the volume at optimal levels while in use. Do not listen at high volume levels for a long period. Prolonged exposure to high volume levels may cause high sound pressure and may run the risk of hearing damage. Safety instructions... -
Page 5: What Is In The Box
What is in the box Package contents The following table provides the list of components that are shipped with your headset. NOTE: Headset must be charged prior to first-time use. NOTE: The documents that are shipped with your headset may vary depending on the region. Table 1. -
Page 6: Headset Features
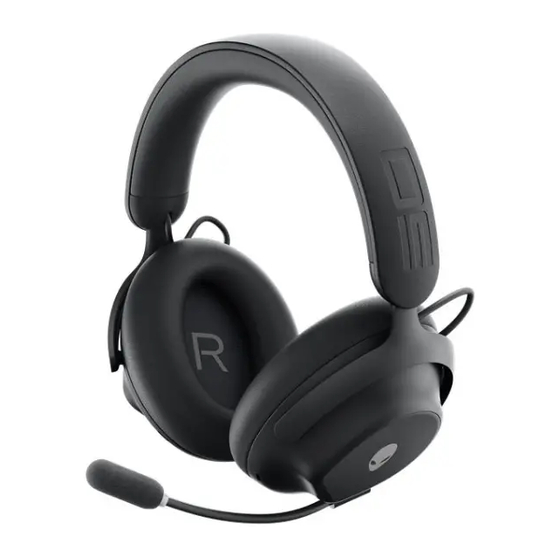
Headset features Headset Figure 1. Headset features and controls Table 2. The following table shows the headset controls and description. Label Description Power slider Connectivity mode slider Microphone mute button Volume control wheel ANC control button USB-C port Boom microphone port Headset features... -
Page 7: Accessories
Accessories Figure 2. Boom microphone features and controls Table 3. The following table provides accessories controls and description. Label Description Boom microphone Microphone mute LED Microphone shield Headset specifications Table 4. The following table provides the headset specifications. Descriptions Value Approximate weight 315 g (headset only) Dimensions... -
Page 8: Charging The Headset
Charging the headset European Union (EU) has a common charger requirement for wireless products that have an embedded rechargeable battery. For more information about the EU charging power requirements, see Charging power requirement. For headset charging, connect the USB-C end of the USB-A to USB-C cable to your headset’s USB-C port, and then attach the other end to a power source of your choice. - Page 9 Complete charging from flat to full may take less than 2.5 hours. Charging indication can be found on the power LED. Figure 4. Location of the power LED Table 5. The following table provides the battery status and LED behavior. Battery status LED behavior Fully charged...
-
Page 10: Turning Your Headset On Or Off
Turning your headset on or off Slide the power slider down to turn the headset on. A “power on” voice prompt will play when the headset is turned on. To turn headset to power off, slide up the power slider. Figure 5. -
Page 11: Connecting The Headset To Your Device
Connecting the headset to your device System requirements Microsoft Windows 10 or Microsoft Windows 11 64-bit/Mobile/PS4/PS5/Nintendo Switch. Inserting the boom microphone Insert the boom microphone firmly into the boom microphone port of the headset, making sure the line on the mic plug is fully covered. -
Page 12: Connecting The Headset To Your Device Using The Usb-C Wireless Dongle
Connecting the headset to your device using the USB-C wireless dongle Plug the USB-C wireless dongle into the USB-C port on your computer directly or use the USB-A to USB-C adapter, and then connect the adapter to the USB-A port on your computer device. Figure 7. - Page 13 Once the headset is connected: The audio prompt “dongle connected” will be played. The power LED lights up white for 3 seconds followed by slow blink in white. The dongle LED lights up teal. Figure 9. Indication when the headset is successfully connected NOTE: It is recommended to unplug the USB-C wireless dongle when not in use, to avoid confusion on the audio end-point selection.
-
Page 14: Connecting The Headset To Your Device Using Bluetooth
Connecting the headset to your device using Bluetooth Turn on the Bluetooth on your moblie device before connecting the headset using Bluetooth mode. 2. Slide the connectivity mode slider to the bottom for 2 seconds. The audio prompt “Bluetooth pairing” will be played and the power LED blinks in blue, which indicates the pairing mode is on. -
Page 15: Connecting The Headset To Your Device Using The Usb-A To Usb-C Cable
Connecting the headset to your device using the USB-A to USB-C cable Connect the USB-C end of the USB-A to USB-C cable to your headset, and connect the other end to the USB-A port on your computer device. Figure 12. Connecting the headset using the USB cable NOTE: When connecting a USB cable, Power Slider and Connectivity mode are disabled. -
Page 16: Selecting The Headset Audio End Point On Your Computer
Selecting the headset audio end point on your computer To use your headset for gaming or listen music from your computer, select the preferred audio end point as the default playback device and the default communication device in Windows Audio Settings. NOTE: This setting is applicable in both wired and wireless mode. - Page 17 4. Click the Recording tab: • Set the following device name as the default communication device. • When using USB cable, select AWPRO H Wired Chat. • When using USB-C wireless dongle, select AWPRO H Wireless Chat. Figure 15. Image of Recording tab setting page 5.
-
Page 18: Alienware Command Center (Awcc)
View the firmware version and upgrade the device firmware to the latest version. Restore Factory Defaults: For best product experience, please reboot your device after restore to factory default. • NOTE: For more information, see the AWCC application Online Help at Dell support site. Alienware Command Center (AWCC) -
Page 19: Installing Awcc
AWCC 6.4 or later, you can configure your Alienware Pro Wireless Gaming Headset through FX available in AWCC. If your computer is not pre-installed with AWCC 6.4 or later, install AWCC through Windows Update or from the Dell Support website at Dell support site. -
Page 20: Activating Dolby Atmos For Headphones
Activating Dolby Atmos for headphones The headset automatically activates Dolby Atmos when connected to Microsoft Windows 10 or Microsoft Windows 11 computer by following the steps below: Go to the Microsoft Store. 2. Download the Dolby Access application. Connect the headset to the computer. 4. -
Page 21: Updating The Firmware
For best performance, update your headset and USB-C wireless dongle firmware to the latest version. Updating the headset and USB-C wireless dongle firmware manually Go to Dell support site and search for Alienware Pro Wireless Gaming Headset. 2. From the Drivers & Downloads tab, download the Alienware Pro Wireless Gaming Headset FW update tool. -
Page 22: Using The Headset
Using the headset Adjusting the headset Adjust the headband and ear pads to find the optimal fit for your head. Figure 17. Adjust the headband When using boom microphone, position it approximately two centimeters away from your mouth and to make sure the side with microphone icon is facing your mouth for best microphone quality. -
Page 23: Using Features On The Headset
Using features on the headset Volume adjustment Scroll the volume control wheel to increase or decrease the volume. Scroll up for volume up, scroll down for volume down. Unit volume is 2% for each scroll. NOTE: Bluetooth mode will have different volume steps. Active Noise Cancellation (ANC) Press the ANC Control Button: Locate the ANC control button on your device. -
Page 24: Mute Or Unmute The Microphone
Mute or unmute the microphone Press the mute button on the left ear cup to mute or unmute the microphone. The microphone mute LED on the boom microphone turns red when the microphone is muted. A voice prompt “Mic on “, “Mic off” will be played. Figure 20. -
Page 25: Hi-Res Audio
Hi-Res audio Hi-Res audio is only applicable under USB wired connection. When connecting the headset to the computer using the USB-A to USB-C cable, follow the steps below to apply Hi-Res audio in Windows configurartion. On the taskbar, right-click the speaker icon and click Sound settings. Figure 21. -
Page 26: Game Mode
Game mode Toggle Game mode on or off using by microphone mute button in Bluetooth mode In Bluetooth mode, latency is reduced by enabling gaming mode. Press and hold the microphone mute button for 5 seconds to toggle between gaming mode on/off, voice prompt “Game mode on” and “Game mode off” will be played. The headset default setting is “Game mode off”. -
Page 27: Replacing The Ear Pads
Replacing the ear pads To remove the ear pads, hold the ear pad firmly and then pull the ear pad away from the headset. Figure 24. Replace ear pads Regulatory label position Remove the left and right ear pads to find the regulatory label. Figure 25. -
Page 28: Troubleshooting
Troubleshooting Table 6. The following table provides the possible problems and its solutions. Problems Possible solutions The headset has no sound. • Ensure that the headset is turned on, and properly connected through the USB-C wireless dongle, USB connection or Bluetooth. Ensure that you’re not using the headset with a USB cable •... - Page 29 Problems Possible solutions The microphone picks up too much background noise. • Ensure that the microphone is positioned close to the mouth. • Ensure that the mic is fully inserted making sure the line on the mic plug is covered. •...
-
Page 30: Charging Power Requirement
Charging power requirement NOTE: The information in this section is applicable only to the European Union (EU) countries. Charging power requirement The power delivered by the charger must be between the minimum 2.5 W required by the radio equipment, and maximum 2.5 W in order to achieve the maximum charging speed. - Page 31 Απαίτηση ισχύος φόρτισης: Η ισχύς που παρέχει ο φορτιστής πρέπει να κυμαίνεται μεταξύ των ελάχιστων 2.5 W που απαιτούνται από τον ραδιοεξοπλισμού και των μέγιστων 2.5 W, προκειμένου να επιτευχθεί η μέγιστη ταχύτητα φόρτισης. Töltési teljesítményigény: A maximális töltési sebesség eléréséhez a töltő által leadott teljesítménynek a rádióberendezés által megkövetelt minimális 2.5 W és a maximális 2.5 W között kell lennie.
- Page 32 Требования к мощности для зарядки Зарядное устройство должно подавать мощность в диапазоне от 2.5 Вт, согласно минимальному требованию для радиооборудования, до 2.5 Вт для достижения максимальной скорости зарядки. Charging power requirement...
-
Page 33: Warranty Information
(which will apply between you and the retailer) and Dell’s end-user contract terms. Dell may also provide an additional hardware warranty – full details of the Dell end user contract and warranty terms can be found...
Need help?
Do you have a question about the Alienware PRO-HS/UD2202u and is the answer not in the manual?
Questions and answers