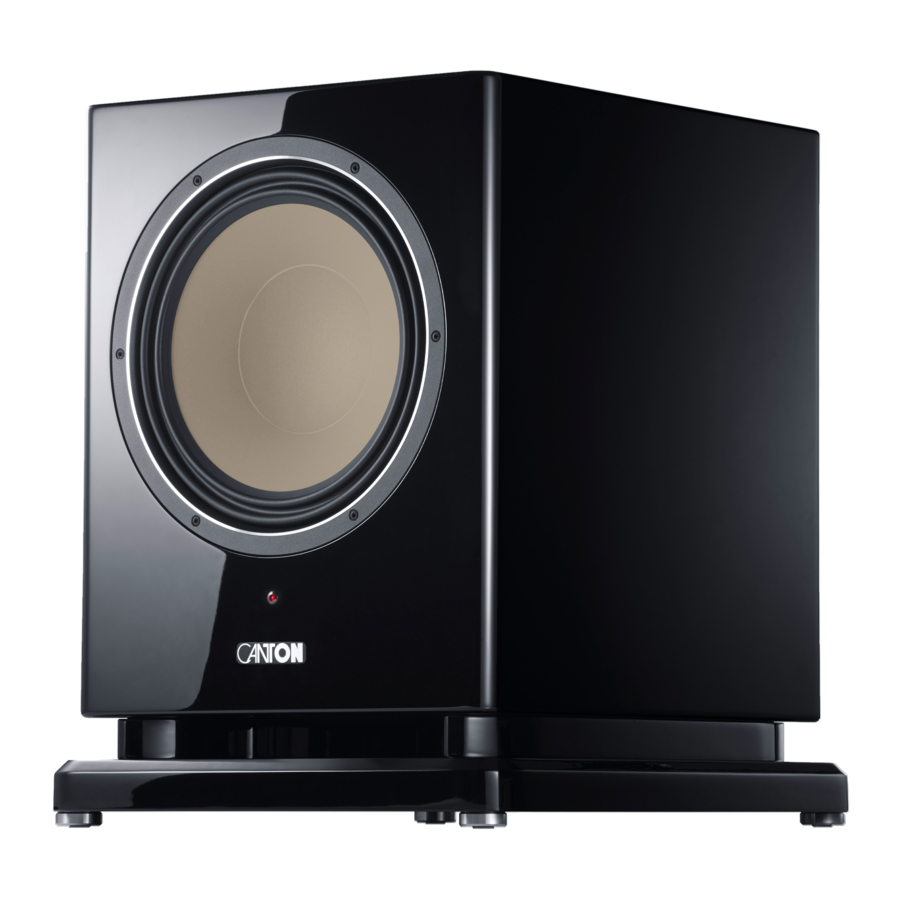
Canton Reference Manual
- Owner's manual (21 pages) ,
- Manual (10 pages) ,
- Owner's manual (52 pages)
Advertisement
UNPACKING AND PLACEMENT
Unpacking:
Open the carton and if necessary, remove any metal clips. Carefully unpack the subwoofer and check that the carton content is undamaged. If any part is damaged, do not use it, but please contact our customer service (see back page). Keep the packaging during the entire warranty period.
Placement:
Subwoofers can be positioned anywhere in the room. However, the ideal position is between the two front speakers with a distance of at least 30 cm from the wall. In any case, avoid placing the subwoofer in the corner of the room or directly against the wall.

- Before connecting the subwoofer, switch off all components of your system, but at least the amplifier(s).
- Make sure that your subwoofer is not placed in an elevated position (e.g. on a table) or on a ledge (e.g. stairs) without being secured against falling down!
Installation of the equipment feet/spikes:
To decouple the subwoofer, please mount the supplied (self-adhesive) unit feet or spikes. This will prevent vibrations. The height of the spikes can be adjusted to compensate for height differences.

SUBWOOFER MODULE
The following module (CSP 502) is installed in the Reference Subwoofer.
Detailed information about power consumptions and switch-off times can be found at: www.canton.de/en/service/ecodesign/
The module offers the following functions:

- Mains socket (IEC C14)
- Device protection fuse (250V T3.15AL resp. T6.3AL)
- Mains voltage selector switch
- Mains switch (ON = enabled)
- High Level Input (speaker level, maximum 50V per input)
- Low Level Output (RCA, to pass-through the input signal)
- Low Level Input (RCA, max. 2Vrms per input)
- Volume level (base setting 0dB at one input, -6 dB at two inputs)
- Crossover frequency (upper transmission frequency)
- Phase adjustment (to satellite speaker)
- Room Compensation (see "Operation and settings")
- Amplifier operation modes: ON = Module is permanently active, AUTO = Module automatically switches to standby after maximum 20 minutes when not in use
- LED operating status: LED off = Module switched off, LED red = Module in standby, LED green = Module active
- The voltage range set by the selector switch must match the local mains voltage.
- When switching the range, the fuse must be changed in accordance with the imprint.
CONNECTION
Before connecting the subwoofer, switch off the source to be connected (AV-Receiver, amplifier, etc.)! Only connect the subwoofer to the mains after connecting the source.
Depending on the type and features of your amplifier or receiver, you have different options for connecting your subwoofer:
Amplifier and AV-Receiver with preamplifier output "Pre-Out" or special stereo subwoofer output (LFE): Connection via "Low Level Input" (R/MONO and L) via stereo RCA cable.

Amplifier and AV-Rreceiver with mono subwoofer-output (LFE): Connection via the "Low Level Input" (R/MONO) via RCA cable.

Amplifier and AV-Receiver without special subwoofer output: Connect the loudspeaker outputs of the amplifier/AV-Receiver to the "High Level Input" (L and R) using a loud- speaker cable. Please pay attention to the correct polarity!


Make sure that the stripped ends of the speaker cables do not touch each other and do not touch the panel. There is a risk of short circuit!
OPERATION AND SETTINGS
- Mains switch:
After connecting the subwoofer, switch it on (ON) at the mains switch. To deactivate the subwoofer completely (LED off), switch it off at the mains switch. - Amplifier operation modes:
With the switch "Amplifier Mode", you can select whether the subwoofer should remain switched on permanently (e.g. if using a master- slave socket strip) or whether it should switch on automatically by an incoming audio signal and switch back to standby after 20 minutes in the absence of a signal. In operation, the status LED lights up green, in standby red.
Practical tip:
If the subwoofer does not switch on reliably at low playback volumes, you can use a "Subwoofer-Y-Cable" (1x RCA plug to 2x RCA plugs, or 1x RCA socket to 2x RCA plugs as an extension of the existing connection) when using a single low level input (R/MONO) to connect both inputs, thus doubling the sensitivity of the module's automatic circuit (+6dB). - Volume:
Adjust the volume as desired. As a guide, set the control knob to 0dB if only one input is used, or to -6dB if both inputs are used. - Crossover frequency:
The upper playback frequency of the subwoofer can be set with the "Crossover" control knob, in order to match it to the satellite speakers. If the crossover frequency is set by the AV-Receiver, set the crossover on the subwoofer to the maximum value possible so that the lowpass filters of both devices influence each other as less as possible. - Phase setting:
Depending on the local placement of the subwoofer, phase cancellations may occur at the crossover frequency. Use the phase adjustment to change the phase between the signals of the subwoofer and the satellite speakers to avoid such cancellations. - Room Compensation:
With the switch "Room Compensation" you can change the filter function in the low bass area. In the "Wide" position, the cut-off frequency is extended towards low frequencies compared to "Normal", and reduced in the "Narrow" position.
Please select the switch position that leads to the best sound reproduction, in order to optimally adapt the subwoofer to the acoustic conditions of the room and the installation position. The following basic rule applies: "Normal" setting for normal-sized rooms, "Wide" setting for large rooms (above approx. 40 m2), "Narrow" setting for small rooms (below approx. 20 m2).
SPECIFICS
This module has an externally accessible voltage selector switch that can be used to change the input voltage range of the module. The input voltage range is set to the mains voltage in your country when you purchase the subwoofer. Only change this switch if you want to use the subwoofer in a country where the mains voltage corresponds to the other input voltage range!

An incorrectly selected input voltage range can damage the subwoofer module!
This module has a device protection fuse that can be changed from the outside. If the status LED does not light up red or green despite connection to the mains and the mains switch being switched on, you can replace the fuse as a first measure. To do this, disconnect the mains cable from the module and lever the fuse holder out of the socket (e.g. with a flat-blade screwdriver). Replace the fuse only with a fuse of the same type (see imprint on the panel)!
If you change the input voltage range on the voltage selector switch, you must also change the fuse according to the panel imprint!
TROUBLESHOOTING
Enclosed you will find an overview of the most frequently occurring problems with corresponding suggested solutions.
| Problem | Possible reason | Solution |
| The LED on the subwoofer module does not light up |
|
|
|
| |
|
| |
| The subwoofer does not turn on |
|
|
|
| |
|
| |
| ||
| ||
|
| |
| The volume of the subwoofer is too low |
|
|
|
| |
|
| |
|
| |
| The subwoofer does not switch into standby mode |
|
|
|
| |
| ||
| The subwoofer hums permanently |
|
|
|
| |
|
| |
|
| |
| ||
|
SAFETY INSTRUCTIONS
 ATTENTION
Risk of electric shock.
Do not open!
Proper installation and connection of the speaker is the responsibility of the operator. Canton cannot accept any responsibility for damage or accidents caused by improper installation or improper connection.
Important Safety Instruction:
 Read and follow all instructions. Observe all warnings and safety instructions. Keep these instructions and hand over all documents when giving the unit to a third party.
Operate this device only in a moderate climate (not in a tropical climate). Do not operate this device at altitudes above 2000 m above sea level. Operate this device indoors only, not outdoors or in humid rooms. Do not operate this device in potentially explosive atmospheres. To avoid the risk of fire or electric shock, the device must not be exposed to rain or moisture. Do not operate this device near water. Do not expose this device to dripping or splashing. Strong fluctuations in temperature lead to condensation (water droplets) forming inside the device. Wait until the moisture has evaporated before initial operation (min. 3 hours). Do not place objects filled with liquids (such as vases) on the device. Do not place open fire, such as lit candles, on or near the device. Do not place the device near heat sources such as radiators, heat accumulators, stoves or other devices (including amplifiers) that generate heat. Prevent from direct sunlight. Keep a free space of at least 5 cm around the device.
Never touch signal- and mains cables with wet hands. The high level inputs must never be connected to the mains, but only to the corresponding amplifier output sockets. Do not use connectors on the loudspeaker cables that can also be connected to the mains (socket), such as 4 mm plugs (so-called banana plugs). Always switch off the unit before connecting or disconnecting cables. Always pull the plugs and not the cables. Protect the power cord from being walked on or pinched, particularly at plug, convenience receptacles, and the point where they exit from the device. Never prevent the protective function of polarised or grounded plugs: A polarised plug has two pins, one wider than the other. An earthed plug has a third earthing pin. The wide or third pin is for your safety. If the plug does not fit into your outlet, contact a qualified electrician to replace the obsolete outlet. To avoid electric shock, connect the mains plug only to sockets or extensions where the contact pins can be fully inserted to prevent exposed contact pins. For devices without a mains switch, in which the mains plug or the mains socket serves as a switching device, the plug of the mains plug and/or the appliance coupler must be freely accessible at all times. Unplug the device from the mains during thunderstorms or long periods of non-use. To completely disconnect the device from the mains, unplug the mains plug from the wall outlet. The device may only be operated with the voltage and frequency specified on the device or the type label. Do not insert any objects or body parts into the openings of the device. Live parts inside the enclosure could get touched and/or damaged. This could lead to short circuit, electric shock and fire.
Install this device in accordance with the manufacturer's instructions. Always choose a level surface. The apparatus has to be in perfect vertical alignment. Make sure that the surface has sufficient load-bearing capacity for the device. Do not place the device in direct proximity to an edge (table or shelf edge) or (stair) step in order to prevent it from falling down due to vibrations. If necessary, secure the unit against falling down. Do not use force on operating elements, connections and cables.
 Only use trolleys, stands, tripods, holders or tables specified by the manufacturer or sold with the device. When using a trolley, be careful when moving the trolley/device assembly to prevent damage and injury from tipping over.
![]() If sound distortions such as unnatural knocking, throbbing or high-frequency clicking occur during playback, the volume level must be reduced immediately. To avoid possible hearing damage, do not listen at high levels for long periods of time. Interrupt the playback if you hear ringing or whistling noises in your ears or if you have the impression that you can no longer hear high sounds (even for a short time).
If sound distortions such as unnatural knocking, throbbing or high-frequency clicking occur during playback, the volume level must be reduced immediately. To avoid possible hearing damage, do not listen at high levels for long periods of time. Interrupt the playback if you hear ringing or whistling noises in your ears or if you have the impression that you can no longer hear high sounds (even for a short time).
To avoid electric shock, do not open the housing! There are no user-serviceable parts inside. Consult qualified personnel for all repair and maintenance work. This is required when the device has been damaged in any way, such as mains cable or plug damage, liquid or objects have been spilled, exposed to rain or moisture, does not operate normally, or has been dropped. Do not make any modifications to the device and/or accessories. Unauthorised modifications can affect the safety, regulatory compliance or the system performance. In this case, the operating license/warranty may expire.
Only clean this device with a clean, dry cloth. Do not use any aggressive, alcoholic or abrasive agents for cleaning.
 The device contains permanent magnets. Do not place or lay objects that are sensitive to magnetic fields (e.g. tube TVs, external hard drives, magnetic cards, video cassettes, etc.) on or directly next to the device.
 The device and/or the accessory may contain small parts that can be swallowed. Therefore not suitable for children under three years.
This symbol is intended to alert the user to the presence of uninsulated dangerous voltages within the product's enclosure that may be of sufficient magnitude to constitute risk of fire and electric shock.
This symbol is intended to alert the user to the presence of important operating and maintenance instructions on the product or in the documentation (manual) accompanying this product.
 This symbol denotes equipment with Class II protection rating. These devices are deemed to be fully protected against the risk of electric shock during normal use by means of double or reinforced insulation, and therefore require no earth conductor.
FURTHER IMPORTANT INFORMATION
Information about the "intended use":
The subwoofer is designed for indoor use and must not be used outdoors or in a wet environment. It must not be modified or altered. Connect the subwoofer as described in the instructions and observe the safety instructions. Operate it only with the mains voltage and frequency specified on the type label.
Information on environmentally friendly operation:
Set the "Amplifier Mode Auto/On" selector switch to "Auto". This switches the subwoofer to standby mode to reduce power consumption when not in use. This "saves power" and lowers your electricity bill.
For further questions, please do not hesitate to contact our Customer Service:
Canton Elektronik GmbH + Co. KG
Neugasse 21 – 23
61276 Weilrod, Germany
Tel. +49 (0)6083 287-87
service@canton.de
www.canton.de
Documents / Resources
References

Download manual
Here you can download full pdf version of manual, it may contain additional safety instructions, warranty information, FCC rules, etc.
Advertisement


Need help?
Do you have a question about the Reference and is the answer not in the manual?
Questions and answers