Xerox Phaser 3250 User Manual
Xerox phaser 3250: user guide
Hide thumbs
Also See for Phaser 3250:
- Service manual (335 pages) ,
- Evaluator manual (12 pages) ,
- Install manual (2 pages)
Table of Contents
Advertisement
Advertisement
Chapters
Table of Contents
Troubleshooting

Related Manuals for Xerox Phaser 3250


Summary of Contents for Xerox Phaser 3250
- Page 1 User Guide...
- Page 2 This manual is provided for information purposes only. All information included herein is subject to change without notice. Xerox Corporation is not responsible for any direct or indirect damages, arising from or related to the use of this manual. © 2008 Xerox Corporation. All rights reserved.
-
Page 3: Table Of Contents
Contents Safety Safety Introduction ..............................1.i Marks and Labels ..............................1.i Radio Frequency Emissions ............................ 1.i Laser Safety Introduction ............................1.i Operational Safety Information ..........................1.i Maintenance Information ............................1.iii Product Safety Certification ............................ 1.iii Regulatory Information ............................1.iii Product Recycling & Disposal ..........................1.iv Energy program compliance ........................... - Page 4 6. Basic printing Printing a document ..............................6.1 Canceling a print job ............................... 6.1 7. Ordering supplies and accessories Print cartridge ................................. 7.1 Accessories ................................7.1 How to purchase ..............................7.1 8. Maintenance Cleaning the printer ..............................8.1 Cleaning the outside of the printer ........................8.1 Cleaning the inside of the printer ........................
-
Page 5: Safety
- Increase the separation between the equipment and receiver. Your Xerox product and supplies have been designed and tested to meet strict safety requirements. These include safety agency evaluation and - Connect the equipment into an outlet on a circuit different from that to certification, and compliance with electromagnetic regulations and which the receiver is connected. -
Page 6: Electrical Supply
• Do not use aerosol cleaners, they may be explosive and flammable under certain conditions. Do not use an adapter to connect any Xerox equipment to an electrical outlet that lacks a ground connection terminal. • Always exercise care when moving or relocating equipment. Please... -
Page 7: Maintenance Information
CE The CE mark applied to this product, symbolizes XEROX's declaration of conformity with the following applicable European Union If you need additional information about ozone, please request the Xerox Directives, as of the dates indicated: publication Facts About Ozone (part number 610P64653) by calling 1-800-828-6571 in the United States and Canada. -
Page 8: Product Recycling & Disposal
The ENERGY STAR and ENERGY STAR MARK are If your product is not part of the Xerox program and you are managing its registered United States trademarks. The ENERGY disposal, please note that the product may contain lead and other... -
Page 9: Introduction
Save time and money Introduction • Your printer allows you to use toner save mode to save toner. See the Software Section. Congratulations on the purchase of your printer! • You can print on both sides of the paper to save This chapter includes: paper. -
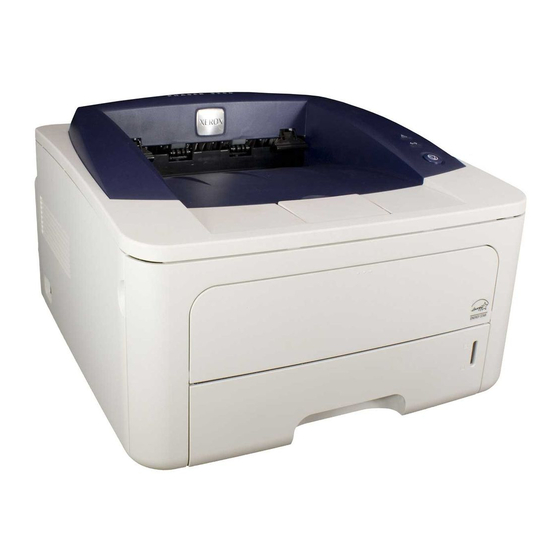
Page 10: Printer Overview
Machine features Printer overview The table below lists a general overview of features supported by your printer. Front view (I: Installed, O: Option, NA: Not Available) Features Phaser 3250D Phaser 3250DN USB 2.0 (USB 2.0: Hi-Speed USB 2.0) Network Interface (Ethernet 10/100 Base TX) PCL Emulation PostScript Emulation... -
Page 11: Rear View
Rear view Understanding the LEDs Status Description Error • The cover is open. Close the cover. • There is no paper in the tray. Load paper in the tray. • The printer has stopped printing due to a major error. •... -
Page 12: Finding More Information
If you have Internet access, you can get help, support, printer drivers, manuals, and order Printing is suitable for altitudes under 1,000 m (3,281 ft). Refer to information from the Xerox website, the altitude setting to optimize your printing. See page 1.5 for more www.xerox.com. -
Page 13: Altitude Adjustment
Unpack the machine and check all the enclosed items. Altitude adjustment Remove the tape holding the machine tightly. The print quality is affected by atmospheric pressure, which is Install the print cartridge. determined by the height of the machine above sea level. The following information will guide you on how to set your machine to the best print Load paper. -
Page 14: Changing The Font Setting
Changing the font setting Your machine has preset the font for your region or country. If you want to change the font or set the font for special conditions such as DOS environment, you can change the font setting as follows: Ensure that you have installed the printer driver from the provided software CD. -
Page 15: Basic Setup
Basic setup This chapter includes: • Printing a demo page • Using toner save mode Printing a demo page After setting up your printer, print a demo page to make sure that the printer is operating correctly. Press and hold the Start/Stop button for about 2 seconds. A demo page prints out. -
Page 16: Software Overview
Contents Software overview Macintosh • Printer driver: Use this driver to run This chapter gives you an overview of the software that comes with your your printer from a Macintosh printer. Further details about installing and using the software are computer and print documents. -
Page 17: System Requirements
Linux System requirements Item Requirements Before you begin, ensure that your system meets the following requirements: Operating system Various Linux OS including • Red Hat 8~9 Windows • Fedora Core 1~4 • Mandrake 9.2~10.1 Item Requirements Recommended • SuSE 8.2~9.2 Operating Windows 2000/XP/2003/Vista Processor... -
Page 18: Network Setup (Phaser 3250Dn Only)
Open the language folder you want to use. Double click Setup.exe to install this program. Supported operating systems From the Windows Start menu, select Programs > Xerox Phaser 3250 > SetIP > SetIP. The following table shows the network environments supported by the printer: Select the name of your printer and click “... - Page 19 Enter the network card’s MAC address, IP address, subnet mask, default gateway, and then click Apply. Note If you do not know the network card’s MAC address, print the machine’s network information report. Click OK to confirm the settings. 10 Click Exit to close the SetIP program. <Network setup (Phaser 3250DN only)>...
-
Page 20: Loading Print Media
• Some print media may meet all of the guidelines in this section and still not produce satisfactory results. This may be the result of improper handling, unacceptable temperature and humidity levels, or other variables over which Xerox has no control. • Before purchasing large quantities of print media, ensure that it meets the requirements specified in this user guide. -
Page 21: Supported Sizes Of Paper
Supported sizes of paper Type Size Dimensions Weight Capacity Letter 216 x 279 mm (8.5 x 11 inches) • 60 to 105 g/m (16 to 28 lb • 250 sheets of 75 g/m bond) for the tray (20 lb bond) paper for the Legal 216 x 356 mm (8.5 x 14 inches) •... -
Page 22: Media Sizes Supported In Each Mode
Media sizes supported in each mode Guidelines for special print media Type Guidelines Mode Size Source Envelopes • Successful printing on envelopes depends Single side All sizes supported by • tray 1 upon the quality of the envelopes. When printing the machine •... -
Page 23: Loading Paper
Type Guidelines Type Guidelines Transparencies • To avoid damaging the printer, use only Preprinted • Letterhead must be printed with heat-resistant paper transparencies designed for use in laser ink that will not melt, vaporize, or release printers. hazardous emissions when subjected to the •... -
Page 24: Using Tray 1 Or The Optional Tray 2
Using tray 1 or the optional tray 2 Press and hold the guide lock, and slide the paper length guide to locate it in the correct paper size slot. Use the print material you use for the majority of your print jobs in tray 1. Tray 1 can hold a maximum of 250 sheets of 75 g/m paper. -
Page 25: Using The Manual Feeder
Note Adjust the manual tray paper width guides to the width of the paper. Do not force too much, or the paper will bend, which could result in • Do not push the paper width guide far enough to cause the a paper jam or skew. -
Page 26: Output Tray Information
Output tray information output tray 3250-043 The output tray collects paper face down, in the order in which the sheets were printed. Notes • If you continuously print many pages, the surface of the output tray may become hot. Be careful not to touch the surface, and especially keep children away from the surface. -
Page 27: Basic Printing
For Windows 2000, select Settings and then Printers. For Windows XP (32/64 bit)/2003, select Printers and Faxes. For Windows Vista, select Control Panel > Hardware and Sound > Printers. Double-click the Xerox Phaser 3250 icon. From the Document menu, select Cancel Note •... -
Page 28: Ordering Supplies And Accessories
106R01374 To order Xerox-authorized supplies or accessories, contact your local a. Declared yield value in accordance with ISO/IEC 19752. Xerox dealer or the retailer where you purchased your printer, or visit www.xerox.com and select your country/region for information on calling Caution for technical support. -
Page 29: Maintenance
Cleaning the inside of the printer Maintenance Turn the printer off and unplug the power cord. Wait for the printer to cool down. This chapter provides information for maintaining your printer and the print cartridge. Open the front cover and pull the print cartridge out. Set it on a This chapter includes: clean flat surface. -
Page 30: Maintaining The Print Cartridge
Gently swab the long strip of glass (LSU) inside the top of the Maintaining the print cartridge cartridge and check for dirt or dust. Print cartridge storage To get the most from the print cartridge, keep the following guidelines in mind: •... -
Page 31: Replacing The Print Cartridge
Replacing the print cartridge Caution • Avoid reaching too far into the printer. The fuser area may be When the toner is completely empty or the print cartridge reached the hot. end of its life span: • To prevent damage to the print cartridge, do not expose it to •... -
Page 32: Printing A Configuration Page
Approx. 50,000 pages Pick-up roller Approx. 50,000 pages Xerox highly recommends that an authorized service provider, dealer or the retailer where you bought printer performs this maintenance activity. The warranty does not cover the replacement of the maintenance parts after their lifespan. -
Page 33: Troubleshooting
Remove the jammed paper by gently pulling it straight out. Make Troubleshooting sure that all of the paper is properly aligned in the tray 1. This chapter provides helpful information for what to do if you encounter an error while using your printer. This chapter includes: •... -
Page 34: Areas Near The Print Cartridge
Pull the paper straight up and out. Areas near the print cartridge Caution The fuser area is hot. Take care when removing paper from the printer. Open the front cover and pull the print cartridge out. 3250-022 Insert the trays back into the printer. Printing automatically resumes. -
Page 35: In The Paper Exit Area
In the paper exit area In the duplex unit area If the duplex unit is not inserted correctly, paper jam may occur. Make Open and close the front cover. The jammed paper is automatically sure that the duplex unit is inserted correctly. ejected from the printer. -
Page 36: Tips For Avoiding Paper Jams
Duplex jam 1 Load the paper into the tray with the long edge facing the front of the tray. Open the rear cover. Lower the rear guide and remove the paper. Return the rear guide to its original position. 3250-023 In the printer properties window, set the page orientation to be rotated 90 degrees. -
Page 37: Troubleshooting Checklist
Check the power source by plugging the The printer is not Select Xerox Phaser 3250 or green. power cord into another outlet. selected as the Xerox Phaser 3250 PS as default printer. -
Page 38: Printer Specifications
Condition Possible cause Suggested solutions Condition Possible cause Suggested solutions The printer The printer may Check the printer properties to Half the page The page layout Simplify the page layout and does not be configured ensure that all of the print is blank. -
Page 39: Solving Print Quality Problems
Condition Possible cause Suggested solutions Solving print quality problems Pages print, The print Redistribute the print cartridge. Dirt inside of the printer or improper paper loading may reduce print but are cartridge is See page 8.2. quality. See the table below to troubleshoot problems. blank. - Page 40 Condition Suggested solutions Condition Suggested solutions Vertical lines If black vertical streaks appear on the page: Background Background scatter results from bits of toner scatter distributed on the printed page. • The drum inside the print cartridge has • The paper may be too damp. Try printing with probably been scratched.
-
Page 41: Common Windows Problems
Condition Suggested solutions Condition Suggested solutions Wrinkles or • Ensure that the paper is loaded properly. Horizontal If horizontally aligned black streaks or smears creases stripes appear: • Check the paper type and quality. See page 5.2. • The print cartridge may be installed •... -
Page 42: Common Postscript Problems
Common PostScript problems Common Linux problems The following situations are PostScript language specific and may occur Condition Suggested solutions when several printer languages are being used. • Check if the printer driver is installed in your Note system. Open Unified Driver Configurator •... -
Page 43: Common Macintosh Problems
Common Macintosh problems Condition Suggested solutions The printer does not Incompatibility between the PDF file and print PDF file correctly. the Acrobat products: Some parts of graphics, Printing the PDF file as an image may text, or illustrations are solve this problem. Turn on Print As missing. -
Page 44: Installing Additional Memory
Installing additional memory Your machine is a full-featured model that has been optimized to meet most of your printing needs. Recognizing that each user may have different requirements, however, Xerox makes additional memory available to enhance your machine’s capabilities. This chapter includes: •... -
Page 45: Activating The Added Memory In The Ps Printer Properties
For Windows XP/2003, select Printers and Faxes. For Windows Vista, select Control Panel > Hardware and Sound > Printers. Select the Xerox Phaser 3250 PS printer. Click the right mouse button on the printer icon and select Properties. For Windows 2000/XP/2003/Vista, select Device Settings. -
Page 46: Specifications
Declared yield value in accordance with ISO/IEC 19752. e. Compatible with PCL6 version 2.1. Print cartridge Standard Yield: Average cartridge yield 3,500 f. Please visit www.xerox.com to download the latest software version. life standard pages. High Yield: Average cartridge yield 5,000 standard pages. -
Page 47: Glossary
Glossary Comma Separated Values (CSV). A type of file format, CSV is used to exchange data between disparate applications. The file format, as it is used in Microsoft Excel, has become a pseudo standard The following glossary helps you get familiar with the product by throughout the industry, even among non-Microsoft platforms. - Page 48 and corrects errors in the fax transmission process that are IEEE sometimes caused by telephone line noise. The Institute of Electrical and Electronics Engineers (IEEE) is an international non-profit, professional organization for the Emulation advancement of technology related to electricity. Emulation is a technique of one machine obtaining the same results as another.
- Page 49 PC, and An interface for a device driver, this allows software to interact with the network protocols were based on the archetypal Xerox XNS the device driver using standard input/output system calls, which stack.
- Page 50 Protocol TWAIN A convention or standard that controls or enables the connection, An industry standard for scanners and software. By using a TWAIN- communication, and data transfer between two computing compliant scanner with a TWAIN-compliant program, a scan can be endpoints.
- Page 51 Index accessories, order information 7.1 output location 5.7 quality problems 9.7 cleaning paper guidelines 5.3 redistributing, print cartridge 8.2 inside 8.1 paper jam, clear replacing, print cartridge 8.3 outside 8.1 around the print cartridge 9.2 component location 1.2 duplex area 9.3 configuration page, print 8.4 multi-purpose tray 9.2 control panel...
- Page 52 Software Section...
- Page 53 Software section Contents 1. Installing Printer Software in Windows Installing Printer Software ............................4 Installing Software for Local Printing ......................4 Installing Software for Network Printing ...................... 6 Reinstalling Printer Software ..........................9 Removing Printer Software ..........................10 2. Using SetIP (Phaser 3250DN only) Installing SetIP ..............................
- Page 54 4. Advanced Printing Printing Multiple Pages on One Sheet of Paper (N-Up Printing) ................19 Printing Posters ..............................20 Printing Booklets ..............................20 Printing on Both Sides of Paper ........................... 21 Printing a Reduced or Enlarged Document ......................21 Fitting Your Document to a Selected Paper Size ....................21 Using Watermarks ..............................
- Page 55 6. Using Your Printer in Linux Getting Started ..............................27 Installing the MFP Driver ............................27 Installing the MFP Driver ........................... 27 Uninstalling the MFP Driver ........................28 Using the MFP Configurator ..........................29 Opening the MFP Configurator ......................... 29 Printers Configuration ..........................
-
Page 56: Installing Printer Software In Windows
Typical Installation Installing Printer Software in This is recommended for most users. All components necessary for printer operations will be installed. Windows Make sure that the printer is connected to your computer and powered on. This chapter includes: Insert the supplied CD-ROM into your CD-ROM drive. •... - Page 57 Custom Installation : If your printer is not already connected to the computer, the You can choose individual components to install. following window will appear. Make sure that the printer is connected to your computer and powered on. Insert the supplied CD-ROM into your CD-ROM drive. The CD-ROM should automatically run, and an installation window appears.
-
Page 58: Installing Software For Network Printing
Select your printer and click Next. : You can change the desired installation folder by clicking [Browse]. After the installation is finished, a window asking you to print a test page appears. If you choose to print a test page, select the checkbox and click Next Next... - Page 59 Click Install Software. • If you do not see your printer on the list, click Update to refresh the list, or select Add TCP/IP Port to add your printer to the network. To add the printer to the network, enter the port name and the IP address for the printer.
- Page 60 Click Install Software. • To find a shared network printer (UNC Path), select Shared Printer [UNC] and enter the shared name manually or find a shared printer by clicking the Browse button. : To search the network printer, the firewall should be disabled. : If you want to set a specific IP address on a specific network printer, click the Set IP Address button.
-
Page 61: Reinstalling Printer Software
You can also change the printer name, set the printer to be The list of printers available on the network appears. Select the shared on the network, set the printer as the default printer, and printer you want to install from the list and then click Next. change the port name of each printer. -
Page 62: Removing Printer Software
Select the components you want to reinstall and click Next. If you installed the printer software for local printing and select your printer driver name, the window asking you to print a test page appears. Do as follows: a. To print a test page, select the check box and click Next. -
Page 63: Using Setip (Phaser 3250Dn Only)
Click Install SetIP Utility(Optional). Click Finish. Using SetIP From the Windows Start menu, select Programs or All Programs Xerox Phaser 3250 SetIP SetIP. The program automatically detects and displays new and configured print servers on your network. Using SetIP (Phaser 3250DN only) - Page 64 Select the name of your printer and click . If you cannot find your printer name, click to refresh the list. OTES • To confirm the MAC address, see the NETWORK PRINTER CARD TEST PAGE. The NETWORK PRINTER CARD TEST PAGE will be printed after the Configuration Page.
-
Page 65: Basic Printing
Open the document you want to print. Basic Printing Select Print from the File menu. The Print window is displayed. It may look slightly different depending on your application. The basic print settings are selected within the Print window. This chapter explains the printing options and common printing tasks These settings include the number of copies and print range. -
Page 66: Printing To A File (Prn)
Printing to a file (PRN) Printer Settings You will sometimes need to save the print data as a file for your purpose. You can use the printer properties window, which allows you to access all of the printer options you need when using your printer. When the To create a file: printer properties are displayed, you can review and change the settings needed for your print job. -
Page 67: Layout Tab
Layout Tab Paper Tab The Layout tab provides options to adjust how the document appears Use the following options to set the basic paper handling specifications on the printed page. The Layout Options includes Multiple Pages when you access the printer properties. See “Printing a Document” on per Side, Poster Printing and Booklet Printing. -
Page 68: Graphics Tab
Use the following Graphic options to adjust the print quality for your specific printing needs. See “Printing a Document” on page 13 for more : For optimal performance and reliability consider using xerox information on accessing printer properties. paper. -
Page 69: Extras Tab
Advanced Options Extras Tab You can set advanced settings by clicking the Advanced Options You can select output options for your document. See “Printing a button. Document” on page 13 for more information about accessing the printer • Print All Text To Black: When the Print All Text To Black option properties. -
Page 70: Troubleshooting Tab
Troubleshooting Tab Using a Favorite Setting Use the Troubleshooting tab for printer information page. See The Favorites option, which is visible on each properties tab, allows you “Printing a Document” on page 13 for more information about accessing to save the current properties settings for future use. printer properties. -
Page 71: Advanced Printing
Advanced Printing Printing Multiple Pages on One Sheet of Paper (N-Up Printing) This chapter explains printing options and advanced printing tasks. You can select the number of pages to print on a single sheet of paper. To print more than one page per sheet, the pages will be reduced in size •... -
Page 72: Printing Posters
Printing Posters Printing Booklets This feature allows you to print a single-page document onto 4, 9, or 16 sheets of paper, for the purpose of pasting the sheets together to form one poster-size document. : The poster printing option is available when 600 dpi is selected in the resolution option on the Graphic tab. -
Page 73: Printing On Both Sides Of Paper
Printing on Both Sides of Paper Printing a Reduced or Enlarged Document You can print on both sides of a sheet of paper. Before printing, decide how you want your document oriented. You can change the size of a page’s content to appear larger or smaller The options are: on the printed page. -
Page 74: Using Watermarks
Editing a Watermark Using Watermarks To change the print settings from your software application, access printer properties. See “Printing a Document” on The Watermark option allows you to print text over an existing document. page 13. For example, you may want to have large gray letters reading “DRAFT” Click the Extras tab and click the Edit button in the Watermark or “CONFIDENTIAL”... -
Page 75: Using Overlays
Using a Page Overlay Using Overlays After an overlay has been created, it is ready to be printed with your document. To print an overlay with a document: Create or open the document you want to print. What is an Overlay? To change the print settings from your software application, An overlay is text and/or images stored in the computer hard disk drive access printer properties. -
Page 76: Using Windows Postscript Driver
Advanced Using Windows PostScript You can use advanced settings by clicking the button. Advanced Driver If you want to use the PostScript driver provided with your system CD-ROM to print a document. PPDs, in combination with the PostScript driver, access printer features and allow the computer to communicate with the printer. -
Page 77: Sharing The Printer Locally
Sharing the Printer Locally Setting Up a Host Computer Start Windows. You can connect the printer directly to a selected computer, which is called “host computer,” on the network. From the Start menu select Printers and Faxes. The following procedure is for Windows XP. For other Windows OS, refer Double-click your printer driver icon. -
Page 78: Using Utility Applications
• To use the this program, you need: - To check for Operating System(s) that are compatible with your Or, from the Start menu, select Programs or All Programs → Xerox printer, refer to Printer Specifications in your Printer User Guide. -
Page 79: Using Your Printer In Linux
Using Your Printer in Linux Installing the MFP Driver You can use your machine in a Linux environment. Installing the MFP Driver This chapter includes: Make sure that you connect your machine to your computer. • Getting Started Turn both the computer and the machine on. root •... -
Page 80: Uninstalling The Mfp Driver
The installation program has added the MFP Configurator desktop icon and Xerox MFP group to the system menu for your If the CD-ROM is secondary master and the location to mount is convenience. If you have any difficulties, consult the onscreen... -
Page 81: Using The Mfp Configurator
Opening the MFP Configurator Switches to Printer configuration. Double-click MFP Configurator on the desktop. You can also click the Startup Menu icon and select Xerox MFP Shows all of the and then MFP Configurator. installed printer. Press each button on the Modules pane to switch to the corresponding configuration window. -
Page 82: Ports Configuration
Classes Tab Configuring Printer Properties The Classes tab shows a list of available printer classes. Using the properties window provided by the Printers configuration, you can change the various properties for your machine as a printer. Open the MFP Configurator. If necessary, switch to Printers configuration. -
Page 83: Printing A Document
In the Xerox LPR window, select the model name of your Printing Files machine from the Printer list and click Properties. You can print many different types of files on the Xerox machine device using the standard CUPS way - directly from the command line interface. Click. -
Page 84: Using Your Printer With A Macintosh
Double-click the MAC_Installer folder. driver by installing the PPD file. Double-click the MAC_Printer folder. Double-click the Xerox Phaser 3250D or Xerox Phaser Some printers do not support a network interface. Make 3250DN icon. sure that your printer supports a network interface by referring to Printer Specifications in your Printer User Guide. -
Page 85: For A Usb-Connected
Follow the instructions on “Installing Software” on page 32 to install the PPD file on your computer. For MAC OS 10.3, if Auto Select does not work properly, select Xerox in Printer Model and your printer name in Model Open the Applications folder → Utilities, and Print Setup Name. -
Page 86: Printing
Changing Printer Settings Printing You can use advanced printing features when using your printer. From your Macintosh application, select Print from the File menu. The printer name which appears in the printer properties window may differ OTES depending on the printer in use. Except for the name, the composition of •... -
Page 87: Printing Multiple Pages On One Sheet Of Paper
The higher setting also may increase the time it takes to print a document. : For optimal performance and reliability consider using xerox paper. Using Your Printer with a Macintosh... -
Page 88: Duplex Printing
Duplex Printing You can print on both sides of the paper. Before printing in the duplex mode, decide on which edge you will be binding your finished document. The binding options are: Long-edged binding: Which is the conventional layout used in book binding. - Page 89 Software section Index Windows 15 document 13 Linux fit to page 21 advanced printing 19 driver, install 27 from Macintosh 34 printer properties 30 from Windows 13 printing 31 N-up Macintosh 35 booklet printing 20 Windows 19 overlay 23 poster 22 Macintosh PRN 14 driver...
- Page 90 image mode 16 resolution Windows 16 toner save 16 true-type option 16 software install Macintosh 32 Windows 4 reinstall Windows 9 system requirements Macintosh 32 uninstall Windows 10 status monitor 26 toner save 16 toner save, set 16 uninstall, software Windows 10 uninstalling driver...
Need help?
Do you have a question about the Phaser 3250 and is the answer not in the manual?
Questions and answers