Sony PS-LX310BT Manual
- Operating instructions manual (168 pages) ,
- Service manual (37 pages) ,
- Operating instructions manual (73 pages)
Advertisement
Features
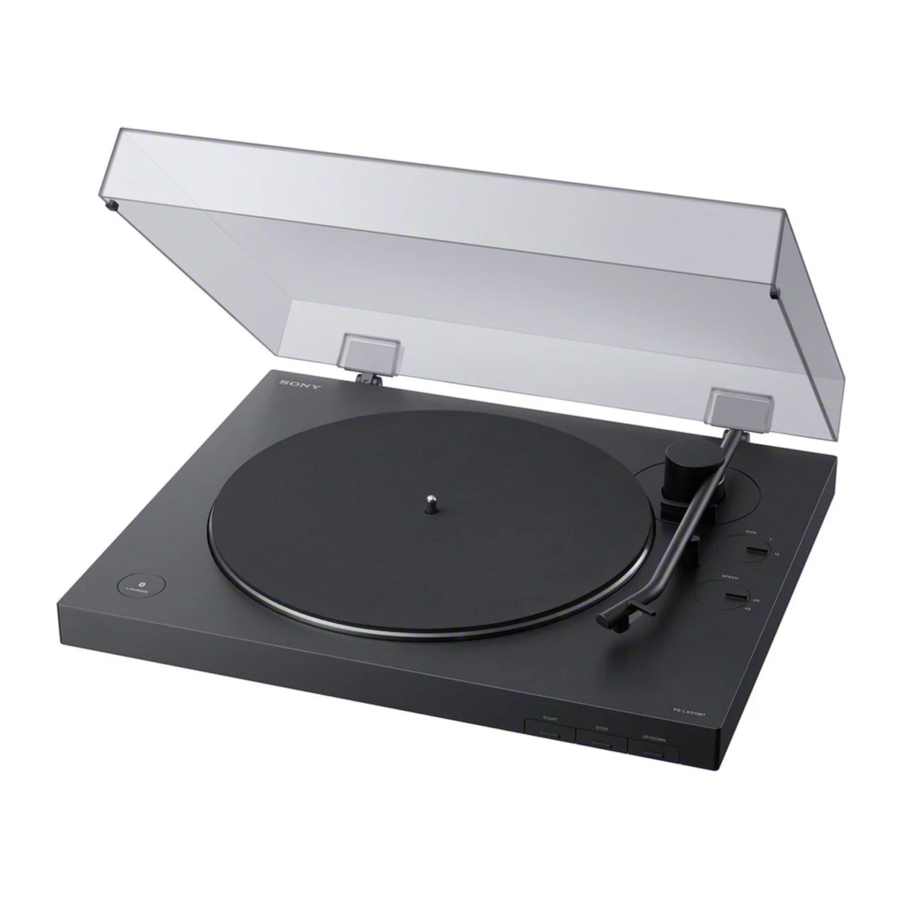
PS-LX310BT is a stereo turntable system designed for analog playback of vinyl records. Assemble your turntable to use it for the first time.
Your turntable does not have built-in speakers.
To listen to audio on vinyl records, either use an audio cable to connect to an audio device or use the BLUETOOTH® function to connect to a BLUETOOTH wireless technology enabled audio device, such as wireless speakers or wireless headphones.
You can record audio tracks from vinyl records, which are played using your turntable, to a computer by connecting the turntable to a computer with a USB cable (not supplied) and using recording software on the computer.

Note
- Be sure to connect to and use a BLUETOOTH wireless technology enabled audio device with a volume adjustment function. Audio tracks may be played at very loud volumes if you connect your turntable to a device from which you cannot adjust the volume.
- Devices, including TVs, smartphones, and computers, cannot receive streams that are sent from your turntable if the turntable is connected to a BLUETOOTH device.
- Your turntable is not an analog record player designed for DJ (Disk Jockey) use. Stopping or reversing the rotation of the vinyl record by hand will cause malfunctions.
Parts and Controls
Front/Side

- Spindle
- Mat for the platter
- Platter
Place the platter on the spindle while you are assembling your turntable. It has a drive belt wound around on the back side. - BLUETOOTH indicator
The indicator lights blue while the turntable is connected to the BLUETOOTH wireless technology enabled playback device with the BLUETOOTH function, rapidly flashes blue while the turntable is in pairing mode, and turns off when the BLUETOOTH function is disabled. If there are no devices nearby that have already been paired when you press the BLUETOOTH button/![]() PAIRING button with the BLUETOOTH function disabled, the indicator lights orange and the turntable goes into standby.
PAIRING button with the BLUETOOTH function disabled, the indicator lights orange and the turntable goes into standby. - BLUETOOTH button/
![]() PAIRING button
PAIRING button
Enables/disables the BLUETOOTH function. Press for about 2 seconds and release to turn on your turntable's pairing mode. - Micro USB port
This is on the inside of your turntable when the platter is removed.
When the updates are available, connect your turntable to the computer via a micro USB cable (not supplied) and update the firmware. - Dust cover
- Dust cover hinges
- Storage hole for the 45 rpm adaptor
You can store the 45 rpm adaptor when you are not using it. - Tone arm
- SIZE rotary switch knob
Rotate to set to the appropriate size of the vinyl record to be played. - Tone arm rest
Place the tone arm here while you are not playing a vinyl record.
Note
There is a hole on the lower side of the tone armrest. Pass a string through the hole and fix the tone arm and the tone arm rest before carrying your turntable. - SPEED rotary switch knob
Rotate to set to the appropriate rpm of the vinyl record to be played. - Headshell
- Stylus
The stylus's protective cover was attached when you purchased your turntable. Attach the cover when assembling your turntable and when you are not using your turntable for a long time.
Note
The stylus is a high precision component. Handle it with care to avoid damage. - Cartridge body
- START button
- STOP button
- UP/DOWN button
Rear

- OUTPUT SELECT switch
Switch to the appropriate output format of the device you are using when an audio device, such as a stereo system or an amplifier, is connected. - GAIN SELECT switch
When playing, adjust the difference of the volume of the vinyl records. If the audio track was recorded on the vinyl record at a quiet volume, set this to HIGH to play at the appropriate volume. If the audio track was recorded on the vinyl record at a loud volume, the sound may become distorted if you play the vinyl record with this set to HIGH. Change the settings to be appropriate for the vinyl record.
Volume adjustment is effective for audio output when the OUTPUT SELECT switch is set to LINE, the playback volume on BLUETOOTH connections, and the recording volume on the computer. It is ineffective for audio output when the OUTPUT SELECT switch is set to PHONO. ![]() USB port (Type B)
USB port (Type B)
Use this port to connect a computer for recording.![]() DC IN 12V jack
DC IN 12V jack- Power
![]() ON/
ON/![]() STANDBY button
STANDBY button
Turn on/off your turntable.
If playback does not start, even when you press the START button, check that the power is set to![]() ON.
ON.
 USB port (Type B)
 DC IN 12V jack
 ON/
ON/ STANDBY button
Note on carrying this product
When you carry this product, make sure that you firmly hold the bottom of the product as illustrated below. Inappropriate holding may cause you to drop the product, resulting in malfunctions or injuries.

Getting Started
Checking the Supplied Items
Make sure that you have all of the supplied accessories listed below. If you find anything missing, contact your dealer or the customer support website.
- Platter (with drive belt) (1)
![]()
- Mat for the platter (1)
![]()
- Dust cover (1)
![]()
- 45 rpm adaptor (1)*
Place the 45 rpm adaptor on the spindle to play a 7 in (17 cm) vinyl record (EP record).
When you are not using the 45 rpm adaptor, keep it in its storage hole.
![]()
- Dust cover hinges (2)*
![]()
- AC adaptor (1)
![]()
- Operating Instructions (this manual)
* The 45 rpm adaptor and dust cover hinges are attached to a side surface of your turntable's packaging material.


Note
Keep the packaging materials in case you need to transport your turntable for repair.
Assembling the Turntable
Note
- When you purchased your turntable, a stylus's protective cover was attached to the stylus. Leave on the cover as you assemble your turntable.
- Do not connect your turntable to a power outlet with the AC adaptor until you are finished with assembly.
- The stylus is a high precision component. Do not touch the stylus while handling it. Touching the stylus with your fingers, or banging the stylus into the platter, may cause damage to the stylus.
- To move your turntable after assembling the turntable,
- attach the stylus's protective cover,
- remove the platter, and
- pass a string through the hole in the tone arm rest and fix the tone arm and the tone arm rest.
Precautions on placement
- Place the unit on a level surface.
- Avoid placing the unit near electrical appliances (such as a television, hair dryer, or fluorescent lamp) which may cause hum or noise.
- Place the unit where it will not be subject to any vibration, such as from speakers, slamming of doors, etc.
- Keep the unit away from direct sunlight, extremes of temperature, and excessive dust and moisture.
- Keep the unit away from electronic devices that may emit radio waves or electromagnetic noise.
Attaching the platter
- Place the platter on the spindle.
Keep the platter level while placing it on the spindle.

Note
Hold the platter firmly so as not to drop the platter as it may cause personal injuries or damage to your turntable. - Turn the platter to the position where you can see the motor pulley through the rectangular hole with the tips of the red ribbon taped on the platter.

- Peel off the adhesive tape, pull and hold the red ribbon, and then hook the drive belt around the motor pulley.
![]()
Note- Be careful to not let the drive belt twist. If the drive belt is twisted while placing it around the motor pulley, the speed will become unstable and the platter will stop after it begins rotating. If this happens, place the drive belt around the motor pulley again.
- When placing the drive belt around the platter, do not stretch the drive belt roughly. Doing so degrades the drive belt, which causes the sound's pitch to fluctuate and be too high.
- If the drive belt comes off of the platter's inner circle while you are placing the drive belt around it, temporarily remove the platter. Turn the platter over and wind the drive belt around the circumference of the inner circle. Then, start again from the beginning of the procedure.
- Be sure to remove the red ribbon after you place the drive belt around the motor pulley. The red ribbon is intended to help you with this work. Placing the drive belt around the motor pulley is still possible without the red ribbon. The red ribbon is no longer needed once you have attached the platter.
- Place the mat for the platter onto the platter.
- Do the following operations to set the operating mechanism for the platter and tone arm to its initial state.
- Remove the string that is holding the tone arm.
- Press the UP/DOWN button to raise the tone arm.
- Use your hand to slowly rotate the platter clockwise 10 times.
- Press the UP/DOWN button to lower the tone arm.


The platter's rotation and the tone arm's movement can be stabilized.
Attaching the dust cover
- Insert the supplied dust cover hinges to the hinge pockets on the dust cover.

- Align the attached hinges with the hinge pockets on the rear of your turntable and push in the dust cover.

Tip
To remove the dust cover from the turntable, fully open the dust cover, grasp both sides near the bottom of the cover, and then gently pull it out in the upward direction.


Connecting Your Turntable
Connecting via the audio cable
Note
- Be sure to turn off the audio device, such as a stereo system or an amplifier, before connection.
- Be sure to make all the connections before you connect the AC adaptor to a power outlet.
- Connect the audio cable, which comes out from the back of the turntable, to the PHONO input jack, AUX input jack, or analog input jack for the audio device.
Connect the white plug to the white (L) jack and the red plug to the red (R) jack.
![]()
Note
Be sure to insert the plugs firmly into the jacks. Loose connection will cause playback noises. - Switch the OUTPUT SELECT switch on the back of the turntable according to the connected audio device's jack.
- If the audio device has a PHONO input jack (connected to the PHONO input jack)
Set the switch to PHONO. An audio signal from the MM cartridge is output from the audio cable without passing through the phono preamp built into the turntable. The phono preamp for the audio device is used. - If the audio device does not have a PHONO input jack (connected to the AUX input jack, VIDEO input jack, etc.)
Set the switch to LINE. The audio signal that passes through the phono preamp built into the turntable is output from the audio cable.
![]()
Note- If you are only using the BLUETOOTH connection and not connecting the turntable to another device using the audio cable, place the audio cable so that its metal tips do not touch each other or any metallic parts from racks or other devices. Then, set the OUTPUT SELECT switch to LINE to use the turntable.
- Connecting the audio cable to the PHONO input jack and setting the OUTPUT SELECT switch to LINE may produce a very loud sound that may break the amp or speaker. Always set the switch to PHONO when connecting to the PHONO input jack. Connecting the audio cable to an analog input jack, such as an AUX input jack, and setting the OUTPUT SELECT switch to PHONO produces only a very quiet sound. Always set the switch to LINE when connecting to the analog input jack.
- If the audio device has a PHONO input jack (connected to the PHONO input jack)


Tip
The OUTPUT SELECT switch is set to LINE at the time of purchase.
- Connect the AC adaptor.

Note
To avoid noise interference, place the AC adaptor body away from your turntable as far as possible.

Connecting with the BLUETOOTH function
You can enjoy playing vinyl records by using your turntable's BLUETOOTH function to connect wirelessly to a playback device (not supplied) that supports BLUETOOTH wireless technology, such as BLUETOOTH speakers or BLUETOOTH headphones. The jolts from pressing the BLUETOOTH button/ PAIRING button while playing a vinyl record may cause the stylus to skip. We recommend connecting to BLUETOOTH before playing a vinyl record.
Note
Do not connect to headphones for which you cannot adjust the volume. Audio tracks may be played at very loud volumes.
Registering (pairing) devices to your turntable
When you first connect your turntable to a playback device that supports BLUETOOTH wireless technology, you must pair it with the device.
Because your turntable can register information for up to 8 paired devices, you do not have to pair the next or subsequent times you connect the device to the turntable.
- Place the playback device that supports BLUETOOTH wireless technology, to which you want to connect, as close to your turntable as possible.
- Press and hold your turntable's
BLUETOOTH button/![]() PAIRING button for about 2 seconds, and then release it.
PAIRING button for about 2 seconds, and then release it.
The BLUETOOTH indicator rapidly flashes blue.
![]()
- Turn on the pairing mode for the playback device that supports BLUETOOTH wireless technology, to which you want to connect.
![]()
The above illustration is one example of a device that is connecting.
For how to turn on the pairing mode for the device to which you want to connect, refer to the user's instructions supplied with the device.
The BLUETOOTH indicator stops flashing blue and remains lit when pairing is complete.


Note
If you are only using the BLUETOOTH connection and not connecting your turntable to another device using the audio cable, set the OUTPUT SELECT switch on the back of the turntable to LINE to use the turntable.
Tip
- Once you have paired your turntable and device, you can connect to the paired device simply by giving a short press to the BLUETOOTH button/
![]() PAIRING button to enable your turntable's BLUETOOTH function. You can also connect to the paired device and play vinyl records by pressing the START button on the front of the turntable when the BLUETOOTH indicator is lit orange (in standby).
PAIRING button to enable your turntable's BLUETOOTH function. You can also connect to the paired device and play vinyl records by pressing the START button on the front of the turntable when the BLUETOOTH indicator is lit orange (in standby). - Press the BLUETOOTH button/
![]() PAIRING button to disengage from the BLUETOOTH connection. The BLUETOOTH indicator turns off.
PAIRING button to disengage from the BLUETOOTH connection. The BLUETOOTH indicator turns off. - You can register information for a maximum of 8 devices paired to your turntable. You can delete all information for paired devices by pressing and holding the BLUETOOTH button/
![]() PAIRING button for about 10 seconds, and then releasing it.
PAIRING button for about 10 seconds, and then releasing it.
If you cannot register (pair) devices
- If there are playback devices, which support BLUETOOTH wireless technology nearby, that have the BLUETOOTH function enabled, but some of them are not the device with which you want to pair, disable their BLUETOOTH function and try pairing again.
- With the pairing operation, the device with which you do not want to pair may be turned on and connected to the turntable automatically. If this occurs, change the device's setting not to turn on by the BLUETOOTH connection, turn off the device, and try pairing again.
- You cannot pair your turntable with smartphones, TVs, or computers. The turntable can use the BLUETOOTH function to send data to playback devices that support BLUETOOTH wireless technology; however, because the turntable cannot receive data from smartphones, TVs, or computers, the turntable cannot pair with them.
Listening to a Vinyl Record
Playing a Vinyl Record
Note
- Before you play a vinyl record, turn down the audio device's volume. The loud, crackling noise made by the tone arm descending and the stylus coming into contact with the vinyl record could damage the speakers or audio device. Wait until the stylus has completely descended, and then adjust the volume.
- Even new vinyl records may produce a crackling noise when you play them. Please note that this noise is a characteristic of playing vinyl records. Also, be aware of the storage practices for vinyl records, as dust and dirt that stick to the vinyl records when they are taken out of their sleeves may cause noise.
- Place a vinyl record onto the platter.

Note
Place only one vinyl record on the platter at a time.
To play 7 in (17 cm) vinyl records (EP records)
Place the supplied 45 rpm adaptor on the spindle to play 7 in (17 cm) vinyl records (EP record).
When you have finished using the 45 rpm adaptor, keep it in its storage hole. - Use the SPEED rotary switch knob to select the rotation speed appropriate for the vinyl record.

Tip
The rotation speed is usually printed on the center label of the vinyl record or the record jacket. - Use the SIZE rotary switch knob to select the size (in inches) of the vinyl record.
Set it to "12" for LP records, or "7" for EP records.

- Remove the stylus protective cover.
![]()
Note
Remove the stylus protective cover with care so as not to damage the stylus. - Press the START button.
Playback begins when the tone arm automatically descends to its position, which was set using the SIZE rotary switch knob, at the beginning of the vinyl record.

Note- When closing the dust cover, close it slowly to avoid making physical force that may cause the stylus to skip.
- During playback, keep your hands away from the tone arm and the turning vinyl record.
- During playback, do not change the settings with the switches on the rear of your turntable.
- Adjust the volume using the audio device.


To stop playback
Press the STOP button. The tone arm returns to the tone arm rest. The platter stops rotating.
To pause playback
Press the UP/DOWN button to raise the stylus off the vinyl record. The platter keeps rotating.
When playback is finished
The tone arm returns to the tone arm rest automatically, then the platter stops rotating.
To play a different part of the vinyl record
- After performing step 4, press the UP/ DOWN button to lift the tone arm.
Move the tone arm to the position you desire. - Press the UP/DOWN button.
The tone arm descends to the vinyl record, then playback starts.
Playing via a BLUETOOTH connection
To connect your turntable for the first time to a playback device that supports BLUETOOTH wireless technology using the BLUETOOTH function, you must register (pair) the device in advance.
- First, turn on the playback device and make it ready to receive data through a BLUETOOTH connection. Then, press the BLUETOOTH button/
![]() PAIRING button on your turntable to enable the BLUETOOTH function.
PAIRING button on your turntable to enable the BLUETOOTH function.
If the BLUETOOTH connection is successful, your turntable's BLUETOOTH indicator lights blue. - Do steps 1 through 5 of "Playing a Vinyl Record" to play a vinyl record.
Tip
If you disable the BLUETOOTH function of the playback device connected via BLUETOOTH wireless technology, your turntable's BLUETOOTH indicator lights orange and the turntable goes into standby. In standby, the turntable automatically connects to the playback device if the playback device's BLUETOOTH function is re-enabled and the turntable is playing.
To switch playback devices
To switch to another playback device that supports BLUETOOTH wireless technology, which has already been paired, turn off the playback device that is playing, and then enable the BLUETOOTH function for the playback device you want to use.
To switch to a new device that has not been paired, turn off the device that is playing, and then follow the procedure in "Registering (pairing) devices to your turntable" to finish pairing.
Recording a Vinyl Record
Recording Audio Tracks onto a Computer
You can use a USB cable (not supplied) to connect your turntable to a computer, and then record audio tracks from the vinyl record to your computer.
Note
- You need to install recording software on the computer to record audio tracks. If no recording software is installed, you cannot record audio tracks, even if you connect a computer to your turntable. Set up any music recording software (not included). You can also use freeware, such as Audacity®. Download Audacity from the following URL.
http://www.audacityteam.org/
Sony does not offer support for this software. - The USB output signals can be used only for recording, not for playback.
System requirements
Operating systems:
Windows 7/Windows 8.1/Windows 10 (32/64 bit)
(The latest service pack is required.)
OS X Mavericks (10.9)
OS X Yosemite (10.10)
OS X El Capitan (10.11)
macOS Sierra (10.12)
macOS High Sierra (10.13)
macOS Mojave (10.14)
macOS Catalina (10.15)
Any operating systems other than the listed ones are not supported.
The standard driver software of Windows and Mac is supported. No installation of the dedicated driver software is needed.
Note
A recording application is not assured to work successfully:
- on every computer with one of the listed operating systems
- on a homemade computer
- on a computer with a user-upgraded operating system
- on a multi-boot computer
- with the power-saving features of the computer: System Suspend or Sleep (Standby)
- on a computer with an operating system for which support has ended
Connecting to a computer
- Connect a computer to your turntable.
![]()
- Press the power
![]() ON/
ON/ ![]() STANDBY button on the back of your turntable to turn on the turntable.
STANDBY button on the back of your turntable to turn on the turntable.
Note- Be sure to use only the USB cable (not supplied) when connecting a computer to your turntable. Do not use a USB hub or a USB extension cable for connection.
- Be sure to insert the USB cable plug straight and all the way into the USB port. Do not force it obliquely into the port as it may cause malfunctions.
- When you do not intend to record audio tracks onto a computer, it is recommended that you disconnect the USB cable from your turntable. With a computer connected to the turntable via the USB port, playback with the connected audio device may cause noises.
- When a computer is connected to your turntable to record with a USB cable, audio that has been adjusted using the turntable's built-in phono preamp is sent to the computer's USB port, regardless of the position of the OUTPUT SELECT switch on the back of the turntable.

Setting up your computer
You must do the settings for the recording device and the playback device on your computer in advance to record the vinyl record's audio tracks. When doing the settings, make sure that your turntable is connected to the computer with a USB cable and that the turntable is turned on.
For Windows users
The following procedure is an example when using Windows 10 as the operating system.
- Click [Start], and then select [Windows System] from the "W" field in the list of applications displayed.
- Select [Control Panel] from the displayed list.
- Select [Sound] from the control panel's list.
- Select the [Playback] tab.
- Select your computer's speakers and select [Set Default].
The default playback devices vary depending on your computer. For details, refer to your computer's operating instructions and help file.
Note
Selecting [USB Audio CODEC] on the [Playback] tab sets your turntable as a device for sound output. Note that no sound will be output if you select this option. - Select the [Recording] tab and make sure that [USB Audio CODEC] is set as the default device.
[USB Audio CODEC] does not appear unless your turntable, which is connected to the computer, is on. - Select [OK].
For Mac users
- Select the Apple menu in the menu bar and [System Preferences].
- Select [Sound].
- Select the [Output] tab and [Internal Speakers] under [Select a device for sound output:].
Note
Selecting [USB Audio CODEC] under [Select a device for sound output:] sets your turntable as a device for sound output. Note that no sound will be output if you select this option. - Select the [Input] tab and [USB Audio CODEC] under [Select a device for sound input:].
To hear sounds during recording
When the recorded sound on the computer is output but no sound is output during recording, enable the setting (Software playthrough of input) of your recording software to send the input directly to the playback device. Depending on the recording software you use, this setting is not available and the procedure to enable the setting varies.
Maintenance
Cleaning the Stylus
The stylus is a high precision component. Handle it with care to avoid damage. Use a commercial cleaning product for cleaning the stylus.
Replacing the Stylus
The stylus may become worn out, damaged, or dirty beyond cleaning depending on your use case. In such a case, replace the stylus.
To obtain a spare stylus, contact your dealer or the customer support website.
Note
- Do not use a replacement stylus made by another company.
- Be sure to attach the stylus protective cover before you replace the stylus so as not to harm your fingertips or damage the stylus.
To remove the stylus
- Turn off your turntable and the connected audio device and unplug the AC adaptor from the power outlet.
- Attach the stylus protective cover to the stylus.
![]()
- Hold the cartridge body (
![]() ) with one hand, grasp the stylus with the other, and then pull the stylus in the direction of the arrow to remove it from the cartridge body.
) with one hand, grasp the stylus with the other, and then pull the stylus in the direction of the arrow to remove it from the cartridge body.
![]()

 ) with one hand, grasp the stylus with the other, and then pull the stylus in the direction of the arrow to remove it from the cartridge body.
To attach the stylus
- Attach the stylus protective cover to the spare stylus.
- Hold the cartridge body (
![]() ) with one hand and then insert the tab on the spare stylus into the receptacle on the cartridge body.
) with one hand and then insert the tab on the spare stylus into the receptacle on the cartridge body.
![]()
- Push the stylus in the direction of the arrow until it clicks into place.
![]()


Replacing the Drive Belt
The drive belt will wear or may even break over time. In such a case, replace it with a new one.
To obtain a spare drive belt, contact your dealer or the customer support website.
- Turn off your turntable and the connected audio device and unplug the AC adaptor from the power outlet.
- Remove the mat for the platter.
- Unhook the drive belt from the motor pulley.
![]()
- Put your finger and thumb into the platter's round holes to hold the platter and remove the platter.

- Turn the platter upside down and remove the drive belt.
![]()
- Wind a new drive belt around the platter while keeping it untwisted.
Follow the steps in "Assembling the Turntable" to finish assembly.
Note
Spare drive belts do not have the red indication ribbon attached.


Cleaning the Dust Cover and the Turntable Body
Use a dry, soft cloth to clean the dust cover and the turntable body.
When it is hard to wipe off the soil, use a cloth moistened with a mild detergent solution. Do not use any chemical solution, such as alcohol, benzine, or paint thinner, that damages the finish.
Troubleshooting
When you find your turntable not working properly, first review the following suggestions before you consider requesting for repair. If they do not help solving your problem, contact your dealer or the customer support website.
Vinyl record playback
You hear no sounds from the computer or audio device connected via the USB port.
- Connect the audio cable on the back of the turntable to the audio device to play vinyl records on your turntable.
- Use the USB port when recording audio tracks to the computer using recording software. You cannot use it for a connection with an audio device.
The tone arm skips or skates.
- Your turntable is not positioned level. Place the turntable on a level surface.
- The vinyl record is dusty or scratched. Clean the surface with a commercial record cleaning product or replace the vinyl record.
You experience sound problems.
- If the dirty stylus is causing frequent noises, clean the stylus with a commercial stylus cleaning product. If the stylus is worn out, replace the stylus.
- If the sound pitch is unstable, the drive belt may be worn out. Replace the drive belt.
- If the dusty vinyl record is causing frequent noises, clean the surface with a commercial record cleaning product.
- The stylus is worn out. Replace it with a new one.
You hear rumbling or low-frequency howling noises*.
Your turntable is placed too close to speakers. Move the turntable away from the speakers.
* This phenomenon, called "acoustic feedback," occurs when vibrations that travel through the air or solid objects (such as shelves, a cabinet, or the floor) from speakers are picked up by the stylus, amplified and reproduced through the speakers.
You hear noises.
- Make sure that the OUTPUT SELECT switch on the rear of your turntable is set to LINE. If the PHONO/LINE switch is set to PHONO when the turntable is connected to any other input jacks than the PHONO input jacks on the audio device, you may hear playback noises. When the PHONO/LINE switch is set to LINE, do not connect the turntable to the PHONO input jacks on the audio device.
- Make sure that a computer is NOT connected to your turntable with a USB cable. With a computer connected to the turntable via the USB port, playback with the connected audio device may cause noises.
- Noise may be produced when playing vinyl records if an audio device and computer are connected with a USB cable or audio cable. If this happens, disconnect the computer and audio device.
The sound pitch is too high or low.
- A wrong rotation speed is selected. Check the center label of the vinyl record or the record jacket for the rotation speed and select the appropriate one. Rotate the SPEED rotary switch knob to select "33" for 33 1/3 rpm records or "45" for 45 rpm records.
- The drive belt may be twisted or worn out. Untwist the drive belt.
The sound pitch fluctuates.
The stylus is worn out. Replace it with a new one.
The drive belt is worn out or broken.
Replace the drive belt. To obtain a spare drive belt, contact your dealer or the customer support website.
The platter does not turn.
- Make sure that the AC adaptor is firmly connected to a power outlet and the DC IN 12V jack on your turntable.
- Make sure that the drive belt is completely hooked around the motor pulley.
Playback sound is too low in volume or distorted.
Make sure that the OUTPUT SELECT switch selection on your turntable matches the type of the input jacks on the audio device used for connection with the turntable.
BLUETOOTH connections
You cannot pair via the BLUETOOTH wireless technology.
- If there are playback devices, which support BLUETOOTH wireless technology nearby, that have the BLUETOOTH function enabled, but some of them are not the device with which you want to pair, disable their BLUETOOTH function and try pairing again.
- With the pairing operation, the device with which you do not want to pair may be turned on and connected to the turntable automatically. If this occurs, change the device's setting not to turn on by the BLUETOOTH connection, turn off the device, and try pairing again.
- The procedure for turning on the pairing mode differs depending on the playback device that supports BLUETOOTH wireless technology. For details, refer to the user's instructions supplied with the device.
You cannot connect your turntable to the playback device, which supports BLUETOOTH wireless technology, to which you want to connect.
If there are playback devices, which support BLUETOOTH wireless technology nearby, that have the BLUETOOTH function enabled, but some of them are not the device to which you want to connect, disable their BLUETOOTH function.
You cannot connect your smartphone, TV, or computer.
Your turntable can use the BLUETOOTH function to send data to playback devices that support BLUETOOTH wireless technology; however, because your turntable cannot receive data from smartphones, TVs, or computers, your turntable cannot connect to them.
The BLUETOOTH wireless communication range is short.
Try the following.
- If there are other electronic devices connected to your turntable and the playback device, disconnect them.
- Connect the turntable to a power outlet to which a microwave is not connected.
- Place the turntable on a table not made of metal.
Repair Services
When you find your turntable not working properly, first review the suggestions listed in "Troubleshooting" to find out if your problem needs repair.
If the suggestions do not help solving the problem, contact your dealer or the customer support website.
Spare components retention period: Sony retains functional turntable components for repair (components required to maintain the turntable functions) for at least eight years after discontinuation of the product, as instructed by the Ministry of Economy, Trade and Industry of Japan, and will provide repair services during this retention period. Depending on the component that needs repair, however, repair services may still be provided beyond the retention period. For more information, contact the customer support website.
Before you contact your dealer or the customer support website, you are advised to have the following information at hand:
- Model number: PS-LX310BT
- Serial number at the bottom of your turntable:
- Description of the defect(s): Please describe as much as you can.
- Date of your purchase:
- Your dealer name:
If the stylus or the drive belt is damaged or worn out due to improper use, repair services will be provided at your expense.
Specifications
| Motor and Platter | |
| Drive system | Belt-drive |
| Motor | DC motor |
| Platter | 296 mm dia. (aluminum die-cast) |
| Speeds | 33 1/3 and 45 rpm, 2 speed |
| Wow and flutter | 0.1% (WRMS) |
| S/N ratio | More than 50 dB (DIN-B) with the supplied cartridge |
| Tone Arm | |
| Type | Dynamic balanced J shaped arm |
| Effective arm length | 197 mm |
| USB Connectivity | |
| Output port | USB2.0 Plug-in power Type-B Powered by PC (DC5V 100 mA) |
| Cartridge | |
| Type | MM |
| Stylus pressure | 3 g |
| Output level | 2.5 mV |
| General | |
| Power supply | DC 12 V 0.8 A (AC adaptor) |
| Power consumption | 1.8 W |
| Dimensions | 430 mm x 108 mm x 367 mm (17 in x 4 3/8 in x 14 1/2 in) (width/height/depth) |
| Weight | Approx. 3.5 kg (7 Ib 11 1/2 oz) |
| AC adaptor | |
| Input | AC 100-240 V 0.35 A 50/60 Hz |
| Output | DC 12 V 0.8 A (AC adaptor) |
| BLUETOOTH section | |
| Communication system | BLUETOOTH Specification version 4.2 |
| Output | BLUETOOTH Specification Power Class 2 |
| Maximum communication range | Line of sight approx. 10 m (33 feet)*1 |
| Frequency band | 2.4 GHz band |
| Modulation method | FHSS |
| Compatible BLUETOOTH profiles*2 | A2DP 1.3 |
| Supported Codecs*3 | SBC*4, Qualcomm® aptX™ audio |
| Transmission range (A2DP) | 20 Hz - 20,000 Hz (Sampling frequency 48 kHz) |
- The actual range will vary depending on factors such as obstacles between devices, magnetic fields around a microwave oven, static electricity, cordless phone, reception sensitivity, antenna's performance, operating system, software application, etc.
- BLUETOOTH standard profiles indicate the purpose of BLUETOOTH communication between devices.
- Codec: Audio signal compression and conversion format
- Subband Codec
Design and specifications are subject to change without notice.

To reduce the risk of fire or electric shock, do not expose this apparatus to rain or moisture.
The AC adaptor is for use in dry, indoor locations.
To reduce the risk of fire, do not cover the ventilation opening of the appliance with newspapers, tablecloths, curtains, etc. Do not expose the appliance to naked flame sources (for example, lighted candles).
To reduce the risk of fire or electric shock, do not expose this appliance to dripping or splashing, and do not place objects filled with liquids, such as vases, on the appliance.
Do not install the appliance in a confined space, such as a bookcase or built-in cabinet.
The AC adaptor must not be covered over by anything and should only be used in an ambient temperature of up to 45°C (113°F).
The unit is not disconnected from the mains as long as it is connected to the AC outlet, even if the unit itself has been turned off.
As the main plug of AC power adaptor is used to disconnect the AC power adaptor from the mains, connect it to an easily accessible AC outlet.
Should you notice an abnormality in it, disconnect it from the AC outlet immediately.
The AC adaptor is not available for repair and its use should be terminated immediately when the AC adaptor is found damaged or defective.

RISK OF ELECTRIC SHOCK
DRY LOCATION USE ONLY
Polarity of DC output of the AC adaptor

For the stereo turntable system
The name plate is located on the bottom of the stereo turntable system.
About the AC adaptor
The model name of the AC adaptor is located at the bottom of the AC adaptor.
To check the firmware version of your turntable
You can check the firmware version of your turntable on the computer. Update the firmware by downloading updates provided on the Sony Support Page when the updates are available.
Important Safety Instructions
For the customers in the U.S.A.
- Read these instructions.
- Keep these instructions.
- Heed all warnings.
- Follow all instructions.
- Do not use this apparatus near water.
- Clean only with dry cloth.
- Do not block any ventilation openings. Install in accordance with the manufacturer's instructions.
- Do not install near any heat sources such as radiators, heat registers, stoves, or other apparatus (including amplifiers) that produce heat.
- Do not defeat the safety purpose of the polarized or grounding-type plug. A polarized plug has two blades with one wider than the other. A grounding type plug has two blades and a third grounding prong. The wide blade or the third prong are provided for your safety. If the provided plug does not fit into your outlet, consult an electrician for replacement of the obsolete outlet.
- Protect the power cord from being walked on or pinched particularly at plugs, convenience receptacles, and the point where they exit from the apparatus.
- Only use attachments/accessories specified by the manufacturer.
- Use only with the cart, stand, tripod, bracket, or table specified by the manufacturer, or sold with the apparatus. When a cart is used, use caution when moving the cart/apparatus combination to avoid injury from tip-over.
![]()
- Unplug this apparatus during lightning storms or when unused for long periods of time.
- Refer all servicing to qualified service personnel. Servicing is required when the apparatus has been damaged in any way, such as power-supply cord or plug is damaged, liquid has been spilled or objects have fallen into the apparatus, the apparatus has been exposed to rain or moisture, does not operate normally, or has been dropped.

Precautions
On safety
- Before operating the unit, check that the operating voltage of your unit is identical with that of your local power supply.
- Should any solid object or liquid fall into the cabinet, unplug the unit and have it checked by qualified personnel before operating it any further.
- Unplug the unit from the wall outlet if it is not to be used for an extended period of time. To disconnect the cord, pull it out by the plug. Never pull the cord itself.
On repacking
Keep the carton and packing materials. They provide an ideal container to transport the unit. If you have any question or problem concerning your unit that is not covered in this manual, please consult your nearest Sony dealer.
Note on recording
The recorded music is limited to private use only. Use of the music beyond this limit requires permission of the copyright holders.
Customer Support Websites
For information about purchasing spare components, accessories, and other support services, visit the customer support website designated to your area of residency.
For customers in Europe: http://www.sony.eu/support
For customers in the U.S.A.: http://esupport.sony.com/US
For customers in Canada: http://esupport.sony.com/CA/
For customers in other countries/ regions: http://www.sony-asia.com/support
If you have any questions about this product:
Visit: www.sony.com/support
Contact: Sony Customer Information Service
Center at 1-800-222-SONY (7669)
Write: Sony Customer Information Service
Center 12451 Gateway Blvd., Fort Myers, FL 33913
Documents / Resources
References
![www.audacityteam.org]() Audacity ® | Free Audio editor, recorder, music making and more!
Audacity ® | Free Audio editor, recorder, music making and more!Sony Support Europe
![esupport.sony.com]() http://esupport.sony.com/US
http://esupport.sony.com/US![esupport.sony.com]() http://esupport.sony.com/CA/
http://esupport.sony.com/CA/![www.sony-asia.com]() http://www.sony-asia.com/support
http://www.sony-asia.com/support![www.sony.com]() http://www.sony.com/support
http://www.sony.com/support

Download manual
Here you can download full pdf version of manual, it may contain additional safety instructions, warranty information, FCC rules, etc.
Advertisement


Need help?
Do you have a question about the PS-LX310BT and is the answer not in the manual?
Questions and answers