Sony PS-LX310BT Operating Instructions Manual
Stereo turntable system
Hide thumbs
Also See for PS-LX310BT:
- User manual ,
- Operating instructions manual (168 pages) ,
- Service manual (37 pages)
Chapters
Table of Contents
Troubleshooting

Related Manuals for Sony PS-LX310BT


Summary of Contents for Sony PS-LX310BT
- Page 1 User Manual of Product 1: Sony PS-LX310BT Belt Drive Turntable: Fully Automatic Wireless Vinyl Record Player with Bluetooth and USB Output Black User Manual of Product 2: Sony STRDH190 2-ch Home Stereo Receiver with Phono Inputs & Bluetooth Black...
- Page 2 4-748-755-12 (1) Stereo Turntable System Getting Started Listening to a Vinyl Record Operating Instructions Recording a Vinyl Record Maintenance Additional Information PS-LX310BT...
-
Page 3: Owner's Record
To reduce the risk of fire, do not cover the firmware by downloading updates provided ventilation opening of the appliance with on the Sony Support Page when the updates newspapers, tablecloths, curtains, etc. are available. Do not expose the appliance to naked flame sources (for example, lighted candles). - Page 4 This equipment generates, uses and can Model Name : PS-LX310BT radiate radio frequency energy and, if not Responsible Party : Sony Electronics Inc. installed and used in accordance with the Address : 16535 Via Esprillo, San Diego, CA instructions, may cause harmful interference 92127 USA to radio communications.
-
Page 5: Precautions
If you have any question or problem concerning your unit that is not covered in This equipment complies with ISED radiation this manual, please consult your nearest Sony exposure limits set forth for an uncontrolled dealer. environment and meets RSS-102 of the ISED... -
Page 6: Features
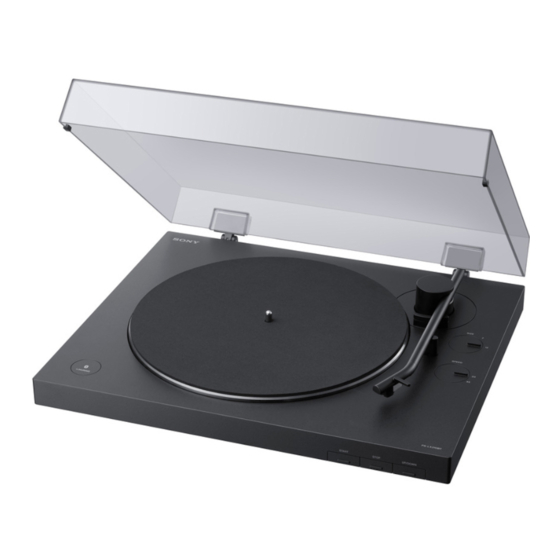
Features PS-LX310BT is a stereo turntable system designed for analog playback of vinyl records. Assemble your turntable to use it for the first time. Your turntable does not have built-in speakers. To listen to audio on vinyl records, either use an audio cable to connect to an audio device or use the BLUETOOTH®... -
Page 7: Table Of Contents
Table of Contents Owner’s Record ....... 2 Precautions ........4 Features ........... 5 Parts and Controls ......7 Getting Started Checking the Supplied Items ..10 Assembling the Turntable ....11 Connecting Your Turntable .... 13 Listening to a Vinyl Record Playing a Vinyl Record ....16 Recording a Vinyl Record Recording Audio Tracks onto a Computer ........19... -
Page 8: Parts And Controls
Parts and Controls Front/Side Spindle (page BLUETOOTH button/ PAIRING button (page Mat for the platter (page 10, 12 Enables/disables the BLUETOOTH function. Press for about 2 seconds and release to turn Platter (page 10, 11 on your turntable's pairing mode. Place the platter on the spindle while you are ... - Page 9 Tone arm (page Stylus (page 21) The stylus's protective cover was attached SIZE rotary switch knob (page when you purchased your turntable. Attach the cover when assembling your turntable and Rotate to set to the appropriate size of the when you are not using your turntable for a vinyl record to be played.
- Page 10 Rear OUTPUT SELECT switch (page 13) Power STANDBY button (page 19) Switch to the appropriate output format of the device you are using when an audio device, Turn on/off your turntable. such as a stereo system or an amplifier, is If playback does not start, even when you connected.
-
Page 11: Checking The Supplied Items
• Dust cover hinges (2)* Getting Started Checking the Supplied • AC adaptor (1) Items Make sure that you have all of the supplied accessories listed below. If you find anything missing, contact your dealer or the customer support website. (See page •... -
Page 12: Assembling The Turntable
Attaching the platter Assembling the Turntable Place the platter on the spindle. Keep the platter level while placing it on Note the spindle. • When you purchased your turntable, a stylus's protective cover was attached to the stylus. Leave on the cover as you assemble your turntable. - Page 13 Peel off the adhesive tape, pull and • Use your hand to slowly rotate the platter clockwise 10 times. hold the red ribbon, and then hook • Press the UP/DOWN button to lower the drive belt around the motor pulley. the tone arm.
-
Page 14: Connecting Your Turntable
Switch the OUTPUT SELECT switch Connecting Your on the back of the turntable Turntable according to the connected audio device's jack. • If the audio device has a PHONO input jack (connected to the PHONO Connecting via the audio input jack) cable Set the switch to PHONO. - Page 15 Connecting with the The OUTPUT SELECT switch is set to LINE at the BLUETOOTH function time of purchase. Connect the AC adaptor. You can enjoy playing vinyl records by using your turntable's BLUETOOTH function to connect wirelessly to a playback device (not supplied) that supports BLUETOOTH wireless technology, such as BLUETOOTH speakers or BLUETOOTH headphones.
- Page 16 Press and hold your turntable's Note BLUETOOTH button/ PAIRING button If you are only using the BLUETOOTH connection and not connecting your turntable to another for about 2 seconds, and then release it. device using the audio cable, set the OUTPUT The BLUETOOTH indicator rapidly flashes blue.
-
Page 17: Listening To A Vinyl Record
Use the SPEED rotary switch knob to Listening to a Vinyl select the rotation speed Record appropriate for the vinyl record. Playing a Vinyl Record Note • Before you play a vinyl record, turn down the audio device's volume. The loud, crackling noise made by the tone arm descending and the stylus coming into contact with the vinyl record could damage the speakers or audio device. - Page 18 Remove the stylus protective cover. Adjust the volume using the audio device. To stop playback Press the STOP button. The tone arm returns to the tone arm rest. The platter stops rotating. To pause playback Stylus protective Press the UP/DOWN button to raise the cover stylus off the vinyl record.
- Page 19 Playing via a BLUETOOTH connection To connect your turntable for the first time to a playback device that supports BLUETOOTH wireless technology using the BLUETOOTH function, you must register (pair) the device in advance. (See page 14.) First, turn on the playback device and make it ready to receive data through a BLUETOOTH connection.
-
Page 20: Recording A Vinyl Record
(not included). You can also use freeware, such as Audacity®. Download Audacity from the following URL. http://www.audacityteam.org/ Sony does not offer support for this software. • The USB output signals can be used only for To the USB recording, not for playback. - Page 21 • When you do not intend to record audio Note tracks onto a computer, it is recommended Selecting [USB Audio CODEC] on the [Playback] that you disconnect the USB cable from your tab sets your turntable as a device for sound turntable.
-
Page 22: Maintenance
Hold the cartridge body () with Maintenance one hand, grasp the stylus with the other, and then pull the stylus in the direction of the arrow to remove it Cleaning the Stylus from the cartridge body. The stylus is a high precision component. Handle it with care to avoid damage. -
Page 23: Replacing The Drive Belt
Turn the platter upside down and Replacing the Drive Belt remove the drive belt. The drive belt will wear or may even break over time. In such a case, replace it with a new one. To obtain a spare drive belt, contact your dealer or the customer support website. -
Page 24: Additional Information
You hear rumbling or low-frequency Additional Information howling noises*. Your turntable is placed too close to speakers. Move the turntable away from the speakers. Troubleshooting * This phenomenon, called “acoustic feedback,” occurs when vibrations that travel through the air or solid objects (such as shelves, a cabinet, or the When you find your turntable not working floor) from speakers are picked up by the stylus, properly, first review the following... -
Page 25: Repair Services
Spare components retention period: turned on and connected to the turntable Sony retains functional turntable components automatically. If this occurs, change the for repair (components required to maintain device's setting not to turn on by the... -
Page 26: Specifications
BLUETOOTH section Specifications Communication system BLUETOOTH Specification version 4.2 Output Motor and Platter BLUETOOTH Specification Power Class 2 Drive system Maximum communication range Belt-drive Line of sight approx. 10 m (33 feet)* Motor Frequency band DC motor 2.4 GHz band Platter Modulation method 296 mm dia. -
Page 27: Index
• The BLUETOOTH® word mark and logos are registered trademarks owned by the Bluetooth SIG, Inc. and any use of such marks by Sony Corporation is under license. • All other trademarks and registered trademarks are trademarks or registered trademarks of their respective holders. In... - Page 29 © 2019 Sony Corporation Printed in China...
- Page 30 Stereo Receiver Connection and Preparation Playback Operating Instructions Tuner Menu/Other Functions Troubleshooting/ Specifications STR-DH190...
- Page 31 Refer to ÉTATS-UNIS. NON APPLICABLE AU these numbers whenever you call upon your CANADA, Y COMPRIS LA PROVINCE DE Sony dealer regarding this product. QUÉBEC. Model No. STR-DH190 For the customers in the USA Serial No.
- Page 32 12) Use only with the cart, stand, tripod, CAUTION bracket, or table specified by the You are cautioned that any changes or manufacturer, or sold with the apparatus. modifications not expressly approved in this When a cart is used, use caution when manual could void your authority to operate moving the cart/apparatus combination to this equipment.
- Page 33 Europe should be sent to the manufacturer’s authorized For the customers in Europe representative, Sony Belgium, bijkantoor van Sony Europe Limited, Da Vincilaan 7-D1, 1935 Disposal of waste batteries Zaventem, Belgium. and electrical and electronic equipment (applicable in the...
- Page 34 Table of Contents Menu/Other Functions Using the Menu ........27 Supplied Items .......... 6 Enjoying High-fidelity Sound Main Features of the Receiver ....6 (Pure Direct) ........29 Parts and Controls ........7 Changing the Name for Each Input and Preset Station (NAME IN) ....29 Viewing Information on the Display Connection and Panel ..........
-
Page 35: Supplied Items
Supplied Items Main Features of the Receiver • Receiver (1) Compatible with BLUETOOTH® wireless technology • Remote control (1) • Connect a WALKMAN®, smartphone, or tablet to the receiver via the BLUETOOTH function to play music content on those devices wirelessly (page 21). •... -
Page 36: Parts And Controls
Parts and Controls Receiver front panel (power) Display panel (page 8) Turns the receiver on or sets it to the DISPLAY (page 30) standby mode. DIMMER Power indicator Adjusts the brightness of the display •Green: The receiver is turned on. - Page 37 VOLUME (page 21) PORTABLE IN jack (page 16) INPUT SELECTOR PHONES jack Selects the input channel connected to Connect headphones here. the device you want to use. Indicators on the display panel Speaker system indicator (page 19) Preset station number (The number will change according to the preset...
- Page 38 Receiver rear panel FM ANTENNA terminal (page 18) SPEAKERS terminals (page 13, 14) AUDIO IN/OUT jacks (page 15, 17) Audio input and output jacks. PHONO IN jacks (page 15) For connecting a turntable. * For service purpose only.
-
Page 39: Remote Control
(power) (page 18) Remote control Turns the receiver on or sets it to the standby mode. SLEEP Sets the receiver to turn off automatically at a specified time. Each time you press this button, the display changes cyclically as follows. 0-30-00 ... -
Page 40: R03 (Size Aaa) Batteries
BLUETOOTH PAIRING (page 22) PRESET +/– Switches the input of the receiver to Selects preset stations or channels. “BLUETOOTH” and sets the receiver to MEMORY* the pairing mode. Stores a station that you are receiving TUNER PRESET 1, 2, 3 (page 25) as a preset station. -
Page 41: Connection And Preparation
Connection and Preparation 1: Preparing Necessary Items Supplied items Make sure that you have all the items listed in “Supplied Items” (page 6). Cables required for connection (not supplied) Speaker cables Stereo audio cables* PHONO cables with grounding wires* 3.5 mm Stereo audio cable* * Not required depending on the connection configuration. -
Page 42: 2: Setting/Connecting Speakers
2: Setting/Connecting Speakers Set up and connect the speakers according to the number of speakers that you are using. This manual describes the installation, connections, and setting procedures using the stereo speaker system with A/B speakers as an example. Note •... - Page 43 Stereo speaker system with A/B speakers You can also enjoy the audio in another location by connecting additional B speakers. Room with the receiver installed Another location : Left speaker : Right speaker A speakers B speakers (in another location) Speaker cable (not supplied) Note If you connect additional B speakers, you can select the speakers you want to use with the SPEAKERS...
-
Page 44: 3: Connecting Audio-Visual Devices
3: Connecting Audio-Visual Devices Note Be sure to make cable connections before connecting the AC power cord (mains lead). • You can connect devices other than those indicated below to the AUDIO IN/OUT jacks. • You can rename each input so that the name can be displayed on the display panel of the receiver (page 29). - Page 45 Note • When you connect a turntable with a PHONO/ LINE switch, be sure to set the PHONO/LINE switch to PHONO. • This receiver equipped with Phono Equalizer amplifier to meet MM type PHONO cartridges. MM type cartridge used on turntable have a variation of audio output level.
- Page 46 Connecting visual devices Blu-ray Disc™ player, DVD player, cable box or satellite box, DVD recorder, VCR, game Video signals Audio signals To the TV’s VIDEO input jack Stereo audio cable (not supplied)
-
Page 47: 4: Connecting The Fm Antenna (Aerial)
4: Connecting the FM 5: Turning on the Antenna (aerial) Receiver Connect the AC power cord (mains lead) to a wall outlet. FM wire antenna (aerial) (supplied) Note • Be sure to fully extend the FM wire antenna (aerial). • After connecting the FM wire antenna (aerial), To the wall outlet keep it as horizontal as possible. -
Page 48: 6: Setting The Speakers
• When you connect speakers to either SPEAKERS 6: Setting the Speakers A or B terminals, connect the speakers with a nominal impedance of 8 ohms or 6 ohms. Switching the speaker system Setting the speaker impedance When two speaker systems are connected Set the appropriate speaker impedance for to the receiver, you can select the speaker the speakers you are using. - Page 49 Adjusting the tone You can adjust the tonal balance of the speakers. BASS +/– TREBLE +/– Press TREBLE + or TREBLE – repeatedly to adjust the treble level. Press BASS + or BASS – repeatedly to adjust the bass level. You can adjust from –10 dB to +10 dB in 1 dB step.
-
Page 50: Playback
Playing Back Sound on a Playback BLUETOOTH Device Playing Back Sound on You can receive audio content from a Audio-Visual Devices WALKMAN®, smartphone or tablet that has a BLUETOOTH function and listen to it via this receiver. BLUETOOTH Input buttons BLUETOOTH PAIRING ... -
Page 51: Device
Adjust the volume. Registering BLUETOOTH Adjust the volume of the BLUETOOTH devices to the receiver (Pairing device first. If the volume level is still operation) too low, press +/– to adjust the volume level of the receiver. Pairing is an operation in which BLUETOOTH devices are registered to each To cancel pairing operation other before connection. - Page 52 Adjust the volume. Adjust the volume of the BLUETOOTH device first. If the volume level is still too low, press +/– to adjust the volume level of the receiver. To disconnect a BLUETOOTH connection The BLUETOOTH connection will be disconnected when you perform either of the following operations: •...
-
Page 53: Tuner
In case of poor FM stereo reception If the FM stereo reception is poor and “ST” Tuner flashes on the display panel, select monaural audio to lessen the sound Tuning to a FM Station distortion. Press AMP MENU, and then press / and Automatically to select “FM MODE”... -
Page 54: Presetting Fm Radio Stations (Preset Memory)
Tuning to preset stations Presetting FM Radio Stations (Preset Press FM. Memory) Press PRESET + or PRESET – repeatedly to select the You can store up to 30 FM stations as your favorite stations as preset stations. station. You can also use TUNER PRESET 1, 2 or 3 to select a preset station. -
Page 55: Receiving Rds Broadcasts (European And Asia-Pacific Models Only)
Receiving RDS Broadcasts (European and Asia-Pacific models only) This receiver allows you to use Radio Data System (RDS), which enables FM radio stations* to send additional information along with the regular programming signal. This receiver offers convenient RDS features, such as Program Service name display. -
Page 56: Menu/Other Functions
Menu list Menu/Other Functions The default settings are underlined. Using the Menu “SP IMP.” (Speaker impedance) For details, see “Setting the speaker impedance” (page 19). “FM MODE” (FM station receiving mode) • “STEREO” This receiver will decode the signal as stereo signal when the radio station is broadcast in stereo. - Page 57 • “BT POWER” (BLUETOOTH signal) • If you use the Auto Standby mode and the Sleep Timer at the same time, the Sleep Timer has – “BT ON”: You can connect to the priority. receiver from a paired BLUETOOTH “UPDATE” (Software update) device.
-
Page 58: Enjoying High-Fidelity Sound (Pure Direct)
Enjoying High-fidelity Changing the Name for Sound (Pure Direct) Each Input and Preset Station (NAME IN) You can enjoy higher-fidelity sound from all inputs using the Pure Direct function. You can enter a name of up to 8 characters When the Pure Direct function is on, the for inputs (except “FM TUNER”... -
Page 59: Viewing Information On The Display Panel
Viewing Information on • You can select the character type as follows by pressing the Display Panel Alphabet (upper case) Numbers Symbols • To enter a blank space, press without selecting a character. If you made a mistake Press / until the character you want to change flashes, then press / to... -
Page 60: Recording Using The Receiver
Recording Using the Reverting to the Factory Receiver Default Settings You can record sound from an audio device You can clear all memorized settings and using the receiver. Refer to the operating restore the receiver to the factory default instructions supplied with your recording settings by the following procedure. -
Page 61: Saving Power
Saving Power You can save power by setting “BT STBY” to “STBY OFF” in the “BT MENU” menu. -
Page 62: Troubleshooting/Specifications
(page 31). There is severe humming or noise. If the problem persists after doing all of the above, consult your nearest Sony dealer. • Check that the speakers and device are connected securely. • Make sure that the connecting cables are General not near a transformer or motor. - Page 63 There is no sound from a specific FM radio device. • Check that the device is correctly The FM reception is poor. connected to the corresponding audio input jacks. • Extend and adjust the position of the FM • Check that the cable(s) used for the wire antenna (aerial) to a place where the connection is (are) fully inserted into the reception conditions are good.
- Page 64 + on the remote control (or (mains lead) and turn on the receiver. If the VOLUME on the receiver). problem persists, consult your nearest Sony dealer. Severe humming or noise. • If there are obstructions between the receiver and your BLUETOOTH device, remove them or move the receiver and/or device avoid them.
-
Page 65: Precautions
• Do not place the receiver near device Precautions such as a TV, VCR, or tape deck. (If the receiver is being used in combination with a TV, VCR, or tape deck, and is On safety placed too close to that device, noise may result, and picture quality may Should any solid object or liquid fall into suffer. -
Page 66: Specifications
PORTABLE IN Specifications Sensitivity: 500 mV/50 kilohms : 90 dB AUDIO IN Sensitivity: 500 mV/50 kilohms AUDIO POWER SPECIFICATIONS : 96 dB Output (Analog) POWER OUTPUT AND TOTAL AUDIO OUT HARMONIC DISTORTION: Voltage: 500 mV/10 kilohms (USA models only) Tone Gain levels With 8 ohm loads, both channels driven, ±10 dB, 1 dB step... -
Page 67: On Bluetooth Communication
Frequency band and maximum output power On BLUETOOTH (European models only) BLUETOOTH Communication Frequency Maximum output band power 2,400 MHz – Supported BLUETOOTH version and ≤ 5.0 dBm 2,483.5 MHz profiles The actual range will vary depending on factors Profile refers to a standard set of functions such as obstacles between devices, magnetic for various BLUETOOTH product features. -
Page 68: On Copyrights
BLUETOOTH technology. • Sony shall not be held liable in any way for damages or other loss resulting from information leaks during communication using BLUETOOTH technology. -
Page 69: Index
Index NAME IN 28 Pairing 22 AUTO.STBY 28 PH.OFFSET 28 Power B speakers 14 Power consumption 38 Saving power 32 BALANCE 28 PURE DIRECT 29 BASS 20 Batteries 11 BLUETOOTH RDS 26 Pairing 22 Receiver Playback 21 Display panel 8 Profile 37 Front panel 7 Version 37... - Page 73 ©2018 Sony Corporation Printed in Malaysia 4-726-907-11(1)
Need help?
Do you have a question about the PS-LX310BT and is the answer not in the manual?
Questions and answers