Laney CUB-SUPER Series, CUB-SUPER10, CUB-SUPER12 Manual
- User manual (72 pages)
Advertisement
INTRODUCTION
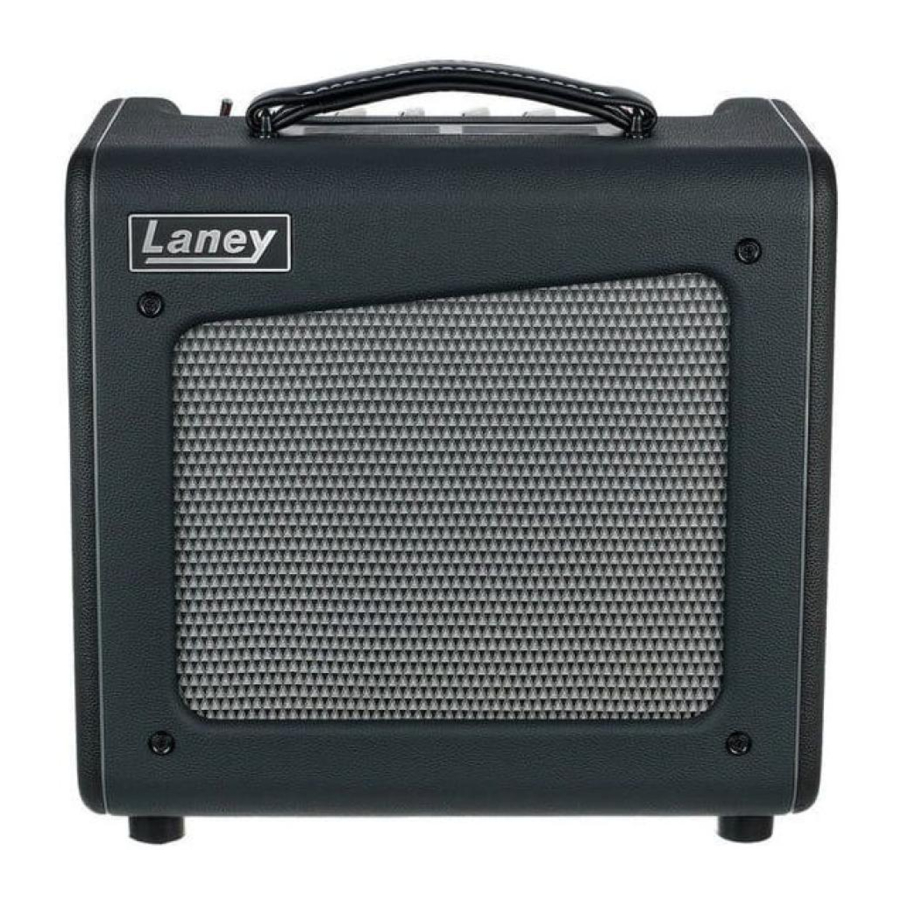
Welcome to the CUB-SUPER range.
The CUB-SUPER range offers the tone conscious guitar player boutique tone without the boutique price tag.
Time proven construction methods refined over 50 years of tube amp building and premium components means that whilst the CUB-SUPER range appears deceptively simple they are reassuringly toneful. From gently compressing cleans to touch sensitive crunches and full-on leads without a hint of harshness, it's difficult to find a bad sound in the CUB-SUPER range.
The CUB-SUPER range was designed to free up space on your pedal board by ditching your boost pedal! Why? Because the CUB-SUPER range has a superb BOOST pedal built into the front end of the circuit. It works in exactly the same way as kicking in your favourite boost pedal on your board – it boosts your guitar signal and hits the first preamp tube in the amp....HARD, and as every guitar player should know hitting a tube amp hard just makes everything sound better! So free some space and get more from your rig.
Available in 2 combo options, a head and 2 matching cabinet options, hand designed boutique aesthetics and dynamic interactive tone is now available to everyone.
This manual explains the key features of your CUB-SUPER amp. Read it thoroughly and keep it safe for future reference.
CUB-SUPER10 FEATURES

- POWER SWITCH & LAMP - Indicates that the amplifier is powered up and ready to play.
- VOLUME - Controls the overall listening volume of the amplifier and is used in conjunction with the Gain control (6).
- TREBLE - Controls the amps high end response. Start at 4 or 5 and adjust depending on how dark or bright you want the amplifier to sound.
- MIDDLE - Controls the amps midrange response. Start at 4 or 5, lower settings will scoop the mids, higher levels will allow you to actually hear the guitar in the mix.
- BASS - Controls the bass or bottom end of the amplifier's response. As the amp gets louder you may want to back this off a bit. Start at 7-10 for bedroom volumes.
- GAIN - Controls the level of gain/distortion present in the guitar signal. Used in conjunction with the volume control (2). For clean guitar sounds with plenty of headroom set the gain control low whilst setting the volume control to the required level. As you dial more gain into the signal it might be necessary to reduce the volume level accordingly.
- BOOST SWITCH - Engages the onboard pre-boost. This is just like kicking in your favourite boost pedal in front of the amplifier.
- BOOST KNOB - Dials in the amount of pre boost hitting the first tube in the amplifiers signal path. Dialling in more BOOST will have the effect of pushing a clean amp into warm tube clipping or naturally compressing an already clipping amplifier.

- BOOST LED - Indicates that the BOOST is engaged.
- INPUT SOCKET - Plug a good quality guitar lead in here.
- EXTERNAL SPEAKER - Your CUB-SUPER10 is loaded with a HH Custom designed 8 Ohm Internal speaker. Should you want to run an external speaker cabinet it can be connected here. Please use a good quality SPEAKER cable. Connecting an external speaker cabinet will disconnect the internal speaker. Please make sure you use the correct impedance of speaker cabinet from 8 - 16 Ohms.
- FX LOOP SEND - This is where you plug the INPUT of your Effect(s). Use a high quality shielded guitar cable. This socket can also be used as a line out.
- FX LOOP RETURN - This is where you plug the OUT of your Effect(s). Use a high quality shielded guitar cable.
- FOOTSWITCH SOCKET - This is where you plug in the footswitch. FS1-Mini optional extra. Enables remote switching of the boost circuit. Ensure the boost switch (7) is switched in.
- POWER SOCKET - Plug in the supplied IEC power cord here
CUB-SUPER12 FEATURES

- POWER SWITCH & LAMP - Indicates that the amplifier is powered up and ready to play.
- VOLUME - Controls the overall listening volume of the amplifier and is used in conjunction with the Gain control (6).
- REVERB - Sets the level of the on board reverb. The onboard reverb is a high-quality spring reverb algorithm used in the acclaimed BCC-SECRET PATH reverb engine.
- TREBLE - Controls the amps high end response. Start at 4 or 5 and adjust depending on how dark or bright you want the amplifier to sound.
- MIDDLE - Controls the amps midrange response. Start at 4 or 5, lower settings will scoop the mids, higher levels will allow you to actually hear the guitar in the mix.
- BASS - Controls the bass or bottom end of the amplifier's response. As the amp gets louder you may want to back this off a bit. Start at 7-10 for bedroom volumes.
- GAIN - Controls the level of gain/distortion present in the guitar signal. Used in conjunction with the volume control (2). For clean guitar sounds with plenty of headroom set the gain control low whilst setting the volume control to the required level. As you dial more gain into the signal it might be necessary to reduce the volume level accordingly.
- BOOST SWITCH - Engages the onboard pre-boost. This is just like kicking in your favourite boost pedal in front of the amplifier.

- BOOST - Determines the amount of pre boost hitting the first tube in the amplifiers signal path. Dialling in more BOOST will have the effect of pushing a clean amp into warm tube clipping or naturally compressing an already clipping amplifier.
- BOOST LED - Indicates that the BOOST is engaged.
- INPUT SOCKET - 15W & <1W inputs. Plugging into the 15W input socket accesses the full power of the amplifier - producing 15 watts RMS of tube tone. Plugging into the <1Watt input switches the output power stage down to <1 watt RMS. Ideal for recording or bedroom playing.
- EXTERNAL SPEAKER - Your CUB-SUPER12 is loaded with a HH Custom designed 8 Ohm Internal speaker. Should you want to run an external speaker cabinet it can be connected here. Please use a good quality SPEAKER cable. Connecting an external speaker cabinet will disconnect the internal speaker. Please make sure you use the correct impedance of speaker cabinet from 8 - 16 Ohms.
- FX LOOP SEND - This is where you plug the INPUT of your Effect(s). Use a high quality shielded guitar cable. This socket can also be used as a line out.
- FX LOOP RETURN - This is where you plug the OUT of your Effect(s). Use a high quality shielded guitar cable.
- FOOTSWITCH SOCKET - This is where you plug in the footswitch. FS2-Mini optional extra. Enables remote switching of the boost circuit and reverb. Ensure the boost switch (7) is switched in and the reverb level is set above zero.
- POWER SOCKET - Plug in the supplied IEC power cord here.
CUB-SUPERTOP FEATURES

- INPUT SOCKET - 15W & <1W inputs. Plugging into the 15W input socket accesses the full power of the amplifier - producing 15 watts RMS of tube tone. Plugging into the <1Watt input switches the output power stage down to <1Watt RMS. Ideal for recording or bedroom playing.
- BOOST LED - Indicates that the BOOST is engaged.
- BOOST - Determines the amount of pre boost hitting the first tube in the amplifiers signal path. Dialling in more BOOST will have the effect of pushing a clean amp into warm tube clipping or naturally compressing an already clipping amplifier.
- BOOST SWITCH - Engages the onboard pre-boost. This is just like kicking in your favourite boost pedal in front of the amplifier.
- GAIN - Controls the level of gain/distortion present in the guitar signal. Used in conjunction with the volume control (2). For clean guitar sounds with plenty of headroom set the gain control low whilst setting the volume control to the required level. As you dial more gain into the signal it might be necessary to reduce the volume level accordingly.
- BASS - Controls the bass or bottom end of the amplifier's response. As the amp gets louder you may want to back this off a bit. Start at 7-10 for bedroom volumes.
- MIDDLE - Controls the amps midrange response. Start at 4 or 5, lower settings will scoop the mids, higher levels will allow you to actually hear the guitar in the mix.
- TREBLE - Controls the amps high end response. Start at 4 or 5 and adjust depending on how dark or bright you want the amplifier to sound.

- REVERB - Sets the level of the on board reverb. The on board reverb is a high-quality spring reverb algorithm used in the acclaimed BCC-SECRET PATH reverb engine.
- VOLUME - Controls the overall listening volume of the amplifier and is used in conjunction with the Gain control (6).
- POWER SWITCH & LAMP - Indicates that the amplifier is powered up and ready to play.
- POWER SOCKET - Plug in the supplied IEC power cord here
- FOOTSWITCH SOCKET - This is where you plug in the footswitch. FS2-Mini optional extra. Enables remote switching of the boost circuit. Ensure the boost switch (7) is switched in.
- FX LOOP RETURN - This is where you plug the OUT of your Effect(s). Use a high quality shielded guitar cable.
- FX LOOP SEND - This is where you plug the INPUT of your Effect(s). Use a high quality shielded guitar cable. This socket can also be used as a line out.
- EXTERNAL SPEAKER - Connect an external cabinet (8 - 16 Ohms) here. Please use a good quality SPEAKER cable. Try the CUB-212 & CUB-112 cabinets.
Technical Specifications
CUB-SUPER10

| Product | GUITAR Amplifier |
| Power | 6 Watts RMS |
| Channels | Single Channel with FS Boost |
| Features | Volume Treble Middle Bass Gain Boost Switch Boost External Speaker socket FX loop/LINE OUT send FX Loop Return Footswitch socket (FS1-MINI) |
| Speaker | 1 x 10 HH Custom Designed Driver |
| Unit Size/mm | 339x373x212 (HxWxD) |
| Unit Weight | 9.6 Kg |
| Carton Size mm | 430x440x275 (HxWxD) |
| Packed Weight | 12.6 Kg |
| Power Consumption | 50W |
CUB-SUPER12

| Product | GUITAR Amplifier |
| Power | <1 Watt - 15 Watts RMS |
| Channels | Single Channel with FS Boost |
| Features | Volume Treble Middle Bass Gain Boost Switch Boost Reverb External Speaker socket FX loop/LINE OUT send FX Loop Return Footswitch socket (FS2-MINI) |
| Speaker | 1 x 12 HH Custom Designed Driver |
| Unit Size/mm | 399x430x233 (HxWxD) |
| Unit Weight | 11.7 Kg |
| Carton Size mm | 480x495x295 (HxWxD) |
| Packed Weight | 15.5 Kg |
| Power Consumption | 50W |
CUB-SUPERTOP

| Product | GUITAR HEAD |
| Power | <1 Watt - 15 Watts RMS |
| Channels | Single Channel with FS Boost |
| Features | Volume Treble Middle Bass Gain Boost Switch Boost Reverb External Speaker socket FX loop/LINE OUT send FX Loop Return Footswitch socket (FS2-MINI) |
| Speaker | NA |
| Unit Size/mm | 210x430x176 (HxWxD) |
| Unit Weight | 7.5 Kg |
| Carton Size mm | 295x555x240 (HxWxD) |
| Packed Weight | 10 Kg |
| Power Consumption | 50W |
CUB-112 & CUB-212 FEATURES

- INPUT SOCKET - Using a good quality speaker cable, connect to the amplifier speaker socket ensuring to use the correct 8 Ohm rated output if a single 8 Ohm extension cabinet is being used. If two 8 Ohm extension cabinets or a single 4 Ohm extension cabinet are to be used please ensure that you connect to the 4 Ohm rated output on the amplifier.
- LINK SOCKET - Optional link out to input socket on an additional 8 Ohm extension speaker.
CUB-112

| Power handling: | 50 Watts |
| Speaker: | 1 x 12 HH Custom Designed Driver |
| Impedance | 8 Ohm impedance |
| Unit Size/mm | 430x520x230 (HxWxD) |
| Unit Weight | 10.4 Kg |
CUB-212

| Power handling: | 100 Watts |
| Speaker: | 2 x 12 HH Custom Designed Driver |
| Impedance | 8 Ohm impedance |
| Unit Size/mm | 430x700x230 (HxWxD) |
| Unit Weight | 13.8 Kg |
GENERAL INSTRUCTIONS
In order to take full advantage of your new product and enjoy long and trouble-free performance, please read this owner's manual carefully, and keep it in a safe place for future reference.
- Unpacking: On unpacking your product please check carefully for any signs of damage that may have occurred whilst in transit from the Laney factory to your dealer. In the unlikely event that there has been damage, please re-pack your unit in its original carton and consult your dealer. We strongly advise you to keep your original transit carton, since in the unlikely event that your unit should develop a fault, you will be able to return it to you dealer for rectification securely packed.
- Amplifier Connection: In order to avoid damage, it is advisable to establish and follow a pattern for turning on and off your system. With all system parts connected, turn on source equipment, tape decks, cd players, mixers, effects processors etc, BEFORE turning on your amplifier. Many products have large transient surges at turn on and off which can cause damage to your speakers. By turning on your bass amplifier LAST and making sure its level control is set to a minimum, any transients from other equipment should not reach your loud speakers. Wait till all system parts have stabilised, usually a couple of seconds. Similarly when turning off your system always turn down the level controls on your bass amplifier and then turn off its power before turning off other equipment.
- Cables: Never use shielded or microphone cable for any speaker connections as this will not be substantial enough to handle the amplifier load and could cause damage to your complete system.
- Servicing: The user should not attempt to service these products. Refer all servicing to qualified service personnel.
IMPORTANT SAFETY INSTRUCTIONS
 | Intended to alert the user to the presence of uninsulated 'Dangerous Voltage' within the products enclosure that may be sufficient to constitute a risk of electrical shock to persons. |
 | Intended to alert the user of the presence of important operating and maintenance (Servicing) instructions in the literature accompanying the product. |
 | Risk of electrical shock - DO NOT OPEN. To reduce the risk of electrical shock, do not remove the cover. No user serviceable parts inside. Refer servicing to qualified personnel. |
 | To prevent electrical shock or fire hazard, do not expose this appliance to rain or moisture. Before using this appliance please read the operating instructions for further warnings. |

When using electrical products, basic cautions should always be followed, including the following:
- Read these instructions.
- Keep these instructions safe.
- Heed all warnings.
- Follow all instructions.
- Do not use this apparatus near water.
- Clean only with a dry cloth.
- Do not block any of the ventilation openings. Install in accordance with manufacturer's instructions.
- Do not install near any heat sources such as radiators, heat registers, stoves or other apparatus (including amplifiers) that produce heat.
- An apparatus with Class I construction shall be connected to a mains socket outlet with a protective connection. Do not defeat the safety purpose of the polarized or grounding-type plug. A polarized plug has two blades with one wider than the other. A grounding type plug has two blades and a third grounding prong. The wide blade or third prong is provided for your safety. If the provided plug does not fit into your outlet, consult an electrician for replacement of the obsolete outlet.
- Protect the power cord from being walked on or pinched, particularly at plugs, convenience receptacles, and the point they exit from the apparatus.
- Only use attachments/accessories provided by the manufacturer.
- Use only with a cart, stand, tripod, bracket, or table specified by the manufacturer, or sold with the apparatus. When a cart is used, use caution when moving the cart/apparatus combination to avoid injury from tip-over.
- The mains plug or appliance coupler is used as the disconnect device and shall remain readily operable. The user should allow easy access to any mains plug, mains coupler and mains switch used in conjunction with this unit thus making it readily operable. Unplug this apparatus during lightning storms or when unused for long periods of time.
- Refer all servicing to qualified service personnel. Servicing is required when the apparatus has been damaged in any way, such as when power-supply cord or plug is damaged, liquid has been spilled or objects have fallen into the apparatus, the apparatus has been exposed to rain or moisture, does not operate normally, or has been dropped.
- Never break off the ground pin. Connect only to a power supply of the type marked on the unit adjacent to the power supply cord.
- If this product is to be mounted in an equipment rack, rear support should be provided.
- Note for UK only: If the colours of the wires in the mains lead of this unit do not correspond with the terminals in your plug‚ proceed as follows:
- The wire that is coloured green and yellow must be connected to the terminal that is marked by the letter E‚ the earth symbol‚ coloured green or coloured green and yellow.
- The wire that is coloured blue must be connected to the terminal that is marked with the letter N or the colour black.
- The wire that is coloured brown must be connected to the terminal that is marked with the letter L or the colour red.
- This electrical apparatus should not be exposed to dripping or splashing and care should be taken not to place objects containing liquids, such as vases, upon the apparatus.
- Exposure to extremely high noise levels may cause a permanent hearing loss. Individuals vary considerably in susceptibility to noise-induced hearing loss, but nearly everyone will lose some hearing if exposed to sufficiently intense noise for a sufficient time.
The U.S. Government's Occupational Safety and Health Administration (OSHA) has specified the following permissible noise level exposures:
![]()
According to OSHA, any exposure in excess of the above permissible limits could result in some hearing loss. Earplugs or protectors to the ear canals or over the ears must be worn when operating this amplification system in order to prevent a permanent hearing loss, if exposure is in excess of the limits as set forth above. To ensure against potentially dangerous exposure to high sound pressure levels, it is recommended that all persons exposed to equipment capable of producing high sound pressure levels such as this amplification system be protected by hearing protectors while this unit is in operation. - Symbols & nomenclature used on the product and in the product manuals, intended to alert the operator to areas where extra caution may be necessary, are as follows:
![]()
Intended to alert the user to the presence of high 'Dangerous Voltage' within the products enclosure that may be sufficient to constitute a risk of electrical shock to persons.
![]()
Intended to alert the user of the presence of important operating and maintenance (Servicing) instructions in the literature accompanying the product.
![]()
Risk of electrical shock - DO NOT OPEN. To reduce the risk of electrical shock, do not remove the cover. No user serviceable parts inside. Refer servicing to qualified personnel.

To prevent electrical shock or fire hazard, do not expose this appliance to rain or moisture. Before using this appliance please read the operating instructions.
If your appliance features a tilting mechanism or a kickback style cabinet, please use this design feature with caution. Due to the ease with which the amplifier can be moved between straight and tilted back positions, only use the amplifier on a level, stable surface. DO NOT operate the amplifier on a desk, table, shelf or otherwise unsuitable non-stable platform.

Documents / Resources
References
Download manual
Here you can download full pdf version of manual, it may contain additional safety instructions, warranty information, FCC rules, etc.
Download Laney CUB-SUPER Series, CUB-SUPER10, CUB-SUPER12 Manual
Advertisement


Need help?
Do you have a question about the CUB-SUPER Series and is the answer not in the manual?
Questions and answers