Advertisement
PACKAGE LIST

PROJECTOR SPECIFICATIONS
| Model No. K9 | |
| Native Resolution | 1920*1080P |
| Aspect Ratio | 16:9/4:3/Auto |
| Display Tech | LCD |
| Light Source | LED |
| Weight | 5.07 Lb |
| Size | 8.26*7.09*6.34Inch |
| Refresh Rate | 60 Hz |
| Power Voltage | AC100-240V~50/60Hz 1A |
| Focus | Auto + Electric +Manual |
| Keystone | Auto + Electric + Manual |
| Output Port | 3.5mm Audio Output |
| Input Port | HDMI*2/USB*2/RJ45 |
| Operation Mode | Remote Control/Button |
| Installation Type | Front/Rear on Desk, Front/Rear on Ceiling |
| Video Format | MP4/MPG/AVI/MPEG-4/TS/MOV/M4V/MKV/FLV/DAT/3GP (Support for video codecs may vary depending on circumstances, contact us for additional support) |
| Audio Format | MP3/WMA/M4A/MP2/AAC/OGG/WAV/FLAC (Dolby SUPPORT) |
| Image Format | JPG/JEPG/BMP/PNG |
Note: Manufactured under license from Dolby Laboratories. Dolby, Dolby Audio, and the double-D symbol are trademarks of Dolby Laboratories Licensing Corporation.
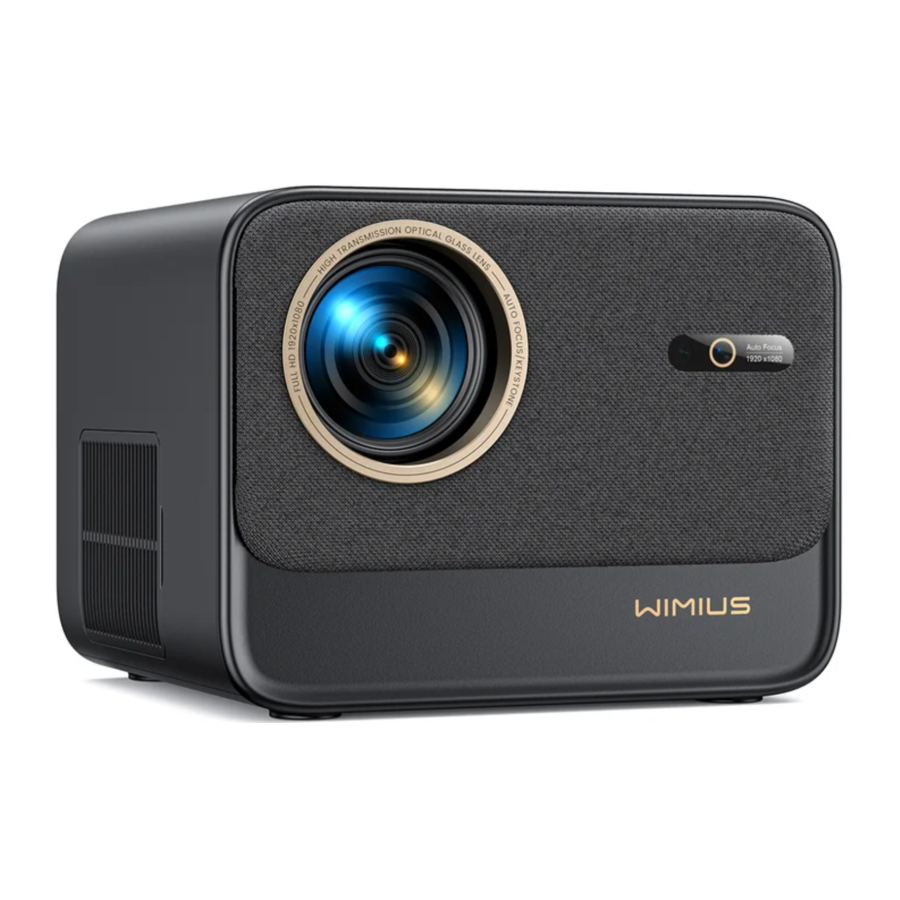
PROJECTOR OVERVIEW

- Lens
- Infrared Signal Receiver
- Autofocus Signal
- Wired Network Port
- USB Port *2
- HDMI1 Port
- HDMI2 Port
- Headphone Jack
- Infrared Signal Receiver
- Power Input
- Detachable Dust-Proof Net
- Air Outlet

- Power Button
- Bracket Screw Holes (1/4 Inc h, Support Hoisting)
- Height Adjustment Machine Feet
- Bottom Labeling
REMOTE CONTROL

- Power
- Mute
- NETFLIX
- YouTube
- Prime Video
- Open BROWSER
- Menu
- Source
- Arrow keys
- Confirmation key
- Back
- Homepape
- Volume +
- Volume -
- Focus+
- Focus-
- Red/Green/Yellow/Blue keys
- USB
- Backspace
- Projection mode
- Number
Note:
- Install 2 pieces of AAA batteries (NOT INCLUDED) into the remote before using it. Do not combine new batteries with old ones in the remote controller, which can cause operation failure due to insufficient power supply.
- When using the remote controller, please make sure that the signal transmitter of the remote controller aims at the infrared signal receiver of the projector.
- If you are not using the remote controller for an extended period, please take out batteries to prevent battery leakage.
INSTALLATION
Installation Method
The projector can be hanged on the ceiling with special hanger frame, and placed on the stable desk to project the image according to the operating environment and requirements. In addition, the projector can be installed with the following methods:
- Front projection Ceiling mount
![]()
- Rear projection Ceiling mount
![]()
- Front projection Desk mount
![]()
- Rear projection Desk mount
![]()


Keep the projector at a height where its lens is axial symmetry to the screen. If this is not possible, use the keystone correction function to adjust the projection image.
Projection Distance and Size
| Aspect Ratio: 16:9 | |
| Distance (ft.) | Screen Size |
| 4.8 | 50" |
| 5.7 | 60" |
| 7.6 | 80" |
| 9.5 | 100" |
| 11.5 | 120" |
| 14.4 | 150" |
* Recommended Projection Distance is about 5.7-8ft.
* Image Size Depends on the Distance Between the Projector and the Screen, the above Estimates may have a 3% Deviation. Different Settings Result in Different Distances.
* The Projection Effect is better in a Dark Environment.
Install on the Ceiling
Keep the projector vertical and towards the mid of the projector screen, and keep the projection image flat on the screen.
- To adjust the tilt base, unscrew the support rod at the bottom of the projector, see the below picture.
- For the Ceiling mount, there is 1 hole at the bottom of the projector Please turn the projector upside down, then you can find the ceiling mount holes as shown in the picture below.
NOTE: The hanging bracket or ceiling mount stand is not packaged. (ALSO NOT SUPPORT 4-Legged Hoisting)

STARTING PROJECTOR
Indicator Light Description
- Connect the power cord: After powering on, the indicator light will flash red 8 times. During the self-test of the machine, you need to wait patiently and then press the power button to turn it on.
- Power on: The blue indicator light is always on, indicating the power on working status.
- Power off: The red indicator light is always on, indicating the shutdown state.
- Standby: Pink indicator light, in the process of standby (5s), please do not press the power button repeatedly.
- Remove the lens cap, connect the projector to the power supply via the power cord, then press the power button, it starts to work. (Light changes from red to blue)
- Use the Automatic or Electronic Keystone Correction/Focus Function of the projector to obtain a rectangular and clear image;
- Adjust the focus buttons "F+" and "F-" on the projector remote control to get the best image performance; (If it is still blurry, please try to adjust the projection distance.)
- Connect external devices (Smartphone(Android), Fire Stick, TV box, DVD player, PC, etc. to the projector at the corresponding position, and be sure to select the corresponding signal source. **If you do not select the correct source, the projector will will not be able to detect the signal)
- Select "
![]() " and then go to the menu and select [Setup] to enter [OSD Language] to set your preferred language.
" and then go to the menu and select [Setup] to enter [OSD Language] to set your preferred language.
PROJECTION IMAGE SETTINGS
Projection Mode
Select the [Settings] menu -- Select the [Projection] Option -- Select your Install Mode, Press the arrow key to select and press "OK" to confirm the projection position.

Manual Keystone Correction
Four-Point Keystone
Select the [Settings] menu -- Select the [Keystone] Option, Then select the [Four Point Correction], Just click "OK" button to pick the point you want to adjust at first, and then press the button "►" or " ▼ " to set the value(Vertical 0~100) needed as shown below.

Reset: Press " ", and the image will restore to the original keystone correction settings.
Vertical Keystone
Select the [Settings] menu -- Select the [Keystone] Option, Then select the [Vertical Keystone] option to adjust the screen vertically ±30° with the arrow keys until the guides are adjusted to a rectangle.
Auto Keystone Correction and Focus
Please place the projector horizontally face to the wall first, Select the [Settings] menu --Select the [Keystone] or [Focus] Option- Turn on the [Auto Correction] or [Auto Focus] option, then it will automatically focus the picture based on the projection distance from the screen and adjust the picture to a rectangle when you change the projection angle.
If the picture is blurry, press repeatedly the focus button ''F+'' ''F-'' on the remote control to adjust the lens focus, until the picture is clear. (**There is no need to press the OK button after the screen is clear)

Note: The side projection angle of the projector should not exceed 20°. Also, there should be no obstacles in front of the projector. Otherwise the automatic keystone correction function may not work.
Zoom Setting
Go to the home page -- Select the ""menu -- Select the [Settings] -- Select the [Zoom] option, the projection screen can be zoomed 50%~100%. Press the button "↑ ↓" to set the value needed as shown below.

Reset: Press "", and the image will restore to the original zoom correction settings.
PROJECTOR SMART SETTINGS
Select The Signal Source
Select The HDMI Input Signal Source
Select the desired input signal source (HDMI1/HDMI2) on the home page, or you can press the " " button on the remote control to select the corresponding signal source.
When playing a video, you can press the menu button "", then select [Picture Mode]. You can freely adjust the brightness and contrast of the image and other functions.

Select The USB Input Signal Source
For USB devices, no need to choose the signal source. The machine will detect them automatically. Press the "" button and Select the [USB input signal source] on the home page:

Warm Tips: If the projector cannot recognize the USB disk, please refer to the following methods to solve the problem.
Please confirm whether your USB disk meets the following formats.
- FAT32: 8G/16G/32G
- NTFS: 64G
If it is not, please format the USB disk. Before you format the USB disk, if you have anything on your USB disk, make sure to backup everything. After these steps, everything will be lost forever.
If the problem is still not solved, please send your problem to this email: support01@wimius.com
Connecting with Smart devices
Warming Tips
- The fluency of screen mirroring with a wireless connection will be affected by the network environment. A bandwidth of 100Mbit or more is recommended when using screen mirroring.
- Make sure your mobile device is close to the projector when using a wireless connection. A distance of 3.28ft. is recommended.
- Some Android devices may not support screen mirroring due to the compatibility.
WiFi Settings
Select the [Settings] icon in the upper right corner of the main interface, and then press the "OK" key on the remote control to enter the settings interface and select "Network Settings".
For iOS System
 Attention: Your device and the projector should be in the same Home WiFi.

- Choose your Home WiFi to connect and enter the right password, then click "OK", please wait 3 seconds to establish the connection.
- When using ios device for the first time, you need to download in the Main Interface (Path: Main Interface My Applications- APP assistant - ScrennShare - Click OK- App download complete, Please power off and restart - Find ScreenShare in My Applications)
- Turn on the WiFi setting of iOS device, then connect in the same Home WiFi.
- Then click "Airplay" on the smartphone.
- Select "Projector-c3d9" from the search results to connect.
NOTE: Due to the upgrading of the WiMiUS K9 smart projector itself: Screen mirroring for iOS, Android, and Windows, and no longer need the iOS Screen Cast Device for screen mirroring (the package does not include an iOS Screen Cast Device)
If you encounter any problems, please contact us in time: support01@wimius.com
For Android System
To activate this function, your android device must support Multi-Screen/Wireless Display. The name of "Multi-Screen" may vary depending on various brands of Android devices.
Setting with mobile internet

- Turn on the projector, and select "Screencast" as the Input Source.
- Turn on the "Multi-Screen/Wireless Display" of your Android device.
- Select "WiMiUS-K9 Projector/Smart Projector"from the search results to connect.
- Succeed.
Bluetooth Settings

- Turn on your Bluetooth Speaker.
- Turn on the [Bluetooth Settings] of your projector.
- Seclect your Bluetooth speaker to connect.
- Succeed.
Note:
- This step is only applicable to connecting the Bluetooth speaker but not to mobile phone Bluetooth.
- The K9 projector is compatible with most Bluetooth headsets, Bluetooth speakers and Airpods, but not the Bluetooth keyboards.
- If you have any questions, please feel free to email WiMiUS via: support01@wimius.com.
Built-in Smart OS System
Netflix Officially-Licensed - The K9 projector has a built-in Smart Netflix OS System, so you can choose your favorite APP and video at will, and you can enjoy a large number of wonderful film and television works without using an additional Fire TV stick.
At the same time, this page is the Main Interface of the projector.

OTHER BASIC PROJECTION SETTINGS
Option Menu
Go to home page -- Select [Setting] -- Select the [Setup].Use the arrow keys on the remote control to switch the menu, press the "OK" to confirm and set.

| Menu | Content |
| OSD Language | English/France/Italian/Japanese etc |
| Time Setup | Set Local Time |
| Screensaver | Turn on/off screen saver |
| Sleep Timer | On/Off: Set the sleep time from 10 - 120 minutes |
| Auto Sleep | On/Off: Set the time from 30minutes - 8Hours |
| USB Auto Upgrade | Local Update |
| Internet Update Check | Check Internet Environment |
| Reset Default | Restore Factory Default |
Picture Mode Menu

| Menu | Content |
| Picture Mode | Select the Picture Mode |
| Brightness | Set the Screen Brightness Value |
| Contrast | Set the Screen Contrast Value |
| Saturation | Set the Screen Saturation Color |
| Hue | Set the Screen Hue Color |
| Sharpness | Set the Screen Sharpness Value |
| Gamma | Correct the Gamma Value |
| Color Temperature | User/Cool/Standard/Warm |
Audio Menu
Go to home page -- Select [Setting] -- Select the [Audio].Use the arrow keys on the remote control to switch the menu, press the "OK" to confirm and set.

| Menu | Content |
| Bass/Treble | Set Preferred Values |
| Sound Style | User/Standard/Movie/Music/Sports/Vivid |
| Digital Output Mode | Auto/Manual |
| TTS | Voice Broadcast Function |
| Dialogue Enhancement | On/Off: Conversation enhancement function, voice broadcast function for special people |
| Reset | Restore Default |
About (System Info)
Go to home page -- Select [Setting] -- Select the [About].Use the arrow keys on the remote control to switch the menu, press the "OK" to confirm and set.

| Menu | Content |
| Netflix | Netflix Officially-Licensed |
| Version/License Info | View the Latest Version/License Information |
| Device Name | Projector Model Name |
| Device Temperature | 50℃ |
SIGNAL LINES CONNECTION
WiMiUS K9 projector has 6 interfaces, HDMI ports*2/USB ports*2/3.5mm headphone output/RJ45
Please select the correct connecting port to connect your device (PC, Phone, DVD Player, Sound bar, USB, PS4,etc.)
USB Multimedia Connecting
Select the USB signal source, the machine will detect them automatically.
- Select the required category "photos" "music" or "video" in the main interface, and press the "OK" key on the remote control to enter the corresponding category.
- According to the programs to choose:"photos" "music" or "video".
- Choose the file you want to play, and press the key "OK" to play or pause the file. (You cannot enter the required category without connecting a USB disk.)
Note: For the "Office Suite" option, PPT/TXT files cannot be played or presented normally.
Connecting with PC
- Connect to the computer and K9 projector with the HDMI cable (Included).
- Select the HDMI source to project any files on your computer;
- On your laptop, hold down the key "Win+P" board keys to change your display mode.

Computer only: it is the default option – only displays on the main monitor.
Duplicate: makes all the monitors display the same thing duplicating the desktop on each monitor.
Extend: makes all your monitors act like one big monitor extending the desktop across all of them.
Projector only: Displays only on the secondary monitor like a projector.
To change the screen resolution in Projector Only mode, follow these steps:
Step: Start > Control Panel > Appearance and Personalization > Adjust Screen Resolution

Connecting with MacBook or MacBook Air
- Choose the media signal channel:"HDMI"
- Use a Type-C to HDMI adapter to connect your MacBook, or a Mini Display to HDMI adapter to connect with your MacBook Air (adapter not included).Connecting with MacBook or Mac Book Air. (Adapter NOT INCLUDED)
Connecting with XBOX/PS5
- Choose the media signal channel:"HDMI"
- Use HDMI cable to connect to XBOX/PS5
- Succeed
Connecting with DVD
- Select "HDMI" mode for connection
- Enter Menu key
- Change the PC mode from [On] to [Off] to avoid the risk of white pixel edges in the image.
FAQ
Thank you for selecting the WiMiUS K9 projector. We provide 3-year warranty for K9 projector. If you have any questions, please feel free to contact us via support01@wimius.com.
We have compiled some frequently asked questions and their corresponding answers to assist you better.
Q1: The WiFi connection is unstable. How can I resolve this issue?
To address WiFi connectivity issues, first, ensure that your home network is functioning well. Additionally, keep the distance between your phone and the projector within 1 meter. If the problem persists, please reach out to us at support01@wimius.com for further assistance.
Q2: The remote control and projector cannot communicate.
- Is the power switch above the projector on or off?
- The remote control battery is exhausted?
- There are obstacles between the remote control and the infrared signal.
Q3: What is the Linux system? Can I watch more popular movies and TV shows?
- The Linux system is officially authorized by Netflix. The projector comes pre-loaded with content from Netflix, YouTube, Prime Video, etc.
- Please find more apps to download in Main Interface My Applications (More Apps Path: Main Interface My Applications - APP assistant)
Q4: Auto-off after working for a while.
- The projector ventilation is blocked or the voltage is not stable.
- Send a video to support01@wimius.com to check for you.
Q5: Not compatible with your Bluetooth speaker?
- The projector may not compatible with some versions Bluetooth speakers of JBL.
- Contact our after-sales email at support01@wimius.com immediately and tell us the brand and model of your Bluetooth speaker.
TIPS
- Do not place the projector in a room that is too hot or too cold, because high temperature or low temperature will affect the performance of the projector. shorten the service life of the equipment. The working environment is preferably 5°C~35°C.
- Equipped with a ventilation device to ensure the stable operation of the projector. Do not cover the vents with cloths, blankets, or other items. Do not insert objects of any kind into the slots of the projector, as this may cause a short circuit or electric shock and damage the device.
- The projector should be strictly protected from strong impact, extrusion and vibration. don't try to keep moving Strong shocks, squeezes and vibrations. Do not try to move and internal circuit failure.
- As the core component of the projector, the lens is directly related to the clarity and effect of the picture. Excessive Wiping dust off the lens can affect image quality. Dirty lenses should be wiped with a soft cotton cloth on the surface of the glass lens. Do not use hard cloths or abrasives.
- Please control the ambient lighting in the room to enhance the visibility of the projected image. Dimming the lights or using curtains can help reduce glare and improve image quality.
- If you have any questions, please do not worry, please contact support01@wimius.com via email.
If you have any questions, please send your order number and problem (For example: US + K9 + Problem) to support01@wimius.com. We will provide a quick solution within 24 hours.
In fact, many problems can be easily solved through settings, such as no signal, no sound, Bluetooth connection failure, WiFi connection failure, intermittent animation, etc. We promise that all projectors are 100% carefully inspected and packed before shipping.
Documents / ResourcesDownload manual
Here you can download full pdf version of manual, it may contain additional safety instructions, warranty information, FCC rules, etc.
Advertisement


Need help?
Do you have a question about the K9 and is the answer not in the manual?
Questions and answers