Advertisement
TIPS
- Do not place projector in too warm or too cold room, because the high temperature or low temperature will shorten lifespan of the device. The working environment would be 5 C -35 C better.
- If there are black spots on the projection screen, please don't worry, please contact support01@wimius.com via email, we can send you a video about how to remove the dust.
- The ventilation is equipped for the projector to work stably- Don't cover the vent with cloth, blanket or other things. Don't insert anything into the slit of the projector, or it may produce a short circuit or an electric shock to your device and cause damager
- The projector shall be strictly protected from strong impact, extrusion and vibratiom Do not try to move and on strong impact, extrusion and vibration. Do not try to move and the internal circuit faults,
- Lens, as the core component of the projector, is directly related to the picture definition and effect The excessive dust thereon will affect image quality. The dirty lens shall be wiped with soft cotton cloth for the glass lens surface. Hard cloth or abrasives shall not be used.
PACKAGE LIST

PROJECTOR SPECIFICATIONS
| Model No.: K7 | |||
| Display Technology | LCD | Light Source | LED |
| Native Resolution | 1920x1080P | FOCUS | Manual |
| Installation Type | Front/Rear on Desk, Front/ Rear on Ceiling | Aspect Ratio | 16:9/4:3/Auto |
| Projection Distance | 1.6-7m | Power Voltage | AC100-240V |
| Product Size | 274*246*113mm | Product Weight | 2.2kg |
| Input Interface | HDMI*2/USB*2/AV/3.5mm audio out | ||
| VldeoFormat | 3GP/AVl/FLV/MP4/MPC/VOB/TS/M2TS/DAT/MKV | ||
| Audio Format | MP3/APE/AAC/FLAC/OGG/WAV/WMA/MlD/DTS/M4A | ||
| Image Format | BMP/JPG/PNG/JPEG | ||
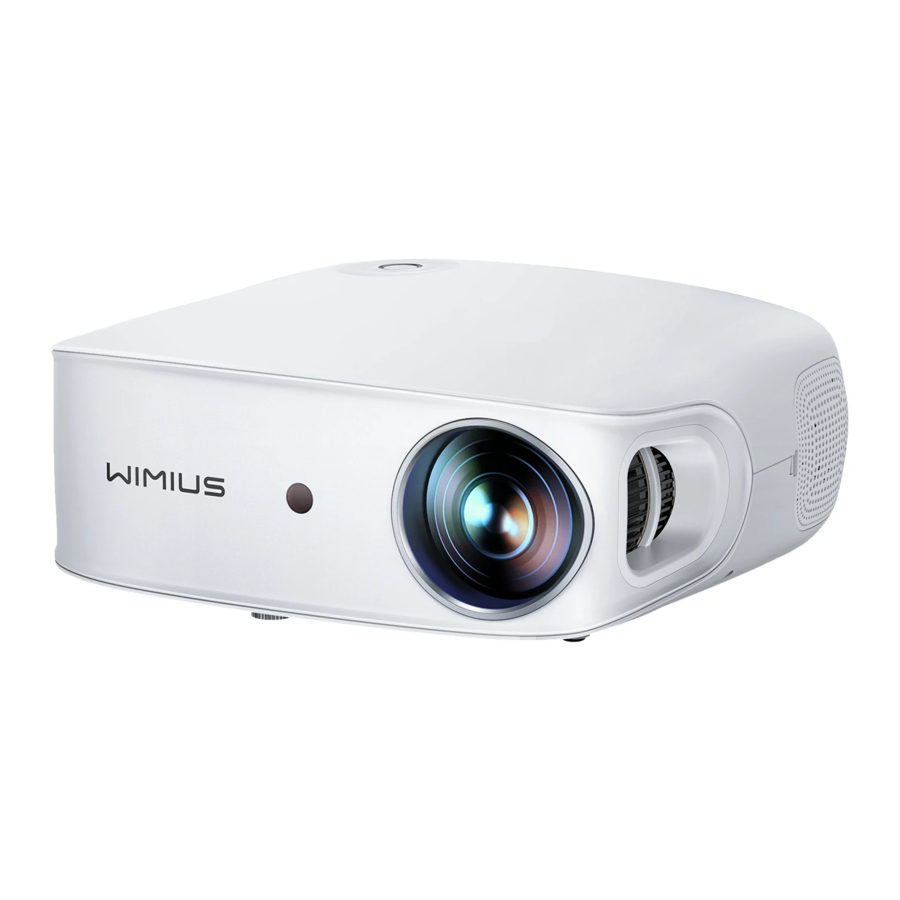
PRODUCT STRUCTURE

- Level-Stand Adjustment
- IR Receiver
- Lens
- Power Connector
- Wired Network Port (no use)
- IR for Remote Control
- 3.5mm Headphone jack
- HDMI 1
- USB Ports*2
- AV Prot
- HDMI 2
- Spea ker
- Cooling Window
- Focusing
- Keystone Correction
- Removable Dust Cover

- Power Button
- Signal Source
- Arrow Button
- All-round Menu Key
- VOL+
- VOL-
- Light
- Menu
- Play/Pause Key
- Back
- 6D
- Previous
- Next
- Mute
Note:
- Install 2 pieces of AAA batteries(not included) into the remote before using it, do not combine new batteries with old ones in remote control, which can cause operation failure due to insufficient power supply.
- When using the remote control, please let the remote control aims at infrared signal of the projector
- When you are not using the remote control for a long Please take out the batteries to prevent it from leakage.
INSTALLATION
- Installation Method
The projector can be hanged on the ceiling with special hanger frame, and placed on the table desk to project the image according to the operating environment and requirements. In addition, the projector can be installed by following methods:- Front projection ceiling mount
![]()
- Front projection table mount
![]()
- Rear projection ceiling mount
![]()
- Rear projection table mount
![]()
- Front projection ceiling mount
- Install on the Ceiling
For ceiling mount, there are 4 holes at the bottom of the projector (M5*16mm). Please slowly unscrew the 4 black rubbers, then you can find the holes for ceiling mount, see below picture.
NOTE: The hanging bracket or ceiling mount stand is not packaged.


PROJECTION SIZE
| Aspect Ratio: 16:9 | |
| Distance | Screen Size |
| 1.7m | 50" |
| 2.5m | 75" |
| 3.3 | 100" |
| 4m | 120" |
| 5m | 157" |
| 7m | 300" |
*The image size depends on the distance between projector and screen, there may be 3% measure difference among above listed data,
*The recommended projection distance is 2.5-3.5m.
*Ambient darkness Will improve the clarity Of the projected images,
STARTING PROJECTOR
- Connect projector with power supply, The indicator light will turn red;
- Press the power key on the remote or projector, the indicator light Will turn green, and the projector's home page will appear as below:

- Adjust the focus ring on the right side of the projector to get the best image performance (If it is still blurry, please try to adjust the projection distance);
- use the 4D keystone function of the projector to get a rectangle projection screen;
- Connect the external device (Smart phone, iPad, Amazon Fire TV, TV box, DVD player€ Computer, etc-in the corresponding interfaces of the projector, please be sure to select the corresponding source, If you do not select the correct source, the projector will not be able to detect the signal.

IMAGE ADJUSTMENT
When using the projector for the first time, it normally displays an unclear image. This is due to the lens being out Of fOClJS or the incorrect trapezoid setting. Please follow the below steps to correct:
- Focus Adjustment

Rotate the focus ring or lens back and forth slowly to make the image clear.
Note: For all LCD projectors, only 90% of the screen is in full focus, This is normal, - 6D Keystone correction
Use the digital 60 keystone correction of the projector to change the image to be rectangle(vertical and horizontal).
Auto 6D keystone correction function
Please turn on the 6D function on remote by pressing button "6D Äor press the "60" button on the proJector, then the image will be in correct keystone correction automatically. After the image corrected, we suggest to turn off Auto 6D function for better viewing.
Manual keystone correction
The projector has both 4-sided trapezoidal and 4-corner trapezoidal correction functions, You can not only adjust the image horizontally or vertically, but also adjust four points to make the projected image a rectangle.
Select the![]() menu - Select the [ FourPoint Correction Setting ] Option 4-corner trapezoidal correction: Adjust the screen by 4 corners to a rectangle.
menu - Select the [ FourPoint Correction Setting ] Option 4-corner trapezoidal correction: Adjust the screen by 4 corners to a rectangle.


Select the![]() menu - Select the [ Keystone Correction Setting ]Option 4-side keystone correction: adjust the screen side by side horizontally or vertically to a rectangle
menu - Select the [ Keystone Correction Setting ]Option 4-side keystone correction: adjust the screen side by side horizontally or vertically to a rectangle


 menu - Select the [ FourPoint Correction Setting ] Option 4-corner trapezoidal correction: Adjust the screen by 4 corners to a rectangle.


WIFI SETTINGS
Warming Tips:
- The fluency of wireless screen mirroring will be affected by the network environment, A bandwidth of 100Mbit or more is recommended when using screen mirroring.
- Make sure your mobile device is close to the projector when using wireless connectiom A distance within 1 meter is recommended.
- Some mobile devices may not support screen mirroring due to the compatibility.
- Any questions, please feel free to email WiMiUS via support01@wimius.com.
- iOS Cast (for iOS Devices)
- Go to home page Select the Screen Mirroring Select the Setting - Select WiFi Setting - Open the WiFi function - Select your home WiFi from the list - Connect the K7 projector to your home WiFi.

- Back to Screen Mirroring - Select [ iOS Cast ] menu Press the OK button to enter the [ iOS Cast ] menu.

- Select the [Settings] menu on your iOS device - Tum on the [Wi-Fi] function
![]() Connect your iOS device to the same home network as the projector.
Connect your iOS device to the same home network as the projector. - Open the Control Center on your iOS device - Select the [ Screen Mirroring ] function - Select and connect the iOS Cast receiver named [K7-81E6-(icast)] - your iOS device screen will be displayed on the projection screen after 3 seconds.
- Go to home page Select the Screen Mirroring Select the Setting - Select WiFi Setting - Open the WiFi function - Select your home WiFi from the list - Connect the K7 projector to your home WiFi.
- Miracast (for Android Devices)
- GO to home page - Select the Screen Mirroring Select the [Miracast] menu Press the OK button to enter the [Miracast Setting ] Menu.


- Select the [ Settings ] menu on your Android device - Select the [ Screen mirroring ] function - Select your Miracast receiver named [ K7-81 E6-(icast) ]- your Android device screen will be displayed on the projection screen after 3 seconds.
- On your Android device, tap [Settings] - [WLAN Display ]-[ Turn WI-Fi ] ON, Connect your home WiFi.
- GO to home page - Select the Screen Mirroring Select the [Miracast] menu Press the OK button to enter the [Miracast Setting ] Menu.


Note:
- Different brands of Android phones have different operations for select Screen Mirroring Display, please refer to your phone's manual. [ Multiscreen/WireIess display/WLAN display/Screen mirroring/Wireless projection/Smart view etc, ]
- Not all Android phones support this function. Please make sure it has this function before use,
iOS CABLE CAST
- GO to home page - Select the Screen Mirroring - Select the iOS Cable Cast

- Connect the lightning connector to the phone - Connect the USB port to the projector.
- Click "Trust' the window that pops up on the phone,
- Enter the phone password and then turn on the mirror function of the iPhone.


BLUETOOTH SETTING


Go to home page - Select the [ ] menu -- Select the BT Setting in the Option menu
 ![]() Open the Blueteeth function and your 31ueteeth device Scan the Blueteeth devices nearby automatically -- Choose the Blueteeth device desired - it will be paired and connected automatically.
Open the Blueteeth function and your 31ueteeth device Scan the Blueteeth devices nearby automatically -- Choose the Blueteeth device desired - it will be paired and connected automatically.
Note:
- The K7 projector is compatible with most Blueteeth headsets, Blueteeth speakers and Airpods, but not the Blueteeth keyboards or Blueteeth phones.
- If you have any question, please feel free to email WiMilJS via: support01@wimius.com.
ZOOM SETTING
GO to home page - Select the [] menu - Select the Infinity zoom setting in the picture menu
Adjust the Vertical Zoom, the width of the projection screen can be scaled individually by 70%~100%

Adjust the Horizontal Zoom, the length of the projection screen can be scaled individually by 70%~100%
Adjust the Whole Zoom, the whole screen can be scaled by 70%~100%.
Go to home page---SeIect the [ ] menu-Select the reduce display size--Adjust the image size from
SIGNAL LINES CONNECTION
WiMilJS K7 projector has 6 interfaces, HDMI ports'2/USB ports*2/3.5mm headphone output* I/AV output* 1. Please select the correct connecting port to connect your device (PC, Phone, DVD Player, Sound bar USB, PS4 etc,)

- Connect with USB Disk
- Insert the U disk into either of the two IJS3 input ports;
- You can directly enter the start-up screen on the home page, select the option [ VideofMusic/Picture/Office ];
- Select the desired file (or folder to enter the sub folder) in the USB diski then press the [ OK ] button to play it,
- Connect the Devices via the HDMI ports
- Connect your TV stick or laptop to any HDMI port of the projector;
- Enter the home page to select the corresponding HDMII or HDM12 as the signal source.
- On your laptop, hold down the key "Win+P" board keys to change your display mode.
Computer only: is the default option - only displays on the main monitor.
Duplicate: makes all of the monitors display the same thing duplicating the desktop on each monitor.
Extend: makes all of your monitors act like one big monitor extending the desktop across all of them.
Projector only: Displays only on the secondary monitor like a projector. You can change the screen resolution on the Projector Only Mode
Step: Start > Control Panel > Appearance and Personalization > Adjust Screen Resolution
| Manufacture | Keys |
| Acer | Fn+F5 |
| Dell | Fn+F8 |
| Epson | Fn+F8 |
| Fujitsu | Fn+F10 |
| IBM | Fn+F7 |
| Hewlett-packard | Fn*F4 |
| Lenovo | Fn+F10 |
| NEC | Fn+F3 |
| Panasonic | Fn+F3 |
| Sharp | Fn+F5 |
| Sorry | Fn+F7 |
| Toshiba | Fn+F5 |
| Zotac | Fn+F3/F5 |
- Connect to the DVD Player
Use the 3-in -1 AV cable in the package- Turn on your DVD player and the projector;
- Connect the colorful female connectors to your DVD player's RCA cable with the 3-in-1 AV cable in the package;
- Connect the black connector to the AV port of the projector, enter the home page to select [AV ]as the signal source.

Or connect to the DVD Player with the HDMI cable in the package.

- Connect to the Sound bar/Speaker
If your speaker has AUX port, please use your 3.5mm audio cable connect the projector and your speaker as the picture shows.


MAIN MENU FUNCTION
- Picture
Select the![]() menu -- Select the [picture] Option
menu -- Select the [picture] Option

 menu -- Select the [picture] Option
| Picture mode | Menu included | Function |
| Picture Mode | Medium/SoftfUser/Vivid | Adjust the "Brightness/Contrast/Saturation/Sharpness/Tint"' of the image: 0-100 |
| Color Temperature | Medium/Warm/User/Cool | Adjust the value of "Red/ Green/ Blue"' |
| Aspect Ratio | Auto/16:9/4:3 | Aspect ratio let you configure how images are displayed |
| Noise Reducion | Off/Low/Medium/High | Adjust the picture noise |
| Reduce Dispaly Size | Reduce Whole Display 100%-50% | Reduce the size of image size |
| Projection Direction | Front-Desktop / Rear-Desktop / Front-Ceiling / Rear-Ceiling | Choose the projection methods, flip the image |
| FourePoint Correction Setting | 4-corner trapezoidal correction functions | Adjust the four points to make the projected image a rectangle |
| Keystone Correction Setting | 4-sided trapezoid | Adjust the image horizontally or vertically |
| Infinity Zoom Setting | Vertical Zoom, Horizontal Zoom or Whole Zoom | The width and the length of the projection screen can be scaled individually by 70%-100% |
| Correction Reset | Reset Correction data | Correction data is restored to default values |
- Sound


| Sound mode | Menu included | Function |
| Sound mode | Standard/Music/Movie/Sports/User | Adjust the mode of the sound |
| Balance | -50 -50 | Adjust the volume of the left and right sound channels |
| Surround Mode | off/Surround | Turn off or turn on the Surround Mode channels |
- Time


| Time | Menu included | Function |
| Clock | Minute/Hour/Date/Month/Year | Set the time in a region |
| Sleep Timer | OFF/10min/20min/30min/6 0m in/120m in | Set the sleep time of the projector |
- Other Options


| Name | Menu included | Function |
| OSD Language | English, French, German, Italian, Spanish, Japanese, 20 several languages | Choose a language |
| BT Setting | Set Blueteeth | Connect bluetooth device |
| Restore Factory | Reset | Restore all settings to their factory settings |
| Color Range | Auto/16-235/0-255 | Adjust the value of the color range |
| Software Update(USB) | Local Update | Update offline |
- System Settings
Go to home page-- Select the Screen Mirroring -- Select the Setting -- Select the System settings


| Menu | Function |
| System Update | Online Update: Download Update Files online. Local Update: Use USB connection to provide Update Files. |
| Factory Reset | Restore user operation application configuration and system setting |
| Language Setting | Set up the language |
FAQ
- When turning on the power switch, the indicator light does not work,
- The power might not be connected well.
- Check the over-heat protection system.
- The remote control does not communicate with the projector.
- The power switch at the back of the projector is turned on or off?
- The remote control's batteries are depleted?
- Something obstructing the signal between the remote and IR
- Strong light on IR directly,
- No image on the screen.
- Is the channel set-up correct?
- Is there an input signal?
- Is the input cable plugged well?
- Under PC mode, is the refresh rate > 75KHz?
- Blue screen, no picture, no sound.
Input cables connected right? - Picture right, no sound
- Input cables connected right?
- Volume at min or on Mute.
- Trun off the AC3/Dolby sound and set it to stereo sound.
- Can't play the movies.
- The format of the video is right?
- Files are broken?
- Device is broken?
- Can't play video in App Netflix, Hulu, Amazon Prime when connected with smartphone. Those APPs are limited with HDCP. Only when connected with TV stick and roku, it can display these apps.
- There is picture, no sound?
The decode system doesnt match, - Can't find devices when connected with hard drive or flash drive.
Check if the device is broken. - Auto-off after working for a while.
- The projector ventilation is blocked,
- The voltage is not stable,
- The over-heat protection system.
- Not compatible with your bluetooth speaker?
- The projector may not compatible with some version bluetooth speaker of JBL.
- Contact our after-sales email at support01@wimius.com immediately and tell us the brand and model of your bluetooth speaker.
- WiFi connection is not stable?
- Please check whether the network of your phone is well.
- Make the distance of phone and projector within 1 meter.

Documents / ResourcesDownload manual
Here you can download full pdf version of manual, it may contain additional safety instructions, warranty information, FCC rules, etc.
Advertisement


Need help?
Do you have a question about the K7 and is the answer not in the manual?
Questions and answers