Philips AquaTrio Cordless XW9385 / XW9383 / XW9383/01 Manual
- User manual ,
- Manual (638 pages) ,
- Instructions manual (86 pages)
Advertisement
- 1 General description
- 2 Before first use
- 3 Charging
- 4 Vacuuming and mopping hard floors
- 5 Vacuuming soft and hard floors
-
6
Cleaning the Vacuum & Mop set-up
- 6.1 AUTOCLEAN after every use
- 6.2 Cleaning the After-Clean tray
- 6.3 Cleaning the AquaSpin nozzle
- 6.4 Removing blockages from the Vacuum & Mop set-up
- 6.5 Clearing blockages from the wet module
- 6.6 Clearing blockages from the AquaSpin nozzle
- 6.7 Clearing blockages from the wetting strips of the AquaSpin nozzle
- 7 Cleaning the Vacuum only set-up
- 8 Display icons and their meaning
- 9 Replacement
- 10 Troubleshooting
- 11 Documents / Resources
General description

- Dust bucket release button
- Display
- Cleaning mode button
- Middle button (AUTOCLEAN)
- On/off button
- Battery
- 3-in-1 handheld
- Dust bucket
- Wall mount
- Tube
- LED nozzle
- Mini Turbo brush
- Long crevice tool
- Adapter
- Power plug
- Extra charger (XW9385 only)
- After-Clean & Storage station
- Appliance holder
- After-Clean tray
- Baseplate
- Wet module
- Dirty water tank
- Clean water tank
- AquaSpin nozzle
- Microfiber brushes
- Philips Floor Cleaner XV1792
- Cleaning brush
Before first use
Assembling the After-Clean & Storage station In order to use the AUTOCLEAN function or store and charge the appliance on the After-Clean & Storage station, you need to first assemble the station by clicking the appliance holder into the baseplate.

 Tip: It is possible to slide the holder for Vacuum only set-up and put it back upside down if you want to place the Vacuum only set-up on the other side of the After-Clean & Storage station.

 Note: Make sure that the After-Clean tray is placed in the baseplate and that the temperature in the room where the appliance is stored, charged and cleaned is between 5°C and 35°C.

Tip: You can hang the cleaning brush on the hook of the appliance holder.

Installing the wall mount

If you want to store and charge the Vacuum only set-up on the wall mount, fasten the wall mount to the wall with the screws supplied. Make sure the wall mount is 140 - 150 cm above the floor.

Note: It is not possible to store the Vacuum & Mop set-up on the wall-mount. It is only possible to store the Vacuum only set-up on the wall mount.
Note: Make sure that the temperature in the room where the appliance is stored or charged is between 5°C and 35°C.

Be careful when you drill holes in the wall to fasten the wall mount, to avoid the risk of electric shock.
Assembling the Vacuum & Mop set-up
- To assemble the Vacuum & Mop set-up, insert the battery and attach the 3-in-1 handheld to the wet module ('click').
![]()
- Attach the wet module to the AquaSpin nozzle ('click').
![]()
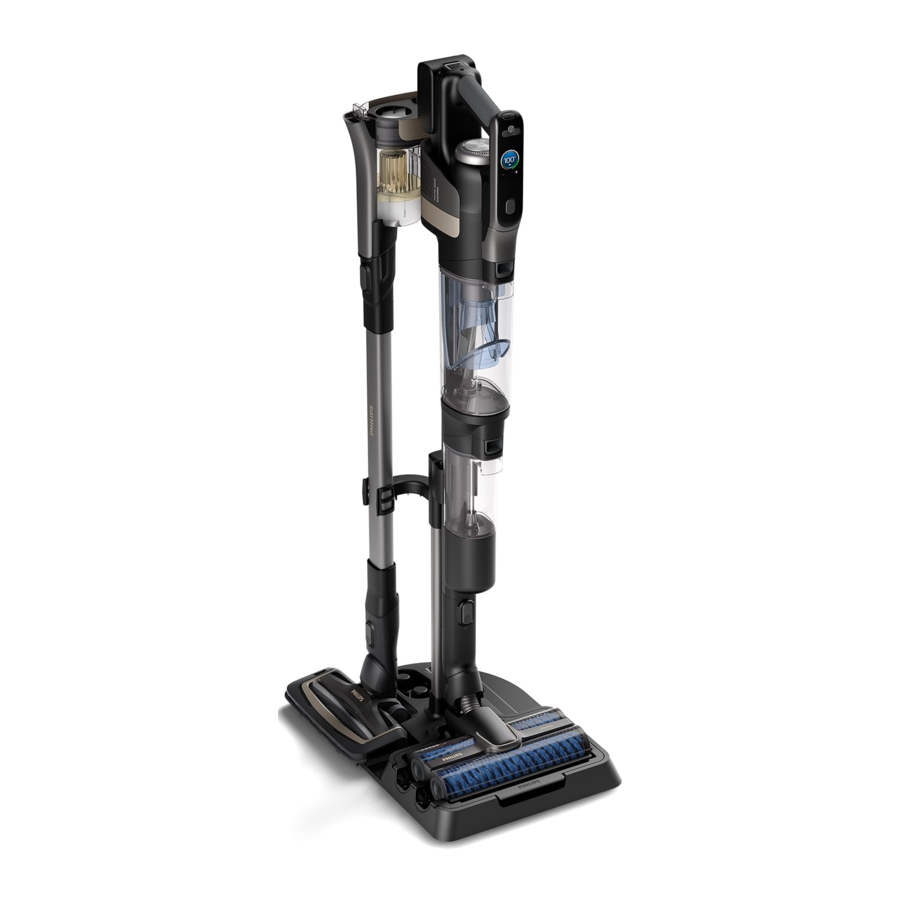
- To store the Vacuum & Mop set-up, you can place it in the After-Clean & Storage station.
![]()


Note: It is not possible to store the Vacuum & Mop set-up on the wall-mount. It is only possible to store the Vacuum only set-up on the wall mount.
Assembling the Vacuum only set-up
- To assemble the Vacuum only set-up, attach the 3-in-1 handheld to the dust bucket ('click').
![]()
- Attach the dust bucket to the tube ('click').
![]()
- Insert the tube into the LED nozzle.
![]()
- To store the Vacuum only set-up, place it in the After-Clean & Storage station by first placing the LED nozzle onto the long side of the baseplate and then pressing the tube into the holder.
![]()


Tip: It is possible to slide the holder for the Vacuum only set-up and put it back upside down if you want to place the Vacuum only set-up on the other side of the After-Clean & Storage station.


Charging
The appliance is equipped with a 25 V Li-Ion battery. Charging takes 4 hours.

- To charge the appliance, insert the power plug into the socket on the back of the appliance. Then insert the adapter into the wall socket.
- A value between 0% and 90% flashes on the screen to indicate that the appliance is charging.
![]()
- When the appliance is fully charged, the value 100% lights up on the screen. After a few minutes, the display will switch off.
![]()


Store and charge the appliance at a temperature above 5°C and below 35°C.
Tip: You can charge the appliance when it is attached to the the wall mount.

Tip: You can charge the appliance in the After-Clean & Storage station.

Tip: You can charge the appliance separately in a place that suits you best.

Vacuuming and mopping hard floors
Using the Vacuum & Mop set-up
The clean water tank and the dirty water tank are already attached to the appliance upon delivery. With the wet module attached to the AquaSpin nozzle, you can clean hard floors.
Note: This Vacuum & Mop set-up is suitable for vacuuming and mopping at the same time. It is not necessary to vacuum the floor before mopping. The Vacuum & Mop set-up is suitable for vacuuming and mopping all types of hard floors, except uncoated wooden floors (see 'Usage restrictions').
- To assemble the Vacuum & Mop set-up, insert the battery and attach the 3-in-1 handheld to the wet module ('click').
![]()
- Attach the wet module to the AquaSpin nozzle ('click').
![]()
- Push the button to unlock the clean water tank and remove the clean water tank.
![]()
- Remove the cap from the clean water tank.
![]()
- Add 10 ml of the XV1792 Philips Floor Cleaner to the clean water tank.
![]()
![]()
Philips has only tested this appliance with XV1792 Philips Floor Cleaner. Other detergents may lead to excessive foaming, which reduces performance and may cause the appliance to malfunction. XV1792 Philips Floor Cleaner is available in selected markets. When using any other suitable liquid floor cleaner, add a maximum of 10 ml to the clean water tank.
![]()
- Fill the clean water tank with cold or lukewarm tap water up to the MAX indication.
![]()
The tap water that is poured into the clean water tank must not be warmer than 50°C.
![]()


- Place the cap back on the clean water tank.
![]()
- Place the clean water tank back into the appliance.
![]()
- To switch on the appliance, press the on/off
![]() button and wait until the appliance is ready for use.
button and wait until the appliance is ready for use.
![]()
- Use the cleaning mode button to choose between three different settings:
- Normal wet mode
- Intense wet mode
- Water absorption mode
![]()


By selecting the normal water mode, you can use the appliance for regular wet cleaning. The intense wet mode is for cleaning extra stubborn stains. If there are wet spots on the floor after cleaning, you can select absorption mode to clean them up. We also recommend using it when lifting the appliance over a threshold, carpet or stairs (see 'Tips and other important information').
If you select water absorption mode, the appliance will stop supplying water and increase suction power for 45 seconds to absorb any water on the floor.
Note: older models feature normal wet mode and intense wet mode, but not water absorption mode.
Active protection system
- This appliance is equipped with an active protection system. This active protection system has been designed to recognize when a foreign object other than dirt or liquid is picked up from the floor.
- When the system is activated, the appliance switches off and the i3 message appears on the display (see 'Display icons and their meaning'). The active protection system can also be activated when the microfiber brushes are too wet, when you move the appliance over a carpet or a rug, or when you move it over flooring that is not properly affixed.
Tips and other important information
- It is not necessary to vacuum the floor before mopping, as the Vacuum & Mop set-up actively wet-cleans your hard floor to capture all kinds of dirt, including liquids and stains. On carpets and rugs, use the Vacuum only set-up.
- If your hard floors do not need mopping, simply use the vacuum only set-up which features LED lights and PowerCyclone 12 technology for precise and powerful dirt pick-up.
- You can move the appliance just as quickly as a vacuum cleaner. To remove difficult stains, click the cleaning mode button to activate the intense wet mode
![]() and move the appliance slowly over the stains.
and move the appliance slowly over the stains. - The appliance can leave a small puddle of water on the floor if you do not move the appliance while switching it off. You can reduce the size of the puddle by moving the appliance while switching it off. If needed, you can remove the last drops with a cloth.
- It is recommended to activate the water absorption mode
![]() when lifting the appliance over a threshold, carpet or stairs during cleaning. This will prevent dirty water from dripping out of the AquaSpin nozzle.
when lifting the appliance over a threshold, carpet or stairs during cleaning. This will prevent dirty water from dripping out of the AquaSpin nozzle. - When moving the appliance, it is recommended to stretch your arm to reduce unnecessary tension on the muscles. In this position, you have the best control over the appliance when cleaning, and it will be the most comfortable.
Note: When you use the water absorption mode ![]() , no more water comes out of the appliance and the suction power increases. After 45 seconds, if you do not take any action, the appliance automatically switches back to normal wet mode
, no more water comes out of the appliance and the suction power increases. After 45 seconds, if you do not take any action, the appliance automatically switches back to normal wet mode ![]() .
.
Note: older models feature normal wet mode ![]() and intense wet mode
and intense wet mode ![]() , but not water absorption mode
, but not water absorption mode![]() . For these models, move the appliance while switching it off to reduce the amount of water left on the floor. It is also recommended to leave the appliance on when lifting it over a threshold, carpet or stairs during cleaning. This will prevent dirty water from dripping out of the AquaSpin nozzle.
. For these models, move the appliance while switching it off to reduce the amount of water left on the floor. It is also recommended to leave the appliance on when lifting it over a threshold, carpet or stairs during cleaning. This will prevent dirty water from dripping out of the AquaSpin nozzle.
Usage restrictions
- The Vacuum & Mop set-up is suitable for vacuuming and mopping all types of hard floors, except uncoated wooden floors.
- The Vacuum & Mop set-up is intended for regular cleaning of hard floors. Always follow the cleaning instructions for your hard floor when you use this appliance.
- If you want to add a liquid floor cleaner other than XV1792 Philips Floor Cleaner to the water in the clean water tank, make sure that you use a lowfoaming or non-foaming liquid floor cleaner that can be diluted in water like XV1792 Philips Floor Cleaner.
- As the clean water tank has a capacity of 400ml, you only have to add a few drops (max 10ml) of liquid floor cleaner to the water.
- If you use the Vacuum & Mop set-up on linoleum floors, only do so on linoleum floors that are properly affixed to prevent linoleum from being drawn into the AquaSpin nozzle.
- Do not use the Vacuum & Mop set-up to clean carpets.
- If you move/lift the appliance over a carpet or rug when it is switched off, wastewater droplets may end up on your carpet or rug.
- Do not push the appliance over the floor grilles of convector heaters. As the appliance cannot pick up water that comes out of the nozzle when you move it over the grille, water ends up at the bottom of the convector pit.
- While cleaning, do not lift the AquaSpin nozzle from the floor or move the AquaSpin nozzle sideways, and do not make strong turns, as this leaves water traces. Only move forwards and backwards.
Note: The operating time depends on the power level used during cleaning.
Note: older models only feature normal wet mode ![]() and intense wet mode
and intense wet mode ![]() , but not water absorption mode
, but not water absorption mode ![]() .
.
Vacuuming soft and hard floors
Using the Vacuum only set-up
- To vacuum soft or hard floors, attach the 3-in-1 handheld to the dust bucket ('click').
![]()
![]()
Do not attach the 3-in-1 handheld to the dust bucket without the filter case being inserted in the dust bucket.
![]()
- Attach the dust bucket to the tube ('click').
![]()
- Insert the tube into the LED nozzle.
![]()


- To switch on the appliance, press the on/off
![]() button and wait until the appliance is ready for use.
button and wait until the appliance is ready for use.
![]()
- Use the buttons on the left
![]() and right
and right ![]() to choose between the two different power settings.
to choose between the two different power settings.
![]()

 and right
  to choose between the two different power settings.
Tip: The LEDs in the LED nozzle make it easier to see dirt on the floor. The tube and LED nozzle allow you to reach under low furniture without the need to twist the appliance.

Do not vacuum up water or other liquids.
Do not look directly into the LEDs of the LED nozzle or point the LEDs at someone's eyes. The LED light is very bright.

Using the tube
You can attach the tube to the handheld and use it without a nozzle to vacuum tight spaces between or behind pieces of furniture with the end of the tube.

Tip: It is also possible to attach the Mini Turbo brush to the tube.

Tip: It is also possible to attach the long crevice tool to the tube.

Using the handheld
Without the nozzle and tube, you can use the handheld to clean small patches of dust and dirt, such as spilled breadcrumbs, or to vacuum staircases and shelves.

Do not vacuum up water or other liquids.
Using the LED nozzle
You can use the LED nozzle to clean areas, such as the steps of a staircase, to vacuum up dirt in corners or on narrow ledges, or to clean small patches of dirt, such as spilled breadcrumbs.
- To attach the LED nozzle, insert the tube or the handheld into the nozzle.
![]()
- To detach the LED nozzle, press the release button (1) and pull the tube or handheld out of the nozzle (2).
![]()


Do not vacuum up water or other liquids.
Using the Mini Turbo brush
- To attach the Mini Turbo brush, insert the tube of the handheld into the Mini Turbo brush.
![]()
- You can use the Mini Turbo brush for standard cleaning, for instance of soft areas such as beds and couches. You can adjust the power setting to suit your cleaning needs.
![]()
- You can use the Mini Turbo brush for extra thorough cleaning, for instance to vacuum up pet hair, or to clean small patches of dirt, such as spilled breadcrumbs. You can adjust the power setting to suit your cleaning needs.
![]()
- To detach the Mini Turbo brush, press the release button (1) and pull the handheld out of the Mini Turbo brush (2).
![]()


Do not vacuum up water or other liquids.

Using the long crevice tool
- To attach the long crevice tool, insert the tube or handheld into the long crevice tool.
![]()
- You can use the long crevice tool to clean narrow corners or hard-to-reach places. You can adjust the power setting to suit your cleaning needs.
![]()
- To detach the long crevice tool, press the release button (1) and pull the tube or handheld out of the long crevice tool (2).
![]()


Do not vacuum up water or other liquids.

Cleaning the Vacuum & Mop set-up
AUTOCLEAN after every use
To prevent odors and scale deposits, use the AUTOCLEAN function after every use. The AUTOCLEAN mode helps you to clean your full appliance in approximately 4 minutes.
- Place the Vacuum & Mop set-up in the After-Clean & Storage station.
![]()
![warning]() Note: If the dirty water level is below the AUTOCLEAN level, it is not necessary to empty the tank before starting the AUTOCLEAN program. You can skip the following steps and move forward to step 6.
Note: If the dirty water level is below the AUTOCLEAN level, it is not necessary to empty the tank before starting the AUTOCLEAN program. You can skip the following steps and move forward to step 6.
![]()
- Push the button to unlock the dirty water tank and remove it.
![]()


- Remove the wet filter from the dirty water tank.
![]()
- Pour the water out of the dirty water tank into the sink.
![]()
- Place the wet filter back on the dirty water tank.
![]()
- Place the empty dirty water tank back into the appliance and take out the clean water tank.
![]()
- Remove the cap from the clean water tank.
![]()
- Pour any remaining detergent liquid from the clean water tank into the sink.
![]()
- Fill the clean water tank with cold or lukewarm tap water at least up to the AUTOCLEAN indication.
![]()
![]()
The tap water that is poured into the clean water tank must not be warmer than 50°C.
![]()
Do not use detergent for the AUTOCLEAN as this might lead to excessive foaming.


- Place the clean water tank back into the appliance.
![]()
- Charge the appliance. Insert the power plug into the socket on the back of the appliance. Then insert the adapter into the wall socket.
![]()
![]()


- To start the AUTOCLEAN cycle, press the middle
![]() button. If you see a black screen, press the on/off
button. If you see a black screen, press the on/off ![]() button first to activate the screen.
button first to activate the screen.
![]()
- The appliance performs the AUTOCLEAN cycle.
![]()
![warning]() Note: The Autoclean cycle lasts approx. 4 minutes. For best results, let the appliance run through the AUTOCLEAN cycle completely. You can pause or cancel the AUTOCLEAN cycle at any time.
Note: The Autoclean cycle lasts approx. 4 minutes. For best results, let the appliance run through the AUTOCLEAN cycle completely. You can pause or cancel the AUTOCLEAN cycle at any time.
![warning]() Note: If you cancel the AUTOCLEAN program, the appliance will suck up the remaining water in the After-clean tray for about 10 seconds.
Note: If you cancel the AUTOCLEAN program, the appliance will suck up the remaining water in the After-clean tray for about 10 seconds. - Push the button to unlock the dirty water tank and remove it.
![]()
- Remove the wet filter from the dirty water tank.
![]()
 button. If you see a black screen, press the on/off


- Pour the water out of the dirty water tank into the sink.
![]()
- Clean the dirty water tank under the tap.
![]()
- Clean the wet filter under the tap.
![]()
- Let the wet filter of the dirty water tank and its water flow element dry completely before putting it back on the dirty water tank.
![]()
- Place the wet filter back on the dirty water tank.
![]()


- Place the dirty water tank back into the appliance.
![]()
- Turn the microfiber brushes counterclockwise (1) and remove them from the AquaSpin nozzle (2).
![]()
![information]() Tip: In case a microfiber brush is difficult to remove, you can use the cleaning brush handle to unlock the microfiber brush.
Tip: In case a microfiber brush is difficult to remove, you can use the cleaning brush handle to unlock the microfiber brush.
![]()
- To allow the microfiber brushes to dry, place the open ends of the brushes on the designated holders of the After-Clean & Storage station.
![warning]() Note: Drying can take approximately 24 hours.
Note: Drying can take approximately 24 hours.
![]()


Cleaning the After-Clean tray
If the After-Clean tray gets dirty, you can clean it by following the steps below.
- Remove the After-Clean tray from the storage station.
![]()

- Rinse the After-Clean tray under the tap and let it dry before placing it back in the Storage station.
![]()
- Make sure to always put the After-Clean tray back in the Storage station. The After-Clean tray is essential to perform the AUTOCLEAN correctly.
![]()


Cleaning the AquaSpin nozzle
- Turn the microfiber brushes counterclockwise (1) and remove them from the AquaSpin nozzle (2).
![]()
![information]() Tip: In case a microfiber brush is difficult to remove, you can use the cleaning brush handle to unlock the microfiber brush.
Tip: In case a microfiber brush is difficult to remove, you can use the cleaning brush handle to unlock the microfiber brush.
![]()
- You can remove entangled hair or threads from the microfiber brushes by sliding down the microfiber brushes with one hand.
![]()


Tip: You can also use a pair of scissors to cut hairs and threads that have become entangled around the microfiber brushes.

Removing blockages from the Vacuum & Mop set-up
The Vacuum & Mop set-up may become clogged. You may notice this when more water gets on the floor than usual or when bigger dirt particles are no longer sucked up and fall back on the floor. Below you can find the instructions to remove blockages from different parts of the Vacuum & Mop set-up.
Clearing blockages from the wet module
If there is a blockage in the wet module, first switch off the appliance and remove the AquaSpin nozzle and the 3-in-1 handheld. Then remove the blockage by moving the cleaning brush in the suction channel of the wet module up and down.

Clearing blockages from the AquaSpin nozzle
If there is a blockage in the AquaSpin nozzle, it can be removed by moving the cleaning brush up and down in the suction channel of the AquaSpin nozzle.

Clearing blockages from the wetting strips of the AquaSpin nozzle
After long and frequent use of the appliance, the wetting strips of the AquaSpin nozzle may become clogged at some point. Follow the steps below to clear the blockage of the wetting strips of the AquaSpin nozzle.
- Remove the wetting strip covers from the AquaSpin nozzle by moving them sideways.
![]()
- Remove the wetting strips from the AquaSpin nozzle by pulling them out sideways.
![]()
- Rinse the wetting strips under the tap.
![]()
- Let the wetting strips dry before placing them back in the AquaSpin nozzle.
![]()


Cleaning the Vacuum only set-up
Emptying the dust bucket
Regularly empty the dust bucket and make sure that the dirt never exceeds the 'Max' indication. This prevents accelerated filter clogging.

- Press the release button (1) to release the 3-in-1 handheld of the dust bucket and then lift the 3-in-1 handheld off the appliance (2).
![]()
- Pull the filter case off the dust bucket.
![]()
- Empty the dust bucket into a waste bin.
![]()


- Put the filter case back onto the dust bucket.
![]()
- Reconnect the 3-in-1 handheld to the dust bucket. Make sure that you connect the rear part first, then connect the front part so it locks into place with a click.
![]()


Cleaning the dust bucket
- To clean the dust bucket and the cyclone, remove the filter case.
![]()
- Empty the dust bucket into a waste bin.
- Remove and clean the cyclone if necessary (see 'Cleaning the cyclone').
![]()
- If you want, you can use a wet or dry cloth to clean the inside of the dust bucket.
![]()
![warning]() Note: do not let the electronic connectors get wet. If the electronic connectors do get wet, please allow them to dry before using the device again. Always use the appliance with dry electronic connectors. This prevents the appliance from malfunctioning over time.
Note: do not let the electronic connectors get wet. If the electronic connectors do get wet, please allow them to dry before using the device again. Always use the appliance with dry electronic connectors. This prevents the appliance from malfunctioning over time.
![]()
Do not clean the dust bucket in the dishwasher.
![]()
Do not rinse the dust bucket under the tap.


- Reattach the filter case back in when the dust bucket is dry.
![]()
- Reconnect the 3-in-1 handheld to the dust bucket.
![]()


Do not reconnect the 3-in-1 handheld to the dust bucket without the filter case being inserted in the dust bucket.

Cleaning the cyclone
- Turn the cyclone clockwise (1) and remove it from the dust bucket (2).
- Remove hair and dirt that is stuck in and under the cyclone.
![]()
- If desired, you can rinse the cyclone under the tap.
![]()
![warning]() Note: Always let the cyclone dry completely before placing it back into the dust bucket.
Note: Always let the cyclone dry completely before placing it back into the dust bucket.
![]()
- Replace the cyclone (1) and turn it counterclockwise (2) to secure it back into the dust bucket.
![]()
![]()
Make sure to fully tighten the cyclone when placing it back. Rotate the cyclone until the cyclone cannot rotate any further and is fully secured.
![]()


Cleaning the filter
When the filter needs to be cleaned, the filter cleaning icon appears on the screen.

- Pull the filter case off the dust bucket.
![]()
![]()


- Press the release button to release the lid of the filter case and remove the foam filter.
![]()
![]()
Make sure that the filter case lid does not get wet during cleaning. - Shake the foam filter over a waste bin to remove the layer of dirt on top of the foam filter. Then rinse the foam filter under a tap.
![]()
- Squeeze the foam filter to remove the water.
![]()
- Shake the filter case and lid over a waste bin to remove dust.
![]()
- Clean the filter holder with a damp cloth.
![]()
Do not clean the white material of the filter case lid with a normal vacuum cleaner or a brush. Do not clean the white material of the filter case lid with water or any cleaning agent. It will damage the material. The white material can be tapped over a bin.
![]()
- Let the foam filter dry and make sure that it is completely dry before you put it back into the filter case.
![]()
![]()
Make sure that the foam filter is correctly placed in the filter case. 8 Close the filter case. - Close the filter case.
![]()
- Put the filter case including the foam filter back into the dust bucket.
![]()
![]()
Make sure the white material of the filter case lid is facing up.
![]()
Make sure that the filter case including the foam filter are completely dry before you put them back into the dust bucket.
![]()
- Reconnect the 3-in-1 handheld to the dust bucket.
![]()
Do not reconnect the 3-in-1 handheld to the dust bucket without the filter case being inserted in the dust bucket.
![]()
![warning]() Note: Replace the filter every 6 months to ensure maximum performance. Replacement filters are available under part number XV1791 (see 'Replacement').
Note: Replace the filter every 6 months to ensure maximum performance. Replacement filters are available under part number XV1791 (see 'Replacement').


Cleaning the motor inlet filter
The 3-in-1 handheld has a filter that may become blocked with dust. This can reduce the suction power over time. To clean the motor inlet filter, follow these steps:
- Press the release button (1) to release the 3-in-1 handheld of the dust bucket and then lift the 3-in-1 handheld off the appliance (2).
![]()
- Clean the inlet filter with a cloth or with the cleaning brush.
![]()
- Reconnect the 3-in-1 handheld to the dust bucket. Make sure that you connect the rear part first, then connect the front part so it locks into place with a click.
![]()


Cleaning the roller brush
- Pull down the locking lever on the side of the LED nozzle (1) and slide the roller brush out of the LED nozzle (2). You can remove entangled hair or threads from the roller brush by sliding down the roller brush with one hand.
![]()
![information]() Tip: You can also move one blade of a pair of scissors through the groove on the roller brush to cut hairs and threads that have become entangled around the roller brush.
Tip: You can also move one blade of a pair of scissors through the groove on the roller brush to cut hairs and threads that have become entangled around the roller brush.
![]()
- Slide the roller brush back into the LED nozzle (1) and push up the locking lever to lock the roller brush in the LED nozzle ('click').
![]()


Cleaning the Mini Turbo brush
- Unlock the release button on the side of the Mini Turbo brush (1) and lift the roller brush out of the Mini Turbo brush (2).
![]()
- Remove the hairs and dirt entangled around the roller brush.
![information]() Tip: You can also move one blade of a pair of scissors through the groove on the roller brush to cut hairs and threads that have become entangled around the roller brush.
Tip: You can also move one blade of a pair of scissors through the groove on the roller brush to cut hairs and threads that have become entangled around the roller brush.
![]()
- Press one side of the roller brush back into the Mini Turbo brush (1) and push down the other side of the roller brush to lock the roller brush in the Mini Turbo brush ('click').
![]()


Display icons and their meaning
Error code
| Error code | Cause | Solution |
 | There is a system error. | An E1 error code means that your Philips AquaTrio 9000 series Vacuum Cleaner has a system error. To solve this, please try one or both of the following options:
|
 | The temperature is too low. | Make sure the temperature in the room where the appliance is used, stored, or charged is above 5°C. |
 | The temperature is too high. | Make sure the temperature in the room where the appliance is used, stored, or charged is below 35°C. Do not expose the device to direct sunlight or high temperatures (near hot stoves, in microwave ovens, or on induction cookers). Batteries may explode if overheated. |
 | The battery is half inserted. | Make sure that the battery is inserted correctly (see 'Assembling the Vacuum & Mop set-up'). |
Information code
| Information code | Cause | Solution |
 | The dirty water tank is full. | Empty the dirty water tank. |
 | The AquaSpin nozzle is not connected (properly). | Connect the AquaSpin nozzle. |
 | The AquaSpin nozzle is stuck. This is a safety cut-off if something is stuck in the nozzle (for instance, a power cable or a toy). | Check the brushes, bearings, motor parts, and caps for hair or other obstacles and remove them. If there are no obstacles, switching the appliance off and on might solve the problem. |
 | The LED nozzle is stuck. This is a safety cut-off if something is stuck in the nozzle (for instance, a power cable or a toy). | Check the roller brush and the rest of the nozzle for hair or other obstacles and remove them (see 'Cleaning the roller brush'). If there are no obstacles, switching the appliance off and on might solve the problem. |
 | The air inlet openings are blocked. | Check the air inlet openings for blockages and remove them. If this does not solve the problem, check the whole air passage for blockages and remove them. For the Vacuum only set-up, this refers to the nozzle, tube, filter, vortex finder, long crevice tool, and Mini turbo brush. For the Vacuum & Mop set-up, this refers to the nozzle, tube, and the wet filter. |
 | Unplug for use. | Unplug the appliance for use. Otherwise, it will not switch on. Only during AUTOCLEAN is it possible to have the appliance plugged in. |
 | The wrong charger is connected. | Only charge the appliance with the adapter supplied. Only use 34V adapter S036-1A340100HE. The corresponding adapter number can be found on the adapter. |
 | The battery is not inserted. | Make sure that the battery is inserted (see 'Assembling the Vacuum & Mop set-up'). |
Icons & Meaning
| Icons | Meaning |
 | AUTOCLEAN |
 | Reminder to clean the filter (see 'Cleaning the filter') |
 | Microfiber brush replacement needed |
 | Filter replacement needed |
Replacement
To buy accessories or spare parts, visit www.philips.com/parts-and-accessories or go to your Philips dealer. You can also contact the Philips Consumer Care Center in your country (see the international warranty leaflet for contact details).
Replacement parts and type numbers:
- Replacement filter XV1791
- Philips Floor Cleaner XV1792
- Replacement microfiber brushes XV1793
- Lithium-Ion Battery pack 25.2V XV1797
Replace the filter and the microfiber brushes every 6 months to ensure maximum performance.
Note: You can dispose of the old filter and the microfiber brushes with the normal household waste.
Troubleshooting
This chapter summarizes the most common problems you could encounter with the appliance. If you are unable to solve the problem with the information below, visit www.philips.com/support for a list of frequently asked questions or contact the Consumer Care Center in your country.
Using the Vacuum & Mop set-up
| Problem | Possible cause | Solution |
The appliance does not work when I push the on/off  button. button. | The battery is not connected. | Connect the battery to the 3-in-1 Handheld. |
| The battery is empty. | To charge the battery, connect the 3-in-1 Handheld with the charger (see 'Charging'). | |
| You did not take the appliance out of the After-Clean & Storage station. | Take the Vacuum & Mop set-up out of the After-Clean & Storage station before switching on the appliance. | |
| You pushed the on/off button more than one time. | Wait a few seconds and push the on/off button again one more time. | |
| You did not connect the 3-in-1 Handheld to the appliance correctly. | Place the lower body of the appliance on the After-Clean & Storage station. Then connect the 3-in-1 Handheld to it. | |
| The appliance is clogged. | Switch the appliance off and remove the battery or 3-in-1 handheld. Then locate and remove the cause of the blockage (see 'Removing blockages from the Vacuum & Mop set-up'). After that, restart the appliance. If you cannot identify the cause of the blockage, restart the appliance. This might already solve the problem. | |
| The microfiber brushes are stuck. | Take the microfiber brushes out and place them back (see 'Cleaning the AquaSpin nozzle').
| |
| The appliance stopped working. | You accidentally touched the on/off button with your hand. | Switch on the appliance by pushing the on/off button. |
| The dirty water tank may be full. In this case, there is an information icon shown on the screen (see 'Display icons and their meaning'). | Empty the dirty water tank (see 'AUTOCLEAN after every use'). | |
| The appliance is clogged. | Switch the appliance off and remove the battery or 3-in-1 handheld. Then locate and remove the cause for the blockage (see 'Removing blockages from the Vacuum & Mop set-up'). After that, restart the appliance. If you do not identify the cause for the blockage, just restart the appliance. This might already solve the problem. | |
| The floor is less wet than usual. | The wetting strips are blocked. | Remove the two microfiber brushes, fill some water into the clean water tank and switch the appliance on. Make small forward and backward movements on the same position for around 15 seconds. You should be able to see four water stripes on the floor. If this is not the case, or if one or more water stripes only consist out of a few droplets, the wetting strips are partially or fully blocked and you can rinse them under the tap (see 'Clearing blockages from the wetting strips of the AquaSpin nozzle'). If that does not help, you can try to carefully open the holes with a needle. |
| One side of the floor under the nozzle is less wet than the other one. | One of the two wetting strips is blocked. | Remove the two microfiber brushes, fill the clean water tank with some water, and switch the appliance on. Make small forward and backward movements on the same position for around 15 seconds. You should be able to see four water stripes on the floor. If this is not the case, or if one or more water stripes only consist out of a few droplets, the wetting strips are partially or fully blocked and you can rinse them under the tap (see 'Clearing blockages from the wetting strips of the AquaSpin nozzle'). If that does not help, you can try to carefully open the holes with a needle. |
| There is no water on the floor. | The clean water tank is empty. | Refill the clean water tank (see 'Using the Vacuum & Mop set-up'). |
| There is more water on the floor or in the After-Clean tray than usual. | The wetting strips are blocked. | Remove the two microfiber brushes, fill the clean water tank with some water, and switch the appliance on. Make small forward and backward movements on the same position for around 15 seconds. You should be able to see four water stripes on the floor. If this is not the case, or if one or more water stripes only consist out of a few droplets, the wetting strips are partially or fully blocked and you can rinse them under the tap (see 'Clearing blockages from the wetting strips of the AquaSpin nozzle'). If that does not help, you can try to carefully open the holes with a needle. |
| The water channel of the wet module and/or AquaSpin nozzle is polluted or blocked. | If you have checked the above and there is still no water on the floor, take the appliance to a Philips service center or contact the Consumer Care Center. Use the cleaning brush and clean the water channel of the wet module and/or AquaSpin nozzle (see 'Removing blockages from the Vacuum & Mop set-up'). | |
| The dirty water tank is not placed correctly. | Place the dirty water tank into the appliance properly (see 'AUTOCLEAN after every use'). It is closed correctly when you can hear a 'click' sound. | |
| The appliance leaves water traces on the floor. | You have moved the appliance sideways. | To prevent water traces on the floor, try to make less strong turns with your AquaTrio 9000 Series and avoid moving the appliance sideways. You can activate the water absorption mode  by pressing the cleaning mode button. All the remaining water on your floor will be absorbed. by pressing the cleaning mode button. All the remaining water on your floor will be absorbed. |
| You made strong turns with the appliance. | To prevent water traces on the floor, try to make less strong turns with your AquaTrio 9000 Series and avoid moving the appliance sideways. You can activate the water absorption mode by pressing the cleaning mode button. All the remaining water on your floor will be absorbed. | |
| You have lifted the appliance over a threshold, carpet or stairs. | Make sure the microfiber brushes stay in contact with the floor. Make sure water absorption mode is switched on before you lift the appliance over a threshold, carpet or stairs to prevent water traces on the floor or to prevent water from splashing from the AquaSpin nozzle (see 'Usage restrictions'). | |
| You lifted the appliance up from the floor immediately after you switched it off. | Switch on water absorption mode to absorb any remaining water. Move the appliance forwards and backwards a few times with water absorption mode engaged before switching it off. If you switch off the appliance and lift it up immediately afterwards, the water that was present between the brushes leaves a trace of water on the floor (see 'Usage restrictions'). | |
| The appliance does not clean as well as it used to. | The wheels are blocked. | Check the condition of the wheels. Remove the dirt that blocks the wheels. |
| The clean water tank is empty. | Refill the clean water tank (see 'Using the Vacuum & Mop set-up'). | |
| The water strips are blocked. | Remove the two microfiber brushes, fill the clean water tank with some water, and switch the appliance on. Make small forward and backward movements on the same position for around 15 seconds. You should be able to see four water stripes on the floor. If this is not the case, or if one or more water stripes only consist out of a few droplets, the water strips are partially or fully blocked and you can rinse them under the tap (see 'Clearing blockages from the wetting strips of the AquaSpin nozzle'). If that does not help, you can try to carefully open the holes with a needle. | |
| The inside of the AquaSpin nozzle is too dirty. | Run the AUTOCLEAN program before returning to cleaning. If there is dirt accumulation in the edges of the nozzle, remove it. Make sure to use the AUTOCLEAN function after each use (see 'AUTOCLEAN after every use'). | |
| The microfiber Brushes are not present. | Place the microfiber brushes in the AquaSpin nozzle (see 'AUTOCLEAN after every use'). | |
| If you have checked the above and the appliance still does not clean well, take it to a Philips service center or contact the Consumer Care Center. | ||
| Bigger dirt particles are not sucked up anymore and fall back on the floor. | The water channel of the wet module and/or AquaSpin nozzle is polluted or blocked. | Use the cleaning brush and clean the water channel of the wet module and/or AquaSpin nozzle (see 'Removing blockages from the Vacuum & Mop set-up'). |
| The floor dries with stripes. | You may have used too much detergent. | Make sure to use the right amount of detergent (see 'Using the Vacuum & Mop set-up'). |
| The wheels are dirty. | Remove the dirt from the wheels. | |
| There is too much foam while cleaning, but also during AUTOCLEAN. | You may have used too much detergent. | Make sure to use the right amount of detergent (see 'Using the Vacuum & Mop set-up'). |
| There are still detergent residues on the floor. | Clean the floor without detergent several times. Wait a moment before going over the same stain again. | |
| It is difficult to clean stains. | You may have used too little water or taken too little time to clean the stain. | Apply water and wait a moment. For example you can go with the appliance over the stain to apply water and come back to the same stain in the end of the cleaning session. |
| The sound of the appliance changed while cleaning. | There might be hairs or other obstacles entangled around the microfiber brushes | Remove the microfiber brushes and check for obstacles and remove them (see 'Cleaning the AquaSpin nozzle'). |
| The display indicates that the dirty water tank is full (code: i1) and shuts down, although the dirty water tank is not full yet. | There may be foam or contamination of the dirty water tank. | Restart the appliance. If that does not solve the problem, clean the dirty water tank. If foaming is the issue, make sure you do not use more than the recommended amount of detergent (see 'Using the Vacuum & Mop set-up'). |
| Water drips out of the appliance after it is switched off. | The appliance leaves a puddle on the floor because you did not move it while switching it off. This is normal. | The appliance can leave a small puddle of water on the floor if you do not move the appliance while switching it off. You can reduce the size of the puddle by moving the appliance while switching it off. When you switch off the appliance, it will switch to water absorption mode for 4 seconds to clean up any water remaining in the nozzle. If needed, you can remove the last drops with a cloth. |
| The appliance is dripping when carrying it over the floor (holding it in the air). | While cleaning, do not lift the AquaSpin nozzle from the floor, as this leaves water traces. Only move forwards and backwards. | |
| Water leaks from the clean water tank because you overfilled the clean water tank. | Do not fill the clean water tank beyond the MAX indication. If you do, water may spill from the clean water tank when you fasten the cap (see 'Using the Vacuum & Mop setup'). | |
| There is a crack in one of the tanks. | If one of the tanks is damaged, take it to a Philips service center or contact the Consumer Care Center. | |
| I cannot remove the microfiber brushes. | Hair and/or dirt is entangled in the microfiber brushes. | Use the cleaning brush handle to remove the microfiber brushes from the AquaSpin nozzle. Remove entangled hair or dirt (see 'Cleaning the AquaSpin nozzle'). If it is difficult to pull the brushes out, you can give them a push from below the AquaSpin nozzle. |
| I cannot move the appliance forward or backward. | One or more wheels may be blocked by a small object. | Switch off the appliance and remove the nozzle. Then check the small and the big wheels for blockage. Remove any object that could block the wheel(s). Put the appliance upright again and resume cleaning. |
| The appliance has a lower suction power than usual. | The water channel of the wet module and/or AquaSpin nozzle is polluted or blocked. | Use the cleaning brush and clean the water channel of the wet module and/or AquaSpin nozzle (see 'Removing blockages from the Vacuum & Mop set-up'). |
| The mesh in the dirty water tank was not dry enough before being used again. | Clean and dry the dirty water tank. | |
| Hair entanglement on the microfiber brushes. | Switch the appliance off and remove the hair from the microfiber brushes (see 'Cleaning the AquaSpin nozzle'). | |
| The dirty water tank is not placed correctly. | Place the dirty water tank into the appliance properly (see 'AUTOCLEAN after every use'). It is closed correctly when you can hear a 'click' sound. | |
| The microfiber brushes do not turn anymore | The microfiber brushes are clogged with hair or dirt. | Clean the microfiber brushes with a pair of scissors or by hand (see 'Cleaning the AquaSpin nozzle'). |
| The microfiber brushes pop out. | The microfiber brushes are not locked correctly. | Place the microfiber brushes back in the right position and lock them. |
| The appliance is not charging. | The power plug is not connected properly to the socket or the adapter is not inserted into the wall socket properly. | Make sure that the power plug is connected properly to the socket and that the adapter is inserted into the wall socket properly. |
| The battery is not in. | Please insert the battery. | |
| The battery is not completely inserted. | Please insert the battery until you hear a click sound. | |
| Wrong adapter connected. | Please use the original adapter. | |
| If you have checked the above and the appliance still does not charge, take it to a Philips service center or contact the Consumer Care Center. | ||
| When I use my vacuum cleaner I sometimes feel static electricity shocks. | Your vacuum cleaner builds up static electricity. The lower the air humidity, the more static electricity the appliance builds up. | Make sure to touch the metal pin with your hand while holding the appliance. |
| You vacuumed up dust and dirt. This also causes static electricity. | Make sure to touch the metal pin with your hand while holding the appliance. |
Using the Vacuum only set-up
| Problem | Possible cause | Solution |
The appliance does not work when I push the on/off  button. button. | You did not connect the battery. | Connect the battery to the 3-in-1 Handheld. |
| The battery is empty. | To charge the battery, connect the 3-in-1 Handheld with the charger (see 'Charging'). | |
| You pushed the on/off button more than one time. | Wait a few seconds and push the on/off button again one more time. | |
| You did not connect the 3-in-1 Handheld to the appliance correctly. | Connect the 3-in-1 handheld correctly to the dust bucket. | |
| The appliance is clogged. | Switch the appliance off and remove the battery or powerhouse. Then locate and remove the cause for the blockage. After that, restart the appliance. If you cannot identify the cause of the blockage, restart the appliance. This might already solve the problem. | |
| The roller brush is stuck. | Take the roller brush out and remove any hair around the brush and the motor and place it back (see 'Cleaning the roller brush'). | |
| It is not possible, to connect the 3-in-1 Handheld to the dust bucket. | The filter case is assembled upside down. | Invert the filter case. The round opening should be visible (see 'Cleaning the dust bucket '). |
| The filter case is not closed properly. | Make sure you hear a click when closing the filter case. If it is difficult to close, the foam filter is probably placed upside down. | |
| The appliance stopped working. | You accidentally touched the on/off button with your hand. | Switch on the appliance by pushing the on/off button. |
| The appliance is clogged. | Switch the appliance off and remove the battery or powerhouse. Then locate and remove the cause for the blockage. After that, restart the appliance. If you cannot identify the cause of the blockage, restart the appliance. This might already solve the problem. | |
| The sound of the appliance changed while cleaning. | There might be hairs or other obstacles entangled around the roller brush. | Please check for obstacles and remove them (see 'Cleaning the roller brush'). |
| Obstacles are blocking the cyclone. | Check the cyclone for obstacles and remove them (see 'Cleaning the cyclone'). | |
| The appliance has a lower suction power than usual. | The filter and/or the cyclone are dirty. | Empty the dust bucket. Clean the filter and the cyclone. Make sure that you remove any hair and dirt that is stuck in the cyclone. You can remove the cyclone for easy maintenance (see 'Cleaning the cyclone'). Make sure that you wash the filter at least once a month if you use the appliance regularly (see 'Cleaning the filter'). |
| Something is blocking the cyclone. | Check the cyclone for objects stuck in it and remove any object that is blocking the cyclone. Make sure that you remove any hair and dirt that is stuck in the cyclone (see 'Cleaning the cyclone'). | |
| The suction channel behind the roller brush is clogged. | Remove the roller brush and check the suction channel for obstacles and remove them. | |
| You have not attached the filter case properly to the dust bucket or you have not attached the dust bucket properly to the appliance. In both cases, there will be a loss of suction power. | Make sure that you attach the filter case to the dust bucket and the dust bucket to the appliance properly (see 'Cleaning the dust bucket '). | |
| The brush is clogged with hair or dirt. | Switch the appliance off and clean the roller brush with a pair of scissors or by hand (see 'Cleaning the roller brush'). | |
| Dust escapes from the appliance. | The foam filter is not present in the filter case, or the top cover is missing. | Make sure that the filter is in the appliance and assembled correctly (see 'Cleaning the filter'). |
| Dust escapes when opening the dust bucket. | This is normal behavior due to under-pressure. | If possible, open the appliance outside. |
| The filter cleaning icon is shown on the display and the device shuts down. | The filter may be dirty. | We advise you to clean the filter. If you cleaned the filter recently, you can disregard this icon. To continue vacuuming, click the arrow icon. |
| The appliance does not move smoothly across the floor when I am cleaning a carpet. | You selected a too high suction power. | Reduce the suction power by choosing setting 1 or move more slowly over the carpet. |
| The roller brush does not turn anymore. | The roller brush is clogged with hair or dirt. | Clean the roller brush with a pair of scissors or by hand (see 'Cleaning the roller brush'). |
| The roller brush may stop turning when it encounters too much resistance from high-pile carpet. | Switch off the appliance and then switch it back on again. | |
| You have not assembled the roller brush into the nozzle properly after cleaning. | Follow the instructions in this user manual to slide the roller brush into the nozzle properly (see 'Cleaning the roller brush'). Secure the roller brush inside the nozzle by snapping the locking lever in place. | |
| The LEDs in the nozzle do not turn on. | You have not attached the nozzle to the tube or appliance properly. | Attach the nozzle to the tube or appliance properly. If this does not help, please take it to a Philips service center or contact the Consumer Care Center. |
| The appliance is not charging. | The plug is not connected properly to the socket-outlet or the adapter is not inserted into the wall socket properly. | Make sure that the plug is connected properly to the socket-outlet and that the adapter is inserted into the wall socket properly. |
| The battery is not in. | Please insert the battery. | |
| The battery is not completely inserted. | Please insert the battery until you hear a click sound. | |
| Wrong adapter connected. | Please use the original adapter. | |
| If you have checked the above and the appliance still does not charge, take it to a Philips service center or contact the Consumer Care Center. | ||
| The Mini Turbo brush does not function properly. | The roller brush is blocked. | Remove hairs from the brush with a pair of scissors (see 'Cleaning the Mini Turbo brush'). |
| The roller brush is blocked by fabric or surfaces during cleaning. | Keep the mini Turbo brush aligned with the surface and do not push the Turbo brush into soft surfaces. | |
| The roller brush is not properly inserted into the nozzle. | Make sure the the roller brush is properly inserted into the nozzle and that there is no gap between the parts (see 'Cleaning the Mini Turbo brush'). | |
| When I use my vacuum cleaner I sometimes feel static electricity shocks. | Your vacuum cleaner builds up static electricity. The lower the air humidity, the more static electricity the appliance builds up. | Make sure to touch the metal pin with your hand while holding the appliance. |
| You vacuumed up dust and dirt. This also causes static electricity. | Make sure to touch the metal pin with your hand, while holding the appliance. | |
| Error code 'E2' appears on the display. | The temperature is too low. | Make sure the temperature in the room where the appliance is used, stored, or charged is above 5°C. |
| Error code 'E3' appears on the display. | The temperature is too high. | Make sure the temperature in the room where the appliance is used, stored, or charged is below 35°C. Do not expose the device to direct sunlight or high temperatures (near hot stoves, in microwave ovens, or on induction cookers). Batteries may explode if overheated. |
To fully benefit from the support that Philips offers, register your product at www.philips.com/myvacuum9000s.
Documents / Resources
References
![www.philips.com]() Parts & accessories | Philips
Parts & accessories | Philips![www.philips.com]() Philips Customer Service Support - Home | Philips
Philips Customer Service Support - Home | Philips![www.philips.com]() Steelstofzuigers | Steelstofzuiger met Dweil | Philips
Steelstofzuigers | Steelstofzuiger met Dweil | Philips
Download manual
Here you can download full pdf version of manual, it may contain additional safety instructions, warranty information, FCC rules, etc.
Download Philips AquaTrio Cordless XW9385 / XW9383 / XW9383/01 Manual
Advertisement


Need help?
Do you have a question about the AquaTrio Cordless 9000 Series and is the answer not in the manual?
Questions and answers