Advertisement
Quick Links
Download this manual
See also:
Instructions for Using
C 420
Bedienungshinweise. . . . . . . S. 2
User Instructions . . . . . . . . . p. 12
Mode d'emploi . . . . . . . . . . . p. 22
Istruzioni d'uso . . . . . . . . . . . p. 32
Modo de empleo . . . . . . . . . p. 42
Instruções de uso . . . . . . . . p. 52
Bitte vor Inbetriebnahme des Gerätes lesen!
Please read the manual before using the equipment!
Veuillez lire cette notice avant d'utiliser le système!
Prima di utilizzare l'apparecchio, leggere il manuale!
Antes de utilizar el equipo, lea por favor el manual!
Por favor leia este manual antes de usar o equipamento!
Advertisement

Related Manuals for AKG C 420


Summary of Contents for AKG C 420
- Page 1 C 420 Bedienungshinweise..S. 2 User Instructions ..p. 12 Mode d’emploi ... p. 22 Istruzioni d’uso ... p. 32 Modo de empleo .
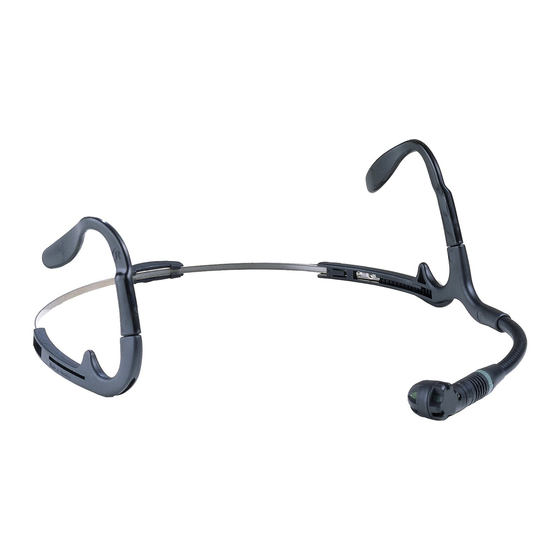
- Page 2 1 Description 1.1 General The C 420 is a head-worn miniature condenser microphone with a convenient behind-the-neck headband. The microphone has a cardioid polar pattern and therefore “prefers” sounds arriving from in front of it (from the user’s mouth). The microphone case containing the condenser...
- Page 3 All C 420 versions are supplied with: MPA II phantom power adapter The C 420 is a condenser microphone and there- fore needs a power supply. 1. Connect the phantom power adapter on the microphone cable to a balanced XLR micro- phone input with phantom power.
- Page 4 2. Connect the B 29 or MPA II to the desired input. This version is identical to the C 420 L except that it uses a screw-in mini jack plug that you can connect directly to the old versions of the B 29, MPA II, or AKG bodypack transmitters.
- Page 5 To connect to a balanced (XLR) input, use a standard XLR cable. To connect to an unbalanced input (mono jack), use a cable with a female XLR connector and TS jack plug (see fig. 1 below): 1. On the XLR connector, use a wire bridge to connect pin 1 to pin 3 and the cable shield.
-
Page 6: Operating Notes
3 Operating Notes 3.1 Putting the Microphone on 1. Adjust the temple pieces so that the behind- the-neck headband will rest securely against your head. Fig. 2: Adjusting the temple pieces. 2. Put the behind-the-neck headband on as shown in figs. 3 through 5. Fig. - Page 7 Fig. 6 3. If the behind-the-neck headband does not fit snugly, readjust the temple pieces as shown in fig. 6. Slide the cable holder so as to slacken the cable a little (refer to fig. 7). 4. Should the micro- phone still fit loo- sely, bend...
-
Page 8: Specifications
Frequency range: Sensitivity: Electrical Impedance at 1000 Hz: Recommended load impedance: Max. SPL for 1% / 3% THD: Equivalent noise level: Supply voltage: C 420: C 420 L: C 420 B/lock: Current consumption: Connector: Finish: Size: Cable length: Net weight:... - Page 9 When connected to equipment with a CE sign, this product conforms to EN 50 082-1. 4.3 Frequency Response Clean metal surfaces with (industrial grade) methylated spirits or alcohol. Clean the foam windscreen in mild soap suds. You can use the windscreen again as soon as it has dried.
-
Page 10: Troubleshooting
Remedy C 420: Check phan- tom power source. C 420 B/lock: Check batteries in the B 29 or PT 300. C 420 L: Check bat- teries in the body- pack transmitter. Adjust headband exactly as described in section 3.1, referring particularly to fig. - Page 11 Problem 5. Microphone sounds “thin”, feedback sets in at low levels: 6 Troubleshooting Possible Cause Microphone sits too far away from mouth or nose. Remedy Move microphone closer to corner of mouth.
Need help?
Do you have a question about the C 420 and is the answer not in the manual?
Questions and answers