
Related Manuals for MPMan MPF99 Series


Summary of Contents for MPMan MPF99 Series
- Page 1 MP3 Player with LCD Display For series MPF99 INSTRUCTION MANUAL Read this manual carefully to get the best performance from this unit.
-
Page 2: Table Of Contents
Table of Contents  Thank You ............................. 4 Package Contents ..........................4 Features ............................4 ConTrols aT a GlanCe ......................5 GeTTinG sTarTed ........................... 6 Charging the Battery ........................6 Charging with a Computer ......................6 Tunning the Player On/Off ......................6 Main Menu ............................ 7 PlaY MusiC Mode......................... - Page 3 reCord Mode ..........................12 Record Controls ..........................12 Folder Mode ..........................13 Folder Controls ..........................13 seTTinG Mode ..........................14 ConneCTinG To a CoMPuTer ....................15 Transferring/Managing Files ......................15 Disconnecting to a Computer ....................16 MPManaGer ..........................18 sPeCiFiCaTions ........................... 19 TroubleshooTinG & suPPorT ....................20 Page 3 Table Of Contents...
-
Page 4: Thank You
Thank You  Congratulations on your purchase of the MP3 player. This manual is designed to help you easily set up and begin using your new player right away. Please read this manual carefully and retain it for future reference. Package Contents Features Please make sure that the items shown below are... -
Page 5: Controls At A Glance
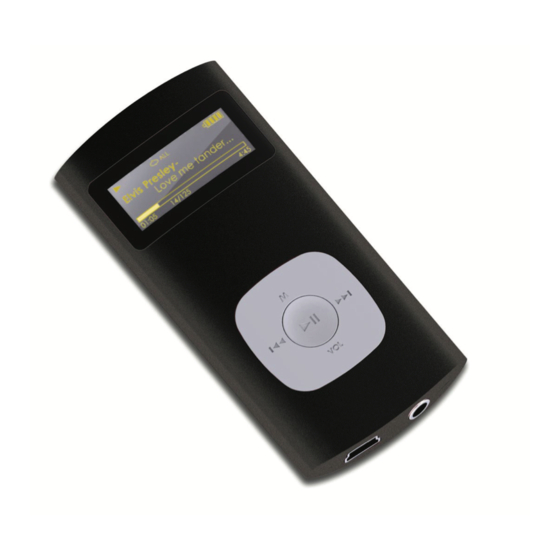
Controls at a Glance  Neckstrap Hole Power Switch <POWER> LCD Display Menu Button <MENU> Previous/Reverse Button <LEFT> OK/Play/Pause Button <OK> Next/Forward Button <RIGHT> Volume Button <VOL> Integrated Microphone USB Port Headphone output Page 5 Controls At A Glance... -
Page 6: Getting Started
Getting started  Charging the Battery Charging with a Computer Your player has an integrated rechargeable battery. Your player can be charged through a USB com- Upon initial use, the battery should be charged fully puter connection. Use the supplied USB cable to to ensure optimal performance and battery life. -
Page 7: Main Menu
Main Menu  The Main Menu gives you access to the different Setting function modes of your player. Set your player’s internal options. To enter the Main Menu from Play Music mode, Folder press and hold <MENU>. (From any other mode, Play, view, or delete files from simply press <MENU>.) your player. -
Page 8: Play Music Mode
Play Music Mode  Enter Play Music mode from the Main menu to play 1. File Type (MP3/WMA) your MP3 or WMA music files. 2. Current track / Total tracks 3. Playback Status Indicator (Play/Pause/Stop) Please refer to the section “Getting Started” to learn how to get music onto your player. -
Page 9: Repeat A-B Mode
To set the end point “B” of the loop, press Function <MENU> again. The loop will now play from point Press <LEFT> Play the previous track. “A” to point “B”. Press <RIGHT> Play the next track. To resume normal playback, press <MENU> again. Hold <LEFT>... -
Page 10: Voice Mode
Voice Mode  Enter Voice mode from the Main menu to play the 1. File Type (WAV) digital Voice Recording files. 2. Current track / Total tracks 3. Playback Status Indicator (Play/Pause/Stop) Please refer to the section “Record” to learn how to make voice recording from your 4. - Page 11 To set the starting point “A” of the loop, press Function <MENU>. Press <OK> Start/Resume voice playback. During playback, press <OK> to pause play- To set the end point “B” of the loop, press back. <MENU> again. The loop will now play from point “A”...
-
Page 12: Record Mode
record Mode  Enter RECORD mode from the Main Menu to record from the integrated microphone (voice). Record Controls Use the following controls in RECORD mode. Recording will start immediately when RECORD is selected from the Main Menu. Function Start/Resume recording. Press <OK>... -
Page 13: Folder Mode
Folder Mode  Enter FOLDER mode to view, play, or delete files on Function your player. If a folder is selected, the folder’s contents will be displayed. You can also connect your player to a computer to If a file is selected, an option box will be easily manage your file library. -
Page 14: Setting Mode
setting Mode  Enter SETTING mode from the Main Menu to Item Description change your player’s internal option settings. Set the Power Set option to change the duration of time (in minutes) that the player will remain To select an option, press <LEFT> or <RIGHT>. To Power Set on when it is idle. -
Page 15: Connecting To A Computer
Connecting to a Computer  Transferring/Managing Files Connect the player to a computer with the USB cable provided to: The USB 2.0 connection makes it easy to transfer Transfer files to and from your player music quickly between the player and your computer. -
Page 16: Disconnecting From A Computer
2. Safely Remove For more information and support regard- Hardware: ing music transfer and synchronization with Select “USB Mass Windows Media Player (WMP), please see Storage Device” the help section included with WMP (click from the list that “Help > Synchronizing Content to Devices”). appears and then click on “Stop”. - Page 17 Macintosh OS X 1. On the left side of the Finder Window, identify the appropriate Removable Disk icon. 2. Click on the “Eject” arrow on the right of the Removable Disk icon. 3. Disconnect the USB cable from the player and your computer. Page 17 Connecting To A Computer...
- Page 18 Specifications  Design, specifications, and manual are subject to change without notice. Memory Integrated Flash Memory Audio Formats MP3, WMA, WAV Recording Format IMA-ADPCM Encoding PC Interface USB 2.0 Hi-speed (MSC) OS Support Windows 7/Vista/XP Macintosh OS X Audio Input Integrated Microphone Audio Output 3.5mm Stereo Headphone...
-
Page 19: Mpmanager
Mpmanager  For music synchronisation and conversion, please use MPMANAGER software supplied in the CD ROM. This software can be used also for UPDATE of your player MPMANAGER manual is included in your CDROM Page 19 Mpmanager... -
Page 20: Troubleshooting & Support
Troubleshooting & support  If you have a problem with this device, please read the troubleshooting guide below. The player does not turn on. Ensure that the player is fully charged. Try charging the player overnight (8 hours). Ensure that the Hold/Lock switch is disengaged. The buttons do not work. - Page 21 Ensure that the Hold/Lock switch is disengaged. There is no sound during playback. Check the volume level. Ensure that the headphones are attached securely to the player. The sound quality of the music is poor. Try playing the file on your computer. If the sound quality is still poor, try downloading the file again or re-encoding the file yourself.
- Page 22 Page 22 Troubleshooting & Support...
- Page 23 Page 23 Troubleshooting & Support...
- Page 24 For more information please check our website www.mpmaneurope.com...
Need help?
Do you have a question about the MPF99 Series and is the answer not in the manual?
Questions and answers