
Related Manuals for MPMan MP-HD2


Summary of Contents for MPMan MP-HD2
- Page 1 MP-HD2 User’s Guide Before operating this product, please read these instructions completely. www.mpmaneurope.com...
-
Page 2: Getting Started
Getting Started INTRODUCTION Digital Audio Player (DAP) –HD2 Your Digital Audio Player (DAP) is a device that stores and plays multi-format digital audio files including MP3, WMA and WAV files. Downloading hours of music from your PC, transfer them into your DAP or use it for voice recording. Please read this manual carefully before using this product for the first time. -
Page 3: Parts Description
PARTS DESCRIPTION - Record Button 2. EQ/Repeat Button 7. USB Port 3. +/-/Mode Button 8. Built-in Microphone - Power On/Off Button 9. Earphone Jack 5. Hold Switch 6. Navigation Control CONTROLS Key Functions +/-/MODE Press to access into the Main Menu. Press and hold to return to the previous Menu. -
Page 4: Charging The Battery
There is a joystick key in the center that can be used to control several key functions. Pushing the button up, down, left or right will achieve the following actions: +/-/MODE Press the button to access the Mode. Push to the right to select the next file. Push and hold to the right to fast-forward within the files. -
Page 5: Downloading And Transferring Files
Downloading and Transferring Files USB DRIVER INSTALLATION For Windows ME, 2000 or XP: These versions of Windows will detect your DAP after connecting with the USB cable and the computer. (Please make sure the DAP is turned ON.) For Windows 98SE: Windows 98SE will not recognize the player until you have installed the driver using the included installation CD-ROM. - Page 6 2. Follow the on screen instruction to install the software. Click “Yes” to accept the License Agreement. GB -...
- Page 7 Please install the software under the directory as prompted. Warning: DO NOT change the installation path. Otherwise, the Player driver may not run properly. Click “Next” as prompted. GB -...
- Page 8 3. After successfully installing the driver software, please click “Finish” to complete the installation. 4. When the installation is completed, the new program will be added to your Program menu in the computer. GB -...
-
Page 9: Transferring Files
TRANSFERRING FILES Connect the DAP by using the supplied USB cable to the computer. If the unit is not On, then press the button to turn the player ON. The following will be displayed on the display of your DAP: A “Removable Disk”... - Page 10 DOWNLOADING WMA FILES WITH DRM In order to download WMA files with DRM you must follow the procedure described below. If you do not have “Windows Media Player 9” on your computer, you must go to www.Microsoft.com to download and install this software. Before beginning the procedure please turn the unit ON and connect the USB cable to the unit and to the USB port of your computer.
- Page 11 2. Click the “Copy Music” tab and tick the option “Copy protect music” in order to copy a DRM music file onto your unit. Click “OK” to save the setting. 3. Click “Copy to CD or Device”. GB -...
- Page 12 4. Click on the “Items to Copy” drop down menu to locate the music files you wish to download. Make sure to tick the box next to the files. 5. Select, the Portable Device you want to copy to from the “Items on Device” drop down menu.
-
Page 13: Safely Remove Hardware Procedure
SAFELY REMOVE HARDWARE PROCEDURE 1. Double click the “Safely Remove Hardware” icon on the task bar: 2. From the “Safely Remove Hardware” window, select “USB Mass Storage Device” and click the “Stop” button. The “Stop a Hardware Device” window will pop up as shown: 3. -
Page 14: Operation
Operation LISTENING TO MUSIC After you have transferred MP3, WMA or WAV files from the computer to the DAP player, you can start listening to music while you learn how to use the rest of the features. Insert the earphones into the earphone jack of the player; press the button to turn the player on. - Page 15 Deletion Files can be deleted in the Browser Mode: - After entering the Browser mode, press the + or the - button to highlight a desired song or file. Press th button; press or the button to highlight Yes or No. - Press the +/-/MODE to confirm to delete the file.
-
Page 16: Voice Recorder
VOICE RECORDER se your DAP to record quick reminder memos or even lengthy business meetings or lectures. ress the +/-/MODE button and use the + or the - button to highlight Record as shown. Press the +/-/MODE button to confirm and enter the Voice Recorder mode. Recording a Voice Message Recording will begin a s soon as the Record mode is entered. -
Page 17: Customizing The Player
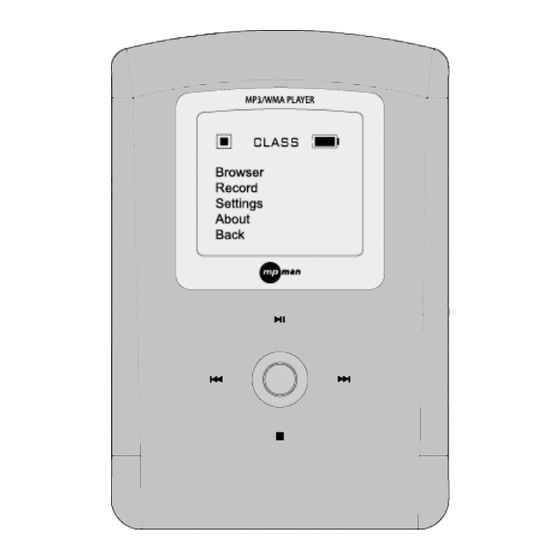
Customizing the Player USING THE SETTING MENU he Setting Menu provides the options to change the player settings, displays, and resolution. Press the +/-/MODE button to display the modes. Scroll down and highlight Settings. Press the +/-/MODE button so that Settings appears on the Display. Press the + or the - button to select one of the following setting options: Equalizer, Repeat Mode, Contrast, Auto Dimmer, Power Saving, Record Settings, and Language. - Page 18 Repeat Mode Setting Push + or - to select between Normal, Repeat Track, Repeat All, Shuffle or Shuffle Repeat. Press +/-/MODE to confirm the selection. Contrast Setting Press the or the button to adjust the contrast level. Press +/-/MODE to confirm the contrast level. Auto Dimmer Setting Press the or the...
- Page 19 Power Savings Setting Push + or - to select one of the following options: Disable, 1 min, 2 mins, 5 mins and 10 mins Press +/-/MODE to confirm the selection. The DAP will turn off after the selected amount of time if playback is suspended in order to save power.
-
Page 20: Additional Information
Additional Information PRECAUTIONS Copyright • Making copies of MP3 tracks or files without permission is a violation of the international copyright laws. Safety • Vibration experienced during walking or exercising will not affect the player. However, dropping the player or dropping a heavy object on the player may result in damage or sound distortion. - Page 21 CE Warning The exclamation point within the triangle is a warning sign alerting the user of important instructions accompanying the product. This unit must not be exposed to moisture or rain. Ensure all connections are properly made before operating the unit. This unit should be positioned so that it is properly ventilated.
-
Page 22: Troubleshooting
TROUBLE SHOOTING Should any problem persist after you have checked these symptoms, consult your dealer. Symptom Possible Reason Actions No Power The battery Recharge the battery. is exhausted. No Sound from The earphones Re-insert the earphones. Earphones are detached from the unit. The volume Increase the volume. -
Page 23: Technical Specifications
TECHNICAL SPECIFICATIONS Category Item Specification Audio Frequency Range 20Hz – 20KHz Headphones Output >40mW, 32ohm (Max. Vol) 130mW per channel, 8ohm S/N Ratio 90db (MP3) File Support MPEG 1/2/2.5 Layer 3 Windows Media Audio ADPCM encoding Bit Rate 8kbps – 320kbps Tag Info ID3 Tag Dimension... -
Page 24: Care And Maintenance
UPGRADE FIRMWARE PROCEDURE Occasionally, it may a new software (firmware) may be released for this unit enhancing its functionality. For more information, please go to the web site at www.mpmaneurope.com for downloading procedure and downloading the latest firmware. CARE AND MAINTENANCE Your Digital Audio Player is a precise electronic device, and should not be subjected to rough handling or exposed to extreme temperatures or moisture.
Need help?
Do you have a question about the MP-HD2 and is the answer not in the manual?
Questions and answers