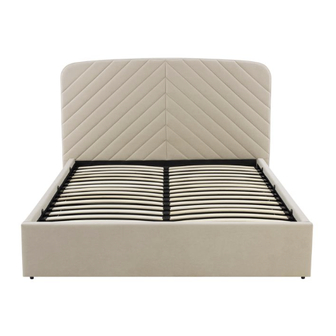
Summary of Contents for DUSK Chevron Ottoman Bed Frame
- Page 1 Box dimensions: double size: box 1: L166 x W124 x H11. box 2: L202 x W38 x H19 (cm) king size: box 1: L181 x W123 x H11. box 2: L212 x W38 x H19 (cm) Chevron Ottoman Bed Frame Double/King size...
- Page 2 Important Assembly Tip Before you begin, it's best to identify all of the parts and fittings to build your ottoman bed frame. We advise laying these out on the floor to check you have everything, and to familiarise yourself with all of the parts and fittings before building. Top Tip We recommend that you build your new ottoman bed frame in the room you'd like it to be located.
- Page 3 Operating Your Ottoman Bed Frame Safely • Caution,this ottoman bed frame uses a pressurised mechanism. • Please ensure children and animals are kept away from the ottoman bed frame when operating the mechanism. • Use caution when operating, and always use two hands at arm's length. •...
- Page 4 Parts Before you begin building your ottoman bed frame, please take a moment to read through the instructions and make sure that you have all the relevant parts listed on the parts check list. Page 4...
-
Page 5: Part Check List
Part Check List Part list Box No. Headboard BOX 1 Footboard BOX 1 Side Rail with Lift Mechanism-LH BOX 2 Side Rail with Lift Mechanism-RH BOX 2 Central Support Rail BOX 2 Angle Iron 2pcs BOX 1 Front Ottoman Metal Frame BOX 1 Rear Ottoman Metal Frame BOX 1... - Page 6 Step 1: All parts in Box 1 are stored in the Headboard (1), please open the zipper behind the headboard and take out the parts. Headboard Step 2: Attaching the Headboard (1) and Footboard (2). 12pcs Full-screwed Ensure that the Angle Irons are attached to the Headboard and the Footboard with...
- Page 7 Step 3: Attaching the Headboard & Footboard to the Side Rails. Headboard end NB: Side Rail Angle Irons are pre- attached Footboard end NB:Attach the bottom Bolt first NB: Before tightening the bolts, please ensure the bed frame is square Step 4: Attaching the Central Support Rail &...
- Page 8 Step 5: 1. Firstly, attach the Rear Metal Frame (9) to Side Metal Frame (17) 2. Then attach Centre Metal Frame (20) to Rear Metal Frame (9) 3. Finally attach Front Metal Frame (8) to Side Metal Frame (17) and Centre Metal Frame (20). 12pcs Step 6: Attaching the Horizontal Ottoman Metal Frame (18) to the Side Ottoman Metal Frame...
- Page 9 Step 7: Put down the completed ottoman metal frame, flip the bed frame upright and then attach the Fabric Base (16). With an assistant, carefully lift both the Headboard & Footboard at the same time, do not let the bed frame twist. Lift and turn the bed frame on its side holding the bed upright for safety.
-
Page 10: Care And Maintenance
Step 9: Attaching the Slat Caps to the Ottoman Bed Frame. Double/King Double/King Positioning Handles (15). Push down firmly on the Slat Caps into the pre-drilled holes on the Ottoman Metal Frame. It is recommended to push the Centre Slat Caps into position before pushing down on the Side Slat Caps. - Page 11 Gas strut/piston best use: • Use caution when operating-always use two hands. • Only attempt to close the ottoman frame, once the mattress has been placed on the frame. • The thicker side of the cylinder should be above the thinner side- this will increase longevity of the part.


Need help?
Do you have a question about the Chevron Ottoman Bed Frame and is the answer not in the manual?
Questions and answers